1.还原系统配置
1.1 释放Linux资源
1.1.1 停止数据库主从服务
stop slave;
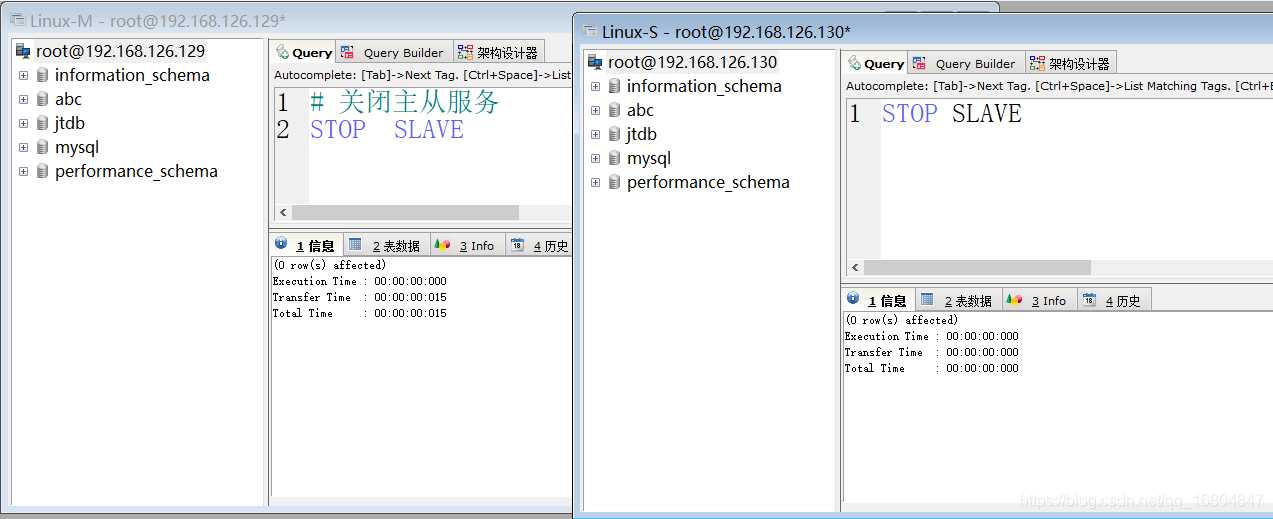
1.1.2 关闭数据库服务
说明:关闭主从数据库服务器.
命令: systemctl stop mariadb
1.1.3 关闭tomcat/mycat服务器
关闭tomcat : kill -9 pid
关闭mycat  : kill -9 pid
1.1.4关闭nginx服务器
./nginx -s stop
1.2 修改代码中的配置
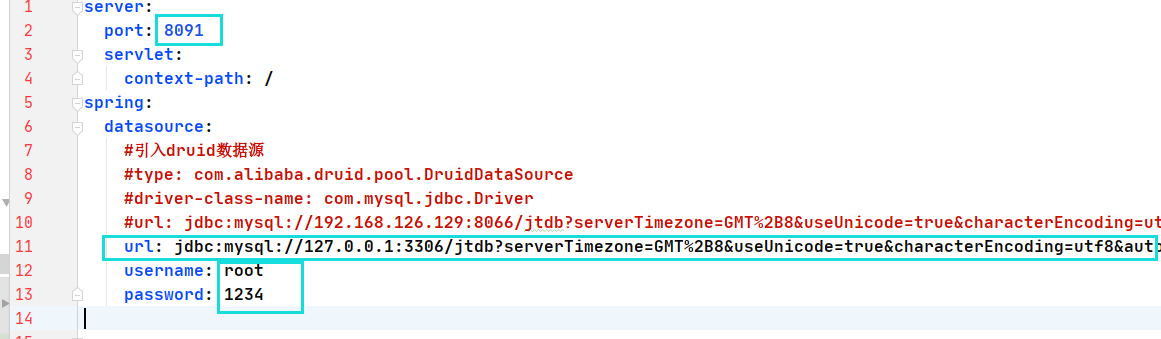
1.2.1 修改YML配置文件
说明:切换端口号和url地址.
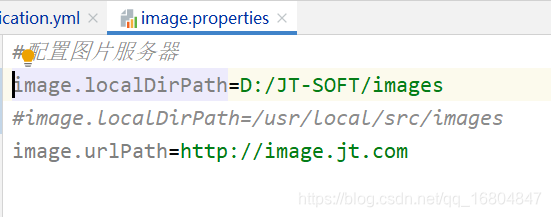
1.2.2 修改图片上传地址
1.3 修改环境配置
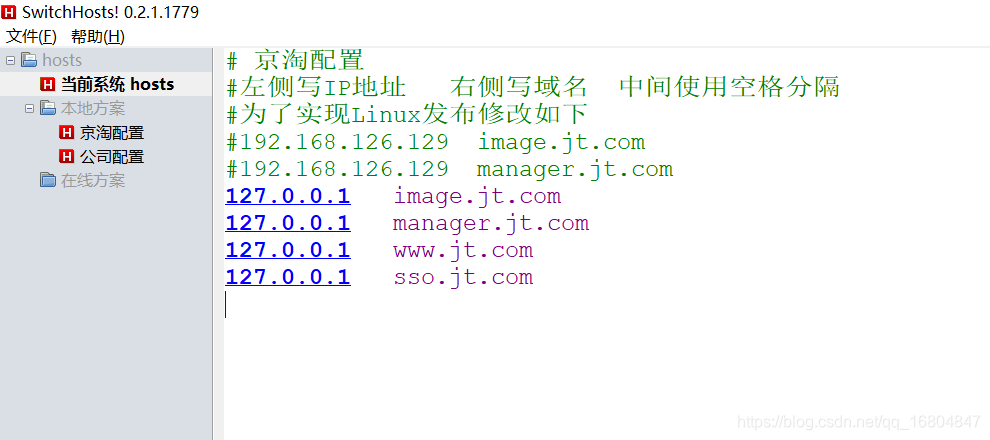
1.3.1 修改hosts文件
1.3.2 修改windows中的Nginx
修改完成之后,启动nginx服务器.
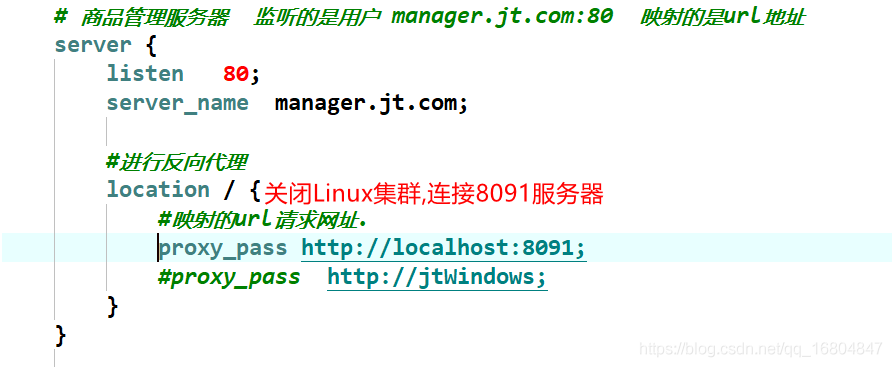
启动命令:进入到nginx的根目录下,执行以下命令
start nginx
nginx -s reload
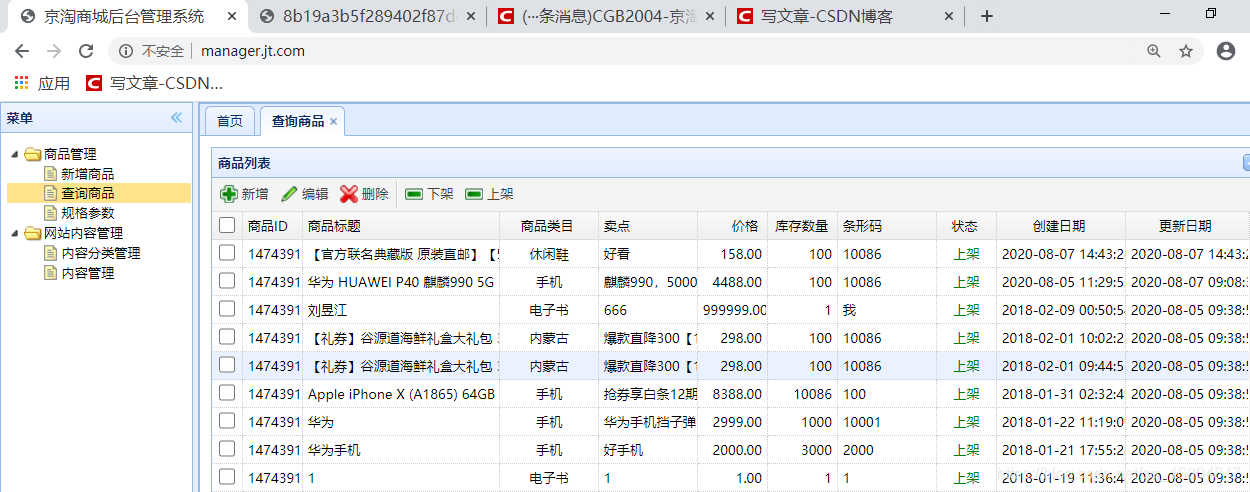
1.3.3 访问测试
检查修改的服务是否有效
2.Redis缓存
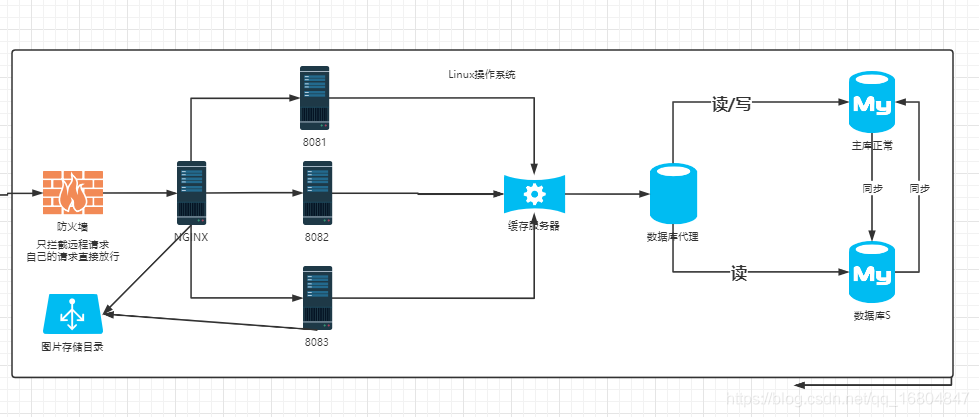
2.1 京淘项目架构优化
说明:为了提高数据库"查询"能力.引入缓存服务器.
2.2 缓存机制的介绍
说明:使用缓存机制主要的目的就是为了降低用户访问物理设备的频次.从缓存服务器中直接获取数据,快速的响应用户,提高整体的查询速度.用户体验更好.
如何实现:
1.缓存机制应该采用什么样的数据结构 进行构建? K-V结构 K必须唯一
2.应该使用什么语言进行开发? C语言
3.缓存的运行环境是哪? 内存
4.内存断电即擦除, 如何保证数据的安全性?? 实现持久化(写入磁盘)操作
5.内存中的数据如何进行优化 (不能一直存? ) 内存优化的算法 LRU算法(最近最少使用算法)
2.3 Redis介绍
Redis 是一个开源(BSD许可)的,内存中的数据结构存储系统,它可以用作数据库、缓存和消息中间件。 它支持多种类型的数据结构,如 字符串(strings), 散列(hashes), 列表(lists), 集合(sets), 有序集合(sorted sets)
与范围查询, bitmaps, hyperloglogs 和 地理空间(geospatial) 索引半径查询。 Redis 内置了 复制(replication),LUA脚本(Lua scripting), LRU驱动事件(LRU eviction),事务(transactions) 和不同级别的 磁盘持久化(persistence), 并通过 Redis哨兵(Sentinel)和自动 分区(Cluster)提供高可用性(high availability).
速度快:
tomcat: 150-220/秒
nginx: 3-5万/秒
redis: 写 8.6万/秒 读 11.2万/秒 ~ 平均10万次/秒
2.4 Redis安装
2.4.1 上传Redis
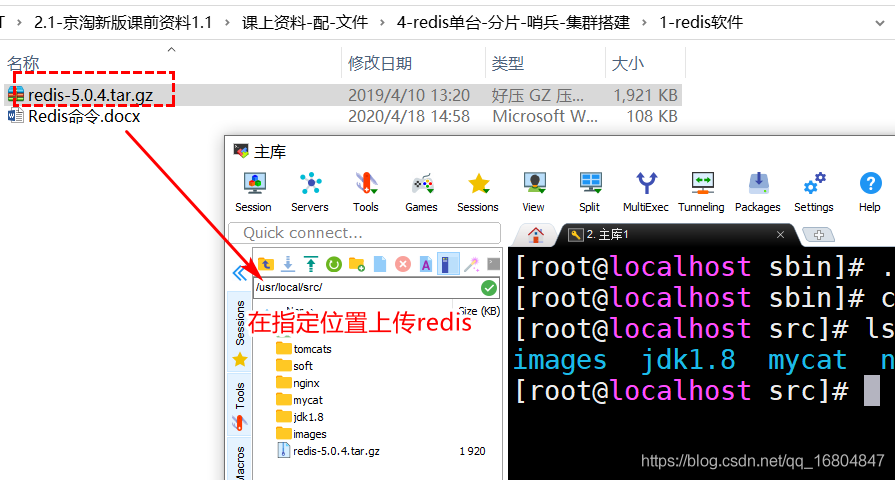
2.4.2 解压Redis
命令:
tar-xvf redis-5.0.4.tar.gz
mv redis  redis-5.0.4
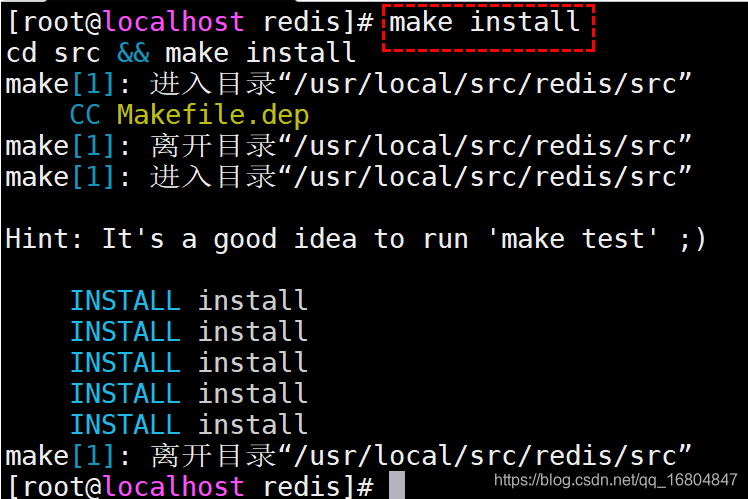
2.4.3 编译安装Redis
1.执行编译操作 make

2.安装redis make install
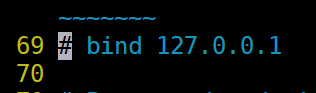
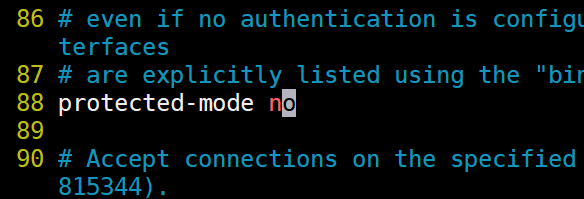
2.4.4 修改redis配置文件
2).取消保护模式
3).开启后台启动

2.4.5 Redis常规命令
要求:进入redis根目录中执行.
特点:redis每次启动时都会读取配置文件. 如果需要准备多台redis则需要准备多个配置文件
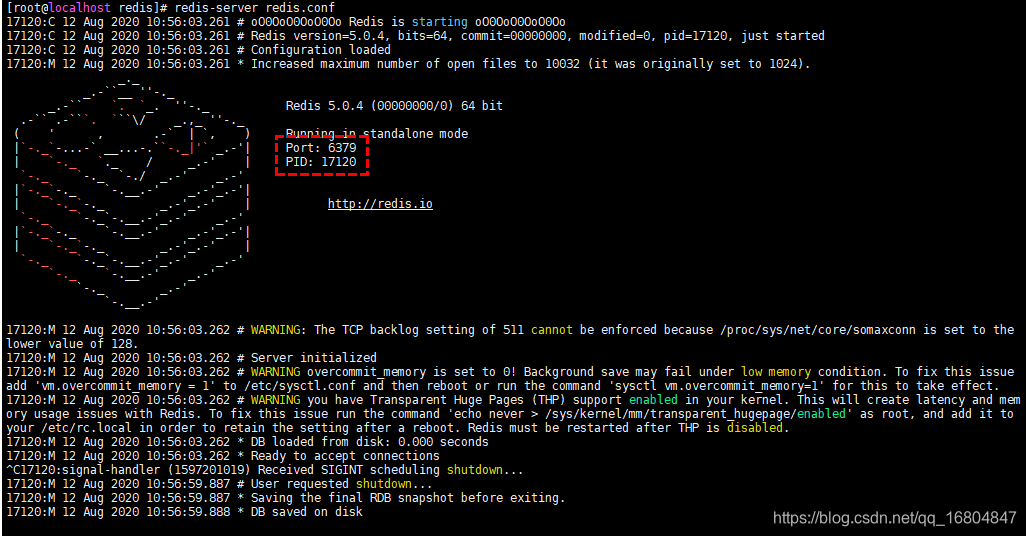
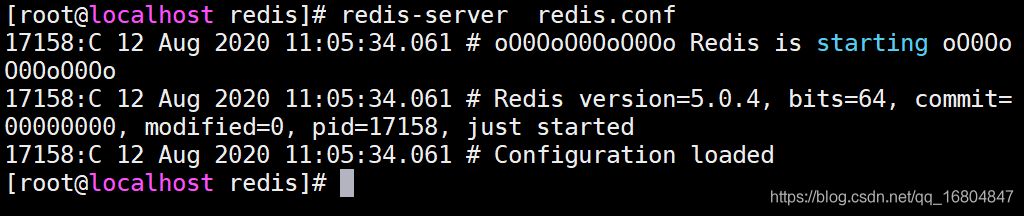
1.启动命令 redis-server redis.conf
没有开启后台运行的效果
开启后台运行的效果
命令: redis-server redis.conf
2.检索redis服务
命令: ps -ef | grep redis

- 进入redis客户端中
命令: redis-cli -p 6379
4.关闭redis
方式1: redis-cli -p 6379 shutdown
方式2:
先检索服务 ps -ef | grep redis
然后杀死进程 kill -9 pid
2.5 Redis入门案例
2.5.1 添加jar包
在父级工程中添加jar包
<!--spring整合redis -->
<dependency>
    <groupId>redis.clients</groupId>
    <artifactId>jedis</artifactId>
</dependency>
<dependency>
    <groupId>org.springframework.data</groupId>
    <artifactId>spring-data-redis</artifactId>
</dependency>
2.5.2 编辑测试API
package com.jt.test;

import org.junit.jupiter.api.Test;
import org.springframework.beans.factory.annotation.Autowired;
import org.springframework.boot.test.context.SpringBootTest;
import redis.clients.jedis.Jedis;
import redis.clients.jedis.Transaction;
import redis.clients.jedis.params.SetParams;

import java.util.Map;

@SpringBootTest //需要依赖spring容器进行操作,从容器中动态的获取对象
public class TestRedis {
    @Autowired
    private  Jedis jedis;

    /**
     * 完成redis入门案例的测试
     */
    @Test
    public void test01(){
//        Jedis jedis = new Jedis("192.168.126.129",6379);
        //想redis中存储数
        jedis.set("2004","今天没下雨,尴尬");
        String value = jedis.get("2004");
        System.out.println(value);

    }
    @Test
    public void test02(){
        Jedis jedis = new Jedis("192.168.126.129",6379);
        //判断redis中是否存在key
        if (jedis.exists("2004")){
            //如果存在则设置超时时间
            jedis.expire("2004",100);
            //线程休眠
            try {
                Thread.sleep(2000);
                //获取剩余的存活时间
                Long time = jedis.ttl("2004");
                System.out.println("还能活"+time);
                //撤销超时时间
                jedis.persist("2004");

            } catch (InterruptedException e) {
                e.printStackTrace();
            }
        }
    }

    /**
     * 需求说明:
     * 1.redis.set操作,后面的操作会将之前的value覆盖
     * 要求:如果key已经存在,则不允许赋值
     * 环境问题: 检测redis中是否已经存在该数据
     */
    @Test
    public void test03() {
        Jedis jedis = new Jedis("192.168.126.129", 6379);
        jedis.flushAll();
        jedis.setnx("boos","liq");
        jedis.setnx("boss","zpk");
        System.out.println(jedis.get("boss"));
    }

    /**
     * 为数据添加超时时间,保证原子性操作
     * 锁机制: 保证原子性
     * 小结: setnx
     *      setex
     */
    @Test
    public void test04() {
        Jedis jedis = new Jedis("192.168.126.129", 6379);
        jedis.setex("aaa",20,"xxxxxx");//满足原子性需求
    }

    /**
     *  需求:
     *      1 要求赋值操作时,如果数据已经存在,则不允许赋值
     *      2 同时要求添加超时时间,并且满足原子性需求
     *      private static final String XX = "xx";只 有key存在时,才能赋值
     *      private static final String NX = "nx";只有key不存在时,赋值
     *
     *       private static final String PX = "px"; 亳秒
             private static final String EX = "ex";秒
     */
    @Test
    public void test05() {
        Jedis jedis = new Jedis("192.168.126.129", 6379);
        SetParams params = new SetParams();
        params.nx().ex(10);
        jedis.set("AAA","CCC",params);
        System.out.println(jedis.get("AAA"));

    }

    /**
     *  测试hash数据类型
     */
    @Test
    public void test06() {
        Jedis jedis = new Jedis("192.168.126.129", 6379);
        jedis.hset("person","name","tomcat");
        jedis.hset("person","age","18");
        Map<String, String> person = jedis.hgetAll("person");
        System.out.println(person);
        jedis.hsetnx("user","id","1");
        jedis.hsetnx("user","name","tom");
        Map<String, String> user = jedis.hgetAll("user");
        System.out.println(user);
    }
    /**
     *  测试list集合数据类型
     */
    @Test
    public void test07() {
        Jedis jedis = new Jedis("192.168.126.129", 6379);
       jedis.lpush("list","1","2","3","4","5");
        String value = jedis.rpop("list");
        System.out.println(value);
    }

    /**
     * 实现redis的事务控制
     */
    @Test
    public void testMulti() {
        Jedis jedis = new Jedis("192.168.126.129", 6379);
        Transaction transaction = jedis.multi();//开启
        try{

        transaction.set("AAA","123");
        transaction.set("BBB","123");
        transaction.exec();//提交
        }catch (Exception e){
            transaction.discard();//回滚
        }
        String aaa = jedis.get("AAA");
        System.out.println(aaa);

    }
}
2.6 SpringBoot整合Redis
2.6.1 编辑配置文件
# 配置单台redis
redis.host=192.168.126.129
redis.port=6379
2.6.2 编辑配置类
package com.jt.config;

import org.springframework.beans.factory.annotation.Value;
import org.springframework.context.annotation.Bean;
import org.springframework.context.annotation.Configuration;
import org.springframework.context.annotation.PropertySource;
import redis.clients.jedis.Jedis;

//表明该类是一个配置类
@Configuration
@PropertySource("classpath:properties/redis.properties")
public class RedisConfig {
    @Value("${redis.host}")
    private String host;
    @Value("${redis.port}")
    private Integer port;

    @Bean
    public Jedis jedis(){

        return  new Jedis(host,port);
    }
}
2.6.3 编辑测试类
说明:校验springBoot整合是否正确
package com.jt.test;

import org.junit.jupiter.api.Test;
import org.springframework.beans.factory.annotation.Autowired;
import org.springframework.boot.test.context.SpringBootTest;
import redis.clients.jedis.Jedis;
import redis.clients.jedis.Transaction;
import redis.clients.jedis.params.SetParams;

import java.util.Map;

@SpringBootTest //需要依赖spring容器进行操作,从容器中动态的获取对象
public class TestRedis {
    @Autowired
    private  Jedis jedis;

    /**
     * 完成redis入门案例的测试
     */
    @Test
    public void test01(){
//        Jedis jedis = new Jedis("192.168.126.129",6379);
        //想redis中存储数
        jedis.set("2004","今天没下雨,尴尬");
        String value = jedis.get("2004");
        System.out.println(value);

    }
}
2.7 数据如何保存到Redis中
2.7.1 业务说明
说明:由于redis中一般使用String数据类型保存业务数据.但是代码中java对象Redis没办法直接保存,所以需要中间的转化的过程.使用JSON方式进行数据中转.
List java对象 --------- JSON ------------ Redis中 使用String数据类型保存.
2.7.2 ObjectMapper API介绍
package com.jt.test;

import com.fasterxml.jackson.core.JsonProcessingException;
import com.fasterxml.jackson.databind.ObjectMapper;
import com.jt.pojo.ItemDesc;
import org.junit.jupiter.api.Test;

import java.util.ArrayList;
import java.util.Date;
import java.util.List;

public class TestObjectMapper {

    private static final ObjectMapper MAPPER = new ObjectMapper();

    @Test
    public void test01(){
        ItemDesc itemDesc = new ItemDesc();
        itemDesc.setItemId(100L).setItemDesc("测试JSON转化").setCreated(new Date())
                .setUpdated(itemDesc.getCreated());

        try {
            //1.将java对象转化为JSON
            String json = MAPPER.writeValueAsString(itemDesc);
            System.out.println(json);
            //2.将JSON转化为对象 利用反射机制实例化对象 利用get/set方法为对象赋值
            ItemDesc itemDesc2 = MAPPER.readValue(json, ItemDesc.class);
            System.out.println(itemDesc2.toString()); //只输出当前对象的数据

            //3.将集合信息转化为JSON  List
            List<ItemDesc> list = new ArrayList<>();
            list.add(itemDesc);
            String listJSON = MAPPER.writeValueAsString(list);
            System.out.println(listJSON);
            //将json转化为List集合
            List<ItemDesc> list2 = MAPPER.readValue(listJSON,list.getClass());
            System.out.println(list2);


        } catch (JsonProcessingException e) {
            e.printStackTrace();
        }
    }
}
2.7.3 编辑工具API
说明:改工具API主要负责将用户参数转化为JSON,或者将JSON串转化为对象. 简化客户端调用
package com.jt.utils;

import com.fasterxml.jackson.core.JsonProcessingException;
import com.fasterxml.jackson.databind.ObjectMapper;
public class ObjectMapperUtils {

    //1. 创建工具API对象
    private static final ObjectMapper MAPPER = new ObjectMapper();

    //2.封装API 将对象转化为JSON
    public static  String toJSON(Object object){
        if (object==null ){
            throw  new RuntimeException("对象不能为null");
        }

        try {
            String json = MAPPER.writeValueAsString(object);
            return  json;
        } catch (JsonProcessingException e) {
            e.printStackTrace();
            throw  new RuntimeException(e.getMessage());
        }

    }
    //3.封装API 将JSON转化为对象 用户传递什么类型,则返回什么对象 利用泛型
    public static  <T> T toObject(String json,Class<T> target){
        //判断json串
        if (json==null || "".equals(json) || target==null){
            throw  new RuntimeException("参数不能为null");
        }
        try {
            T t = MAPPER.readValue(json,target);
            return  t;
        } catch (JsonProcessingException e) {
            e.printStackTrace();
            throw  new RuntimeException(e.getMessage());
        }
    }
}
2.7.4 编辑工具API测试
@Test
public  void testObjectMapperUtils(){
    ItemDesc itemDesc = new ItemDesc();
    itemDesc.setItemId(100L).
        setItemDesc("测试JSON对象转字符串").
        setCreated(new Date()).
        setUpdated(itemDesc.getCreated());

    String json = ObjectMapperUtils.toJSON(itemDesc);
    System.out.println(json);
    ItemDesc itemDesc1 = ObjectMapperUtils.toObject(json, ItemDesc.class);
    System.out.println(itemDesc1);

}