安装node.js
官网下载
homebrew
brew install node
下载Hexo
官网地址
开始使用
npm全局安装hexo
$ npm install hexo-cli -g
- 安装
Hexo完成后,执行下列命令,Hexo 将会在指定文件夹<folder>中新建所需要的文件。
hexo init <folder>
cd <folder>
npm install
hexo server
到这一步时,你已经可以在http://localhost:4000上看到博客的雏形了!

- 下面介绍一下,指定文件夹
<folder>的目录如下:
.
├── _config.yml    #hexo的配置文件
├── package.json    #hexo的版本信息以及依赖、插件的信息
├── scaffolds    #模板文件,为创建新的博客文件提供模板
├── source    #用户资源,写作文件存放位置
|   ├── _drafts    #草稿,不会被解析
|   └── _posts    #所有的博客都在这里,会被解析
└── themes    #主题,可以更换
配置网站信息
您可以在 _config.yml 中修改大部分的配置。
主要的配置信息如下表:
| 参数 | 描述 |
|---|---|
title |
网站标题 |
subtitle |
网站副标题 |
description |
网站描述 |
keywords |
网站的关键词。使用半角逗号 , 分隔多个关键词。 |
author |
您的名字 |
language |
网站使用的语言 |
其余配置基本不用修改,详细配置见 官方文档--配置
Hexo常用指令
接下来需要熟悉一下hexo的常用的基本指令
详细指令见 官方文档--命令
init
hexo init <folder>
new
新建文章
hexo new [layout] <title>
- layout可选,可以选择
scaffolds中的模板新建文章
generate
生成静态文件
hexo generate
可简写为 hexo g
publish
发布草稿
hexo publish [layout] <filename>
server
启动服务器
$ hexo server
默认情况下,访问网址为: http://localhost:4000/
| 选项 | 描述 |
|---|---|
-p, --port |
重设端口 |
-s, --static |
只使用静态文件 |
-l, --log |
启动日记记录,使用覆盖记录格式 |
deploy
部署网站
hexo deploy
- 可以生成静态文件+部署网站
hexo g -d或hexo d -g,写完文章之后需要执行该指令
clean
$ hexo clean
清除缓存文件 (db.json) 和已生成的静态文件 (public)。
主题配置
Hexo的主题库还是蛮丰富的,见官方主题库
个人建议不要太花里胡哨,毕竟要是想凸显前端技术优势,不如自己动手写一个。
这里建议选择NexT,简约风格首选。而且NexT文档也比较完整,相关的博客也比较多,可以有效避免踩坑。
下载主题
cd <folder>
git clone https://github.com/iissnan/hexo-theme-next themes/next
启用主题
在 _config.yml中修改 theme
theme: next
验证主题
- 启动 Hexo 本地站点,并开启调试模式(即加上
--debug),整个命令是hexo s --debug。
INFO Hexo is running at http://0.0.0.0:4000/. Press Ctrl+C to stop.
此时即可使用浏览器访问 http://localhost:4000,检查站点是否正确运行。
Scheme设置
NexT提供了四种 scheme,在 next/_config.yml中修改,本博客采用的是 Gemini风格
# ---------------------------------------------------------------
# Scheme Settings
# ---------------------------------------------------------------

# Schemes
# scheme: Muse
# scheme: Mist
# scheme: Pisces
scheme: Gemini
踩坑小提示: 千万要记得在修改完主题后,执行 hexo clean
设置菜单
menu:
  home: /|| home
  about: /about/|| user
  tags: /tags/|| tags
  categories: /categories/|| th
  # archives: /archives/ || archive
  #schedule: /schedule/ || calendar
  #sitemap: /sitemap.xml || sitemap
  #commonweal: /404/ || heartbeat
踩坑小提示:/后面的空格一定要删去,不然在网页跳转时URL后面会多出一个空格
修改头像
在 next/_config.yml中修改
# avatar: http://example.com/avatar.png
avatar: /images/avatar.png
网站部署
博客部署
- GitHub:免费,简单,主流,自动部署,但是国内访问速度较慢
- Gitee:免费,简单,访问速度快,但是每次都需要手动部署,自动部署收费¥99/年
- 个人服务器:需要租服务器,且不如以上两者操作简单
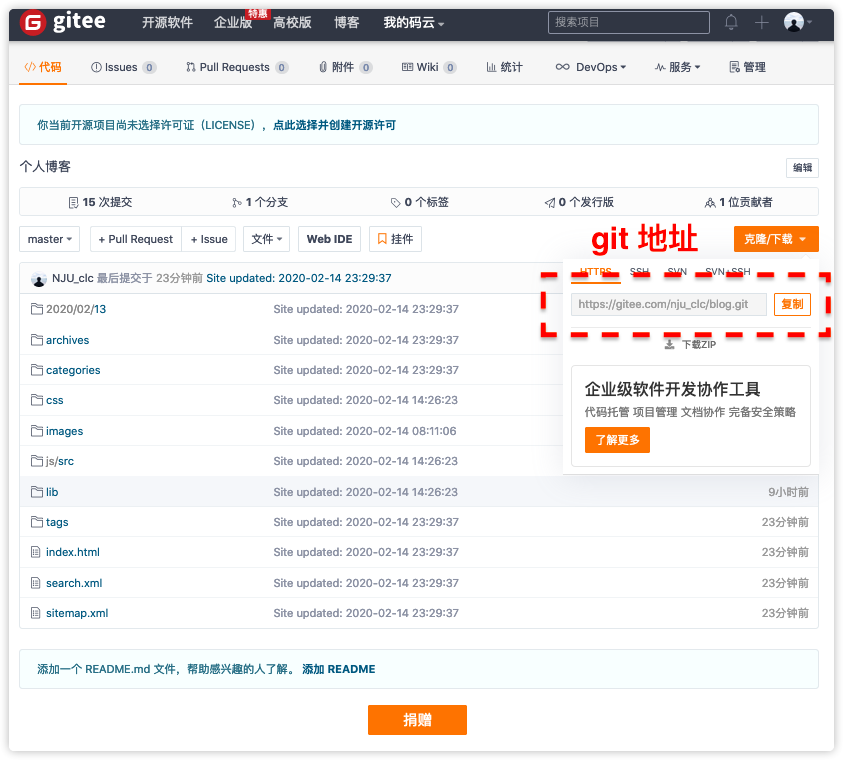
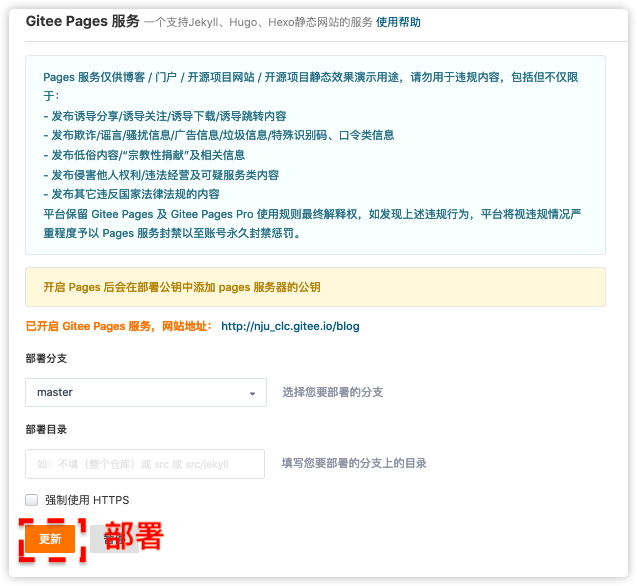
以码云为例,将博客部署到码云的pages上
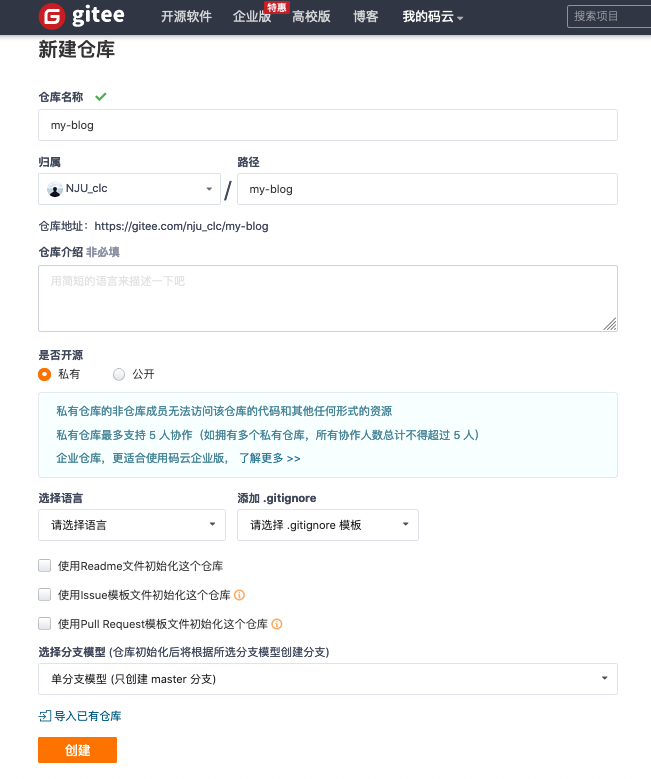
新建代码仓库
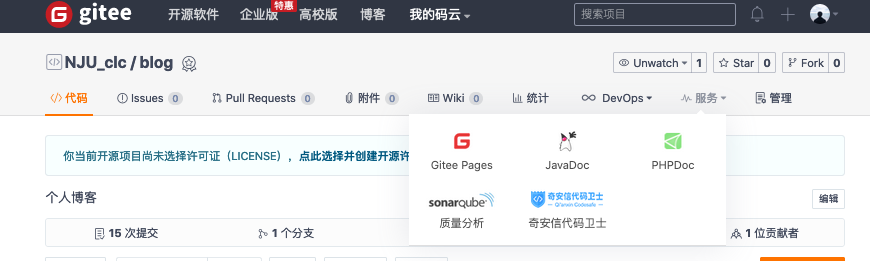
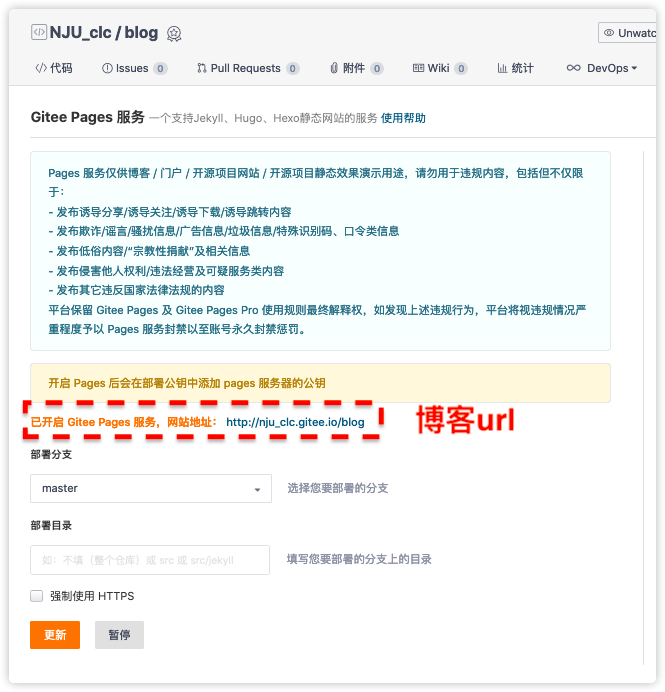
创建Pages
修改_config.yml
- 修改
url和root,url是gitee pages的网站地址
# URL
## If your site is put in a subdirectory, set url as 'http://yoursite.com/child' and root as '/child/'
url: http://nju_clc.gitee.io/blog/
root: /blog
permalink: :year/:month/:day/:title/
permalink_defaults:
pretty_urls:
  trailing_index: true # Set to false to remove trailing 'index.html' from permalinks
  trailing_html: true # Set to false to remove trailing '.html' from permalinks
- 添加
git配置,repo是git的地址
deploy:
  type: git
  repo: https://gitee.com/nju_clc/blog.git
  branch: master
- 删除缓存
hexo clean
- 生成静态文件+部署
hexo g -d
- 重新部署Gitee pages
插件推荐
字数统计
- 在根目录下安装
hexo-wordcount
npm install hexo-wordcount --save
- 然后在主题的配置文件中,配置如下:
# Post wordcount display settings
# Dependencies: https://github.com/willin/hexo-wordcount
post_wordcount:
  item_text: true               # 是否显示“字数统计”及“阅读分钟”的文字
  wordcount: true               # 是否显示字数统计
  min2read: true                # 是否显示估算阅读分钟
  totalcount: true          # 是否在网站底部显示所有文章字数之和
  separated_meta: true
阅读全文按钮
- 在
next/_config.yml中修改
# Please use <!-- more --> in the post to control excerpt accurately.
auto_excerpt:
  enable: true
  length: 150
搜索功能
- 安装
hexo-generator-searchdb
npm install hexo-generator-searchdb --save
- 修改
_config.yml
# Extensions
## Plugins: https://hexo.io/plugins/
## Themes: https://hexo.io/themes/
theme: next
search:
  path: search.xml
  field: post
  format: html
  limit: 10000
- 修改
next/_config.yml
local_search:
  enable: true
博客美化
文章目录全部展开
- 修改
themes/next/source/css/_custom/custom.stly,添加以下代码
.post-toc .nav .nav-child { display: block; }
代码高亮
NexT 默认使用的是 白色的 normal 主题,可选的值有 normal,night,night blue,night bright,night eighties
更改 highlight_theme 字段,将其值设定高亮主题:
# Code Highlight theme
# Available value: normal | night | night eighties | night blue | night bright
# https://github.com/chriskempson/tomorrow-theme
highlight_theme: normal
背景动态效果
在主题配置文件中
# Canvas-nest
canvas_nest: false

# three_waves
three_waves: false

# canvas_lines
canvas_lines: false

# canvas_sphere
canvas_sphere: true