计算器的功能介绍:
Name: Dot   (从某点开始,到某点结束)
功能:  + 、- 、* 、/ 、%
      (清零,退格操作)
版本:1.0
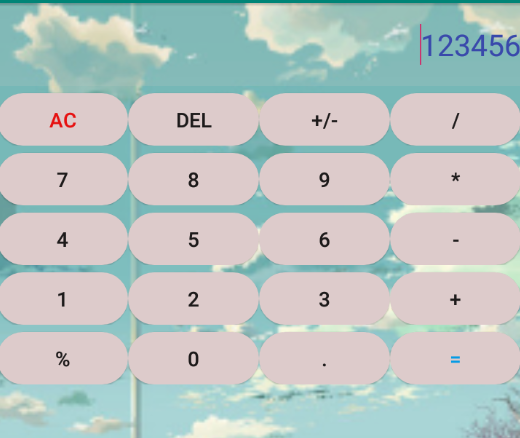
Dot 的效果展示:
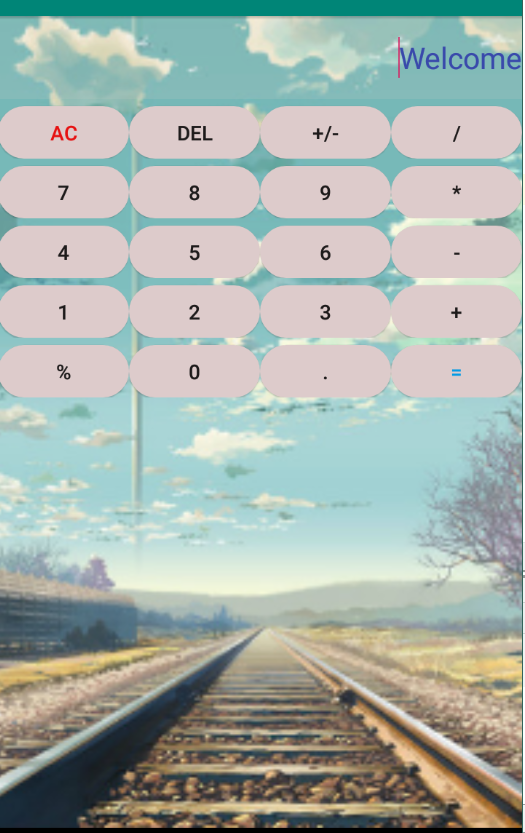
侃侃 Dot:
Dot 与其他的计算器相比没有太大的竞争力,甚至在处理一些极端的问题时还存在很大的不足,
例如:大数的四则运算,对于这个问题处理的还不够到位,目前只能实现一些简单的四则运算
(只能说自己的水平太菜,还没有掌握一些实质性的内容,这个是自己需要检讨的)
另外:
非常感谢 Android 老师教给我们的知识,使我们可以设计出第一款属于自己的 app.
改进的地方:
相对于最原始的设计,更新了哪些东西呢?
1、改变按钮的形状,由原始的长方形 -- 椭圆状,使得按钮更加形象化。
2、增加背景图片,使用户的体验效果更好。
3、增加退格操作,使得用户在输错信息时不用全盘清零,可以删除刚刚写的某个字符。
不足的地方:
1、未实现一些大数的运算。
2、当退格退完后,再按退格时会自动退出(不影响总体效果,但还是有那么一点 bug)
3、目前两个数操作就需要 '=' 一下,但是可以实现多项式的运算,只是每次都需要 '='
   (后续会进行修改,逐渐完善)
补充知识:
android 中的事件处理步骤
a、找到事件目标对象(Button),通过 findViewById(),遍历子对象。
b、实现view.onClickLisenter接口,重写 onClick 方法。
c、在事件目标对象上注册,btn.setOnClickListener(实现类的对象)
如何将信息显示到 View(EditText)上:
a、为 EditText 定义 id -- etResult
b、通过 findViewById 获取 etResult 对象
c、通过 etResult.setText() 将信息显示到计算器界面上
异常的类型:
a、RuntimeException
运行时异常,不要求处理(但最好处理一下),与业务相关,比较主观(每个应用都可以采用
自己的方式进行处理),一般不严重, 对效果不会产生太大的影响。
b、Checked Exception:
检查异常,必须处理,非业务类型的错误,比较客观,比较严重,会影响程序的执行。
代码部分:
calculate_layout.xml:
在 layout 里面新建一个文件calculate_layout.xml(布局类型是 GridLayout)
<?xml version="1.0" encoding="utf-8"?>
<GridLayout xmlns:android="http://schemas.android.com/apk/res/android"
    android:layout_width="match_parent" android:layout_height="match_parent"
    android:rowCount="6"
    android:columnCount="1"
    android:orientation="horizontal"
    android:id="@+id/gridlayout"
    android:background="@mipmap/bg">

    <EditText android:hint="Welcome"
        android:id="@+id/edResult"
        android:background="#2FC6CAC2"
        android:textColor="#3949AB"
        android:textColorHint="#3949AB"
        android:layout_gravity="fill_horizontal"
        android:gravity="right"
        android:paddingBottom="24dp"
        android:paddingTop="24dp"
        android:textSize="30sp"
        />

    <!--    使用 线性布局实现按钮的等比例比重分配,每一行的按钮为一组-->
    <LinearLayout android:layout_gravity="fill_horizontal">
        <Button
            android:text="AC"
            android:textSize="20sp"
            android:textColor="#E61111"
            android:layout_weight="1"
            android:layout_width="0dp"
            android:layout_height="60dp"
            android:layout_marginTop="8dp"
            android:background="@drawable/yuanbtn"
            />

        <Button
            android:text="Del"
            android:textSize="20sp"
            android:layout_weight="1"
            android:layout_width="0dp"
            android:layout_height="60dp"
            android:layout_marginTop="8dp"
            android:background="@drawable/yuanbtn"
            />
        <Button
            android:text="+/-"
            android:textSize="20sp"
            android:layout_weight="1"
            android:layout_width="0dp"
            android:layout_height="60dp"
            android:layout_marginTop="8dp"
            android:background="@drawable/yuanbtn"/>
        <Button android:text="/"
            android:textSize="20sp"
            android:layout_weight="1"
            android:layout_width="0dp"
            android:layout_height="60dp"
            android:layout_marginTop="8dp"
            android:background="@drawable/yuanbtn"/>
    </LinearLayout>
    <LinearLayout android:layout_gravity="fill_horizontal">
        <Button android:text="7"
            android:textSize="20sp"
            android:layout_weight="1"
            android:layout_width="0dp"
            android:layout_height="60dp"
            android:layout_marginTop="8dp"
            android:background="@drawable/yuanbtn"/>
        <Button android:text="8"
            android:textSize="20sp"
            android:layout_weight="1"
            android:layout_width="0dp"
            android:layout_height="60dp"
            android:layout_marginTop="8dp"
            android:background="@drawable/yuanbtn"/>
        <Button android:text="9"
            android:textSize="20sp"
            android:layout_weight="1"
            android:layout_width="0dp"
            android:layout_height="60dp"
            android:layout_marginTop="8dp"
            android:background="@drawable/yuanbtn"/>
        <Button android:text="*"
            android:textSize="20sp"
            android:layout_weight="1"
            android:layout_width="0dp"
            android:layout_height="60dp"
            android:layout_marginTop="8dp"
            android:background="@drawable/yuanbtn"/>
    </LinearLayout>
    <LinearLayout android:layout_gravity="fill_horizontal">
        <Button android:text="4"
            android:textSize="20sp"
            android:layout_weight="1"
            android:layout_width="0dp"
            android:layout_height="60dp"
            android:layout_marginTop="8dp"
            android:background="@drawable/yuanbtn"/>
        <Button android:text="5"
            android:textSize="20sp"
            android:layout_weight="1"
            android:layout_width="0dp"
            android:layout_height="60dp"
            android:layout_marginTop="8dp"
            android:background="@drawable/yuanbtn"/>
        <Button android:text="6"
            android:textSize="20sp"
            android:layout_weight="1"
            android:layout_width="0dp"
            android:layout_height="60dp"
            android:layout_marginTop="8dp"
            android:background="@drawable/yuanbtn"/>
        <Button android:text="-"
            android:textSize="20sp"
            android:layout_weight="1"
            android:layout_width="0dp"
            android:layout_height="60dp"
            android:layout_marginTop="8dp"
            android:background="@drawable/yuanbtn"/>
    </LinearLayout>
    <LinearLayout android:layout_gravity="fill_horizontal">
        <Button android:text="1"
            android:textSize="20sp"
            android:layout_weight="1"
            android:layout_width="0dp"
            android:layout_height="60dp"
            android:layout_marginTop="8dp"
            android:background="@drawable/yuanbtn"/>
        <Button android:text="2"
            android:textSize="20sp"
            android:layout_weight="1"
            android:layout_width="0dp"
            android:layout_height="60dp"
            android:layout_marginTop="8dp"
            android:background="@drawable/yuanbtn"/>
        <Button
            android:text = "3"
            android:textSize="20sp"
            android:layout_weight="1"
            android:layout_width="0dp"
            android:layout_height="60dp"
            android:layout_marginTop="8dp"
            android:background="@drawable/yuanbtn"

            />
        <Button
            android:text = "+"
            android:textSize="20sp"
            android:layout_weight="1"
            android:layout_width="0dp"
            android:layout_height="60dp"
            android:layout_marginTop="8dp"
            android:background="@drawable/yuanbtn"

            />
    </LinearLayout>
    <LinearLayout android:layout_gravity="fill_horizontal">
        <Button
            android:text = "%"
            android:textSize="20sp"
            android:id="@+id/btn_1"
            android:layout_weight="1"
            android:layout_width="0dp"
            android:layout_height="60dp"
            android:layout_marginTop="8dp"
            android:background="@drawable/yuanbtn"

            />
        <Button
            android:text = "0"
            android:textSize="20sp"
            android:layout_weight="1"
            android:layout_width="0dp"
            android:layout_height="60dp"
            android:layout_marginTop="8dp"
            android:background="@drawable/yuanbtn"

            />
        <Button
            android:text = "."
            android:textSize="20sp"
            android:layout_weight="1"
            android:layout_width="0dp"
            android:layout_height="60dp"
            android:layout_marginTop="8dp"
            android:background="@drawable/yuanbtn"

            />
        <Button
            android:text = "="
            android:textColor="#039BE5"
            android:textSize="20sp"
            android:layout_weight="1"
            android:layout_width="0dp"
            android:layout_height="60dp"
            android:layout_marginTop="8dp"
            android:background="@drawable/yuanbtn"
            />
    </LinearLayout>
</GridLayout>
yuanbtn.xml:
在drawable 文件夹下新建一个yuanbtn.xml文件,用来实现椭圆形的按钮。
<?xml version="1.0" encoding="utf-8"?>
<selector xmlns:android="http://schemas.android.com/apk/res/android">


    <item>
        <shape
            xmlns:android="http://schemas.android.com/apk/res/android"
            >
            <!-- 填充的颜色 -->
            <solid android:color="#DDCBCB" />
            <!-- 设置按钮的四个角为弧形 -->
            <!-- android:radius 弧形的半径 -->
            <corners android:radius="105dip"/>

            <!-- padding: Button 里面的文字与Button边界的间隔 -->
            <padding
                android:left="10dp"
                android:top="10dp"
                android:right="10dp"
                android:bottom="10dp"
                />
        </shape>
    </item>

</selector>
MainActivity.java
package com.example.second;

import android.os.Bundle;
import android.util.Log;
import android.view.View;
import android.widget.Button;
import android.widget.EditText;
import android.widget.GridLayout;
import android.widget.LinearLayout;

import androidx.appcompat.app.AppCompatActivity;

/*
*   程序代码、布局文件、二者之间的关系?
*   程序代码:处理逻辑
*   布局文件:设计界面的(UI)
*   相辅相成,为什么要这样呢?
*       1、容易分工,代码清晰
*       2、代码复用
*   如何加载?
*       类似充气(气球 -- 原来是一个空白界面,然后各个组件组合起来形成一个 good View)
* */

public class MainActivity extends AppCompatActivity implements View.OnClickListener{

    GridLayout gridLayout;
    EditText edResult;         // 计算器的显示界面

    protected void onCreate(Bundle savedInstanceState){
            super.onCreate(savedInstanceState);
            // R 相当于是一个总类(静态 -- 全局),我们后面用到的 calculate_layout 相当于是其属性,(都是我们自己写的文件)
            // 加载布局文件、初始化布局对象,进行充气
            setContentView(R.layout.calculate_layout);

            // 通过 id 找到我们想要进行操作的对象
            edResult = findViewById(R.id.edResult);

            gridLayout = findViewById(R.id.gridlayout);
            int rowSize = gridLayout.getChildCount();
            for (int i = 1; i < rowSize; i++) {
                LinearLayout view = (LinearLayout) gridLayout.getChildAt(i);
                int colSize = view.getChildCount();
                for (int j = 0; j < colSize; j++) {
                    // 此时 Button 是事件目标
                    Button button = (Button) view.getChildAt(j);
                    // 当我们点击某个按钮时就会触发这个事件
                    button.setOnClickListener(this);
                }
            }
        }

        String currentNumber = "";   // 当前数字
        String previousNumber = "";  // 前一个数字
        String operator = "";        // 符号


        // 这里相当于是后台,前台通过客户触发某个按钮,然后我们后台得到这个按钮的内容
        // 进行相应的处理
        public void onClick(View view) {
            // view 此时是 事件源(事件的源头) -- 参照的位置不一样
            if(view instanceof Button) {
                // 向下进行强制转换
                Button button = (Button)view;
                // 得到按钮的内容
                String btnStr = button.getText().toString();
                Log.i("calculator__",btnStr);

                switch (btnStr) {
                    case "0":
                    case "1":
                    case "2":
                    case "3":
                    case "4":
                    case "5":
                    case "6":
                    case "7":
                    case "8":
                    case "9":
                    case ".":
                        // 字符串的拼接
                        currentNumber += btnStr;
                        // 将内容显示到 EditText
                        edResult.setText(currentNumber);
                        break;
                    case"+":
                        operator = btnStr;
                        previousNumber = currentNumber;
                        currentNumber = "";
                        break;
                    case"-":
                        operator = btnStr;
                        previousNumber = currentNumber;
                        currentNumber = "";
                        break;
                    case"*":
                        operator = btnStr;
                        previousNumber = currentNumber;
                        currentNumber = "";
                        break;
                    case"/":
                        operator = btnStr;
                        previousNumber = currentNumber;
                        currentNumber = "";
                        break;
                    case"%":
                        operator = btnStr;
                        previousNumber = currentNumber;
                        currentNumber = "";
                        break;
                    case"Del":
                        // 采用字符串截取的方式实现退格操作
                        currentNumber = currentNumber.substring(0,currentNumber.length() - 1);
                        edResult.setText(currentNumber);
                        break;
                    case"AC":
                        // 清空数据
                        operator = "";
                        currentNumber = "";
                        previousNumber = "";
                        edResult.setText("");
                        break;
                    case"=":
                        try{
                            double d1 = 0,d2 = 0,result = 0;
                            // RuntimeErron(运行时异常,最好进行异常处理)
                            d1 = Double.parseDouble(previousNumber);
                            d2 = Double.parseDouble(currentNumber);
                            switch (operator) {
                                case"+":
                                    result = d1 + d2;
                                    break;
                                case"-":
                                    result = d1 - d2;
                                    break;
                                case"*":
                                    result = d1 * d2;
                                    break;
                                case"/":
                                    result = d1 / d2;
                                    break;
                                case"%":
                                    result = d1 % d2;
                                    break;
                            }
                            currentNumber = result + "";
                            // 实现多项式计算
                            edResult.setText(currentNumber+"");
                        } catch(NumberFormatException e) {
                            // 打印错误信息
                            Log.i("calculate__",e.getMessage() + "");
                        }
                        break;
                }
            }
        }
}
实现效果:
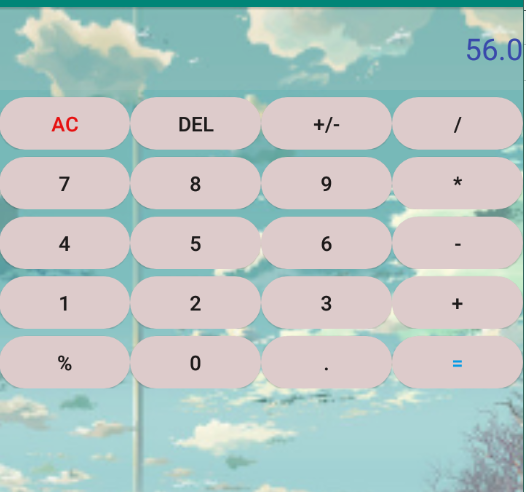
多项式运算:
12 + 13 * 2 + 6 = 56(不放心可以在本地计算器上尝试一下哦)
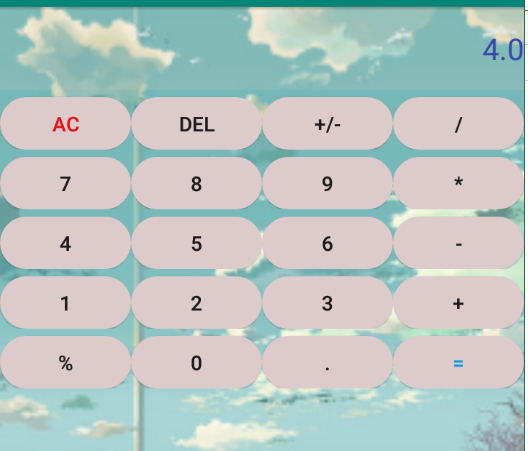
模运算(再次计算时要记得 AC 清空哦):
14 % 5 = 4
退格操作(可不是清空再输入哦,哈哈,可以自己尝试一下):
未退格之前:
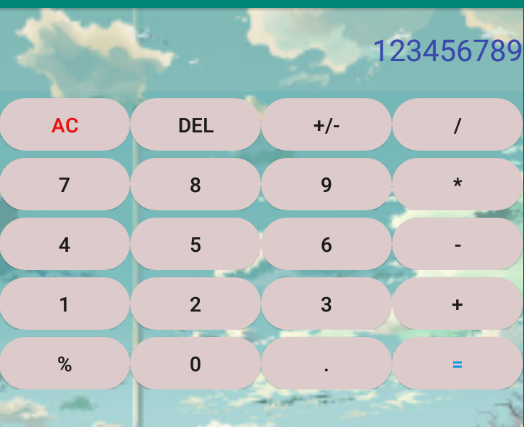
退三格后(DEL 键):
后记:
本人也是初学者,这个设计还存在很多的不足,如果各位看官发现什么问题,希望提出来,
在下万分感谢,同时,在浏览本文时遇到什么问题随时私信我,或者在下面留言,大家共同
进步。


