目录:
1、安装 angular cli
2、创建项目
3、构建路由
4、新建组件
5、组件之间的通信
6、引入primeNG
7、修改primeNG组件样式
8、问题
------------------------------------------------------------------------------------------
1、安装 angular cli
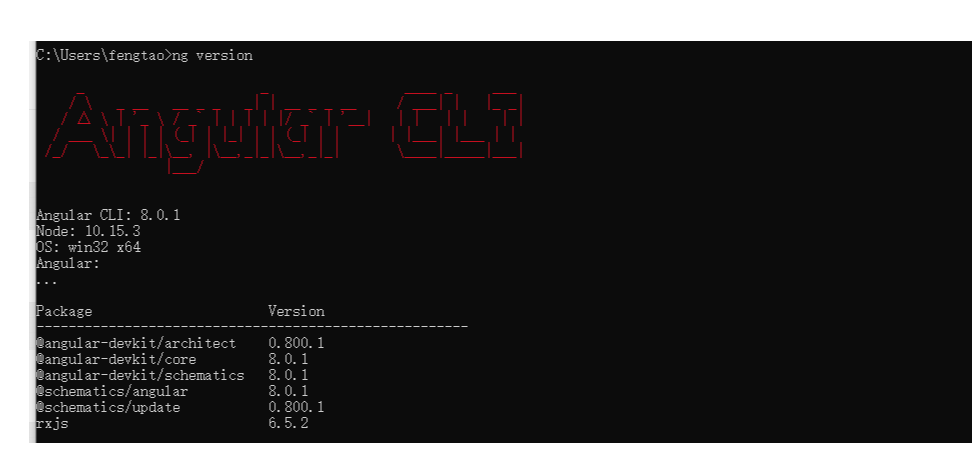
命令 --cnpm install -g @angular/cli
安装完成后可以查看版本是否ok --ng version
官网地址: https://angular.io/start/data 查看语法这些 *ngIf *ngFor
2、创建项目
-- ng init - 在当前目录创建新的应用程序
-- ng new - 创建新的目录,然后在新建的目录中运行 ng init 命令
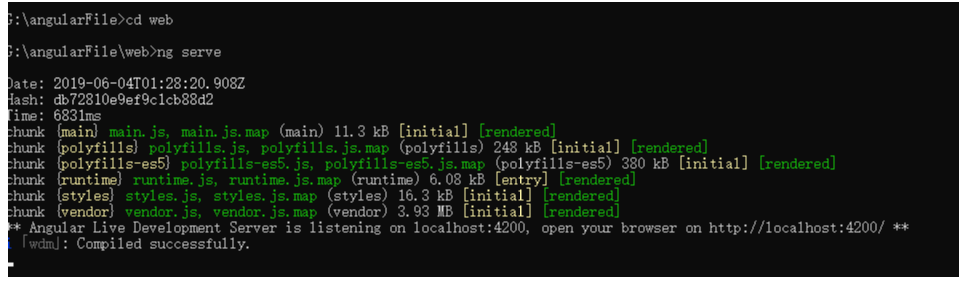
-- ng new web 创建web
项目创建完成之后开始运行
-- cd web
-- ng serve
运行成功默认为4200,网页上可以访问
3、构建路由
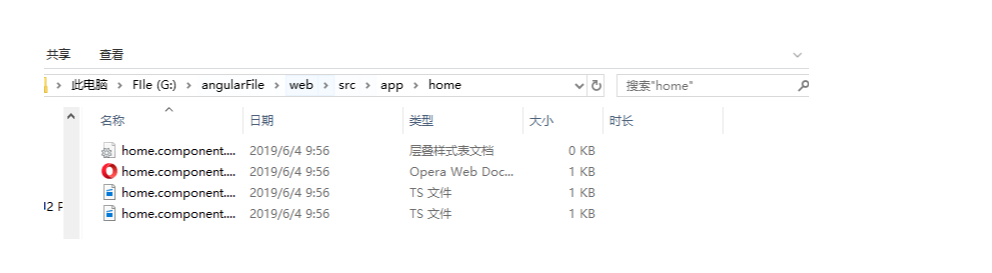
web目录下,先生成components
-- cd web
-- ng g c home // 简写 ng generate component home
创建完成后
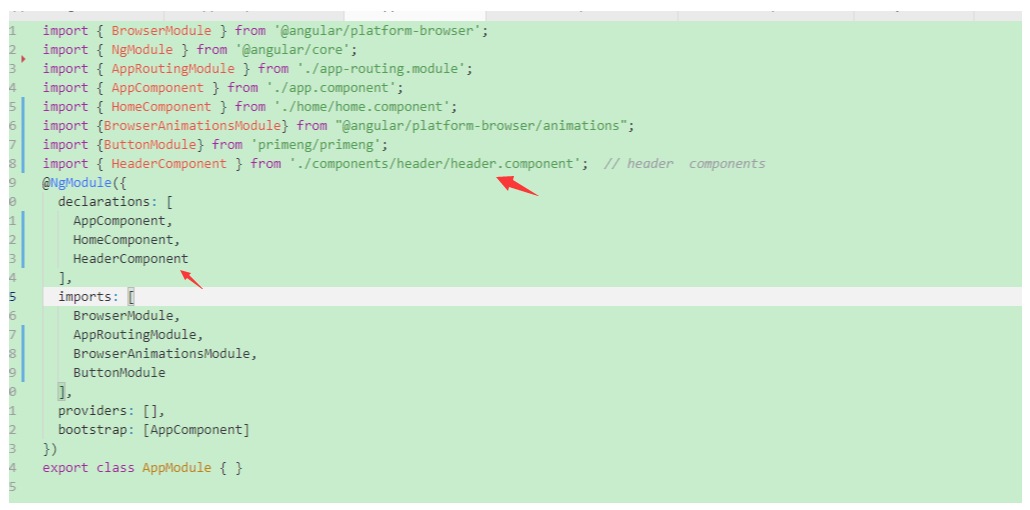
app.module.ts web/src/app/app.module.ts
import { BrowserModule } from '@angular/platform-browser';
import { NgModule } from '@angular/core';
import { AppRoutingModule } from './app-routing.module';
import { AppComponent } from './app.component';
import { HomeComponent } from './home/home.component'; 引入
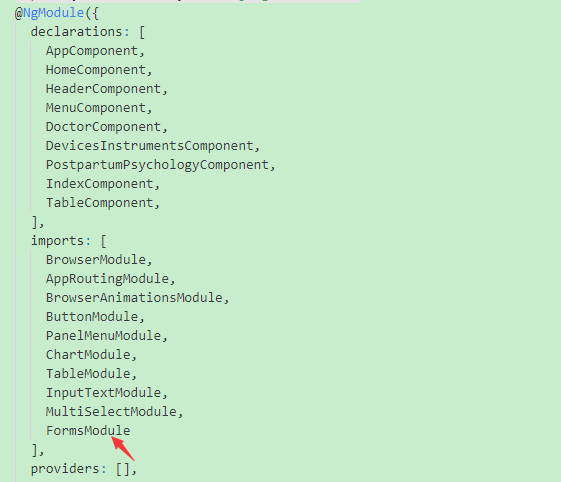
@NgModule({
declarations: [
AppComponent,
HomeComponent //使用
],
imports: [
BrowserModule,
AppRoutingModule
],
providers: [],
bootstrap: [AppComponent]
})
export class AppModule { }
在app-routing.module.ts 创建路由 web/src/app/app-routing.module.ts
import { HomeComponent } from './home/home.component';  引入

const routes: Routes = [
  {path: '', pathMatch: 'full', redirectTo:'home'},  // redirect
  {path: 'home', component:HomeComponent}
];
打开主页页面就会自动进入home页面
4、新建组件
上面已经用到了,使用 -- ng generate component header / -- ng g c header
创建好的组件我移动到了components目录下
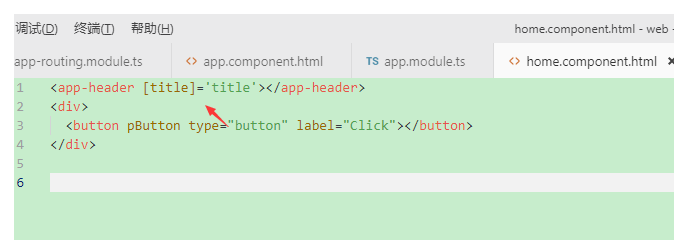
里面的selector 就是调用的名称 <app-header></app-header> 这样调用
在app.module.ts 里面引入
调用app-header

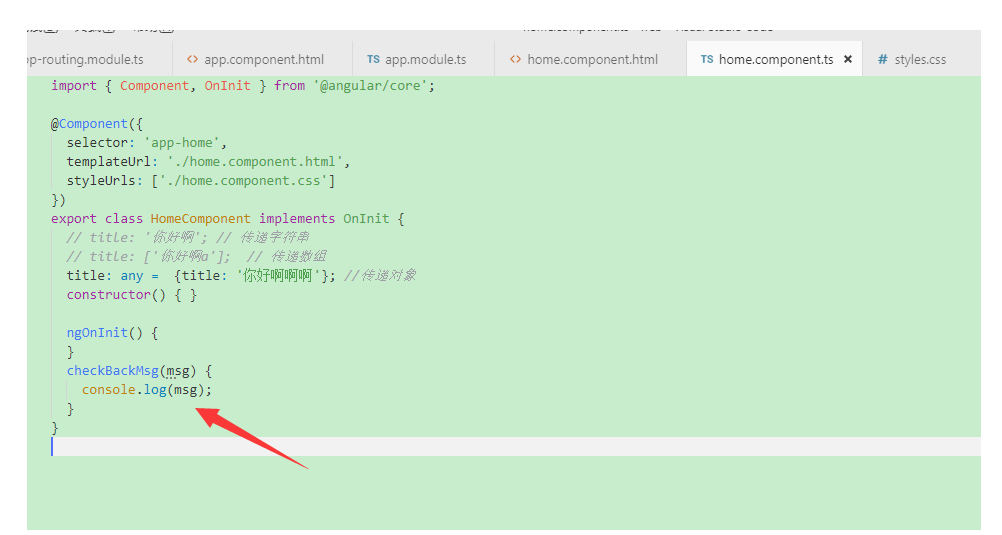
5、组件之间的通信
父组件-> 子组件 通过@Input
home -> header
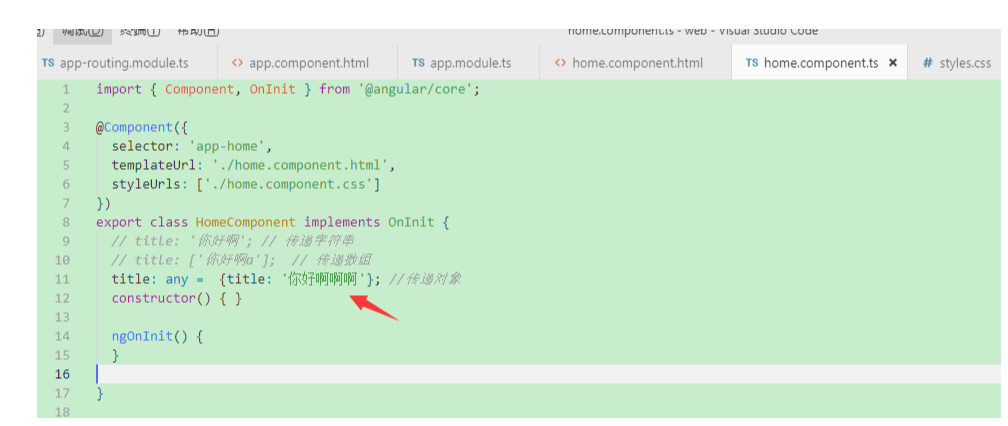
上面我们顶一个title对象传递给header组件,接下来header组件要接收
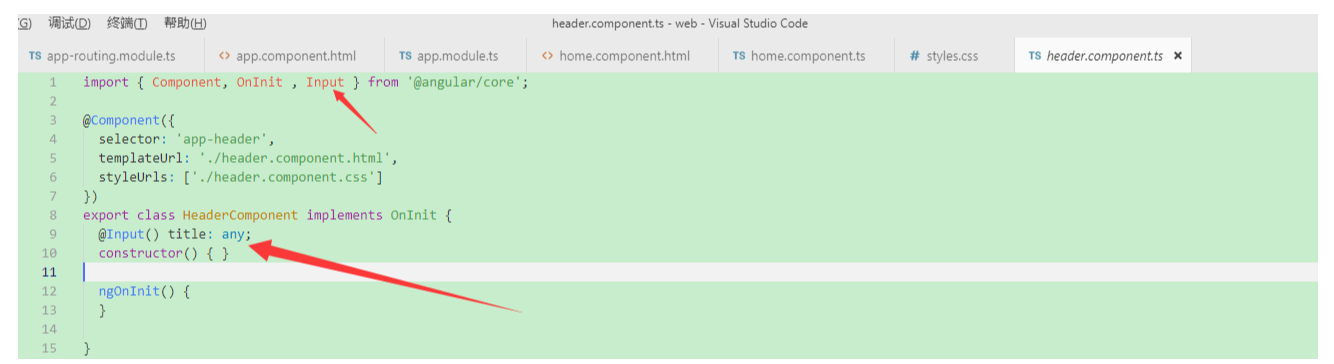
接收完之后,就可以使用

子组件-> 父组件 通过@Output
添加点击按钮
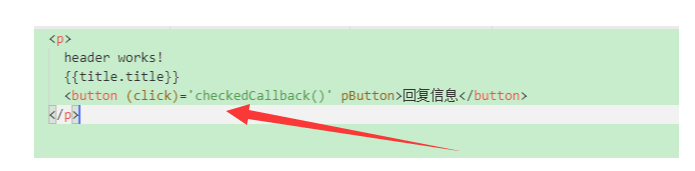
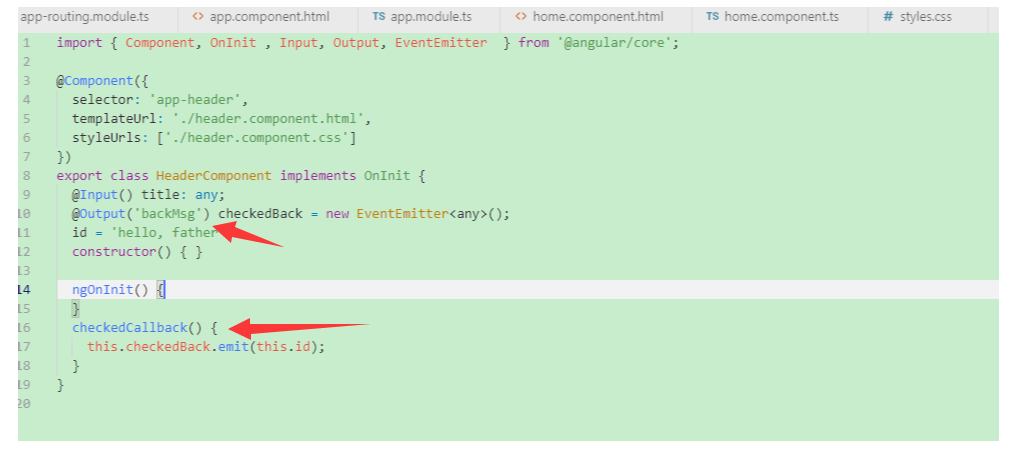
子组件上面点击按钮出发checkedCallback时间,将id值存到checkedBack里面传给父组件
父组件接收,通过backMsg
<app-header [title]='title' (backMsg)='checkBackMsg($event)'></app-header>
6、引入primeNG
-- npm install primeng --save
-- npm install primeicons --save
-- npm install @angular/animations --save
使用模块
import {BrowserModule} from '@angular/platform-browser';
import {BrowserAnimationsModule} from '@angular/platform-browser/animations';

@NgModule({
    imports: [
        BrowserModule,
        BrowserAnimationsModule,
        //...
    ],
    //...
})
export class YourAppModule { }
引入样式
angular.json 修改styles web/src/angular.json
"styles": [
  "node_modules/primeicons/primeicons.css",
  "node_modules/primeng/resources/themes/nova-light/theme.css",
  "node_modules/primeng/resources/primeng.min.css",
  //...
],
针对每个组件看官网文档, 官网: https://www.primefaces.org
7、修改primeNG组件样式
/*修改.ui-panelmenu a的css*/
:host ::ng-deep .ui-panelmenu a{
    background:gray;
    color: white;
    font-size: 14px;
}
8、问题
a、Can't resolve '@angular/cdk/scrolling
-- npm install --save @angular/material
-- npm install --save @angular/cdk
b、ngModel问题
import { FormsModule } from '@angular/forms';
c、语法问题
angular cli语法 改变 ng-if ----> *ngIF ng-for ----> *ngFOr