前端时间整合SSM ,发现了一个现象,在整合的时候 配置文件过于复杂.
1.建工程,建目录,导入jar包。
2.配置 数据源 映射信息 等等 。。。
3. 还有 各种 拦截器,控制器 ,头都大了。。。。。。。。。
4.于是 今天我们就来解决 SSM 的配置问题,所以我们今天就来讲讲 SpringBoot 整合MyBatis
框架的优点和缺点
mybatis的优缺点:
优点 :
- sql写在xml文件中,便于统一管理和优化,解除sql和程序代码的耦合。
- 提供映射标签,支持对象和和数据库orm字段关系的映射,支持对象关系映射标签,支持对象关系的组建
- 提供xml标签,支持编写动态sql。
缺点
-
工作量较大,特别是在表的字段多,关联表多的情况下
-
sql语句的编写依赖于数据库,移植性差。
-
不支持级联删除,级联更新,需要自己对表进行删除。
spring的优点:
优点 :
-
通过Spring的IOC特性,将对象之间的依赖关系交给了Spring控制,方便解耦,简化了 开发。
-
通过Spring的AOP特性,很容易实现事务,日志,权限的控制。
-
提供了对其他优秀开源框架的集成支持。
-
低侵入式。
缺点
-
jsp中要写很多代码、控制器过于灵活,缺少一个公用控制器
-
Spring不支持分布式,这也是EJB仍然在用的原因之一。
今天自己搭建了下Spring boot+Mybatis,比原来的Spring+SpringMVC+Mybatis简
单好多。其实只用Spring boot也可以开发,但是对于多表多条件分页查询,Spring boot就有点力不从心了,所以 把Mybatis整合进去,不得不说,现在的框架搭建真的是方便。话不多说,进入正题。
Spring boot搭建
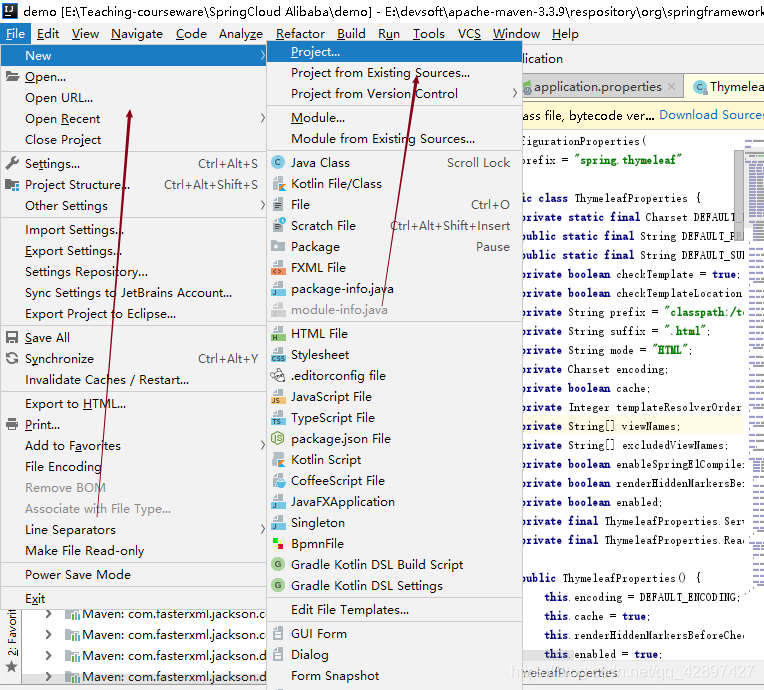
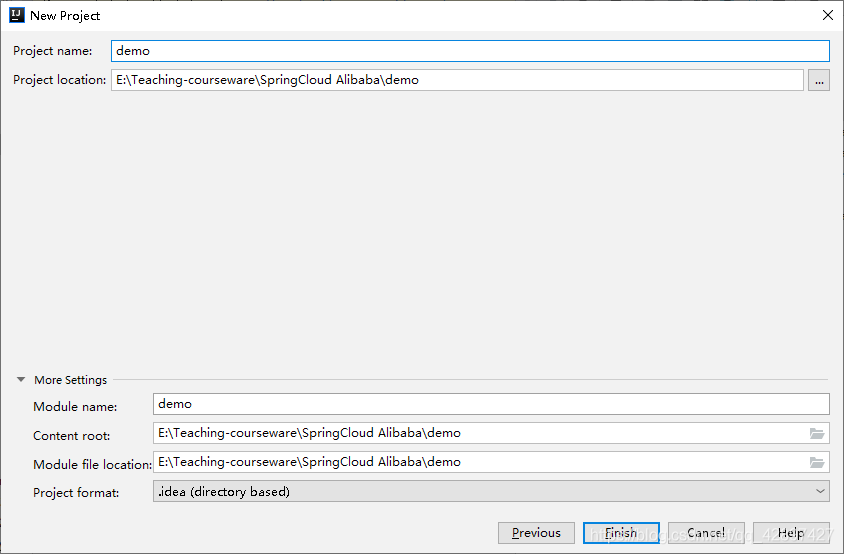
1、Intellij idea菜单栏File->new->project。
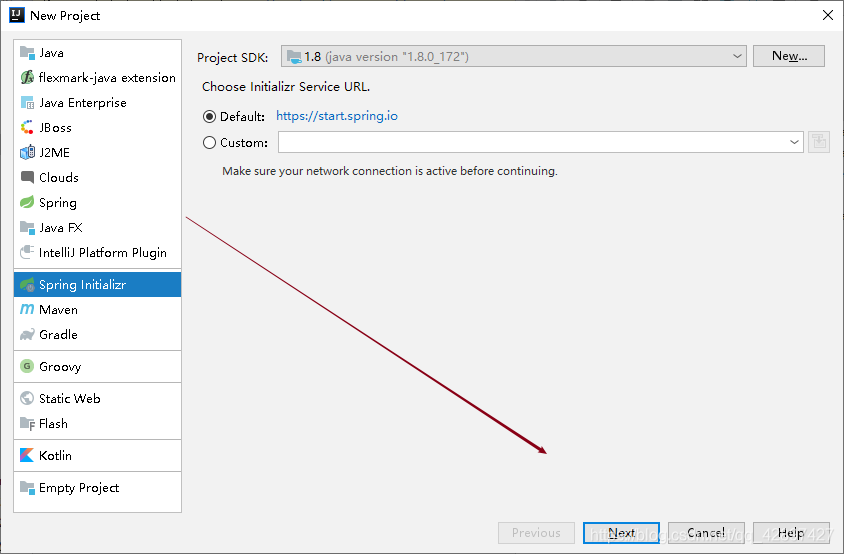
2、选择左侧栏中spring initializr,右侧选择jdk版本,以及默认的Service URL,点击next,大家也可以选择Custom (自定义)。
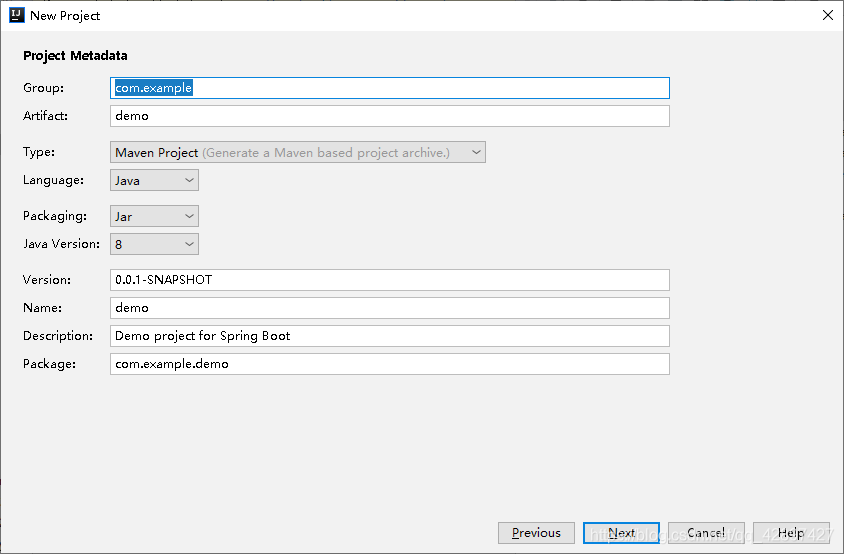
3、然后填写项目的Group(包名)、Artifact(组织名称)等信息,helloworld()阶段选默认就可以了,点击next。
4、左侧点击Web,中间一侧选择Web,然后左侧选择SQL,中间一侧选择 Mybatis、MYSQL(LZ数据库用的是mysql,大家可以选择其他DB),点击next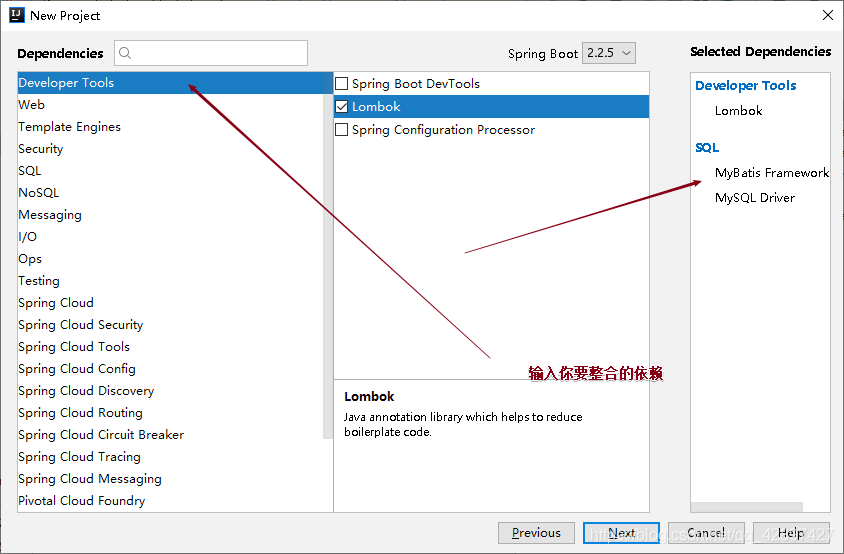
5、填写Project name 等信息,然后点击Finish。
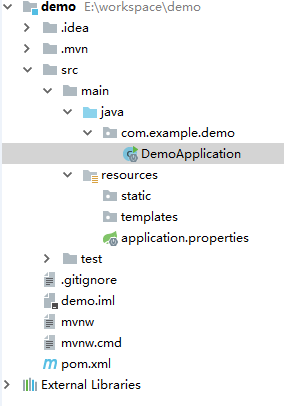
至此,一个maven web项目就创建好了,目录结构如下:
这样,Spring boot就搭建好了,pom.xml里已经有了Spring boot的jar包,包括我们的
mysql数据连接的jar包。Spring boot内置了类似tomcat这样的中间件,所以,只要运行
DemoApplication中的main方法就可以启动项目了。我们测试一下。
     <dependency>
            <groupId>org.springframework.boot</groupId>
            <artifactId>spring-boot-starter-web</artifactId>
        </dependency>
- 在src/main/java下新建目录
com/spiritmark/boot/entity/User。 (实体类)
package com.spiritmark.boot.entity;

  public class User {

	private int id;
	private String name;
	private String password;
	private String number;
	public int getId() {
		return id;
	}

	public void setId(int id) {
		this.id = id;
	}

	public String getName() {
		return name;
	}

	public void setName(String name) {
		this.name = name;
	}

	public String getPassword() {
		return password;
	}

	public void setPassword(String password) {
		this.password = password;
	}


	public String getNumber() {
		return number;
	}

	public void setNumber(String number) {
		this.number = number;
	}


	@Override
	public String toString() {
		return "User [id=" + id + ", name=" + name + ", password=" + password + ", number=" + number + "]";
	}
- 相同目录下新建
com/spiritmark/boot/controller/TestBootController。
package com.spiritmark.boot.controller;

import com.spiritmark.boot.entity.User;
import org.springframework.boot.autoconfigure.EnableAutoConfiguration;
import org.springframework.web.bind.annotation.RequestMapping;
import org.springframework.web.bind.annotation.RestController;

@RestController
@EnableAutoConfiguration
@RequestMapping("/testboot")
public class TestBootController {
    @RequestMapping("getuser")
    public User getUser() {
        User user = new User();
        user.setName("test");
        return user;
    }
}
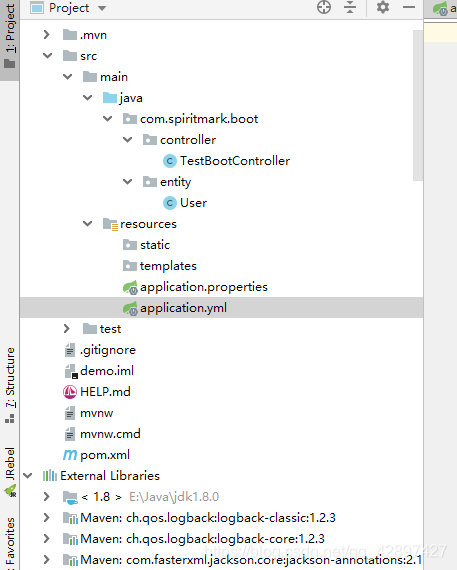
最终的目录结构如下,
启动DemoApplication的main方法,访问http://localhost:8080/testboot/getuser即可。

mapper层的UserMapper类:
package com.spiritmark.boot.mapper;

import java.util.List;

import org.apache.ibatis.annotations.Mapper;

import com.spiritmark.boot.entity.User;
@Mapper
public interface UserMapper {

	List<User> findUserByName(String name);

	public List<User> ListUser();

	public int insertUser(User user);

	public int delete(int id);

	public int Update(User user);

}
service层的实现类Userservice:
package com.spiritmark.boot.service;

import java.util.List;

import org.springframework.beans.factory.annotation.Autowired;
import org.springframework.stereotype.Service;

import com.spiritmark.boot.entity.User;
import com.example.demo.mapper.UserMapper;


@Service
public class UserService {
	@Autowired
	private UserMapper userMapper;

	public List<User> findByName(String name) {
		return userMapper.findUserByName(name);
	}

	public User insertUser(User user) {
		userMapper.insertUser(user);
		return user;
	}
	public List<User> ListUser(){
		return	userMapper.ListUser();
	}


	public int Update(User user){
		return userMapper.Update(user);
	}

	public int delete(int id){
		return userMapper.delete(id);
	}
}
controller层 的访问类CRUD:
package com.spiritmark.boot.controller;

import java.util.List;

import org.springframework.beans.factory.annotation.Autowired;
import org.springframework.web.bind.annotation.RequestMapping;
import org.springframework.web.bind.annotation.RequestMethod;
import org.springframework.web.bind.annotation.ResponseBody;
import org.springframework.web.bind.annotation.RestController;

import com.spiritmark.boot.entity.User;
import com.example.demo.service.UserService;


@RestController
@RequestMapping(value = "/CRUD", method = { RequestMethod.GET, RequestMethod.POST })
public class CRUD {
	@Autowired
	private UserService userservice;

	@RequestMapping(value = "/delete", method = RequestMethod.GET)
	public String delete(int id) {
		int result = userservice.delete(id);
		if (result >= 1) {
			return "删除成功";
		} else {
			return "删除失败";
		}
	}

	@RequestMapping(value = "/update", method = RequestMethod.POST)
	public String update(User user) {
		int result = userservice.Update(user);
		if (result >= 1) {
			return "修改成功";
		} else {
			return "修改失败";
		}

	}

	@RequestMapping(value = "/insert", method = RequestMethod.POST)
	public User insert(User user) {
		return userservice.insertUser(user);
		}

	@RequestMapping("/ListUser")
	@ResponseBody
	public List<User> ListUser(){
		return userservice.ListUser();
	}

	@RequestMapping("/ListUserByname")
	@ResponseBody
	public List<User> ListUserByname(String name){
		return userservice.findByName(name);
	}
}
接着:
在src/main/resources/mapper 下写UserMapper的映射文件xml.
UserMapper.xml
<?xml version = "1.0" encoding = "UTF-8"?>
<!DOCTYPE mapper PUBLIC
        "-//mybatis.org//DTD com.example.Mapper 3.0//EN"
        "http://mybatis.org/dtd/mybatis-3-mapper.dtd">
<mapper namespace="com.spiritmark.boot.mapper.UserMapper">
	<resultMap id="result" type="User">
		<result property="name" column="name" />
		<result property="password" column="password" />
		<result property="number" column="number"/>

	</resultMap>

	<select id="ListUser" resultMap="result">
		SELECT * FROM user
	</select>

	<select id="findUserByName" resultMap="result">
		SELECT * FROM user where name=#{name}
	</select>

	<insert id="insertUser" parameterType="User"
		keyProperty="id" useGeneratedKeys="true">
		INSERT INTO user
		(
		id,name,password,number
		)
		VALUES (
		#{id},
		#{name, jdbcType=VARCHAR},
		#{password, jdbcType=VARCHAR},
		#{number}
		)
	</insert>

	<delete id="delete" parameterType="int">
		delete from user where id=#{id}
	</delete>

	<update id="Update" parameterType="User">
	update user set user.name=#{name},user.password=#{password},user.number=#{number} where user.id=#{id}
	</update>
</mapper>
在配置文件中配置了 别名扫描的包,会自动拼接实体类
application.yml:
#默认使用配置
#公共配置与profiles选择无关
mybatis:
  typeAliasesPackage: com.spiritmark.boot.entity  # 实体的包名
  mapperLocations: classpath:mapper/*.xml   # mapper.xml 的地址
---

#开发配置
spring:
  datasource:
    url: jdbc:mysql://localhost:3306/test?characterEncoding=utf8
    username: root
    password: root
    driver-class-name: com.mysql.jdbc.Driver
启动程序的入口类:SpringbootApplication.java
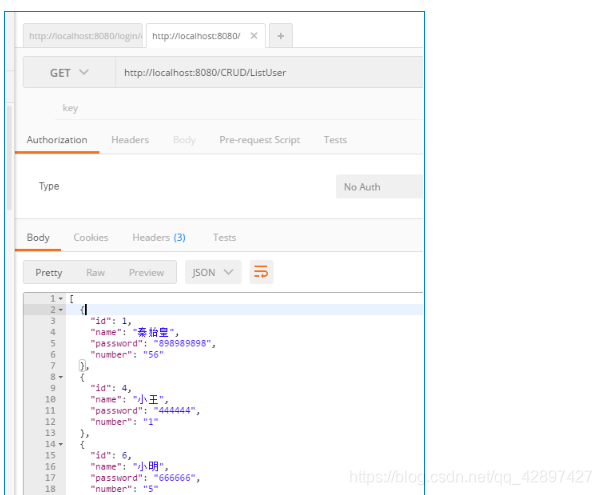
我们在postmain这个工具中测试:
注解版
有人说SpringBoot XML 太麻烦了,这个时候,可以使用 注解版
我们把 XML 删除src/main/resources/mapper/*xml修改成下面这样
package com.spiritmark.boot.mapper;

import com.spiritmark.boot.entity.User;
import org.apache.ibatis.annotations.*;

import java.util.List;

@Mapper
public interface UserMapper {

    @Insert("insert into user(name,age) values(#{name},#{age})")
    int addUser(@Param("name") String name, @Param("age") String age);

    @Select("select * from user where id =#{id}")
    User findById(@Param("id") String id);

    @Update("update user set name=#{name} where id=#{id}")
    void updataById(@Param("id") String id, @Param("name") String name);

    @Delete("delete from user where id=#{id}")
    void deleteById(@Param("id") String id);

    @Select("select * from user")
    List<User> findAllUser();

}