1、配置RaspberryPi交叉编译环境:
在开发RaspberryPi Zero的过程中,由于Zero板卡的CPU的处理性能比较弱,因此其编译的性能比较弱,需要将代码在PC电脑上交叉编译完成之后再拷贝到Zero上调试运行。配置交叉编译环境的基本步骤如下所示:
Step1:从github网站获取raspberryPi交叉编译工具包:https://github.com/raspberrypi/tools
git clone git@github.com:raspberrypi/tools.git

上述文件下载完之后的内容如下所示(其中arm-bcm2708文件夹中的内容为交叉编译器):
![]()
Step2:将交叉编译器配置到环境变量:
编辑环境变量配置文件.bashrc,在文件的末尾添加如下的代码(注意路径,不同的路径记得修改):
export PATH=$PATH:~/Raspberry_Project/tools/arm-bcm2708/gcc-linaro-arm-linux-gnueabihf-raspbian-x64/bin
![]()
配置完成之后,需要执行source指令,让.bashrc生效:
source ~/.bashrc
Step3:测试交叉编译环境
如下图所示,在ubuntu命令行中输入如下指令:
arm-linux-gnueabihf-gcc -v
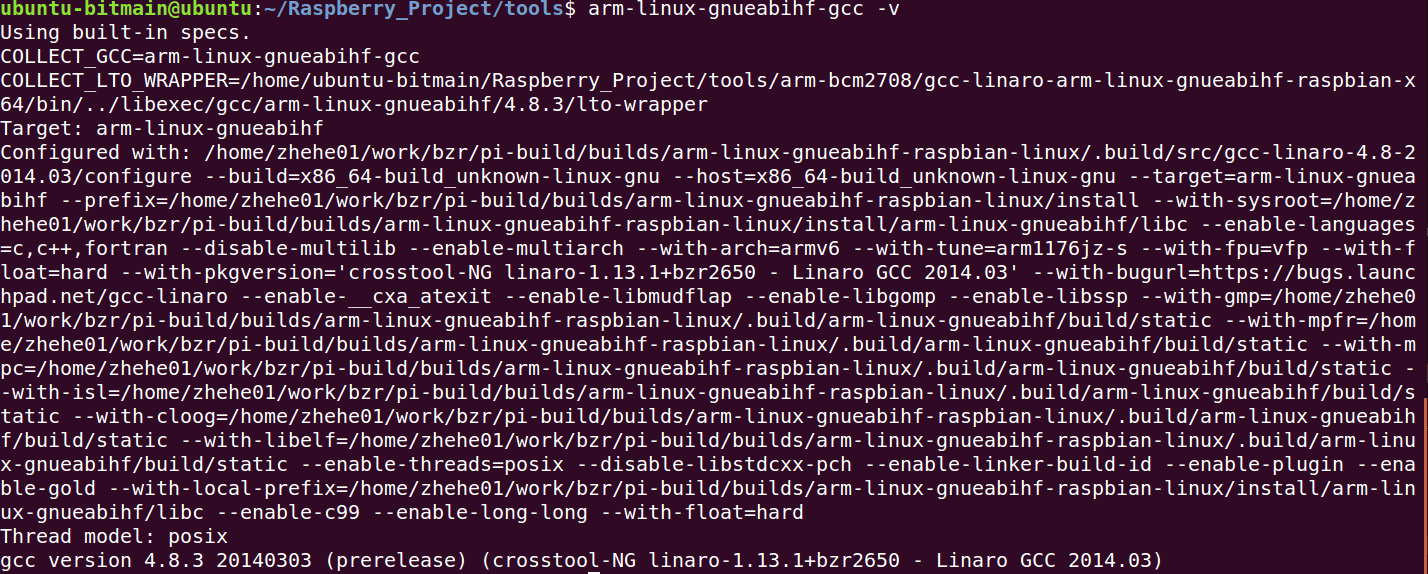 有此图说明配置成功。
2、交叉编译执行main.c文件:
Step1:编写了如下的测试文件:
1 #include <stdio.h>
2
3 int main(void)
4 {
5         printf("Test the cross-compile-env for raspberrypi!
");
6         return 1;
7 }
Step2:使用如下的指令编译上述文件:
arm-linux-gnueabihf-gcc -c main.c -o main
![]()
编译的结果如下:
![]() 将编译生成的main文件拷贝到树莓派上,修改执行权限,执行即可。
将编译生成的main文件拷贝到树莓派上,修改执行权限,执行即可。
3、交叉编译过程中需要链接第三方的库文件:
在编写程序的过程中,我们需要使用到wiringPi库相关的内容,因此需要将wiringPi的文件引入。
Step1:首先下载wiringPi的程序包:https://github.com/mm1994uestc/WiringPi。可以通过github直接下载源代码:
git clone git@github.com:mm1994uestc/WiringPi.git
下载完成之后进入文件夹安装wiringPi的库,安装方法参考这里:https://www.cnblogs.com/uestc-mm/p/6290521.html
注:安装过程中如果出现问题,请使用sudo权限操作,sudo make install
重点:将wiringPi安装在树莓派之后,我们可以在其编译文件夹下面找到编译成功的wiringPi库程序或者安装在/usr/lib当中,如下所示:
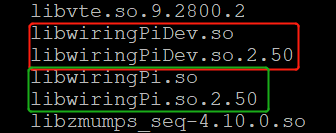 libwiringPi是基本的wiringPi程序库
我们可以将这些文件拷贝到Ubuntu环境下,为交叉编译做好准备,如下所示:
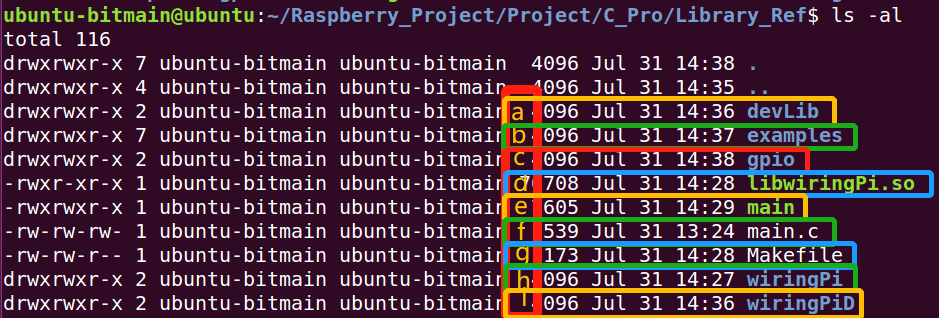
a. devLib:Raspberry basical hardware driv.
b. examples:Some examples for the wiringPi Lib.
c. gpio:gpio demo to show the control of gpio.
d. libwiringPi.so:Baisic wiringpi library usefull when you are compile the c code.
e. main:Executiable file for Raspberry.
f. main.c:The c source code.
g. Makefile:Used to compile the C Code into executibale binary file.
h. wiringPi:The source Code of wiringPi(include .c & .h file),when you are compile the code,it needed.
i. wiringPiD:Other devices Library Source Code if you used it,you need to include the lib and .h file.
Step2:安装拷贝完成之后我们编写如下的程序:
#include <stdio.h>
#include <stdlib.h>
#include "wiringPi.h"

int main(int argc, char **argv)
{
        if(argc<2){
                printf("You should give a param while call the program1
");
                return 0;
        }
        int pinNumber = atoi(argv[1]);
        printf("The control pin number is:%d
",pinNumber);
        if(-1 == wiringPiSetup()){
                printf("Setup wiringPi failed!
");
                return 0;
        }
        pinMode(pinNumber, OUTPUT);
        while(1){
                digitalWrite(pinNumber,0);
                delay(800);
                digitalWrite(pinNumber,1);
                delay(800);
        }
        printf("Hello, you do it succeed!!!
");
        return 0;
}
Step3:编译上述程序,这里编写了简单的Makefile文件,如下所示:
main:main.c
    arm-linux-gnueabihf-g++ main.c -o main -L. -lwiringPi -IwiringPi
clean:
    rm main
注:这里的路径-I是wiringPi的安装路径。一定要应用wiringPi的相关文件的路径才能调用wiringPi的库,举一反三,其他的库也可以类似的方式,对于静态的library,我们可以使用-l的方式来链接,如果在RaspberryPi的本地,我们可以使用如下的方式(这里链接了math数学库&wiringPi库):
gcc -c main.c -o main -lwiringPi -lm
-L.的意义表示,程序调用的库在当前文件目录下,如果不再请举一反三,设置Library库的绝对路径。-I的意思是include的意思,将wiringPi的.h文件包括进来。
关于Makefile链接相关的内容参考这里:https://www.cnblogs.com/starf/p/3652563.html
Step4:make生成RaspberryPi的可执行文件,通过scp拷贝到Raspberry执行即可:
![]()
4、Reference:
交叉编译参考:https://www.cnblogs.com/xieyajie/p/4699724.html
wiringPi官网:http://wiringpi.com/