环境搭建:
下载python3.8的安装包 https://www.python.org/downloads/windows/
下载IDE,使用的pycharm :https://www.jetbrains.com/pycharm/download/#section=windows
安装框架 pip install httprunner
完成以上步骤,环境搭建完毕
-----------------------------------------------------------------------------------
第一步:搭建项目
使用手脚架
httprunner startproject test
在会在当前目录下搭建项目,并生成目录结构如下:

testcases目录存放测试用例
在debugtalk.py 文件中进行自定义方法编写
.env 文件用于存放环境变量例如 用户名/密码等
reports目录存放测试报告
第二步:生产测试用例
只介绍py文件测试用例,json和yaml文件可以在网上找到很多教程
可以使用抓包工具charles/fiddler对接口请求抓包
如下图是charles实例:

导出har文件后,在保存文件的目录下执行
har2case test.har
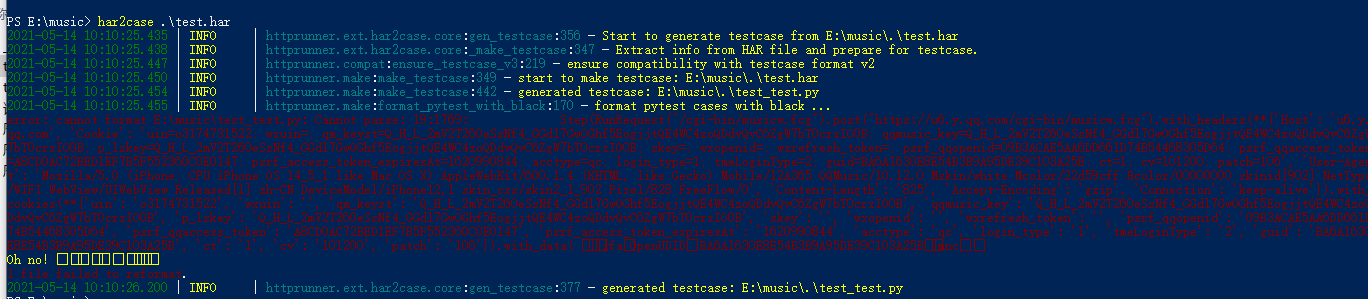
将在当前目录下生产test_test.py的测试用例文件

将test_test.py 转移到项目的testcases目录下
第三步:在debugtalk.py文件中自定义方法,如下截图

第四步:优化测试用例(testcases目录下的文件)
class TestCaseTest(HttpRunner):
    config = Config("测试")
        .variables(
        **{
            "base_url": "${baseurl()}",
            "tim": "${tim()}"
        }
    ).verify(False)

    teststeps = [
#POST请求
        Step(
            RunRequest("teststep1")
                .with_variables(
                **{
                    "url": "/test/test",
                    "now": "${nowtime()}",
                    "tim": "$tim",
                    "para": {"test": "test"}
                   }",
                }
            )
                .post(
                "https://$base_url$url"
            )
                .with_headers(
                **{ "now": "$now",
                   "Connection": "Keep-Alive",
                   "Accept-Encoding": "gzip",
                   "User-Agent": "okhttp/4.2.2"}
            )
                .with_json(
                "$para"
            )
                .validate()
                .assert_equal("status_code", 200)
                .assert_equal("description", "SUCCESS")
                .assert_equal("resultcode", "0")
        ),
# GET请求
Step(
    RunRequest("teststep2")
        .with_variables(
        **{
            "url": "test",
            "para": {},
            "now": "${nowtime()}",
}"

        }
    )
        .get("https://$base_url$url")
        .with_params(**{})
        .with_headers(
        **{
            "now": "$now",
            "accept-language": "zh-Hans-AZ;q=1",
            "accept": "*/*",
            "content-type": "application/json;",
            "enterpriseid": "CC01",
            "accept-encoding": "gzip, deflate, br",
        }
    )
        .validate()
        .assert_equal("status_code", 200)
        .assert_equal("resultcode", "0")
),
]
第六步:测试用例详解
1、调用debugtalk.py中的方法,使用格式
${nowtime()}
2、如下:test是当前测试用例的名称
Config("test")
3、如下:variables定义整个测试用例的共用参数
 Config("测试")
        .variables(
        **{
            "base_url": "${baseurl()}",
            "tim": "${tim()}"
        }
4、如下:verify专门是用于https请求取消对服务端证书校验,默认值是True(校验服务端证书),指定False(不校验服务端证书)
    config = Config("测试")
        .variables(
        **{
            "base_url": "${baseurl()}",
            "tim": "${tim()}"
        }
    ).verify(False)
5、如下,Step测试步骤,需要严格按照如下格式编写
RunRequest ("teststep1") RunRequest 测试步骤执行关键字,teststep1是测试步骤名称
with_variables与config中的variables类似,定义当前测试步骤中使用的参数
用例中公用参数,调用方式
"tim": "$tim"
post请求;post(url)
        Step(
            RunRequest("teststep1")
                .with_variables(
                **{
                    "url": "/test/test",
                    "now": "${nowtime()}",
                    "tim": "$tim",
                    "para": {"test": "test"}
                   }",
                }
            )
                .post(
                "https://$base_url$url"
            )
                .with_headers(
                **{ "now": "$now",
                   "Connection": "Keep-Alive",
                   "Accept-Encoding": "gzip",
                   "User-Agent": "okhttp/4.2.2"}
            )
                .with_json(
                "$para"
            )
                .validate()
                .assert_equal("status_code", 200)
                .assert_equal("description", "SUCCESS")
                .assert_equal("resultcode", "0")
        ),
with_headers 请求的头文件;with_json 请求参数;validate断言标识,assert_equal具体断言内容,还有其他断言类型可以参看源码;
get请求;get(url)
Step(
    RunRequest("teststep2")
        .with_variables(
        **{
            "url": "test",
            "para": {"test":"test"},
            "now": "${nowtime()}",
}"

        }
    )
        .get("https://$base_url$url")
        .with_params(**{"test":"test"})
        .with_headers(
        **{
            "now": "$now",
            "accept-language": "zh-Hans-AZ;q=1",
            "accept": "*/*",
            "content-type": "application/json;",
            "enterpriseid": "CC01",
            "accept-encoding": "gzip, deflate, br",
        }
    )
        .validate()
        .assert_equal("status_code", 200)
        .assert_equal("resultcode", "0")
),
with_params 请求参数
获取接口返回数据,使用extract().with_jmespath("body.data","data");body.data是获取接口返回的数据路径,data是自定义的参数名,用于其他step调用;如下格式:
 Step(
            RunRequest("teststep1")
                .with_variables(
                **{
                    "url": "test",
                    "para":{"test":"test"}
                }
            )
                .post(
                "https://$base_url$url"
            )
                .with_headers(
                **{
                    "Content-Type": "application/json;charset=UTF-8",
                    "Content-Length": "82",
                    "Connection": "Keep-Alive",
                    "Accept-Encoding": "gzip",
                    "User-Agent": "okhttp/4.2.2"
                }
            )
                .with_json(
                "$para"
            )
                .extract().with_jmespath("body.data","data")
                .validate()
                .assert_equal("status_code", 200)
                .assert_equal("data", "$data")
        ),
第七步:测试用例执行,在项目根目录下执行,将测试报告保存在reports/test.html中,--self-contained-html 参数限定生成独立的报告(可以直接将html文件分享)
hrun testcases --html=reports/test.html --self-contained-html

根据实际使用情况,总结以上知识点备忘!