其中其决定作用的是这篇文章 https://www.pugetsystems.com/labs/hpc/Install-TensorFlow-with-GPU-Support-the-Easy-Way-on-Ubuntu-18-04-without-installing-CUDA-1170/
注意兼容版本:https://devtalk.nvidia.com/default/topic/1047898/cuda-setup-and-installation/cuda-10-1-tensorflow-1-13/2
1-安装显卡驱动
在终端执行如下命令,建议先切换到国内源,如huaweicloud mirrors。
sudo apt purge nvidia*
ubuntu-drivers devices            # 可以看到显卡等设备,和推荐的驱动
sudo ubuntu-drivers autoinstall   # 安装推荐驱动,通常是最新版
如果通过ubuntu-drivers devices看不到NVidia显卡,则添加
sudo add-apt-repository ppa:graphics-drivers
sudo apt-get update
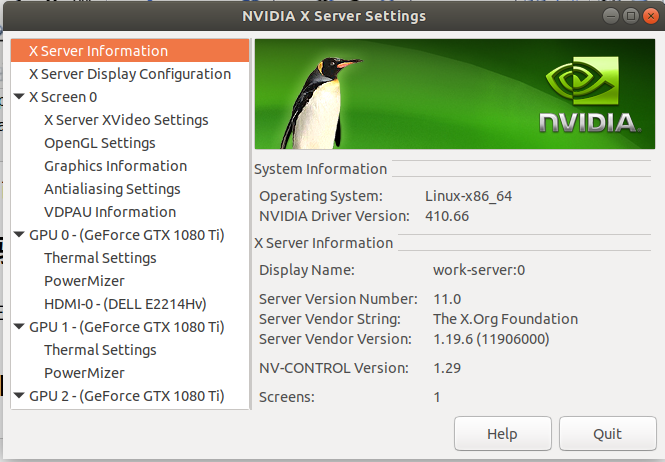
安装完后,重启系统, 启动后,在图形界面运行Nvidia X Server Settings,可以看到显卡情况,如下图。
2-安装Anaconda+Tensorflow-GPU
安装 Anaconda
bash Anaconda3-5.3.0-Linux-x86_64.sh # make sure append the Anaconda executable directory to your PATH environment variable in .bashrc
source ~/.bashrc
python --version # to show the python version
装之前,推荐切换到国内源:
anaconda的源改为国内镜像, 配置文件是~/.condarc
conda config --add channels https://mirrors.tuna.tsinghua.edu.cn/anaconda/pkgs/free/
conda config --add channels https://mirrors.tuna.tsinghua.edu.cn/anaconda/pkgs/main/
conda config --add channels https://mirrors.tuna.tsinghua.edu.cn/anaconda/cloud/conda-forge/
conda config --set show_channel_urls yes
pip源改为国内镜像, 配置文件是~/.pip/pip.conf, 该后的文件内容如下:
[global]
index-url = https://pypi.tuna.tsinghua.edu.cn/simple/
[install]
trusted-host=https://pypi.tuna.tsinghua.edu.cn
update conda
conda update conda -y
conda update anaconda -y
conda update python -y
conda update --all -y
安装tensorflow
conda create --name tf-gpu   # Create a Python "virtual environment" for TensorFlow using conda
conda activate tf-gpu       # 注意运行此命令后,命令行开头的提示变为(tf-gpu) user@computer:~$,表示tf-gpu环境处于激活状态
# 后面的命令,都在tf-gpu环境下执行,我保留了命令行的提示,以示区别
(tf-gpu) user@computer:~$ conda install tensorflow-gpu -y # install TensorFlow with GPU acceleration and all of the dependencies.
为Tensorflow环境创建Jupyter Notebook Kernel
(tf-gpu) user@computer:~$ conda install ipykernel -y
(tf-gpu) user@computer:~$ conda install jupyter
(tf-gpu) user@computer:~$ python -m ipykernel install --user --name tf-gpu --display-name "TensorFlow-GPU"
安装keras
(tf-gpu) user@computer:~$ conda install keras -y
3-测试安装结果
用Keras 例程(Keras内部会用到Tensorflow)
打开Jupyter Notebook
jupyter notebook
创建新笔记: New下拉菜单 -> 选择TensorFlow-GPU
输入如下测试代码,并运行:
# Import dependencies
import keras
from keras.datasets import mnist
from keras.models import Sequential
from keras.layers import Dense, Dropout
from keras.layers import Flatten,  MaxPooling2D, Conv2D
from keras.callbacks import TensorBoard

# Load and process the MNIST data
# 推荐先下载mnist.npz到目录~/.keras/datasets/
(X_train,y_train), (X_test, y_test) = mnist.load_data(path="mnist.npz")
X_train = X_train.reshape(60000,28,28,1).astype('float32')
X_test = X_test.reshape(10000,28,28,1).astype('float32')
X_train /= 255
X_test /= 255
n_classes = 10
y_train = keras.utils.to_categorical(y_train, n_classes)
y_test = keras.utils.to_categorical(y_test, n_classes)

# Create the LeNet-5 neural network architecture
model = Sequential()
model.add(Conv2D(32, kernel_size=(3,3), activation='relu', input_shape=(28,28,1)) )
model.add(Conv2D(64, kernel_size=(3,3), activation='relu'))
model.add(MaxPooling2D(pool_size=(2,2)))
model.add(Dropout(0.25))
model.add(Flatten())
model.add(Dense(128, activation='relu'))
model.add(Dropout(0.5))
model.add(Dense(n_classes, activation='softmax')) # Compile the model
model.compile(loss='categorical_crossentropy', optimizer='adam', metrics=['accuracy']) # Set log data to feed to TensorBoard for visual analysis
tensor_board = TensorBoard('./logs/LeNet-MNIST-1') # Train the model
model.fit(X_train, y_train, batch_size=128, epochs=15, verbose=1,
          validation_data=(X_test,y_test), callbacks=[tensor_board])
运行完后查看误差曲线
(tf-gpu) dbk@i9:~$ tensorboard --logdir=./logs --port 6006
效果如下图
