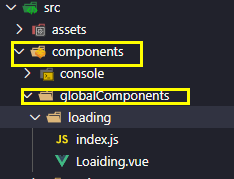
1.全局组件的目录
2.loading/index.js
import LoadingComp from './Loaiding'
const compName=LoadingComp.name //获取组件的名字 当做全局组件名字使用
const loading = {
//Vue.use()方法就会自动执行install
install(Vue) {
Vue.component(compName, LoadingComp)
}
}
export default loading
3.loading/Loading.vue
<template>
  <div>
    <h3>{{loadingMessage}}</h3>
    <h3>{{aa}}</h3>
  </div>
</template>
<script>
export default {
  name: "Loading",
  props: {
    aa: {
      type: String,
    }
  },
  data() {
    return {
      loadingMessage: "loading..."
    };
  },
  methods: {},

};
</script>
<style lang="scss" scoped>
</style>
4.main.js全局注册
import Loading from './components/globalComponents/loading/index'
Vue.use(Loading)
5.使用
<template>
  <div>
    <loading></loading> //无需注册 直接使用
  </div>
</template>
批量导入多个自定义全局组件
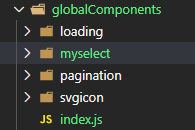
index.js文件(上面globalComponents下面统一新建一个index.js文件)
import loading from './loading'
import mySelect from './myselect'

export default {
  loading,
  mySelect
}
//main.js 批量导入全局自定义组件
import globalComponents from './components/globalComponents'
for (let key in globalComponents) {
  Vue.use(globalComponents[key])
}
自定义全局TarBar组件
<!-- TabBar.vue-->
<template>
  <div
    class="tab"
    v-if="defaultTarBar.textList.length!==0"
    :style="{defaultTarBar.textList.length*45+'px'}"
  >
    <span
      v-for="(item, index) in defaultTarBar.textList"
      :key="index"
      :class="[defaultTarBar.active===index?'active':'']"
      @click="tabClick(index,item)"
    >{{item}}</span>
  </div>
</template>
<script>
export default {
  name: "TabBar",
  props: {
    tabBar: {
      type: Object,
      required: true
    }
  },
  data() {
    return {
      defaultTarBar: {
        textList: [],
        active: 0
      }
    };
  },
  methods: {
    initDefaultTarBar() {
      this.defaultTarBar={...this.defaultTarBar,...this.tabBar}

    },
    tabClick(index, item) {
      // console.log(index, item);
      this.defaultTarBar.active = index;
      this.tabBar.active = index;
    }
  },
  created() {
    this.initDefaultTarBar();
  }
};
</script>
<style lang="less" scoped>
.tab {
  display: flex;
  flex-flow: nowrap row;
  justify-content: space-between;
  align-items: center;
  //  100px;
  background: #1f4b74;
  overflow: hidden;
  border-radius: 30px;
  cursor: pointer;
  text-align: center;
  position: absolute;
  right: 0;
  top: 0;

  span {
    flex: 1; //平分
    color: #5addff;
  }

  .active {
    background: #5addff;
    color: #070931;
  }
}
</style>
//index.js
import TabBar from './TabBar'
const compName = TabBar.name //获取组件的名字 当做全局组件名字使用
console.log("compName", compName)
const tabBar = {
  //Vue.use()方法就会自动执行install

  install(Vue) {
    Vue.component(compName, TabBar)
  }

}
export default tabBar
使用tarbar.vue
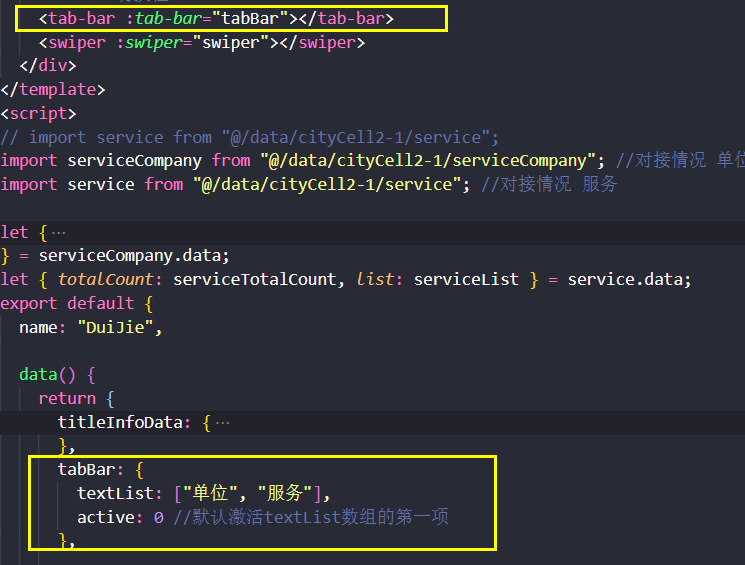
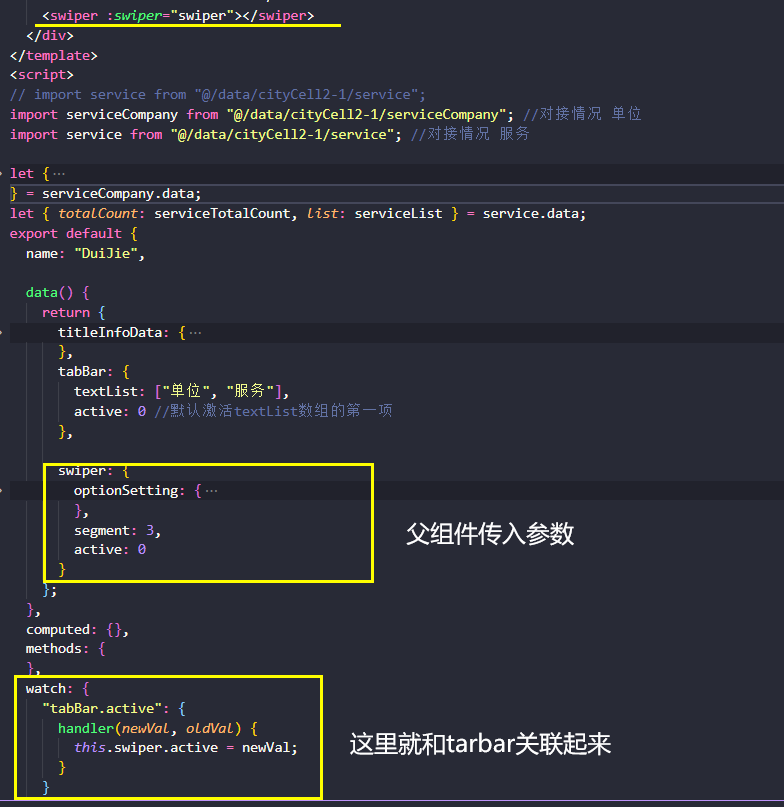
自定义Swiper全局组件
<!--1Swiper使用与两组不同的数据,点击切换不同的数据源 但是两组数据的展示效果是一样的。
2.另外也是将一个很长的数据list[],切了segment段,分列一起滚动。
3. 下载安装 vue-seamless-scroll 单文件引用
 -->
<template>
  <div class="container" v-if="computedListData.length!==0">
    <div v-for="( segmentList,index) in computedListData" :key="index">
      <scroll
        :data="segmentList"
        :class-option="defaultSwiper.optionSetting"
        class="seamless-warp"
      >
        <ul class="item">
          <li class="li" v-for="item in segmentList" :key="item">{{item}}</li>
        </ul>
      </scroll>
    </div>
  </div>
</template>
<script>
// import vueSeamless from "vue-seamless-scroll";

import serviceCompany from "@/data/cityCell2-1/serviceCompany"; //对接情况 单位
import service from "@/data/cityCell2-1/service"; //对接情况 服务

let {
  totalCount: serviceCompanyTotalCount,
  list: serviceCompanyList
} = serviceCompany.data;
let { totalCount: serviceTotalCount, list: serviceList } = service.data;

import scroll  from "vue-seamless-scroll"; //导入组件


export default {
  name: "Swiper",
  props: {
    swiper: {
      type: Object
    }
  },
  components: {
    scroll
  },
  data() {
    return {
      serviceCompanyList: serviceCompanyList, //公司(单位)列表 15
      serviceList: serviceList, //服务列表 40个
      defaultSwiper: {
        optionSetting: {
          step: 0.4, // 数值越大速度滚动越快

          limitMoveNum: 7, // 开始无缝滚动的数据量 this.dataList.length

          hoverStop: false, // 是否开启鼠标悬停stop

          direction: 1, // 0向下 1向上 2向左 3向右

          openWatch: true, // 开启数据实时监控刷新dom

          singleHeight: 0, // 单步运动停止的高度(默认值0是无缝不停止的滚动) direction => 0/1

          singleWidth: 0, // 单步运动停止的宽度(默认值0是无缝不停止的滚动) direction => 2/3

          waitTime: 1000 // 单步运动停止的时间(默认值1000ms)
        },
        segment: 4,
        active: 0 //配合tarbar切换的
      }
    };
  },
  computed: {
    computedListData() {
      const obj = {
        0: this._segmentArr(
          this.serviceCompanyList,
          this.defaultSwiper.segment
        ),
        1: this._segmentArr(this.serviceList, this.defaultSwiper.segment)
      };
      return obj[this.defaultSwiper.active];
    }
  },
  methods: {
    initDefaultSwiper() {
      this.defaultSwiper = { ...this.defaultSwiper, ...this.swiper };
    }
  },
  created() {
    this.initDefaultSwiper();
  },
  watch: {
    "swiper.active": {
      handler(newVal) {
        this.defaultSwiper.active = newVal;
      }
    }
  }
};
</script>
<style lang="less" scoped>
.container {
  display: flex;
  flex-flow: nowrap row;
  justify-content: space-between;
  align-items: flex-start;
  padding: 0.9rem 0.2rem 0.3rem 0.2rem;

  .seamless-warp {
    height: 87%;
    overflow: hidden;
    .item {
      text-align: left;
      .li {
        padding-left: 10px;
        font-size: 14px;
        margin-bottom: 0.2rem;
        overflow: hidden;
        white-space: nowrap;
        text-overflow: ellipsis;
        position: relative;

        &:before {
          content: "";
           4px;
          height: 4px;
          background: rgba(90, 221, 255, 0.3);
          position: absolute;
          top: 9px;
          left: 0;
        }
      }
    }
  }
}
</style>
//index.js
import Swiper from './Swiper'
const compName = Swiper.name //获取组件的名字 当做全局组件名字使用
const swiper = {
  //Vue.use()方法就会自动执行install

  install(Vue) {
    Vue.component(compName, Swiper)
  }

}
export default swiper
use