1、到入jar包
<!-- 添加fastjson 依赖包. -->
        <dependency>
            <groupId>com.alibaba</groupId>
            <artifactId>fastjson</artifactId>
            <version>1.2.15</version>
        </dependency>
2、在启动程序main方法中加入
@Bean
    public HttpMessageConverters fastHttpMessageConverters() {
        // 1、需要先定义一个 convert 转换消息的对象;
        FastJsonHttpMessageConverter fastConverter = new FastJsonHttpMessageConverter();
        // 2、添加fastJson 的配置信息,比如:是否要格式化返回的json数据;
        FastJsonConfig fastJsonConfig = new FastJsonConfig();
        fastJsonConfig.setSerializerFeatures(SerializerFeature.PrettyFormat);
        fastJsonConfig.setCharset(Charset.forName("UTF8"));
        // 3、在convert中添加配置信息.
        fastConverter.setFastJsonConfig(fastJsonConfig);

        HttpMessageConverter<?> converter = fastConverter;
        return new HttpMessageConverters(converter);
    }
3、测试例子
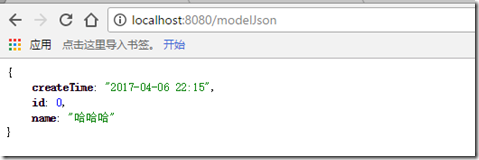
@JSONField(format="yyyy-MM-dd HH:mm")  主要是处理时间
    private Date createTime;
其他:
有的时候会碰到乱码的,在controller类的action方法中解决乱码问题
@RequestMapping(value="modelJson",produces = "text/html;charset=UTF-8")

