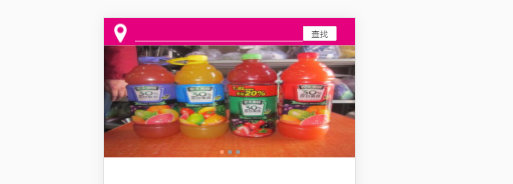
这一节我们将学习制作我们的搜索和轮播图的制作,下面是我们的效果图

首先我们需要创建我们的首页文件,我们在src/components目录下创建个pagesde 文件夹,然后创建我们的首页ShoppingMall.vue
smilesrccomponentspages
然后我们需要在main.js引入我们所需要使用的组件
import {Button,Row,Col,Search,Swipe,SwipeItem,Lazyload} from 'vant'//引入我们需要使用的组件
然后再注册它
//注册需要使用的组件
Vue.use(Button).use(Row).use(Col).use(Search).use(Swipe).use(SwipeItem).use(Lazyload)
Vue主要就是组件的编写调用,我们这个项目使用的vant所有的组件都必须在main.js里面引用注册才能在页面使用
下面我们直接上代码
HTML:
    <div>
        <!--搜索栏 -->
        <div class="search_bar">
            <van-row>
                <van-col span="3">
                    <!--vant是二十四格-->
                    <img :src="locationIcon" width="80%" class="location_icon">
                </van-col>
                <van-col span="16">
                    <input type="text" class="search_input">
                </van-col>
                <van-col span="5">
                    <van-button size="mini">查找</van-button>
                </van-col>
            </van-row>
        </div>
        <!-- swiper area -->
        <div class="swiper_area">
            <van-swipe :autoplay="3000">
                <van-swipe-item v-for="(image, index) in bannerPicArray" :key="index">
                    <img v-lazy="image.imageUrl" width="100%" height="167px">
                </van-swipe-item>
            </van-swipe>
        </div>
    </div>
JS:
export default {
 data() {
        return {
            locationIcon: require('../../assets/images/location.png'),
            bannerPicArray:[
                {imageUrl:'http://img0.imgtn.bdimg.com/it/u=290626911,2570965239&fm=26&gp=0.jpg'},
                {imageUrl:'http://img3.imgtn.bdimg.com/it/u=4106244283,3870023946&fm=26&gp=0.jpg'},
                {imageUrl:'http://img5.imgtn.bdimg.com/it/u=3481517141,969889102&fm=26&gp=0.jpg'},
            ]
        }
    },
}
Css:
.swiper_area{
     100%;
    clear: both;
}

    .search-bar{
        height:2.2rem;
        background-color: #e5017d;
        line-height: 2.2rem;
        overflow: hidden;
    }
    .search_input{
        100%;
        height: 1.3rem;
        border-top:0px;
        border-left:0px;
        border-right:0px;
        border-bottom:1px solid #fff !important;
        background-color: #e5017d;
        color:#fff;
    }
    .location_icon{
        padding-top:.2rem;
        padding-left:.3rem;
    }
    .swiper_area{
        clear:both;
        max-height:15rem;
        overflow: hidden;
    }
这节没什么难度,主要是静态页面,其中搜索栏的定位功能vue暂时没有的,所以后面我们会通过其他的方式来实现
 <img v-lazy="image.imageUrl" width="100%" height="167px">  这里的v-lazy是vant为我们提供的图片懒加载方式,避免了网速慢的时候图片加载直接显示代码出来的尴尬场景

下一节我们将使用axios和easymock进行数据的模拟