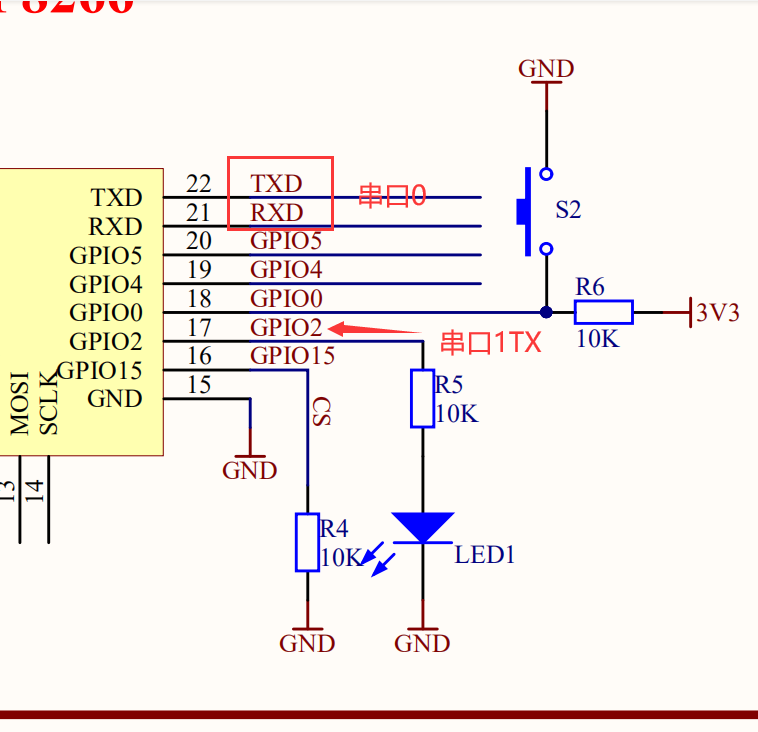
串口分布
NONOS
NONOS
NONOS
1.配置串口

2.按照上面的配置以后,接收中断进入这里面

3.用户需要知道的事情
串口内部自带一个FIFO缓存,数据接收以后先缓存到内部FIFO缓存里面
内部FIFO满了以后进入FIFO满中断
串口打开了串口超时(空闲)中断:超过两个字节的时间没有接受到数据,进入串口超时(空闲)中断
接收思路:
如果进入满中断,在满中断中提取FIFO里面的数据
如果进入空闲中断,在空闲中断中提取FIFO里面的数据
无论怎样,程序最终都会进入空闲中断!
这节接收数据采用缓存
具体细节请参考:
https://www.cnblogs.com/yangfengwu/p/12770504.html
4.直接上菜
4.1创建缓存

#include "driver/BufferManage.h"
/*******串口接收缓存********/
#define UartReadbuffLen 2048
#define UartManagebuffLen 60
u8  UartReadbuff[UartReadbuffLen];//缓存串口接收的每一条数据
u32 UartManagebuff[UartManagebuffLen];//最大管理的数据条数

u8  UartReadbuffCopy[UartReadbuffLen];//提取缓存数据


BufferManageCreate(&buff_manage, UartReadbuff, UartReadbuffLen, UartManagebuff, UartManagebuffLen*4);//创建缓存
4.2往缓存里面存数据
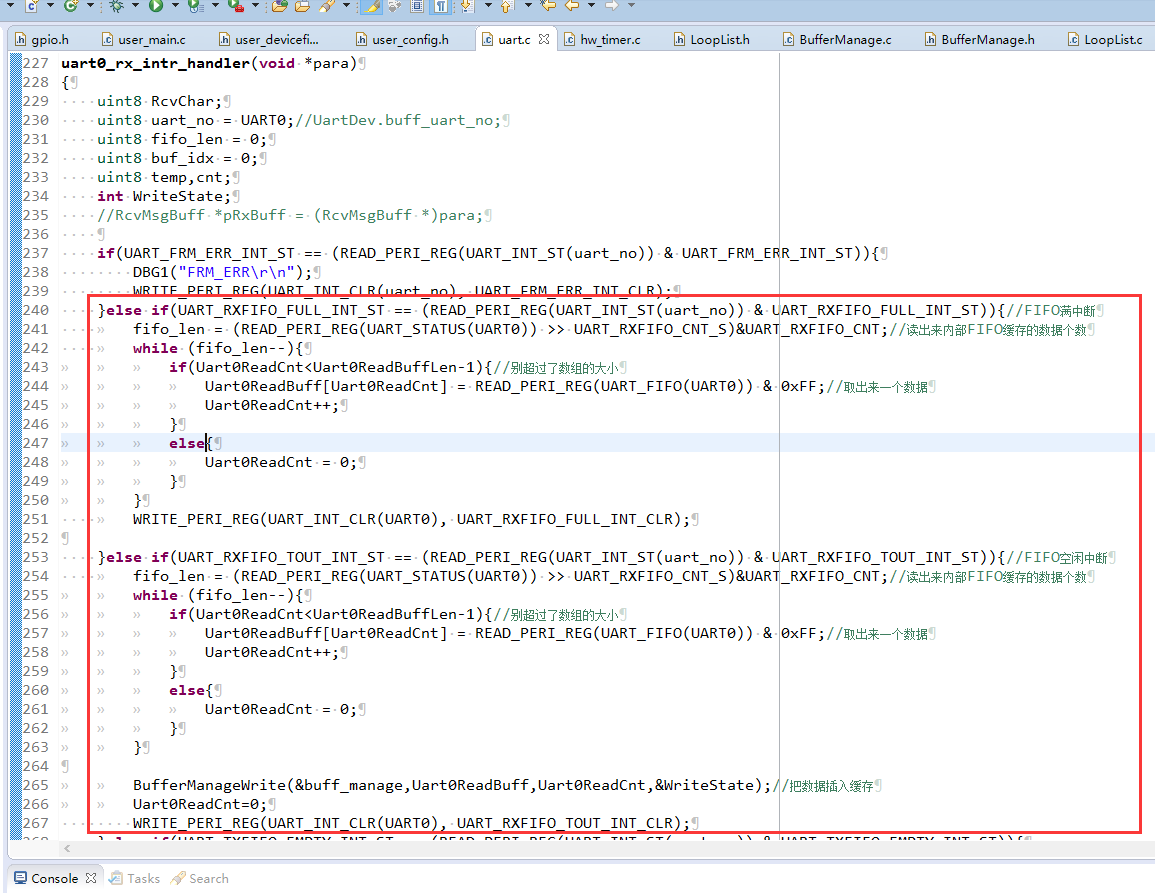
#include "driver/BufferManage.h"

#define Uart0ReadBuffLen 2048
uint8 Uart0ReadBuff[Uart0ReadBuffLen];//串口一次性最大接收的数据个数
u32   Uart0ReadCnt=0;


LOCAL void
uart0_rx_intr_handler(void *para)
{
    uint8 RcvChar;
    uint8 uart_no = UART0;//UartDev.buff_uart_no;
    uint8 fifo_len = 0;
    uint8 buf_idx = 0;
    uint8 temp,cnt;
    int WriteState;
    //RcvMsgBuff *pRxBuff = (RcvMsgBuff *)para;

    if(UART_FRM_ERR_INT_ST == (READ_PERI_REG(UART_INT_ST(uart_no)) & UART_FRM_ERR_INT_ST)){
        DBG1("FRM_ERR
");
        WRITE_PERI_REG(UART_INT_CLR(uart_no), UART_FRM_ERR_INT_CLR);
    }else if(UART_RXFIFO_FULL_INT_ST == (READ_PERI_REG(UART_INT_ST(uart_no)) & UART_RXFIFO_FULL_INT_ST)){//FIFO满中断
        fifo_len = (READ_PERI_REG(UART_STATUS(UART0)) >> UART_RXFIFO_CNT_S)&UART_RXFIFO_CNT;//读出来内部FIFO缓存的数据个数
        while (fifo_len--){
            if(Uart0ReadCnt<Uart0ReadBuffLen-1){//别超过了数组的大小
                Uart0ReadBuff[Uart0ReadCnt] = READ_PERI_REG(UART_FIFO(UART0)) & 0xFF;//取出来一个数据
                Uart0ReadCnt++;
            }
            else{
                Uart0ReadCnt = 0;
            }
        }
        WRITE_PERI_REG(UART_INT_CLR(UART0), UART_RXFIFO_FULL_INT_CLR);

    }else if(UART_RXFIFO_TOUT_INT_ST == (READ_PERI_REG(UART_INT_ST(uart_no)) & UART_RXFIFO_TOUT_INT_ST)){//FIFO空闲中断
        fifo_len = (READ_PERI_REG(UART_STATUS(UART0)) >> UART_RXFIFO_CNT_S)&UART_RXFIFO_CNT;//读出来内部FIFO缓存的数据个数
        while (fifo_len--){
            if(Uart0ReadCnt<Uart0ReadBuffLen-1){//别超过了数组的大小
                Uart0ReadBuff[Uart0ReadCnt] = READ_PERI_REG(UART_FIFO(UART0)) & 0xFF;//取出来一个数据
                Uart0ReadCnt++;
            }
            else{
                Uart0ReadCnt = 0;
            }
        }

        BufferManageWrite(&buff_manage,Uart0ReadBuff,Uart0ReadCnt,&WriteState);//把数据插入缓存
        Uart0ReadCnt=0;
        WRITE_PERI_REG(UART_INT_CLR(UART0), UART_RXFIFO_TOUT_INT_CLR);
    }else if(UART_TXFIFO_EMPTY_INT_ST == (READ_PERI_REG(UART_INT_ST(uart_no)) & UART_TXFIFO_EMPTY_INT_ST)){
        DBG("e");
    CLEAR_PERI_REG_MASK(UART_INT_ENA(UART0), UART_TXFIFO_EMPTY_INT_ENA);
    #if UART_BUFF_EN
        tx_start_uart_buffer(UART0);
    #endif
        //system_os_post(uart_recvTaskPrio, 1, 0);
        WRITE_PERI_REG(UART_INT_CLR(uart_no), UART_TXFIFO_EMPTY_INT_CLR);

    }else if(UART_RXFIFO_OVF_INT_ST  == (READ_PERI_REG(UART_INT_ST(uart_no)) & UART_RXFIFO_OVF_INT_ST)){
        WRITE_PERI_REG(UART_INT_CLR(uart_no), UART_RXFIFO_OVF_INT_CLR);
        DBG1("RX OVF!!
");
    }
}
4.3提取缓存数据,并输出
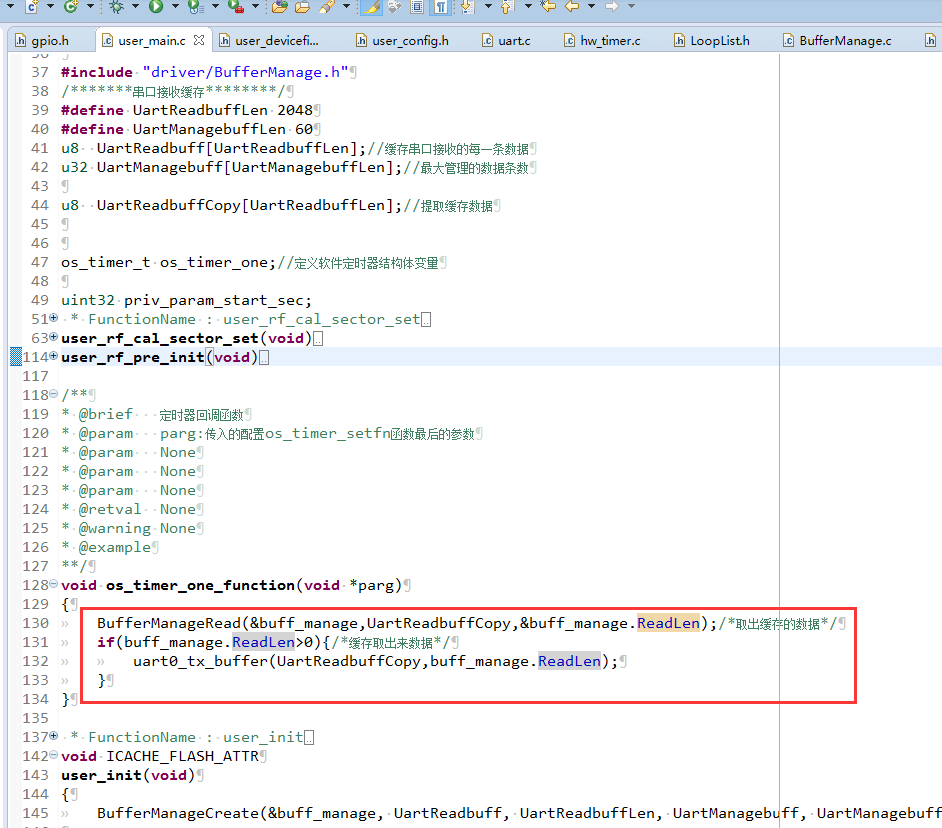
BufferManageRead(&buff_manage,UartReadbuffCopy,&buff_manage.ReadLen);/*取出缓存的数据*/
    if(buff_manage.ReadLen>0){/*缓存取出来数据*/
        uart0_tx_buffer(UartReadbuffCopy,buff_manage.ReadLen);
    }
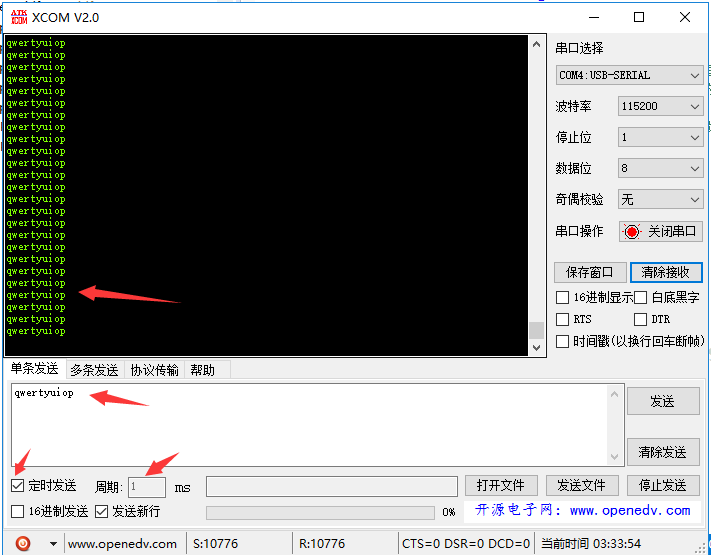
测试
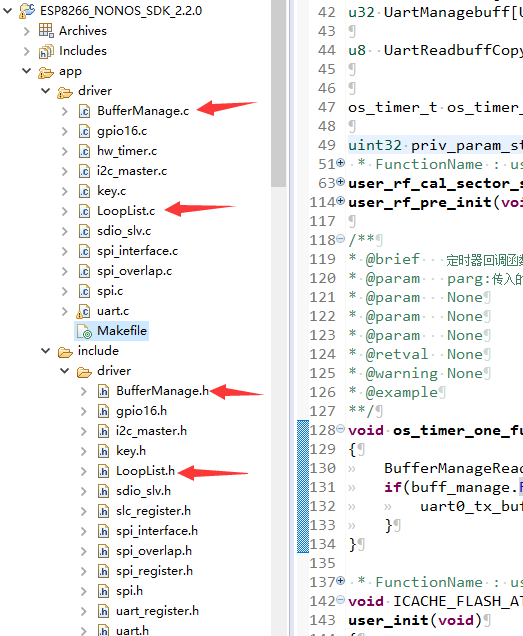
如果想应用到自己的项目,拷贝以下文件
RTOS
RTOS
RTOS
1.默认所有的数据都使用串口0输出
官方提供了函数可以选择printf利用哪一个串口输出
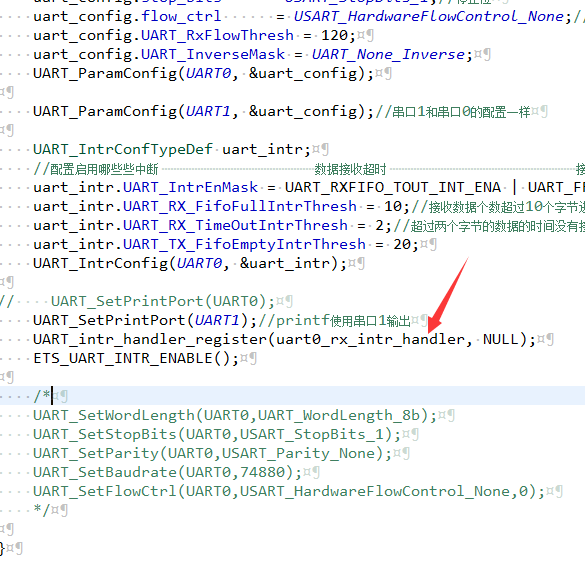
配置printf使用串口1打印输出,波特率115200
(注:这样配置对于调试程序很有帮助,printf当做程序运行的日志打印)
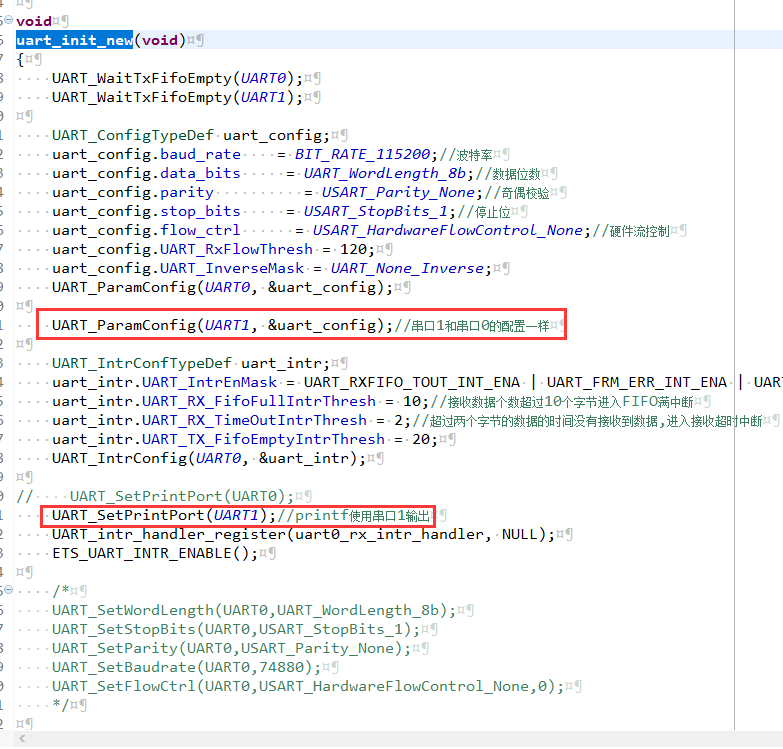
void
uart_init_new(void)
{
    UART_WaitTxFifoEmpty(UART0);
    UART_WaitTxFifoEmpty(UART1);

    UART_ConfigTypeDef uart_config;
    uart_config.baud_rate    = BIT_RATE_115200;//波特率
    uart_config.data_bits     = UART_WordLength_8b;//数据位数
    uart_config.parity          = USART_Parity_None;//奇偶校验
    uart_config.stop_bits     = USART_StopBits_1;//停止位
    uart_config.flow_ctrl      = USART_HardwareFlowControl_None;//硬件流控制
    uart_config.UART_RxFlowThresh = 120;
    uart_config.UART_InverseMask = UART_None_Inverse;
    UART_ParamConfig(UART0, &uart_config);

    UART_ParamConfig(UART1, &uart_config);//串口1和串口0的配置一样

    UART_IntrConfTypeDef uart_intr;
    //配置启用哪些些中断                                                    数据接收超时                                                               接收数据错误                                                  缓存满中断                                                            发送空中断
    uart_intr.UART_IntrEnMask = UART_RXFIFO_TOUT_INT_ENA | UART_FRM_ERR_INT_ENA | UART_RXFIFO_FULL_INT_ENA | UART_TXFIFO_EMPTY_INT_ENA;
    uart_intr.UART_RX_FifoFullIntrThresh = 10;//接收数据个数超过10个字节进入FIFO满中断
    uart_intr.UART_RX_TimeOutIntrThresh = 2;//超过两个字节的数据的时间没有接收到数据,进入接收超时中断
    uart_intr.UART_TX_FifoEmptyIntrThresh = 20;
    UART_IntrConfig(UART0, &uart_intr);

//    UART_SetPrintPort(UART0);
    UART_SetPrintPort(UART1);//printf使用串口1输出
    UART_intr_handler_register(uart0_rx_intr_handler, NULL);
    ETS_UART_INTR_ENABLE();

    /*
    UART_SetWordLength(UART0,UART_WordLength_8b);
    UART_SetStopBits(UART0,USART_StopBits_1);
    UART_SetParity(UART0,USART_Parity_None);
    UART_SetBaudrate(UART0,74880);
    UART_SetFlowCtrl(UART0,USART_HardwareFlowControl_None,0);
    */

}
串口接收数据说明
1.该模块默认内部有个128字节的缓存区,默认接收的数据存入缓存区里面
在中断接收函数里面,从缓存里面获取数据
2.咱们在串口中断函数里面,是在满中断和接收超时中断里面获取串口接收的数据

串口接收数据典型程序
1.具体请参考: https://www.cnblogs.com/yangfengwu/p/11669373.html
2.uart.c
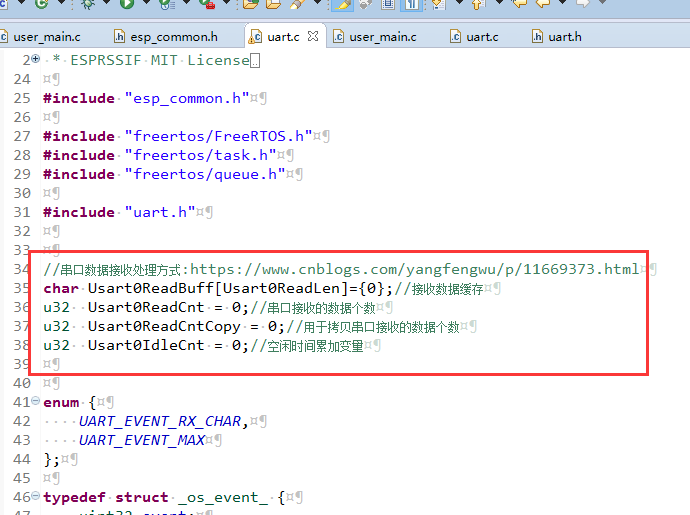
//串口数据接收处理方式:https://www.cnblogs.com/yangfengwu/p/11669373.html
char Usart0ReadBuff[Usart0ReadLen]={0};//接收数据缓存
u32  Usart0ReadCnt = 0;//串口接收的数据个数
u32  Usart0ReadCntCopy = 0;//用于拷贝串口接收的数据个数
u32  Usart0IdleCnt = 0;//空闲时间累加变量
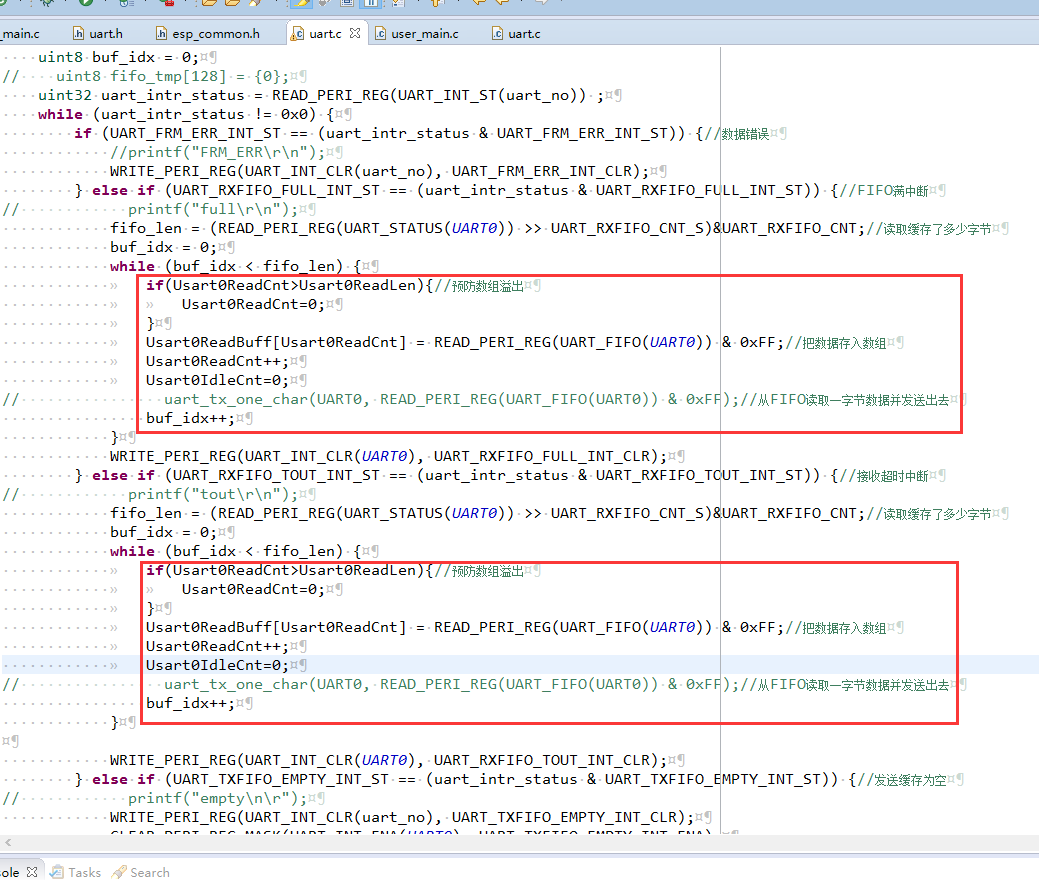
LOCAL void
uart0_rx_intr_handler(void *para)
{
    uint8 RcvChar;
    uint8 uart_no = UART0;//UartDev.buff_uart_no;
    uint8 fifo_len = 0;
    uint8 buf_idx = 0;
//    uint8 fifo_tmp[128] = {0};
    uint32 uart_intr_status = READ_PERI_REG(UART_INT_ST(uart_no)) ;
    while (uart_intr_status != 0x0) {
        if (UART_FRM_ERR_INT_ST == (uart_intr_status & UART_FRM_ERR_INT_ST)) {//数据错误
            //printf("FRM_ERR
");
            WRITE_PERI_REG(UART_INT_CLR(uart_no), UART_FRM_ERR_INT_CLR);
        } else if (UART_RXFIFO_FULL_INT_ST == (uart_intr_status & UART_RXFIFO_FULL_INT_ST)) {//FIFO满中断
//            printf("full
");
            fifo_len = (READ_PERI_REG(UART_STATUS(UART0)) >> UART_RXFIFO_CNT_S)&UART_RXFIFO_CNT;//读取缓存了多少字节
            buf_idx = 0;
            while (buf_idx < fifo_len) {
                if(Usart0ReadCnt>Usart0ReadLen){//预防数组溢出
                    Usart0ReadCnt=0;
                }
                Usart0ReadBuff[Usart0ReadCnt] = READ_PERI_REG(UART_FIFO(UART0)) & 0xFF;//把数据存入数组
                Usart0ReadCnt++;
                Usart0IdleCnt=0;
//                uart_tx_one_char(UART0, READ_PERI_REG(UART_FIFO(UART0)) & 0xFF);//从FIFO读取一字节数据并发送出去
                buf_idx++;
            }
            WRITE_PERI_REG(UART_INT_CLR(UART0), UART_RXFIFO_FULL_INT_CLR);
        } else if (UART_RXFIFO_TOUT_INT_ST == (uart_intr_status & UART_RXFIFO_TOUT_INT_ST)) {//接收超时中断
//            printf("tout
");
            fifo_len = (READ_PERI_REG(UART_STATUS(UART0)) >> UART_RXFIFO_CNT_S)&UART_RXFIFO_CNT;//读取缓存了多少字节
            buf_idx = 0;
            while (buf_idx < fifo_len) {
                if(Usart0ReadCnt>Usart0ReadLen){//预防数组溢出
                    Usart0ReadCnt=0;
                }
                Usart0ReadBuff[Usart0ReadCnt] = READ_PERI_REG(UART_FIFO(UART0)) & 0xFF;//把数据存入数组
                Usart0ReadCnt++;
                Usart0IdleCnt=0;
//                uart_tx_one_char(UART0, READ_PERI_REG(UART_FIFO(UART0)) & 0xFF);//从FIFO读取一字节数据并发送出去
                buf_idx++;
            }

            WRITE_PERI_REG(UART_INT_CLR(UART0), UART_RXFIFO_TOUT_INT_CLR);
        } else if (UART_TXFIFO_EMPTY_INT_ST == (uart_intr_status & UART_TXFIFO_EMPTY_INT_ST)) {//发送缓存为空
//            printf("empty

");
            WRITE_PERI_REG(UART_INT_CLR(uart_no), UART_TXFIFO_EMPTY_INT_CLR);
            CLEAR_PERI_REG_MASK(UART_INT_ENA(UART0), UART_TXFIFO_EMPTY_INT_ENA);
        } else {
            //skip
        }
        uart_intr_status = READ_PERI_REG(UART_INT_ST(uart_no)) ;
    }
}
3.uart.h
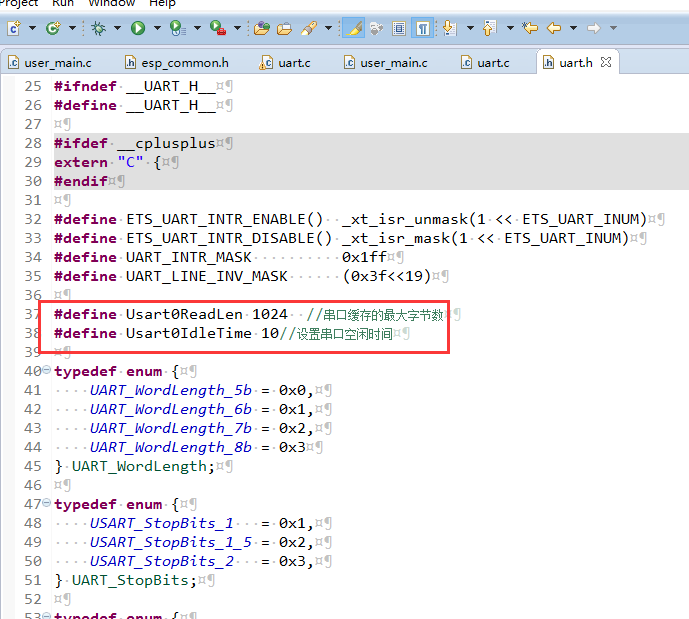
#define Usart0ReadLen 1024  //串口缓存的最大字节数
#define Usart0IdleTime 10//设置串口空闲时间
4.user_main.h

#include "uart.h"


extern char Usart0ReadBuff[Usart0ReadLen];//接收数据缓存
extern u32  Usart0ReadCnt;//串口接收的数据个数
extern u32  Usart0ReadCntCopy;//用于拷贝串口接收的数据个数
extern u32  Usart0IdleCnt;//空闲时间累加变量
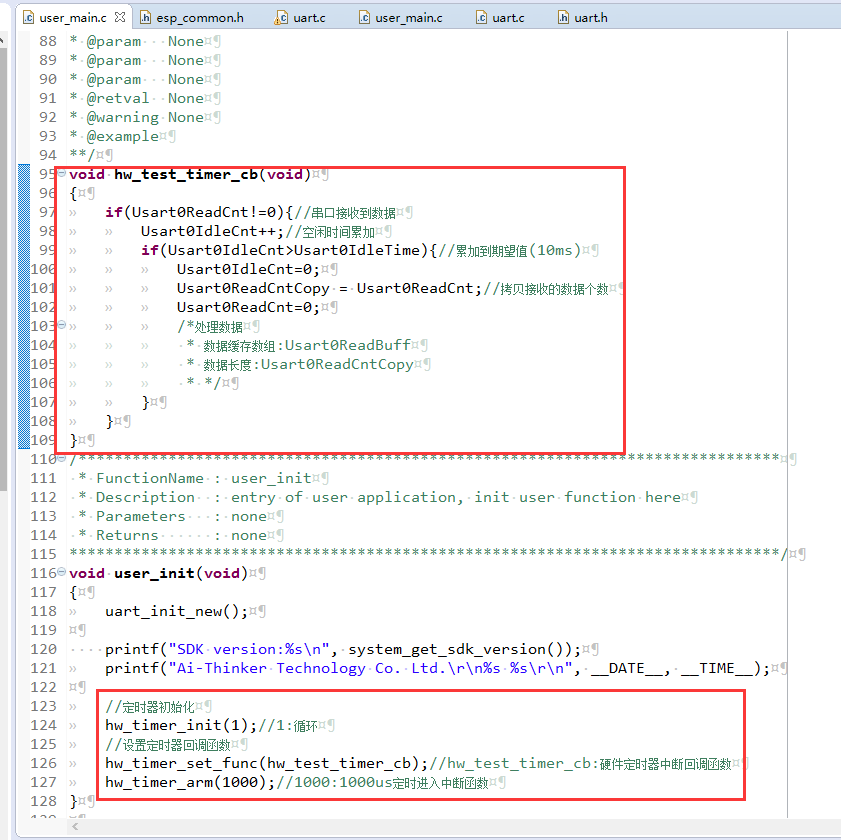
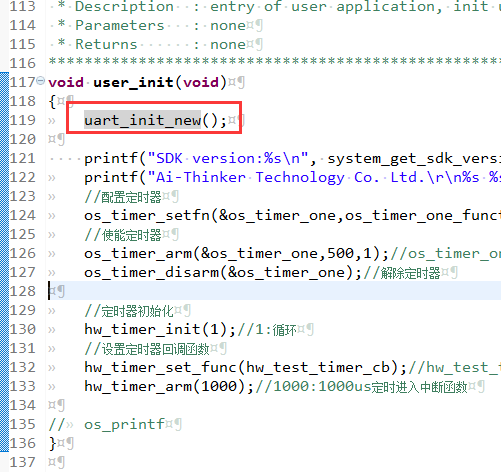
/**
* @brief   硬件定时器中断回调函数
* @param   None
* @param   None
* @param   None
* @param   None
* @retval  None
* @warning None
* @example
**/
void hw_test_timer_cb(void)
{
    if(Usart0ReadCnt!=0){//串口接收到数据
        Usart0IdleCnt++;//空闲时间累加
        if(Usart0IdleCnt>Usart0IdleTime){//累加到期望值(10ms)
            Usart0IdleCnt=0;
            Usart0ReadCntCopy = Usart0ReadCnt;//拷贝接收的数据个数
            Usart0ReadCnt=0;
            /*处理数据
             * 数据缓存数组:Usart0ReadBuff
             * 数据长度:Usart0ReadCntCopy
             * */
        }
    }
}
/******************************************************************************
 * FunctionName : user_init
 * Description  : entry of user application, init user function here
 * Parameters   : none
 * Returns      : none
*******************************************************************************/
void user_init(void)
{
    uart_init_new();

    printf("SDK version:%s
", system_get_sdk_version());
    printf("Ai-Thinker Technology Co. Ltd.
%s %s
", __DATE__, __TIME__);

    //定时器初始化
    hw_timer_init(1);//1:循环
    //设置定时器回调函数
    hw_timer_set_func(hw_test_timer_cb);//hw_test_timer_cb:硬件定时器中断回调函数
    hw_timer_arm(1000);//1000:1000us定时进入中断函数
}
串口发送
1.说明
串口发送实际上是把要发送的数据拷贝到128字节的数据发送缓存区
然后由模块内部发送
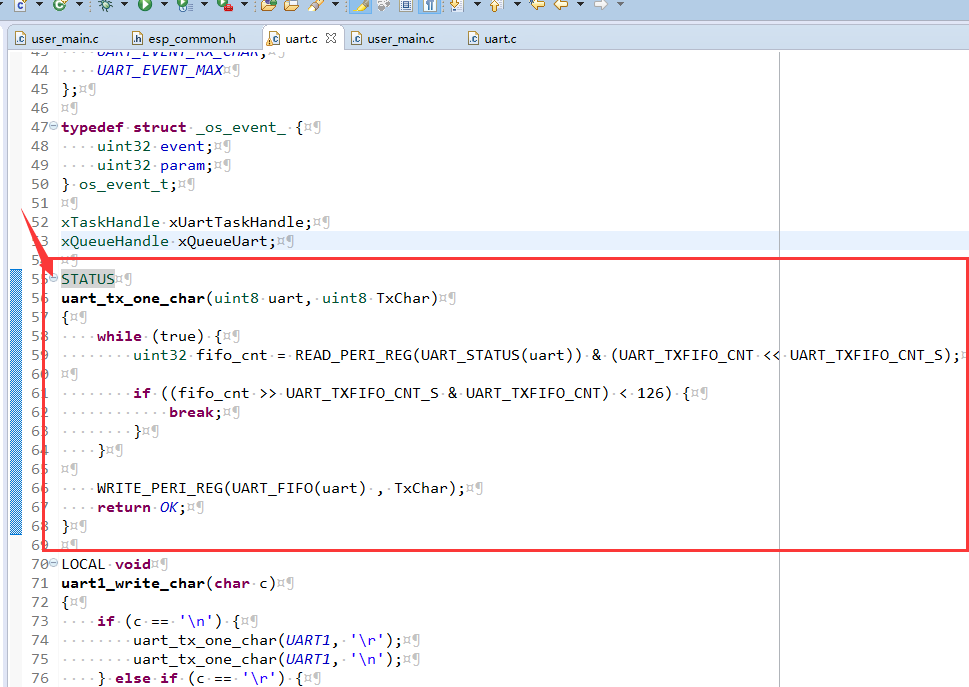
2.发送函数

3.为了可以在别的文件中使用,去掉函数前面的LOCAL 标识
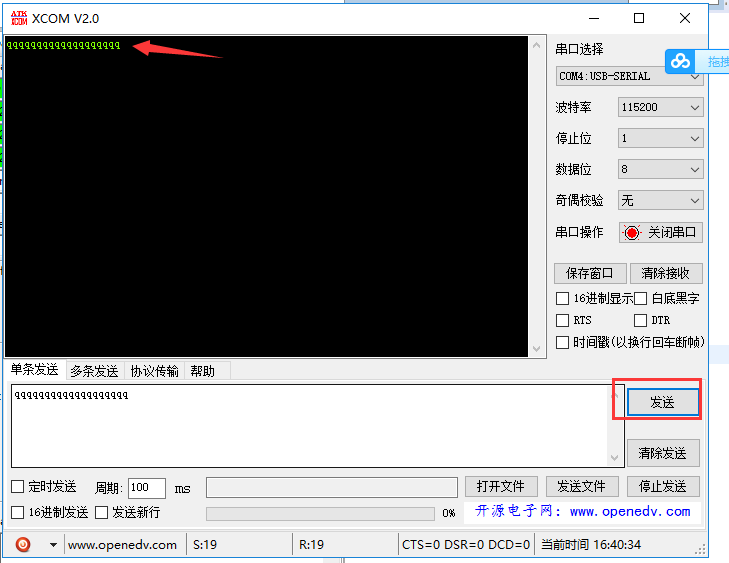
测试串口返回接收到的信息
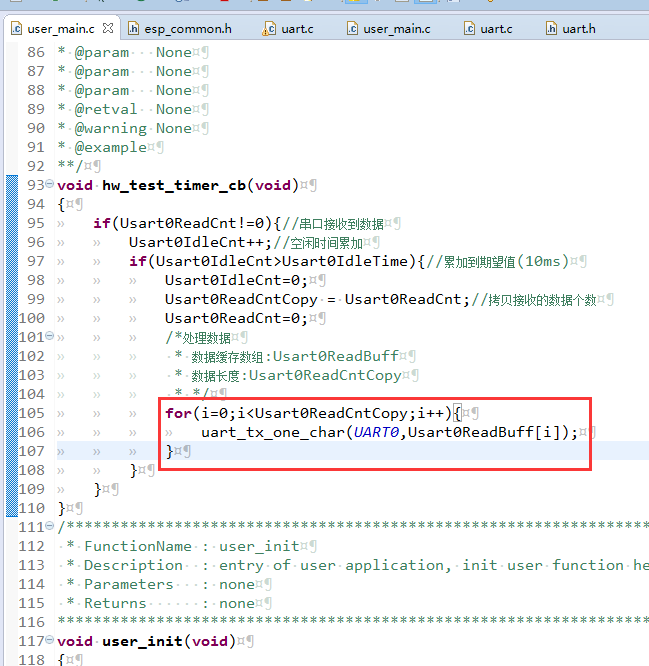
/**
* @brief   硬件定时器中断回调函数
* @param   None
* @param   None
* @param   None
* @param   None
* @retval  None
* @warning None
* @example
**/
void hw_test_timer_cb(void)
{
    if(Usart0ReadCnt!=0){//串口接收到数据
        Usart0IdleCnt++;//空闲时间累加
        if(Usart0IdleCnt>Usart0IdleTime){//累加到期望值(10ms)
            Usart0IdleCnt=0;
            Usart0ReadCntCopy = Usart0ReadCnt;//拷贝接收的数据个数
            Usart0ReadCnt=0;
            /*处理数据
             * 数据缓存数组:Usart0ReadBuff
             * 数据长度:Usart0ReadCntCopy
             * */
            for(i=0;i<Usart0ReadCntCopy;i++){
                uart_tx_one_char(UART0,Usart0ReadBuff[i]);
            }
        }
    }
}
NONOS_SDK版本区别
NONOS提供了使用内部Task接收数据
如果不想使用Task,想用上面的方式实现
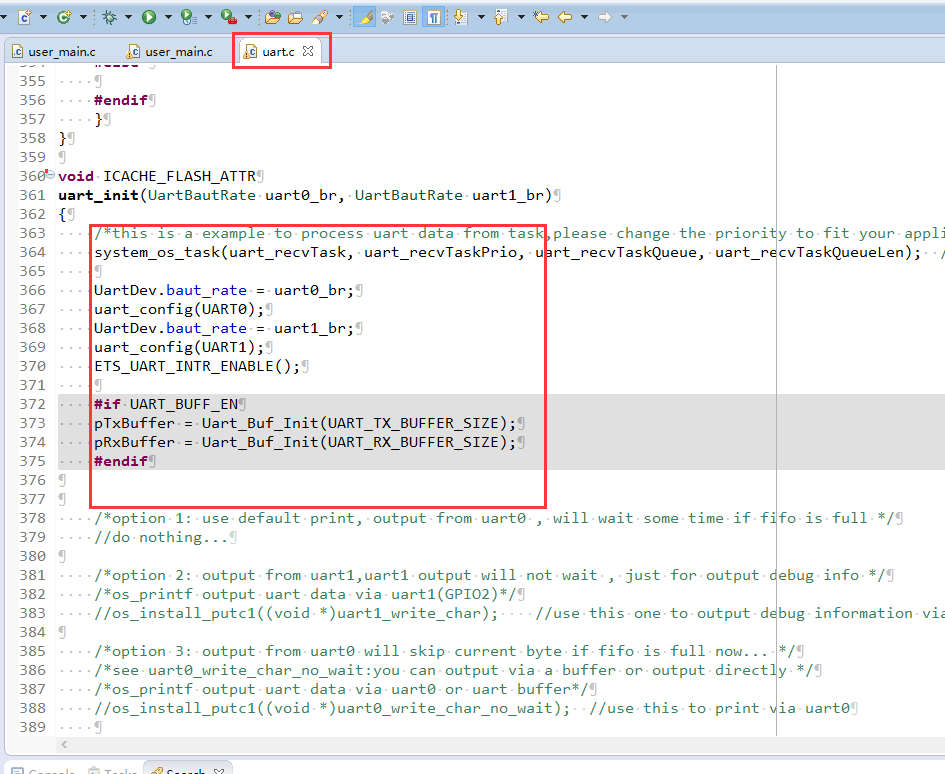
在最后有一个 uart_init_2 可使用这个函数初始化串口
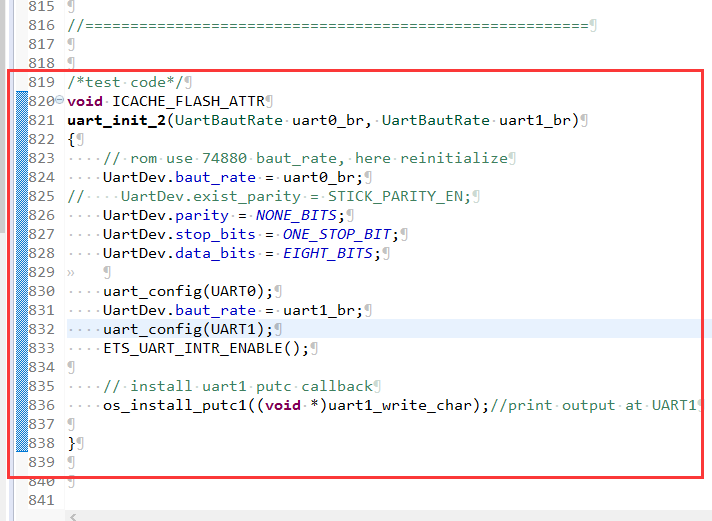
void ICACHE_FLASH_ATTR
uart_init_2(UartBautRate uart0_br, UartBautRate uart1_br)
{
    // rom use 74880 baut_rate, here reinitialize
    UartDev.baut_rate = uart0_br;
//    UartDev.exist_parity = STICK_PARITY_EN;
    UartDev.parity = NONE_BITS;
    UartDev.stop_bits = ONE_STOP_BIT;
    UartDev.data_bits = EIGHT_BITS;

    uart_config(UART0);
    UartDev.baut_rate = uart1_br;
    uart_config(UART1);
    ETS_UART_INTR_ENABLE();

    // install uart1 putc callback
    os_install_putc1((void *)uart1_write_char);//print output at UART1

}
os_install_putc1((void *)uart0_write_char);//print output at UART0