软件启动旋转动画:
布局:
<RelativeLayout xmlns:android="http://schemas.android.com/apk/res/android"
    xmlns:tools="http://schemas.android.com/tools"
    android:layout_width="match_parent"
    android:layout_height="match_parent"
    android:id="@+id/rl_root"
    android:background="@drawable/splash_bg_newyear" >

    <ImageView
        android:layout_width="wrap_content"
        android:layout_height="wrap_content"
        android:src="@drawable/splash_horse_newyear"
      />

</RelativeLayout>
Activity:
package com.itheima.zhbj52;
import android.app.Activity;
import android.content.Intent;
import android.os.Bundle;
import android.view.animation.AlphaAnimation;
import android.view.animation.Animation;
import android.view.animation.Animation.AnimationListener;
import android.view.animation.AnimationSet;
import android.view.animation.RotateAnimation;
import android.view.animation.ScaleAnimation;
import android.widget.RelativeLayout;

import com.itheima.zhbj52.utils.PrefUtils;
/**
 * 旋转首屏页
 */
public class SplashActivity extends Activity {
    RelativeLayout rlRoot;
    @Override
    protected void onCreate(Bundle savedInstanceState) {
        super.onCreate(savedInstanceState);
        setContentView(R.layout.activity_splash);
        rlRoot = (RelativeLayout) findViewById(R.id.rl_root);//rl_root下面是一个ImageView是一张图片。
        startAnim();
        //LibUtils.doSomething();
        //rlRoot.setBackgroundResource(R.drawable.newscenter_press);
    }

    /**
     * 开启动画
     */
    private void startAnim() {
        // 动画集合
        AnimationSet set = new AnimationSet(false);
        // 旋转动画
        RotateAnimation rotate = new RotateAnimation(0, 360,
                Animation.RELATIVE_TO_SELF, 0.5f, Animation.RELATIVE_TO_SELF,
                0.5f);//RELATIVE_TO_SELF表示自身旋转,0.5f表示自身中心。
        rotate.setDuration(1000);// 动画时间
        rotate.setFillAfter(true);// 保持动画最后的状态
        // 缩放动画
        ScaleAnimation scale = new ScaleAnimation(0, 1, 0, 1,//宽和高从0到1,
                Animation.RELATIVE_TO_SELF, 0.5f, Animation.RELATIVE_TO_SELF,
                0.5f);
        scale.setDuration(1000);// 动画时间
        scale.setFillAfter(true);// 保持动画状态
        // 渐变动画
        AlphaAnimation alpha = new AlphaAnimation(0, 1);
        alpha.setDuration(2000);// 动画时间
        alpha.setFillAfter(true);// 保持动画状态

        set.addAnimation(rotate);
        set.addAnimation(scale);
        set.addAnimation(alpha);
        // 设置动画监听
        set.setAnimationListener(new AnimationListener() {
            @Override
            public void onAnimationStart(Animation animation) {
            }
            @Override
            public void onAnimationRepeat(Animation animation) {//动画重复的时候调用,
            }
            // 动画执行结束
            @Override
            public void onAnimationEnd(Animation animation) {
                jumpNextPage();
            }
        });
        rlRoot.startAnimation(set);
    }

    /**
     * 跳转下一个页面
     */
    private void jumpNextPage() {
        // 判断之前有没有显示过新手引导
        boolean userGuide = PrefUtils.getBoolean(this, "is_user_guide_showed",
                false);
        if (!userGuide) {
            // 跳转到新手引导页
            startActivity(new Intent(SplashActivity.this, GuideActivity.class));
        } else {
            startActivity(new Intent(SplashActivity.this, MainActivity.class));
        }
        finish();//跳转到新页面后把当前页面结束
    }
}
引导页面:
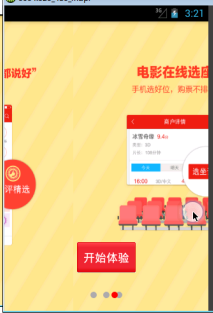
布局:
<?xml version="1.0" encoding="utf-8"?>

<!-- 整体是一个相对布局,这样才会让控件叠加到另一个控件上 -->
<RelativeLayout xmlns:android="http://schemas.android.com/apk/res/android"
    android:layout_width="match_parent"
    android:layout_height="match_parent" >

    <!-- 第三方包 -->
    <android.support.v4.view.ViewPager
        android:id="@+id/vp_guide"
        android:layout_width="match_parent"
        android:layout_height="match_parent" />

    <Button
        android:id="@+id/btn_start"
        android:layout_width="wrap_content"
        android:layout_height="wrap_content"
        android:layout_alignParentBottom="true"
        android:layout_centerHorizontal="true"
        android:layout_marginBottom="60dp"
        android:background="@drawable/btn_guide_selector"   按钮背景图片选择器
        android:padding="5dp"
        android:text="开始体验"
        android:visibility="invisible"
        android:textColor="@drawable/btn_guide_text_selector" />   按钮文字选择器

    <RelativeLayout
        android:layout_width="wrap_content"
        android:layout_height="wrap_content"
        android:layout_alignParentBottom="true"
        android:layout_centerHorizontal="true"
        android:layout_marginBottom="20dp" >

        <!-- 3个黑色的圆点 -->
        <LinearLayout
            android:id="@+id/ll_point_group"
            android:layout_width="wrap_content"
            android:layout_height="wrap_content"
            android:orientation="horizontal" >
        </LinearLayout>
        <!-- 1个可以移动的红色圆点,默认压住第一个黑色圆点 -->
        <View
            android:id="@+id/view_red_point"
            android:layout_width="10dp"
            android:layout_height="10dp"
            android:background="@drawable/shape_point_red" />
    </RelativeLayout>

</RelativeLayout>
Activity:
package com.itheima.zhbj52;

import java.util.ArrayList;

import android.app.Activity;
import android.content.Intent;
import android.os.Bundle;
import android.support.v4.view.PagerAdapter;
import android.support.v4.view.ViewPager;
import android.support.v4.view.ViewPager.OnPageChangeListener;
import android.view.View;
import android.view.View.OnClickListener;
import android.view.ViewGroup;
import android.view.ViewTreeObserver.OnGlobalLayoutListener;
import android.view.Window;
import android.widget.Button;
import android.widget.ImageView;
import android.widget.LinearLayout;
import android.widget.RelativeLayout;

import com.itheima.zhbj52.utils.PrefUtils;

/**
 * 新手引导
 */
public class GuideActivity extends Activity {

    private static final int[] mImageIds = new int[] { R.drawable.guide_1,
            R.drawable.guide_2, R.drawable.guide_3 };//三张图片
    private ViewPager vpGuide;
    private ArrayList<ImageView> mImageViewList;
    private LinearLayout llPointGroup;// 引导圆点的父控件
    private int mPointWidth;// 圆点间的距离
    private View viewRedPoint;// 小红点
    private Button btnStart;// 开始体验

    @Override
    protected void onCreate(Bundle savedInstanceState) {
        super.onCreate(savedInstanceState);
        requestWindowFeature(Window.FEATURE_NO_TITLE);// 去掉标题,在setContentView方法之前调用。
        setContentView(R.layout.activity_guide);
        vpGuide = (ViewPager) findViewById(R.id.vp_guide);
        llPointGroup = (LinearLayout) findViewById(R.id.ll_point_group);//3个黑色的圆点
        viewRedPoint = findViewById(R.id.view_red_point);
        btnStart = (Button) findViewById(R.id.btn_start);//开始体验按钮
        btnStart.setOnClickListener(new OnClickListener() {
            @Override
            public void onClick(View v) {
                // 更新sp, 表示已经展示了新手引导
                PrefUtils.setBoolean(GuideActivity.this,
                        "is_user_guide_showed", true);
                // 跳转主页面
                startActivity(new Intent(GuideActivity.this, MainActivity.class));
                finish();//当前页面消失
            }
        });
        initViews();
        vpGuide.setAdapter(new GuideAdapter());//ViewPager要设置Adapter
        vpGuide.setOnPageChangeListener(new GuidePageListener());//ViewPager滑动时的监听器
    }

    /**
     * 初始化界面
     */
    private void initViews() {
        mImageViewList = new ArrayList<ImageView>();

        // 初始化引导页的3个页面
        for (int i = 0; i < mImageIds.length; i++) {
            ImageView image = new ImageView(this);
            image.setBackgroundResource(mImageIds[i]);// 设置引导页背景
            mImageViewList.add(image);
        }

        // 动态初始化小圆点,便于代码的扩展。
        for (int i = 0; i < mImageIds.length; i++) {
            View point = new View(this);
            point.setBackgroundResource(R.drawable.shape_point_gray);// 所有的View都有背景,
            LinearLayout.LayoutParams params = new LinearLayout.LayoutParams(
                    10, 10);//宽高为10像素,因为圆点的父控件是LinearLayout所以这里用LinearLayout.LayoutParams,
            if (i > 0) {
                params.leftMargin = 10;// 设置圆点间隔
            }
            point.setLayoutParams(params);// 设置圆点的大小
            llPointGroup.addView(point);// 将圆点动态添加给线性布局
        }
        //控件出现的时候会经过measure()方法测量控件的宽高,layout()方法用来决定将控件放在哪个地方,ondraw()方法来画控件。
        // 获取视图树(因为整个页面的布局是一层一层的xml节点树), 对layout方法结束的事件进行监听
        llPointGroup.getViewTreeObserver().addOnGlobalLayoutListener(
                new OnGlobalLayoutListener() {
                    // 当layout方法执行结束后回调此方法
                    @Override
                    public void onGlobalLayout() {
                        System.out.println("layout 结束");
                        llPointGroup.getViewTreeObserver()
                                .removeGlobalOnLayoutListener(this);//以后不再监听,this是OnGlobalLayoutListener对象,这是一个内部类。
                        mPointWidth = llPointGroup.getChildAt(1).getLeft()
                                - llPointGroup.getChildAt(0).getLeft();//getLeft()是返回圆点的左边到页面左边的距离,getRight()是返回圆点的右边到页面左边的距离。
                        System.out.println("圆点距离:" + mPointWidth);//20
                    }
                });
    }

    /**
     * ViewPager数据适配器
     */
    class GuideAdapter extends PagerAdapter {
        @Override
        public int getCount() {
            return mImageIds.length;
        }
        @Override
        public boolean isViewFromObject(View arg0, Object arg1) {
            return arg0 == arg1;
        }
        @Override
        public Object instantiateItem(ViewGroup container, int position) {//类似于listView的getView()方法,
            container.addView(mImageViewList.get(position));//mImageViewList.get(position)返回的是ImageView,
            return mImageViewList.get(position);
        }
        @Override
        public void destroyItem(ViewGroup container, int position, Object object) {
            container.removeView((View) object);//删除一个
        }
    }

    /**
     * viewpager的滑动监听
     */
    class GuidePageListener implements OnPageChangeListener {
        // 滑动事件,滑动的过程中这个方法一直调用。
        @Override
        public void onPageScrolled(int position, float positionOffset,
                int positionOffsetPixels) {
            //position是当前页面的位置,positionOffset偏移百分比,positionOffsetPixels是偏移的像素,
            //从一个页面滑到第二个页面的时候positionOffset从0到100%并且到第二个页面的时候百分比又变为0,positionOffsetPixels从0到页面的宽度到达第二个页面的时候偏移量又淸0。
            System.out.println("当前位置:" + position + ";百分比:" + positionOffset
            + ";移动距离:" + positionOffsetPixels);
            int len = (int) (mPointWidth * positionOffset) + position
                    * mPointWidth;//mPointWidth * positionOffset是圆点的距离乘以移动的百分比,
            RelativeLayout.LayoutParams params = (RelativeLayout.LayoutParams) viewRedPoint
                    .getLayoutParams();// 获取当前红点的布局参数,因为红色的点是在UI文件写的所以已经有了LayoutParams,而黑色的点是动态生成的没有LayoutParams,红色点的父节点是相对布局,
            params.leftMargin = len;// 设置左边距
            viewRedPoint.setLayoutParams(params);// 重新给小红点设置布局参数
        }

        // 某个页面被选中
        @Override
        public void onPageSelected(int position) {
            if (position == mImageIds.length - 1) {// 最后一个页面
                btnStart.setVisibility(View.VISIBLE);// 显示开始体验的按钮
            } else {
                btnStart.setVisibility(View.INVISIBLE);
            }
        }

        // 滑动状态发生变化(正在滑动   滑动松开状态,)
        @Override
        public void onPageScrollStateChanged(int state) {

        }

    }

}
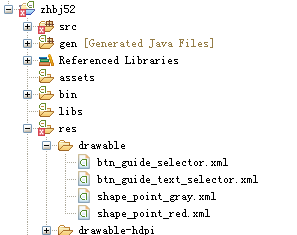
<!-- 图片颜色选择器(drawable文件夹里面) -->

<?xml version="1.0" encoding="utf-8"?>
<selector xmlns:android="http://schemas.android.com/apk/res/android">

    <item android:drawable="@drawable/button_red_pressed" android:state_pressed="true"/>  <!-- 被点击之后 -->
    <item android:drawable="@drawable/button_red_normal"/>

</selector>
<!-- 文字颜色选择器(drawable文件夹里面) -->
<?xml version="1.0" encoding="utf-8"?>
<selector xmlns:android="http://schemas.android.com/apk/res/android">

    <item android:state_pressed="true" android:color="@android:color/black"/>  <!-- 文字点击后是黑色 -->
    <item android:color="@android:color/white"/>  <!-- 文字默认是白色 -->

</selector>
<!-- 不可以移动的黑色的圆点 -->
<?xml version="1.0" encoding="utf-8"?>
<shape xmlns:android="http://schemas.android.com/apk/res/android"
    android:shape="oval" > <!-- shape下面的oval是圆形 -->

    <solid android:color="@android:color/darker_gray" />  <!-- 圆形是灰色 -->

</shape>
<!-- 红色可以移动的圆点 -->
<?xml version="1.0" encoding="utf-8"?>
<shape xmlns:android="http://schemas.android.com/apk/res/android"
    android:shape="oval" >

    <solid android:color="#f00" />    <!-- 圆点颜色是红色 -->

</shape>
package com.itheima.zhbj52.utils;

import android.content.Context;
import android.content.SharedPreferences;

/**
 * SharePreference封装
 *
 * @author Kevin
 *
 */
public class PrefUtils {

    public static final String PREF_NAME = "config";

    public static boolean getBoolean(Context ctx, String key,
            boolean defaultValue) {
        SharedPreferences sp = ctx.getSharedPreferences(PREF_NAME,
                Context.MODE_PRIVATE);
        return sp.getBoolean(key, defaultValue);
    }

    public static void setBoolean(Context ctx, String key, boolean value) {
        SharedPreferences sp = ctx.getSharedPreferences(PREF_NAME,
                Context.MODE_PRIVATE);
        sp.edit().putBoolean(key, value).commit();
    }
}
清单文件:
<activity android:name=".GuideActivity" />
<activity android:name=".MainActivity" />