使用mysql存放Ambari元数据的配置案例
作者:尹正杰
版权声明:原创作品,谢绝转载!否则将追究法律责任。
一.环境准备
详情请参考我之前的笔记:离线方式部署Ambari2.6.0.0 中关于第三步和第四步的操作。
二.安装ambari-server(需要配置好本地yum源哟~也就是第一步骤)
[root@node101 ~]# yum -y install ambari-server
Loaded plugins: fastestmirror, priorities
Loading mirror speeds from cached hostfile
 * base: mirrors.aliyun.com
 * extras: mirrors.tuna.tsinghua.edu.cn
 * updates: mirrors.tuna.tsinghua.edu.cn
23 packages excluded due to repository priority protections
Resolving Dependencies
--> Running transaction check
---> Package ambari-server.x86_64 0:2.6.0.0-267 will be installed
--> Processing Dependency: postgresql-server >= 8.1 for package: ambari-server-2.6.0.0-267.x86_64
--> Running transaction check
---> Package postgresql-server.x86_64 0:9.2.24-1.el7_5 will be installed
--> Processing Dependency: postgresql-libs(x86-64) = 9.2.24-1.el7_5 for package: postgresql-server-9.2.24-1.el7_5.x86_64
--> Processing Dependency: postgresql(x86-64) = 9.2.24-1.el7_5 for package: postgresql-server-9.2.24-1.el7_5.x86_64
--> Processing Dependency: libpq.so.5()(64bit) for package: postgresql-server-9.2.24-1.el7_5.x86_64
--> Running transaction check
---> Package postgresql.x86_64 0:9.2.24-1.el7_5 will be installed
---> Package postgresql-libs.x86_64 0:9.2.24-1.el7_5 will be installed
--> Finished Dependency Resolution

Dependencies Resolved

======================================================================================================================================
 Package                             Arch                     Version                          Repository                        Size
======================================================================================================================================
Installing:
 ambari-server                       x86_64                   2.6.0.0-267                      ambari-2.6.0.0                   712 M
Installing for dependencies:
 postgresql                          x86_64                   9.2.24-1.el7_5                   base                             3.0 M
 postgresql-libs                     x86_64                   9.2.24-1.el7_5                   base                             234 k
 postgresql-server                   x86_64                   9.2.24-1.el7_5                   base                             3.8 M

Transaction Summary
======================================================================================================================================
Install  1 Package (+3 Dependent packages)

Total download size: 720 M
Installed size: 809 M
Downloading packages:
(1/4): postgresql-libs-9.2.24-1.el7_5.x86_64.rpm                                                               | 234 kB  00:00:00
(2/4): postgresql-server-9.2.24-1.el7_5.x86_64.rpm                                                             | 3.8 MB  00:00:04
warning: /var/cache/yum/x86_64/7/ambari-2.6.0.0/packages/ambari-server-2.6.0.0-267.x86_64.rpm: Header V4 RSA/SHA1 Signature, key ID 07513cad: NOKEY
Public key for ambari-server-2.6.0.0-267.x86_64.rpm is not installed
(3/4): ambari-server-2.6.0.0-267.x86_64.rpm                                                                    | 712 MB  00:00:09
(4/4): postgresql-9.2.24-1.el7_5.x86_64.rpm                                                                    | 3.0 MB  00:00:31
--------------------------------------------------------------------------------------------------------------------------------------
Total                                                                                                  22 MB/s | 720 MB  00:00:32
Retrieving key from http://node101.yinzhengjie.org.cn/ambari/ambari/centos7/2.6.0.0-267/RPM-GPG-KEY/RPM-GPG-KEY-Jenkins
Importing GPG key 0x07513CAD:
 Userid     : "Jenkins (HDP Builds) <jenkin@hortonworks.com>"
 Fingerprint: df52 ed4f 7a3a 5882 c099 4c66 b973 3a7a 0751 3cad
 From       : http://node101.yinzhengjie.org.cn/ambari/ambari/centos7/2.6.0.0-267/RPM-GPG-KEY/RPM-GPG-KEY-Jenkins
Running transaction check
Running transaction test
Transaction test succeeded
Running transaction
  Installing : postgresql-libs-9.2.24-1.el7_5.x86_64                                                                              1/4
  Installing : postgresql-9.2.24-1.el7_5.x86_64                                                                                   2/4
  Installing : postgresql-server-9.2.24-1.el7_5.x86_64                                                                            3/4
  Installing : ambari-server-2.6.0.0-267.x86_64                                                                                   4/4
  Verifying  : postgresql-server-9.2.24-1.el7_5.x86_64                                                                            1/4
  Verifying  : postgresql-libs-9.2.24-1.el7_5.x86_64                                                                              2/4
  Verifying  : ambari-server-2.6.0.0-267.x86_64                                                                                   3/4
  Verifying  : postgresql-9.2.24-1.el7_5.x86_64                                                                                   4/4

Installed:
  ambari-server.x86_64 0:2.6.0.0-267

Dependency Installed:
  postgresql.x86_64 0:9.2.24-1.el7_5      postgresql-libs.x86_64 0:9.2.24-1.el7_5      postgresql-server.x86_64 0:9.2.24-1.el7_5

Complete!
[root@node101 ~]#
三.部署mysql数据库
部署mysql倒是很简单,建议大家部署mysql 的主从同步,以保证数据库的高可用性。
1>.安装mysql数据库
 [root@node101 ~]# yum -y install wget #安装下载工具包

[root@node101 ~]# wget http://dev.mysql.com/get/mysql-community-release-el7-5.noarch.rpm
--2018-12-07 12:43:29--  http://dev.mysql.com/get/mysql-community-release-el7-5.noarch.rpm
Resolving dev.mysql.com (dev.mysql.com)... 137.254.60.11
Connecting to dev.mysql.com (dev.mysql.com)|137.254.60.11|:80... connected.
HTTP request sent, awaiting response... 302 Found
Location: http://101.96.8.156/dev.mysql.com/get/mysql-community-release-el7-5.noarch.rpm [following]
--2018-12-07 12:43:29--  http://101.96.8.156/dev.mysql.com/get/mysql-community-release-el7-5.noarch.rpm
Connecting to 101.96.8.156:80... connected.
HTTP request sent, awaiting response... 301 Moved Permanently
Location: https://dev.mysql.com/get/mysql-community-release-el7-5.noarch.rpm [following]
--2018-12-07 12:43:33--  https://dev.mysql.com/get/mysql-community-release-el7-5.noarch.rpm
Connecting to dev.mysql.com (dev.mysql.com)|137.254.60.11|:443... connected.
HTTP request sent, awaiting response... 302 Found
Location: https://repo.mysql.com//mysql-community-release-el7-5.noarch.rpm [following]
--2018-12-07 12:43:34--  https://repo.mysql.com//mysql-community-release-el7-5.noarch.rpm
Resolving repo.mysql.com (repo.mysql.com)... 23.51.209.162
Connecting to repo.mysql.com (repo.mysql.com)|23.51.209.162|:443... connected.
HTTP request sent, awaiting response... 200 OK
Length: 6140 (6.0K) [application/x-redhat-package-manager]
Saving to: ‘mysql-community-release-el7-5.noarch.rpm’

100%[===========================================================================>] 6,140       --.-K/s   in 0s

2018-12-07 12:43:34 (666 MB/s) - ‘mysql-community-release-el7-5.noarch.rpm’ saved [6140/6140]

[root@node101 ~]#
[root@node101 ~]# ll
total 9621676
-rwxrwxrwx. 1 root root 1760430816 Dec  5 23:01 ambari-2.6.0.0-centos7.tar.gz
-rwxr-xr-x. 1 root root 7020369101 Dec  6 10:24 HDP-2.6.3.0-centos7-rpm.tar.gz
-rwxr-xr-x. 1 root root  880016614 Dec  6 10:24 HDP-UTILS-1.1.0.21-centos7.tar.gz
-rw-r--r--. 1 root root  191753373 Dec  5 15:32 jdk-8u191-linux-x64.tar.gz
-rw-r--r--  1 root root       6140 Nov 12  2015 mysql-community-release-el7-5.noarch.rpm
[root@node101 ~]#
[root@node101 ~]# rpm -ivh mysql-community-release-el7-5.noarch.rpm
Preparing...                          ################################# [100%]
Updating / installing...
   1:mysql-community-release-el7-5    ################################# [100%]
[root@node101 ~]#
[root@node101 ~]# ll /etc/yum.repos.d/ | grep mysql
-rw-r--r--  1 root root 1209 Jan 29  2014 mysql-community.repo
-rw-r--r--  1 root root 1060 Jan 29  2014 mysql-community-source.repo
[root@node101 ~]#
[root@node101 ~]# yum -y install mysql-community-server
Loaded plugins: fastestmirror, priorities
Loading mirror speeds from cached hostfile
 * base: mirrors.aliyun.com
 * extras: mirrors.tuna.tsinghua.edu.cn
 * updates: mirrors.tuna.tsinghua.edu.cn
23 packages excluded due to repository priority protections
Resolving Dependencies
--> Running transaction check
---> Package mysql-community-server.x86_64 0:5.6.42-2.el7 will be installed
--> Processing Dependency: mysql-community-common(x86-64) = 5.6.42-2.el7 for package: mysql-community-server-5.6.42-2.el7.x86_64
--> Processing Dependency: mysql-community-client(x86-64) >= 5.6.10 for package: mysql-community-server-5.6.42-2.el7.x86_64
--> Processing Dependency: perl(Data::Dumper) for package: mysql-community-server-5.6.42-2.el7.x86_64
--> Processing Dependency: perl(DBI) for package: mysql-community-server-5.6.42-2.el7.x86_64
--> Running transaction check
---> Package mysql-community-client.x86_64 0:5.6.42-2.el7 will be installed
--> Processing Dependency: mysql-community-libs(x86-64) >= 5.6.10 for package: mysql-community-client-5.6.42-2.el7.x86_64
---> Package mysql-community-common.x86_64 0:5.6.42-2.el7 will be installed
---> Package perl-DBI.x86_64 0:1.627-4.el7 will be installed
--> Processing Dependency: perl(RPC::PlServer) >= 0.2001 for package: perl-DBI-1.627-4.el7.x86_64
--> Processing Dependency: perl(RPC::PlClient) >= 0.2000 for package: perl-DBI-1.627-4.el7.x86_64
---> Package perl-Data-Dumper.x86_64 0:2.145-3.el7 will be installed
--> Running transaction check
---> Package mariadb-libs.x86_64 1:5.5.44-2.el7.centos will be obsoleted
---> Package mysql-community-libs.x86_64 0:5.6.42-2.el7 will be obsoleting
---> Package perl-PlRPC.noarch 0:0.2020-14.el7 will be installed
--> Processing Dependency: perl(Net::Daemon) >= 0.13 for package: perl-PlRPC-0.2020-14.el7.noarch
--> Processing Dependency: perl(Net::Daemon::Test) for package: perl-PlRPC-0.2020-14.el7.noarch
--> Processing Dependency: perl(Net::Daemon::Log) for package: perl-PlRPC-0.2020-14.el7.noarch
--> Processing Dependency: perl(Compress::Zlib) for package: perl-PlRPC-0.2020-14.el7.noarch
--> Running transaction check
---> Package perl-IO-Compress.noarch 0:2.061-2.el7 will be installed
--> Processing Dependency: perl(Compress::Raw::Zlib) >= 2.061 for package: perl-IO-Compress-2.061-2.el7.noarch
--> Processing Dependency: perl(Compress::Raw::Bzip2) >= 2.061 for package: perl-IO-Compress-2.061-2.el7.noarch
---> Package perl-Net-Daemon.noarch 0:0.48-5.el7 will be installed
--> Running transaction check
---> Package perl-Compress-Raw-Bzip2.x86_64 0:2.061-3.el7 will be installed
---> Package perl-Compress-Raw-Zlib.x86_64 1:2.061-4.el7 will be installed
--> Finished Dependency Resolution

Dependencies Resolved

=====================================================================================================================
 Package                            Arch              Version                     Repository                    Size
=====================================================================================================================
Installing:
 mysql-community-libs               x86_64            5.6.42-2.el7                mysql56-community            2.0 M
     replacing  mariadb-libs.x86_64 1:5.5.44-2.el7.centos
 mysql-community-server             x86_64            5.6.42-2.el7                mysql56-community             59 M
Installing for dependencies:
 mysql-community-client             x86_64            5.6.42-2.el7                mysql56-community             20 M
 mysql-community-common             x86_64            5.6.42-2.el7                mysql56-community            257 k
 perl-Compress-Raw-Bzip2            x86_64            2.061-3.el7                 base                          32 k
 perl-Compress-Raw-Zlib             x86_64            1:2.061-4.el7               base                          57 k
 perl-DBI                           x86_64            1.627-4.el7                 base                         802 k
 perl-Data-Dumper                   x86_64            2.145-3.el7                 base                          47 k
 perl-IO-Compress                   noarch            2.061-2.el7                 base                         260 k
 perl-Net-Daemon                    noarch            0.48-5.el7                  base                          51 k
 perl-PlRPC                         noarch            0.2020-14.el7               base                          36 k

Transaction Summary
=====================================================================================================================
Install  2 Packages (+9 Dependent packages)

Total download size: 82 M
Downloading packages:
warning: /var/cache/yum/x86_64/7/mysql56-community/packages/mysql-community-common-5.6.42-2.el7.x86_64.rpm: Header V3 DSA/SHA1 Signature, key ID 5072e1f5: NOKEY
Public key for mysql-community-common-5.6.42-2.el7.x86_64.rpm is not installed
(1/11): mysql-community-common-5.6.42-2.el7.x86_64.rpm                                        | 257 kB  00:00:00
(2/11): mysql-community-libs-5.6.42-2.el7.x86_64.rpm                                          | 2.0 MB  00:00:07
(3/11): perl-Compress-Raw-Zlib-2.061-4.el7.x86_64.rpm                                         |  57 kB  00:00:00
(4/11): perl-Data-Dumper-2.145-3.el7.x86_64.rpm                                               |  47 kB  00:00:00
(5/11): perl-Compress-Raw-Bzip2-2.061-3.el7.x86_64.rpm                                        |  32 kB  00:00:00
(6/11): perl-IO-Compress-2.061-2.el7.noarch.rpm                                               | 260 kB  00:00:00
(7/11): perl-Net-Daemon-0.48-5.el7.noarch.rpm                                                 |  51 kB  00:00:00
(8/11): perl-PlRPC-0.2020-14.el7.noarch.rpm                                                   |  36 kB  00:00:00
(9/11): perl-DBI-1.627-4.el7.x86_64.rpm                                                       | 802 kB  00:00:03
(10/11): mysql-community-client-5.6.42-2.el7.x86_64.rpm                                       |  20 MB  00:00:27
(11/11): mysql-community-server-5.6.42-2.el7.x86_64.rpm                                       |  59 MB  00:01:27
---------------------------------------------------------------------------------------------------------------------
Total                                                                                884 kB/s |  82 MB  00:01:35
Retrieving key from file:/etc/pki/rpm-gpg/RPM-GPG-KEY-mysql
Importing GPG key 0x5072E1F5:
 Userid     : "MySQL Release Engineering <mysql-build@oss.oracle.com>"
 Fingerprint: a4a9 4068 76fc bd3c 4567 70c8 8c71 8d3b 5072 e1f5
 Package    : mysql-community-release-el7-5.noarch (installed)
 From       : file:/etc/pki/rpm-gpg/RPM-GPG-KEY-mysql
Running transaction check
Running transaction test
Transaction test succeeded
Running transaction
Warning: RPMDB altered outside of yum.
  Installing : perl-Data-Dumper-2.145-3.el7.x86_64                                                              1/12
  Installing : mysql-community-common-5.6.42-2.el7.x86_64                                                       2/12
  Installing : mysql-community-libs-5.6.42-2.el7.x86_64                                                         3/12
  Installing : mysql-community-client-5.6.42-2.el7.x86_64                                                       4/12
  Installing : perl-Compress-Raw-Bzip2-2.061-3.el7.x86_64                                                       5/12
  Installing : 1:perl-Compress-Raw-Zlib-2.061-4.el7.x86_64                                                      6/12
  Installing : perl-IO-Compress-2.061-2.el7.noarch                                                              7/12
  Installing : perl-Net-Daemon-0.48-5.el7.noarch                                                                8/12
  Installing : perl-PlRPC-0.2020-14.el7.noarch                                                                  9/12
  Installing : perl-DBI-1.627-4.el7.x86_64                                                                     10/12
  Installing : mysql-community-server-5.6.42-2.el7.x86_64                                                      11/12
  Erasing    : 1:mariadb-libs-5.5.44-2.el7.centos.x86_64                                                       12/12
  Verifying  : mysql-community-libs-5.6.42-2.el7.x86_64                                                         1/12
  Verifying  : mysql-community-common-5.6.42-2.el7.x86_64                                                       2/12
  Verifying  : perl-Net-Daemon-0.48-5.el7.noarch                                                                3/12
  Verifying  : mysql-community-server-5.6.42-2.el7.x86_64                                                       4/12
  Verifying  : perl-Data-Dumper-2.145-3.el7.x86_64                                                              5/12
  Verifying  : mysql-community-client-5.6.42-2.el7.x86_64                                                       6/12
  Verifying  : perl-IO-Compress-2.061-2.el7.noarch                                                              7/12
  Verifying  : 1:perl-Compress-Raw-Zlib-2.061-4.el7.x86_64                                                      8/12
  Verifying  : perl-DBI-1.627-4.el7.x86_64                                                                      9/12
  Verifying  : perl-Compress-Raw-Bzip2-2.061-3.el7.x86_64                                                      10/12
  Verifying  : perl-PlRPC-0.2020-14.el7.noarch                                                                 11/12
  Verifying  : 1:mariadb-libs-5.5.44-2.el7.centos.x86_64                                                       12/12

Installed:
  mysql-community-libs.x86_64 0:5.6.42-2.el7               mysql-community-server.x86_64 0:5.6.42-2.el7

Dependency Installed:
  mysql-community-client.x86_64 0:5.6.42-2.el7              mysql-community-common.x86_64 0:5.6.42-2.el7
  perl-Compress-Raw-Bzip2.x86_64 0:2.061-3.el7              perl-Compress-Raw-Zlib.x86_64 1:2.061-4.el7
  perl-DBI.x86_64 0:1.627-4.el7                             perl-Data-Dumper.x86_64 0:2.145-3.el7
  perl-IO-Compress.noarch 0:2.061-2.el7                     perl-Net-Daemon.noarch 0:0.48-5.el7
  perl-PlRPC.noarch 0:0.2020-14.el7

Replaced:
  mariadb-libs.x86_64 1:5.5.44-2.el7.centos

Complete!
[root@node101 ~]#
2>.启动MySQL服务
[root@node101 ~]# systemctl enable mysqld
Created symlink from /etc/systemd/system/mysql.service to /usr/lib/systemd/system/mysqld.service.
Created symlink from /etc/systemd/system/multi-user.target.wants/mysqld.service to /usr/lib/systemd/system/mysqld.service.
[root@node101 ~]#
[root@node101 ~]# systemctl start mysqld
[root@node101 ~]#
[root@node101 ~]# systemctl status mysqld
● mysqld.service - MySQL Community Server
   Loaded: loaded (/usr/lib/systemd/system/mysqld.service; enabled; vendor preset: disabled)
   Active: active (running) since Fri 2018-12-07 13:08:13 CST; 1min 42s ago
  Process: 3542 ExecStartPost=/usr/bin/mysql-systemd-start post (code=exited, status=0/SUCCESS)
  Process: 3482 ExecStartPre=/usr/bin/mysql-systemd-start pre (code=exited, status=0/SUCCESS)
 Main PID: 3541 (mysqld_safe)
   CGroup: /system.slice/mysqld.service
           ├─3541 /bin/sh /usr/bin/mysqld_safe --basedir=/usr
           └─3708 /usr/sbin/mysqld --basedir=/usr --datadir=/var/lib/mysql --plugin-dir=/usr/lib64/mysql/plugin --log-error=/var/lo...

Dec 07 13:08:12 node101.yinzhengjie.org.cn mysql-systemd-start[3482]: /usr/bin/mysql_secure_installation
Dec 07 13:08:12 node101.yinzhengjie.org.cn mysql-systemd-start[3482]: which will also give you the option of removing the test
Dec 07 13:08:12 node101.yinzhengjie.org.cn mysql-systemd-start[3482]: databases and anonymous user created by default.  This is
Dec 07 13:08:12 node101.yinzhengjie.org.cn mysql-systemd-start[3482]: strongly recommended for production servers.
Dec 07 13:08:12 node101.yinzhengjie.org.cn mysql-systemd-start[3482]: See the manual for more instructions.
Dec 07 13:08:12 node101.yinzhengjie.org.cn mysql-systemd-start[3482]: Please report any problems at http://bugs.mysql.com/
Dec 07 13:08:12 node101.yinzhengjie.org.cn mysql-systemd-start[3482]: The latest information about MySQL is available on the web at
Dec 07 13:08:12 node101.yinzhengjie.org.cn mysqld_safe[3541]: 181207 13:08:12 mysqld_safe Logging to '/var/log/mysqld.log'.
Dec 07 13:08:12 node101.yinzhengjie.org.cn mysqld_safe[3541]: 181207 13:08:12 mysqld_safe Starting mysqld daemon with database...mysql
Dec 07 13:08:13 node101.yinzhengjie.org.cn systemd[1]: Started MySQL Community Server.
Hint: Some lines were ellipsized, use -l to show in full.
[root@node101 ~]#
3>.为mysql配置管理用户
[root@node101 ~]# mysql -uroot                                        #安装后的操作系统,默认是密钥root密码的,我们直接可以用root用户登陆即可。
Welcome to the MySQL monitor.  Commands end with ; or g.
Your MySQL connection id is 2
Server version: 5.6.42 MySQL Community Server (GPL)

Copyright (c) 2000, 2018, Oracle and/or its affiliates. All rights reserved.

Oracle is a registered trademark of Oracle Corporation and/or its
affiliates. Other names may be trademarks of their respective
owners.

Type 'help;' or 'h' for help. Type 'c' to clear the current input statement.

mysql> set password for 'root'@'localhost' = password('yinzhengjie');                  #修改root本地用户的登陆密码为“yinzhengjie”
Query OK, 0 rows affected (0.00 sec)

mysql> grant all privileges on *.* to 'root'@'172.30.1.10%' identified by 'yinzhengjie';      #我这里值允许172.30.1.100~172.30.1.109这10个服务器IP使用root用户登陆我这台mysql。其他的机器不允许。
Query OK, 0 rows affected (0.00 sec)

mysql> FLUSH PRIVILEGES;                                             #别忘记刷新权限哟!
Query OK, 0 rows affected (0.00 sec)

mysql> quit
Bye
[root@node101 ~]#
[root@node102 ~]# mysql -h 172.30.1.101 -uroot -pyinzhengjie
Warning: Using a password on the command line interface can be insecure.
Welcome to the MySQL monitor.  Commands end with ; or g.
Your MySQL connection id is 5
Server version: 5.6.42 MySQL Community Server (GPL)

Copyright (c) 2000, 2018, Oracle and/or its affiliates. All rights reserved.

Oracle is a registered trademark of Oracle Corporation and/or its
affiliates. Other names may be trademarks of their respective
owners.

Type 'help;' or 'h' for help. Type 'c' to clear the current input statement.

mysql> show databases;
+--------------------+
| Database           |
+--------------------+
| information_schema |
| mysql              |
| performance_schema |
+--------------------+
3 rows in set (0.00 sec)

mysql> quit
Bye
[root@node102 ~]#
[root@node103 ~]# mysql -h 172.30.1.101 -uroot -pyinzhengjie
Warning: Using a password on the command line interface can be insecure.
Welcome to the MySQL monitor.  Commands end with ; or g.
Your MySQL connection id is 8
Server version: 5.6.42 MySQL Community Server (GPL)

Copyright (c) 2000, 2018, Oracle and/or its affiliates. All rights reserved.

Oracle is a registered trademark of Oracle Corporation and/or its
affiliates. Other names may be trademarks of their respective
owners.

Type 'help;' or 'h' for help. Type 'c' to clear the current input statement.

mysql> show databases;
+--------------------+
| Database           |
+--------------------+
| information_schema |
| mysql              |
| performance_schema |
+--------------------+
3 rows in set (0.00 sec)

mysql> quit
Bye
[root@node103 ~]#
4>.初始化Ambari的数据库表(本篇博客没有安装hive,oozie之类的服务, 如果你要部署他们,只需要创建对应的数据库并授权用户名和密码即可!下面我给出了案例!)
[root@node101 ~]# cat yinzhengjie-hdp.sql                           #注意,下面的mysql命令都很简单,我就不多费口舌啦,你只需要根据自己的环境做适当的调整即可。
CREATE DATABASE ambari;
use ambari;
GRANT ALL PRIVILEGES ON ambari.* TO 'ambari'@'node101.yinzhengjie.org.cn' IDENTIFIED BY 'yinzhengjie' WITH GRANT OPTION;
FLUSH PRIVILEGES;
source /var/lib/ambari-server/resources/Ambari-DDL-MySQL-CREATE.sql
show tables;
select Host,User,Password from mysql.user where user='ambari';
[root@node101 ~]#
[root@node101 ~]# mysql -uroot -pyinzhengjie < yinzhengjie-hdp.sql
Warning: Using a password on the command line interface can be insecure.
Tables_in_ambari
ClusterHostMapping
QRTZ_BLOB_TRIGGERS
QRTZ_CALENDARS
QRTZ_CRON_TRIGGERS
QRTZ_FIRED_TRIGGERS
QRTZ_JOB_DETAILS
QRTZ_LOCKS
QRTZ_PAUSED_TRIGGER_GRPS
QRTZ_SCHEDULER_STATE
QRTZ_SIMPLE_TRIGGERS
QRTZ_SIMPROP_TRIGGERS
QRTZ_TRIGGERS
adminpermission
adminprincipal
adminprincipaltype
adminprivilege
adminresource
adminresourcetype
alert_current
alert_definition
alert_group
alert_group_target
alert_grouping
alert_history
alert_notice
alert_target
alert_target_states
ambari_operation_history
ambari_sequences
artifact
blueprint
blueprint_configuration
blueprint_setting
clusterconfig
clusters
clusterservices
clusterstate
confgroupclusterconfigmapping
configgroup
configgrouphostmapping
execution_command
extension
extensionlink
groups
host_role_command
host_version
hostcomponentdesiredstate
hostcomponentstate
hostconfigmapping
hostgroup
hostgroup_component
hostgroup_configuration
hosts
hoststate
kerberos_descriptor
kerberos_principal
kerberos_principal_host
key_value_store
members
metainfo
permission_roleauthorization
remoteambaricluster
remoteambariclusterservice
repo_version
request
requestoperationlevel
requestresourcefilter
requestschedule
requestschedulebatchrequest
role_success_criteria
roleauthorization
servicecomponent_version
servicecomponentdesiredstate
serviceconfig
serviceconfighosts
serviceconfigmapping
servicedesiredstate
setting
stack
stage
topology_host_info
topology_host_request
topology_host_task
topology_hostgroup
topology_logical_request
topology_logical_task
topology_request
upgrade
upgrade_group
upgrade_history
upgrade_item
users
viewentity
viewinstance
viewinstancedata
viewinstanceproperty
viewmain
viewparameter
viewresource
viewurl
widget
widget_layout
widget_layout_user_widget
Host    User    Password
node101.yinzhengjie.org.cn      ambari  *BD0B1F48FDC55BD27555FC2F22FF29A68A25A1D7
[root@node101 ~]#
5>.下载mysql的驱动到ambari-server的依赖库中
[root@node101 ~]# mkdir  /usr/share/java
[root@node101 ~]#
[root@node101 ~]# cp mysql-connector-java-5.1.26.jar /usr/share/java/mysql-connector-java.jar
[root@node101 ~]#
[root@node101 ~]# cp /usr/share/java/mysql-connector-java.jar /var/lib/ambari-server/resources/mysql-jdbc-driver.jar
[root@node101 ~]#
[root@node101 ~]# echo "server.jdbc.driver.path=/usr/share/java/mysql-connector-java.jar" >> /etc/ambari-server/conf/ambari.properties
[root@node101 ~]#
三.使用mysql存放Ambari元数据的配置
1>.初始化设置ambari-server(这个步骤必须先做,如果跳过这个步骤启动ambari-server会报错的!)
[root@node101 ~]# ambari-server setup
Using python  /usr/bin/python
Setup ambari-server
Checking SELinux...
SELinux status is 'disabled'
Customize user account for ambari-server daemon [y/n] (n)? y                  #这里咱们可以自定义Ambari的用户,我们输入y就直接可以自定义啦!
Enter user account for ambari-server daemon (root):ambari                    #我们看到了括号里的用户为默认用户,及默认用户是root用户!我们这里自定义管理Ambari的用户为ambari
Adjusting ambari-server permissions and ownership...
Checking firewall status...
Checking JDK...
[1] Oracle JDK 1.8 + Java Cryptography Extension (JCE) Policy Files 8
[2] Oracle JDK 1.7 + Java Cryptography Extension (JCE) Policy Files 7
[3] Custom JDK
==============================================================================
Enter choice (1): 3                                          #这里需要选择你的JDK类型,是jdk7还是jdk8还是自定义安装了jdk,我是自己安装的,这里选择3.
WARNING: JDK must be installed on all hosts and JAVA_HOME must be valid on all hosts.
WARNING: JCE Policy files are required for configuring Kerberos security. If you plan to use Kerberos,please make sure JCE Unlimited Strength Jurisdiction Policy Files are valid on all hosts.
Path to JAVA_HOME: /yinzhengjie/softwares/jdk                          #这里咱们把安装的jdk路径写进入即可
Validating JDK on Ambari Server...done.
Completing setup...
Configuring database..
Enter advanced database configuration [y/n] (n)? y                        #这里是数据库设置,默认使用PostgreSQL,由于咱们上面大费周章布置好了mysql服务。因此我们不要使用默认的,这里输入字母“y”
Configuring database...
==============================================================================
Choose one of the following options:
[1] - PostgreSQL (Embedded)
[2] - Oracle
[3] - MySQL / MariaDB
[4] - PostgreSQL
[5] - Microsoft SQL Server (Tech Preview)
[6] - SQL Anywhere
[7] - BDB
==============================================================================
Enter choice (1): 3                                          #我们可以发现,HDP支持的数据还是满多的,竟然支持7种呢,这里咱们选择我们部署好的mysql即可。
Hostname (localhost): node101.yinzhengjie.org.cn                         #这里指定服务器的地址,可以输入IP也可以谁让主机名,大家可以根据自己的情况来就好,如果你啥也不输入,那括号里就是默认值!
Port (3306):
Database name (ambari):                                         #指定数据库的名称,默认是ambari,很显然我在mysql已经创建这个数据库来,我们默认即可!
Username (ambari):                                           #这里指定mysql的用户名即可。
Enter Database Password (bigdata):                                 #这里是数据库的密码,我默认设置的可不是bigdata,而是“yinzhengjie”,我们把字符串输进去即可,注意:你输入密码的过程是看不到的哟!
Re-enter password:
Configuring ambari database...
Configuring remote database connection properties...
WARNING: Before starting Ambari Server, you must run the following DDL against the database to create the schema: /var/lib/ambari-server/resources/Ambari-DDL-MySQL-CREATE.sql
Proceed with configuring remote database connection properties [y/n] (y)?         #这里我们敲击回车即可,即默认的参数“y”
Extracting system views...
..........ambari-admin-2.6.0.0.267.jar
.
Adjusting ambari-server permissions and ownership...
Ambari Server 'setup' completed successfully.                          #当你看到这一行时,说明你配置的整个过程都是一路绿灯的,接下来就可以开启Ambari服务啦!
[root@node101 ~]#
2>.启动ambari-seriver服务
[root@node101 ~]# ambari-server start                       #输入相应的启动命令,你就会发现启动数据是成功的
Using python  /usr/bin/python
Starting ambari-server
Ambari Server running with administrator privileges.
Organizing resource files at /var/lib/ambari-server/resources...
Ambari database consistency check started...
Server PID at: /var/run/ambari-server/ambari-server.pid
Server out at: /var/log/ambari-server/ambari-server.out
Server log at: /var/log/ambari-server/ambari-server.log            #这个文件是存放日志的,上面2个文件存放的是PID以及
Waiting for server start......................
Server started listening on 8080                          #这里自然就是监听服务的端口啦~我们可以通过webUI的方式去访问它。

DB configs consistency check: no errors and warnings were found.
Ambari Server 'start' completed successfully.                  #这里提示我们服务启动成功啦~
[root@node101 ~]#
好啦,既然服务已经启动成功了,那我们也别闲着了,说干就干吧,访问一下WebUI吧:
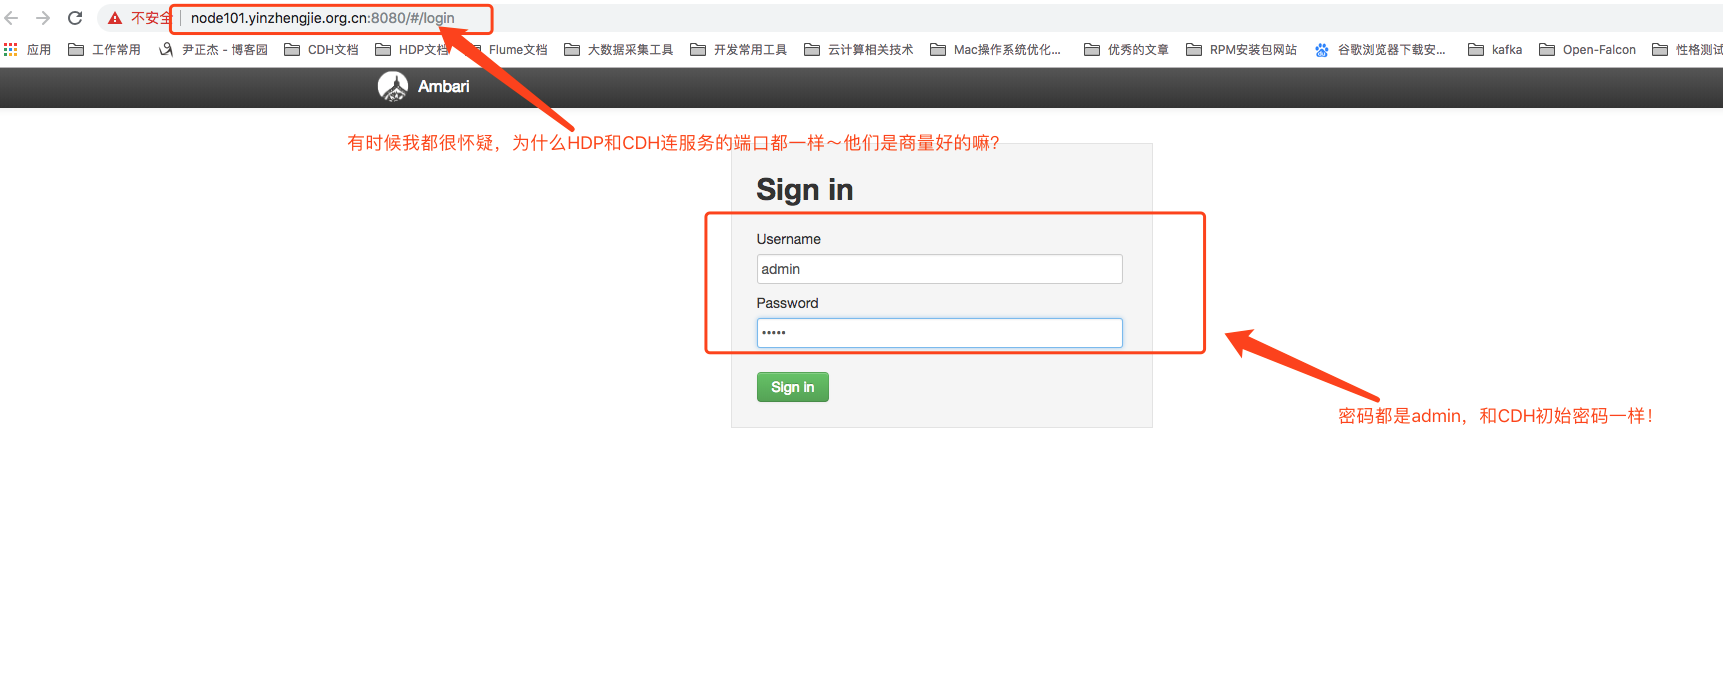
如上图所示,登陆系统之后,会看到Ambari空空如也的欢迎界面,接下来我们就需要介绍如何通过Ambari新建Hadoop集群。详情请参考我的博客:手把手教你通过Ambari新建Hadoop集群图解案例。
四. 重置ambari-server的方法
如果出现错误,请注意查看日志,根据具体的错误内容进行处理,默认ambari-server的日志在/var/log/ambari-server/ambari-server.log里面。如果在处理日志的过程中或者后面安装的过程中出现一些莫名的错误,可以重置的安装。如果上面进行的默认数据库的配置,可以使用下面的代码重置ambari-server:
[root@yinzhengjie ~]# ambari-server stop      #停止ambari-server服务
[root@yinzhengjie ~]# ambari-server reset      #重置ambari-server服务
[root@yinzhengjie ~]# ambari-server setup      #重复第二和三步骤,对使用mysql存放元数据信息。但在吃之前,你创建对数据库表之类需要删除,或者你创建新对数据库,在配置对时候自定义指定都是可以的!
如果在安装的过程中出现了错误,又想重新安装,可以在ambari-server开启的情况下,执行下面的语句来移除已安装的包,然后再通过不同的情况选择上面两种方式的一种对ambari-server进行重置
[root@node101 ~]# python /usr/lib/python2.6/site-packages/ambari_agent/HostCleanup.py --silent