http://reactnative.cn/docs/integration-with-existing-apps/
1.安装好ReactNative开发环境
2.安装好CocoaPods
3.创建项目根文件夹:A
4.创建文件夹A/ios
5.创建新项目到A/ios目录下(最上层目录移除,否则下面的路径需要修改,例如原来为ProjectDir/ProjectDir,但是根目录ProjectDir下只有一个文件夹,那么最上层移除,只要下一层包含项目数据文件的ProjectDir拷贝到A/ios文件夹下面即可)
6.根目录A下创建package.json和index.js(老版本index.ios.js)文件
{
  "name": "MyReactNativeApp",
  "version": "0.0.1",
  "private": true,
  "scripts": {
    "start": "node node_modules/react-native/local-cli/cli.js start"
  }
}
7.根目录A下执行$ yarn add react-native集成(以下两条命令是可以用npm替换yarn,如果网络问题出错如此)
8.控制台打印可能会出现警告类似warning "react-native@0.52.2" has unmet peer dependency "react@x.y.z".
此时安装指定版本React $ yarn add react@x.y.z
8.添加CocoaPods到iOS项目中
# Uncomment the next line to define a global platform for your project
# platform :ios, '9.0'
target 'MyReactNativeApp' do
# Uncomment the next line if you're using Swift or would like to use dynamic frameworks
# use_frameworks!
# Pods for MyReactNativeApp
# 'node_modules'目录一般位于根目录中
# 但是如果你的结构不同,那你就要根据实际路径修改下面的`:path`
pod 'React', :path => '../node_modules/react-native', :subspecs => [
'Core',
'CxxBridge', # 如果RN版本 >= 0.47则加入此行
'DevSupport', # 如果RN版本 >= 0.43,则需要加入此行才能开启开发者菜单
'RCTText',
'RCTImage',
'RCTNetwork',
'RCTWebSocket', # 调试功能需要此模块
'RCTAnimation', # FlatList和原生动画功能需要此模块
# 在这里继续添加你所需要的其他RN模块
#'ART',
#'RCTActionSheet',
#'RCTAdSupport',
#'RCTCameraRoll',
#'RCTGeolocation',
#'RCTPushNotification',
#'RCTSettings',
#'RCTVibration',
#'RCTLinkingIOS',
]
# 如果你的RN版本 >= 0.42.0,则加入下面这行
pod 'yoga', :path => '../node_modules/react-native/ReactCommon/yoga'
# 如果RN版本 >= 0.45则加入下面三个第三方编译依赖
pod 'DoubleConversion', :podspec => '../node_modules/react-native/third-party-podspecs/DoubleConversion.podspec'
pod 'glog', :podspec => '../node_modules/react-native/third-party-podspecs/glog.podspec'
pod 'Folly', :podspec => '../node_modules/react-native/third-party-podspecs/Folly.podspec'
target 'MyReactNativeAppTests' do
inherit! :search_paths
# Pods for testing
end
target 'MyReactNativeAppUITests' do
inherit! :search_paths
# Pods for testing
end
end
10.$ pod install
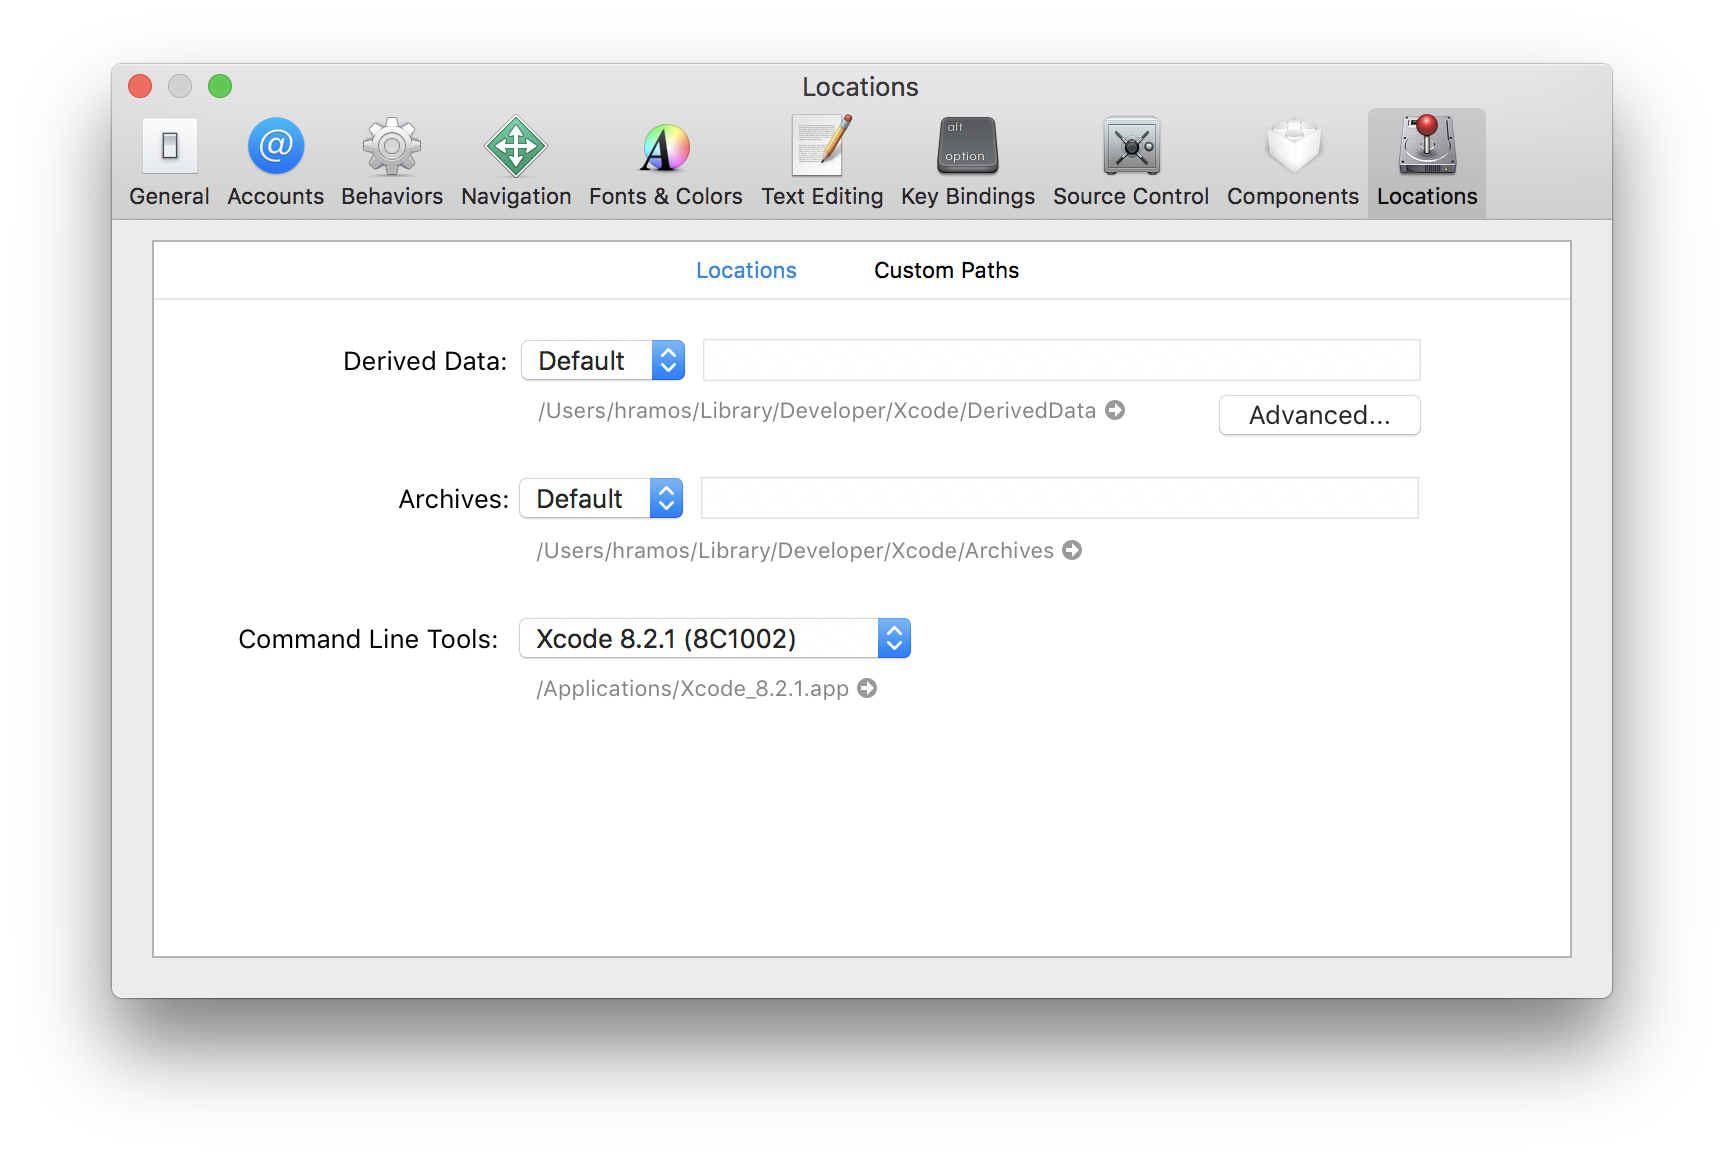
此处注意xcode的command line tool必须设置完成正常,如下图选择中了xcode 8.2.1 ,否则报错没有找到命令集合
11.使用本地Web服务调试
<key>NSAppTransportSecurity</key>
    <dict>
        <key>NSExceptionDomains</key>
        <dict>
            <key>localhost</key>
            <dict>
                <key>NSTemporaryExceptionAllowsInsecureHTTPLoads</key>
                <true/>
            </dict>
        </dict>
    </dict>
在项目根目录A下启动
$npm start
引用框架
#import <React/RCTRootView.h>
- (IBAction)highScoreButtonPressed:(id)sender {
    NSLog(@"High Score Button Pressed");
    NSURL *jsCodeLocation = [NSURL URLWithString:@"http://localhost:8081/index.bundle?platform=ios"];

    RCTRootView *rootView =
      [[RCTRootView alloc] initWithBundleURL: jsCodeLocation
                                  moduleName: @"RNHighScores"
                           initialProperties:
                             @{
                               @"scores" : @[
                                 @{
                                   @"name" : @"Alex",
                                   @"value": @"42"
                                  },
                                 @{
                                   @"name" : @"Joel",
                                   @"value": @"10"
                                 }
                               ]
                             }
                               launchOptions: nil];
    UIViewController *vc = [[UIViewController alloc] init];
    vc.view = rootView;
    [self presentViewController:vc animated:YES completion:nil];
}
12.打包js和资源文件
http://www.cocoachina.com/ios/20170511/19250.html
https://www.jianshu.com/p/e14c96fabcaf
在根目录下创建release_ios文件夹后
执行
react-native bundle --entry-file index.ios.js --platform ios --dev false --bundle-output release_ios/main.jsbundle --assets-dest release_ios/
13.将生成的main.jsbundle导入到项目中
14.js路径替换为
NSURL *jsCodeLocation = [[NSBundle mainBundle] URLForResource:@"main" withExtension:@"jsbundle"];//[NSURL URLWithString:@"http://localhost:8081/index.bundle?platform=ios"];
15.未知大部分使用者Target下添加了shell命令
export NODE_BINARY=node
../node_modules/react-native/scripts/react-native-xcode.sh
https://github.com/378056350/react-native-diary 一个日历源码项目
https://www.cnblogs.com/Unknw/p/6431375.html 如何新建类
按官网创建项目后,使用其它的示例代码,结果老是不成功显示,报错RCTImageView Not Found IN UIMANAGER这种错误,纠结了差不多一个星期,没错,我就是自学菜鸟,最后发现在Podfile导入的框架不够,没有包含RCTImage,也就是说需要什么就包含上,仔细些别缺失了,修改后执行pod update