把自己的项目发布到maven仓库并在maven和gradle中开始使用
上一条博客中提到的日志打印项目总算是维护的差不多了, 不过现在使用它还是打成jar包放到其他项目内, 所以决定把项目传到maven仓库内, 使用时只需要配置一下即可了
我使用的是阿里云的maven仓库服务, 如何购买阿里云仓库这里就不多说了, 去阿里云上找很容易找到
1. 修改maven配置文件conf/settings.xml
首先添加服务配置项, 相当于令牌, 连接远程仓库
    <servers>
        <server>
            <id>rdc-releases</id>
            <username>阿里仓库账号</username>
            <password>密码</password>
        </server>
        <server>
            <id>rdc-snapshots</id>
            <username>阿里仓库账号</username>
            <password>密码</password>
        </server>
    </servers>
再添加仓库地址的配置:
<mirrors>
        <mirror>
            <id>mirror</id>
            <mirrorOf>!rdc-releases,!rdc-snapshots</mirrorOf>
            <name>mirror</name>
            <url>https://maven.aliyun.com/nexus/content/groups/public</url>
        </mirror>

    </mirrors>
然后是私有仓库的配置
<profiles>
    <profile>
        <id>rdc-private-repo</id>
        <repositories>
            <repository>
                <id>rdc-releases</id>
                <url>https://repo.rdc.aliyun.com/repository/119569-release-xxxx/</url>
            </repository>
            <repository>
                <id>rdc-snapshots</id>
                <url>https://repo.rdc.aliyun.com/repository/119569-snapshot-xxxx/</url>
            </repository>
        </repositories>
    </profile>
2.修改项目内的pom.xml文件
<groupId>com.xxx.common</groupId>
    <artifactId>xxxx-log</artifactId>
    <version>1.0</version>
    <packaging>jar</packaging>
有一点要注意, 项目的pom.xml文件呢不能有<build>标签, 不然下一步会失败, 而且正式版的版本号内不能带有SNAPSHOT
3.部署项目到仓库
在pom.xml文件中右击,run As – Maven build … 打开如下的框。
在 Goal输入如下命令:

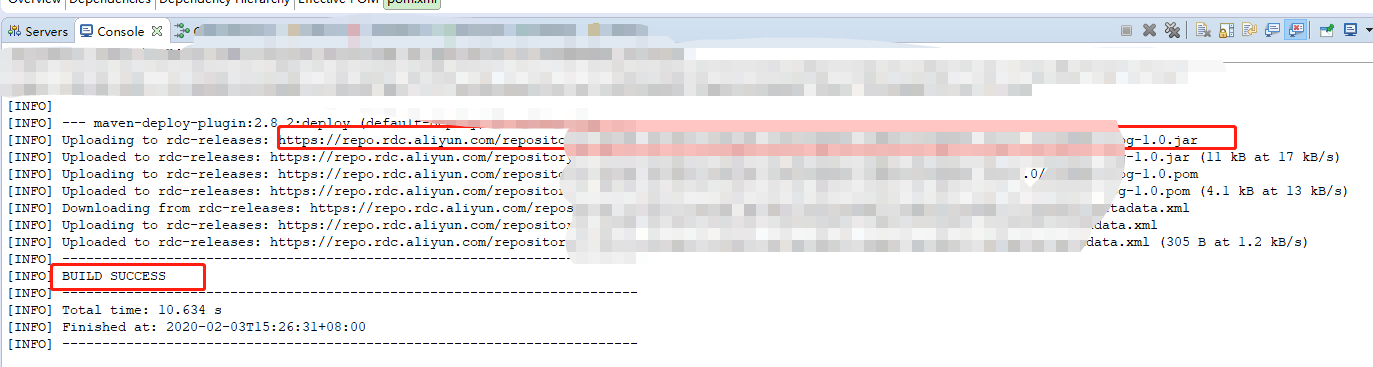
上传成功后如图:
4.开始使用
maven:
首先在settings.xml中添加配置:
<servers>
    <server>
        <id>rdc-releases</id>
        <username>账号</username>
        <password>******</password>
    </server>
    <server>
        <id>rdc-snapshots</id>
        <username>账号</username>
        <password>******</password>
    </server>

<profile>
    <id>rdc-private-repo</id>
    <repositories>
        <repository>
            <id>rdc-releases</id>
            <url>https://repo.rdc.aliyun.com/repository/119569-release-xxx/</url>
        </repository>
        <repository>
            <id>rdc-snapshots</id>
            <url>https://repo.rdc.aliyun.com/repository/119569-snapshot-xxx/</url>
        </repository>
    </repositories>
</profile>
在项目的pom.xml文件中加入依赖项
        <dependency>
            <groupId>刚才上传时的分组id</groupId>
            <artifactId>刚才上传时的项目id</artifactId>
            <version>1.0</version>
        </dependency>
gradle:
在build.gradle文件内加入配置:
allprojects {
    repositories {
        maven {
            url 'https://maven.aliyun.com/repository/public'
        }

        maven {
            credentials {
                username '账号'
                password '******'
            }
            url 'https://repo.rdc.aliyun.com/repository/119569-release-xxx/'
        }
        maven {
            credentials {
                username '账号'
                password '******'
            }
            url 'https://repo.rdc.aliyun.com/repository/119569-snapshot-xxx/'
        }
    }
}
在build.gradle文件内加入依赖项
compile group: '刚才上传时的分组id', name: '刚才上传时的项目id', version: '1.0'
参考文章:
https://www.cnblogs.com/supiaopiao/p/9804733.html
https://blog.csdn.net/loveshunyi/article/details/88813433
本文链接: