最近想学习dubbo,就利用周末写了一个特别简单的demo,不知道有没有用,先记录一下。
1、安装zookeeper并启动(安装看我上一篇博客https://www.cnblogs.com/huangzhang/p/9219319.html)
2、下载dubbo源码,安装dubbo-admin(安装看我之前的博客https://www.cnblogs.com/huangzhang/p/9219296.html)
这些准备工作做好之后开始写demo代码:
这里用的开发工具是Intellij IDEA,所以利用idea的智能生成一个spring boot项目,这里就不细说了。
搭建好spring boot项目之后,pom.xml文件中引入依赖
<!--引入dubbot-->
        <dependency>
            <groupId>com.alibaba</groupId>
            <artifactId>dubbo</artifactId>
            <version>2.5.10</version>
        </dependency>
        <!--引入zookeeper-->
        <dependency>
            <groupId>org.apache.zookeeper</groupId>
            <artifactId>zookeeper</artifactId>
            <version>3.4.6</version>
            <exclusions>
                <exclusion>
                    <artifactId>slf4j-log4j12</artifactId>
                    <groupId>org.slf4j</groupId>
                </exclusion>
            </exclusions>
        </dependency>
        <!--引入zookeeper客户端-->
        <dependency>
            <groupId>com.github.sgroschupf</groupId>
            <artifactId>zkclient</artifactId>
            <version>0.1</version>
        </dependency>
这里是生产者
写测试接口:
package com.example.demo01.service;
/**
 * @description 声明服务接口
 * @date 2018/06/23
 * @author huangzhang
 */
public interface DubboServiceProvider {
    //声明服务方法
    public String sayHello(String name);
}
实现该接口:
package com.example.demo01.service.Impl;

import com.example.demo01.service.DubboServiceProvider;
import org.springframework.stereotype.Component;

/**
 * @author huangzhang
 * @description
 * @date Created in 2018/6/23 18:13
 */
@Component("dubboServiceProvider")
public class DubboServiceProviderImpl implements DubboServiceProvider {
    @Override
    public String sayHello(String name) {
        return "------hello  " + name + "------";
    }
}
在resource目录下面加入一个dubbo.xml配置文件
<?xml version="1.0" encoding="UTF-8"?>
<beans xmlns="http://www.springframework.org/schema/beans"
       xmlns:xsi="http://www.w3.org/2001/XMLSchema-instance"
       xmlns:dubbo="http://code.alibabatech.com/schema/dubbo"
       xsi:schemaLocation="http://www.springframework.org/schema/beans http://www.springframework.org/schema/beans/spring-beans.xsd http://code.alibabatech.com/schema/dubbo http://code.alibabatech.com/schema/dubbo/dubbo.xsd">
    <!--配置服务名称-->
    <dubbo:application name="dubboproviderhello" />
    <!--配置服务注册中心,dubbo不仅仅支持zookeeper-->
    <dubbo:registry address="zookeeper://127.0.0.1:2181" />
    <!--声明对外暴露的服务-->
    <dubbo:service interface="com.example.demo01.service.DubboServiceProvider" ref="dubboServiceProvider" />
    <bean id="demoService" class="com.example.demo01.service.Impl.DubboServiceProviderImpl"></bean>
</beans>
启动类加入注解:
package com.example.demo01;

import org.springframework.boot.SpringApplication;
import org.springframework.boot.autoconfigure.SpringBootApplication;
import org.springframework.context.annotation.ComponentScan;
import org.springframework.context.annotation.ImportResource;

@SpringBootApplication
@ImportResource("classpath:/dubbo.xml")
public class Demo01Application {

    public static void main(String[] args) {
        SpringApplication.run(Demo01Application.class, args);
    }
}
编写controller:
package com.example.demo01.controller;

import org.springframework.stereotype.Controller;
import org.springframework.web.bind.annotation.RequestMapping;
import org.springframework.web.bind.annotation.ResponseBody;

@Controller
public class HelloController {
    @RequestMapping("/index")
    @ResponseBody
    public String index(){
        return "hello world";
    }
}
这里项目默认端口是8080,zookeeper默认端口也是8080,所以到application.properties中配置端口
server.port: 8082
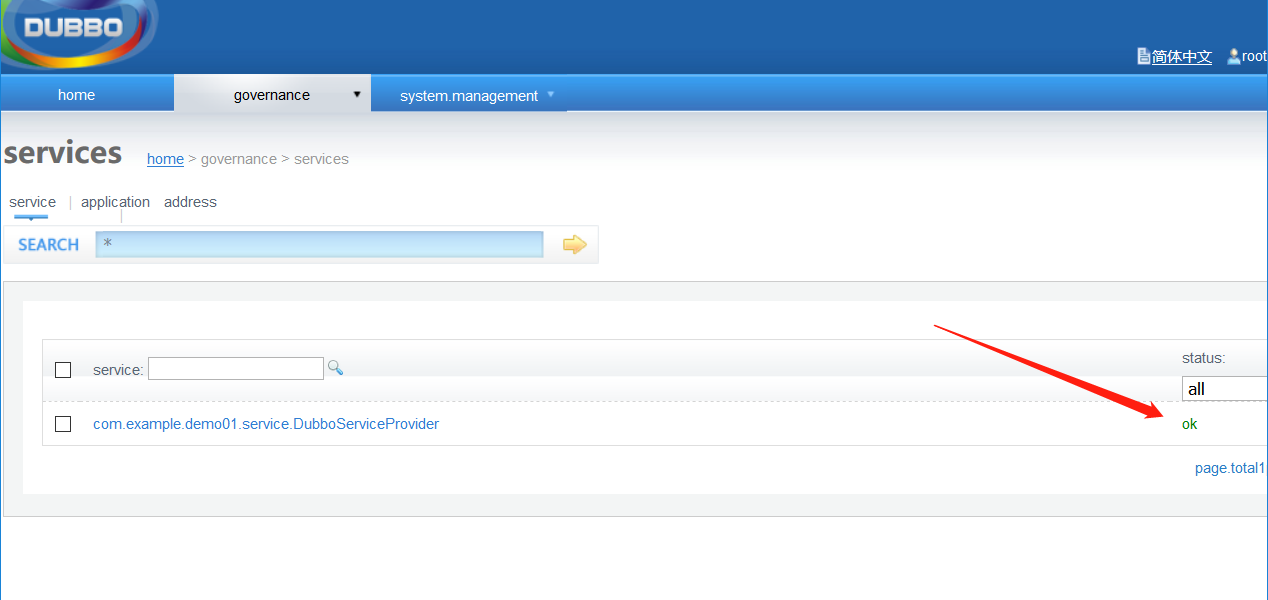
然后启动项目,Dubbo-admin管理平台中的注册列表中显示有一个生产者以注册,但是没有消费者,如下图

生产者完成了,然后就是消费者
搭建一个spring boot项目,pom.xml、启动类、service接口都跟生产这一样,在application.properties中配置端口8081
这里配置dubbo.xml的时候有点不一样,不用注入bean
<?xml version="1.0" encoding="UTF-8"?>
<beans xmlns="http://www.springframework.org/schema/beans"
       xmlns:xsi="http://www.w3.org/2001/XMLSchema-instance"
       xmlns:dubbo="http://code.alibabatech.com/schema/dubbo"
       xsi:schemaLocation="http://www.springframework.org/schema/beans http://www.springframework.org/schema/beans/spring-beans.xsd http://code.alibabatech.com/schema/dubbo http://code.alibabatech.com/schema/dubbo/dubbo.xsd">
    <!--配置服务名称-->
    <dubbo:application name="dubboproviderhello" />
    <!--配置服务注册中心,dubbo不仅仅支持zookeeper-->
    <dubbo:registry address="zookeeper://127.0.0.1:2181" />
    <!--声明服务引用,与服务声明接口类型一致-->
    <dubbo:reference interface="com.example.demo01.service.DubboServiceProvider" id="dubboServiceProvider" />
</beans>
编写controller
import org.springframework.stereotype.Controller;
import org.springframework.web.bind.annotation.RequestMapping;
import org.springframework.web.bind.annotation.ResponseBody;

import javax.annotation.Resource;

/**
 * @author huangzhang
 * @description
 * @date Created in 2018/6/23 20:13
 */
@Controller
public class HelloController {
    @Resource
    private DubboServiceProvider dubboServiceProvider;
    @RequestMapping("/index")
    @ResponseBody
    public String index(){return dubboServiceProvider.sayHello("tom");
    }
}
之后Dubbo-admin管理平台就这样了,有了一个消费者
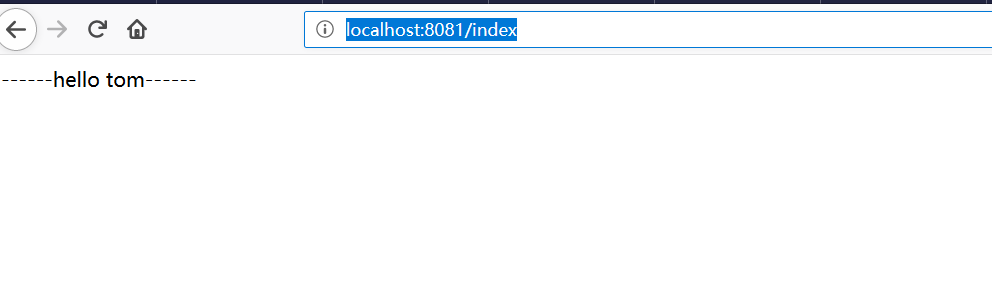
启动消费者,访问消费者提供的index接口,浏览器直接调用就可以了http://localhost:8081/index
这样一个简单的生产者-消费者demo就搭建完成了,这里消费者通过RPC调用了生产者在Dubbo-admin管理平台注册的服务接口。