1、安装前准备
yum -y install gcc gcc-c++
systemctl stop firewalld(临时关闭) systemctl disable firewalld (永久关闭)
setenforce 0(临时关闭) /etc/sysconfig/selinux 将SELINUX=disabled(永久关闭)
2、安装LAMP环境(Linux、 Apache、mysql/mariadb、PHP)
A: 配置网易yum源
/etc/yum.repos.d 新建一个文件夹,将之前yum源放进去
rpm -ivh http://mirrors.163.com/.help/CentOS7-Base-163.repo (下载网易163yum源)
yum clean all (清除yum源记录)
yum makecache 重建yum缓存(这个命令是把服务器的包信息下载到本地电脑缓存起来)
yum search 包名 和yum -C search 包名
B:安装LAMP环境所需软件
yum -y install mariadb mariadb-server httpd php php-mysql
systemctl retsart httpd systemctl enable httpd
systemctl restart mariadb systemctl enable mariadb
mysql_secure_installation (mariadb和mysql不一样,安装完不会自动初始化,所以需要手动初始化)
mysql_secure_installation会执行几个设置:
--为root用户设置密码
--删除匿名账号
--取消root用户远程登录
--删除test库和对test库的访问权限
--刷新授权表使修改生效
3、安装zabbix程序
A:安装3.2版本的zabbix的yum源
rpm -ivh https://mirrors.aliyun.com/zabbix/zabbix/3.2/rhel/7/x86_64/zabbix-release-3.2-1.el7.noarch.rpm
B:修改zabbix的repo文件中的源地址为国内源
vim /etc/yum.repos.d/zabbix.repo
[zabbix]
name=Zabbix Official Repository - $basearch
baseurl=http://mirrors.aliyun.com/zabbix/zabbix/3.2/rhel/7/$basearch/
enabled=1
gpgcheck=1
gpgkey=file:///etc/pki/rpm-gpg/RPM-GPG-KEY-ZABBIX-A14FE591
[zabbix-non-supported]
name=Zabbix Official Repository non-supported - $basearch
baseurl=http://mirrors.aliyun.com/zabbix/non-supported/rhel/7/$basearch/
enabled=1
gpgkey=file:///etc/pki/rpm-gpg/RPM-GPG-KEY-ZABBIX
gpgcheck=1
C:安装zabbix里面程序
yum -y install zabbix-server-mysql zabbix-web-mysql zabbix-agent
D:初始化数据库
mysql -u root -p
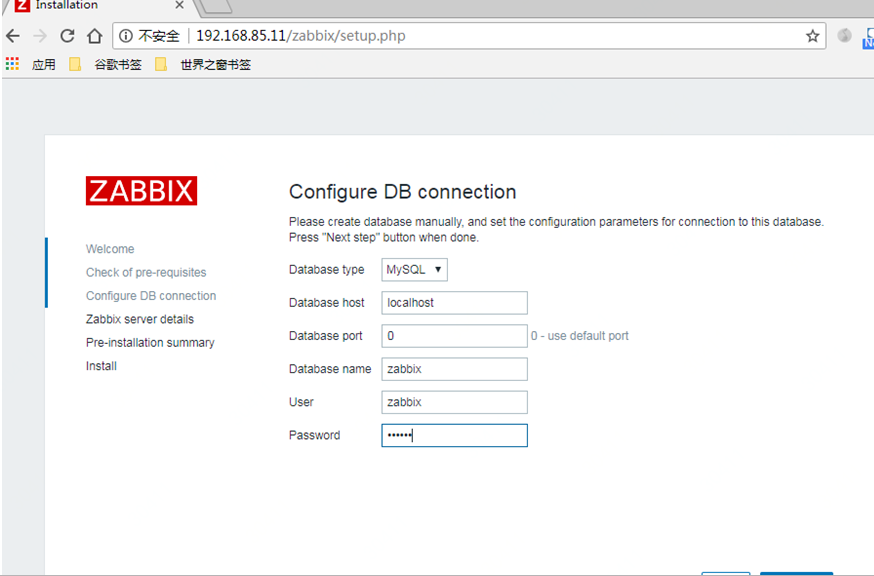
create database zabbix character set utf8 collate utf8_bin;(创建一个zabbix库并设置为utf8的字符编码格式)
grant all privileges on zabbix.* to zabbix@localhost identified by 'zabbix';(给来自localhost的用户zabbix分配可对数据库zabbix所有表进行所有操作的权限并 且设置密码为zabbix)
进入cd /usr/share/doc/zabbix-server-mysql-3.2.11/(下面的create.sql.gz是数据库模板文件)
zcat create.sql.gz | mysql -uroot -p zabbix(zcat是解压并打开.sql.gz文件然后交给zabbix数据库进行还原)
4、zabbix配置
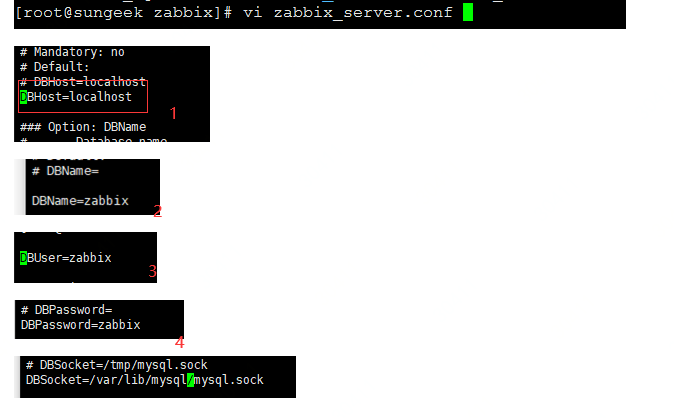
A:vim /etc/zabbix/zabbix_server.conf(1/2/3/4需要根据情况更改)
因为上面受zabbix所有表的权限是localhost所以这里DBHost应该写localhost
开启服务 systemct start zabbix-server systemctl enable zbbix-server
B:配置PHP
vim /etc/httpd/conf.d/zabbix.conf

systemctl restart httpd
C:调整时间同步
yum -y install ntpdate
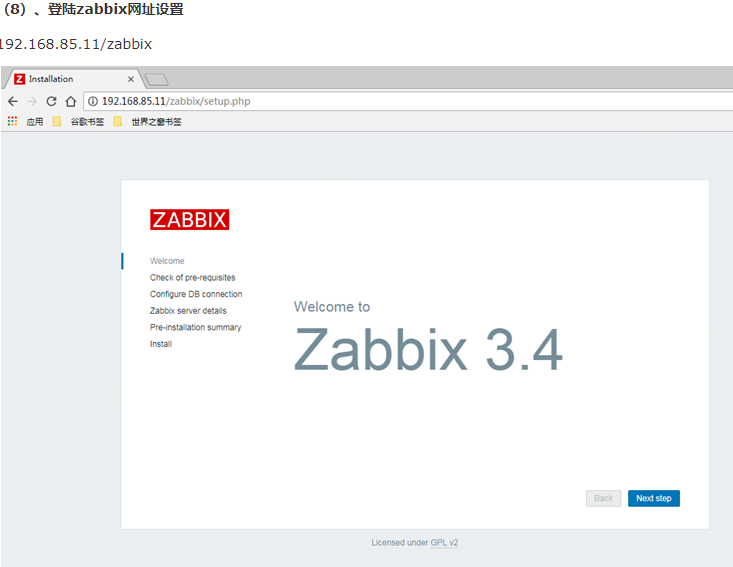
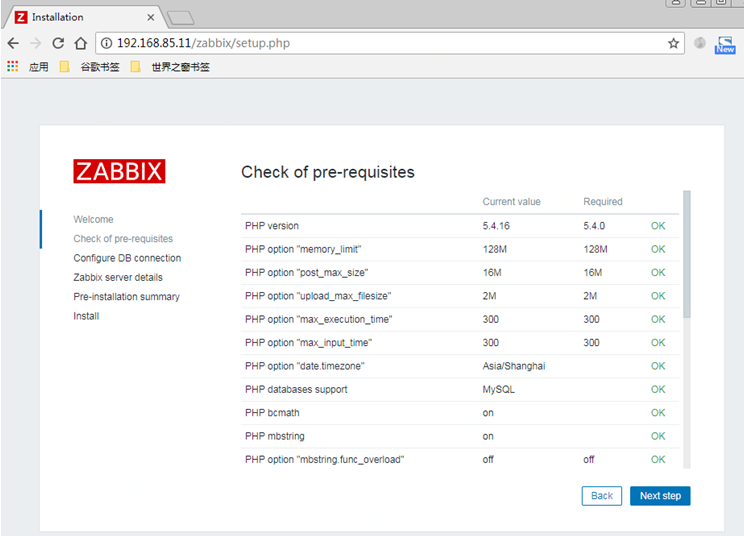
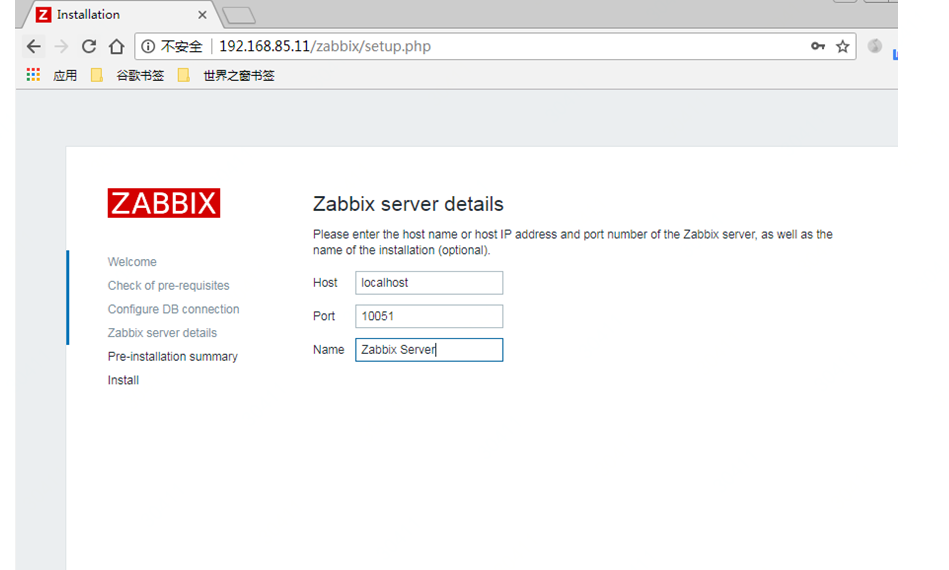
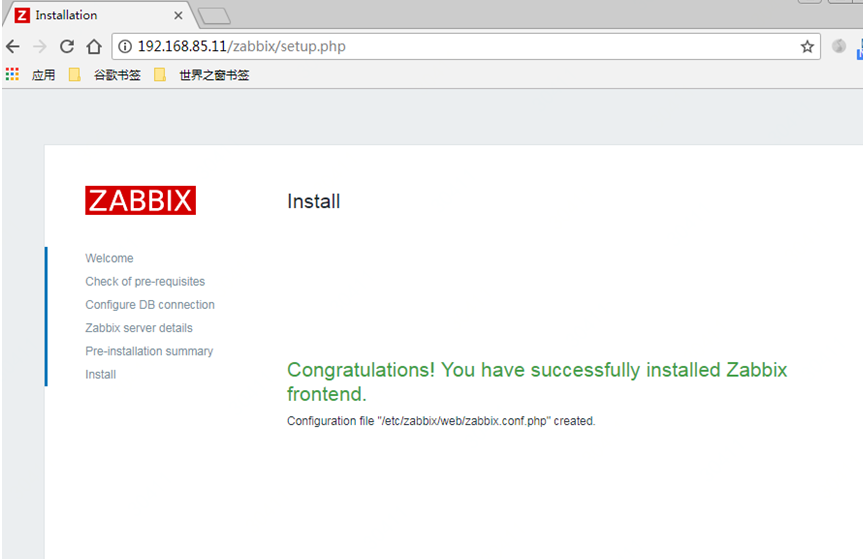
5、界面配置
http://10.10.10.11/zabbix (10.10.10.11是zabbix服务器地址)(默认网页登录账号Admin 密码zabbix)
A:如果觉得后面加上/zabbix麻烦可以用下面方法解决
vim /etc/httpd/conf/httpd.conf 找到/DocumengRoot "/var/www/html"这一行
将双引号内目录改为 /usr/share/zabbix/ (zabbix网页配置目录)
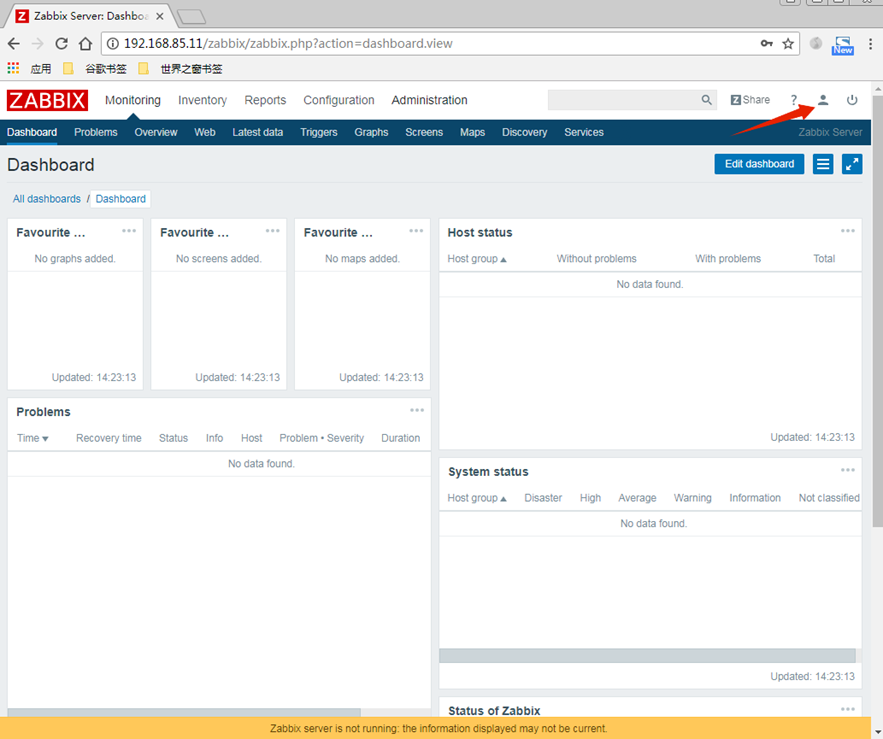
B:

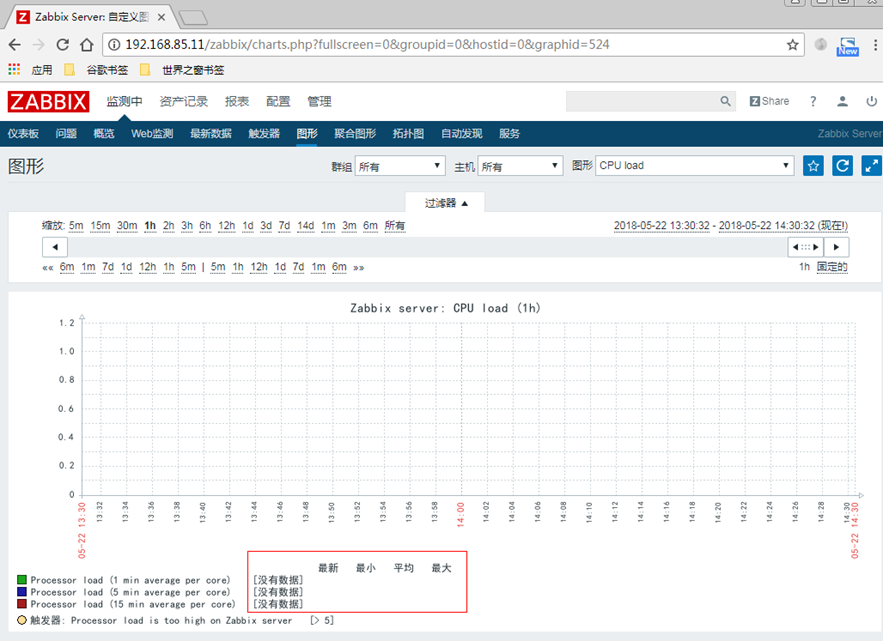
C:中文设置
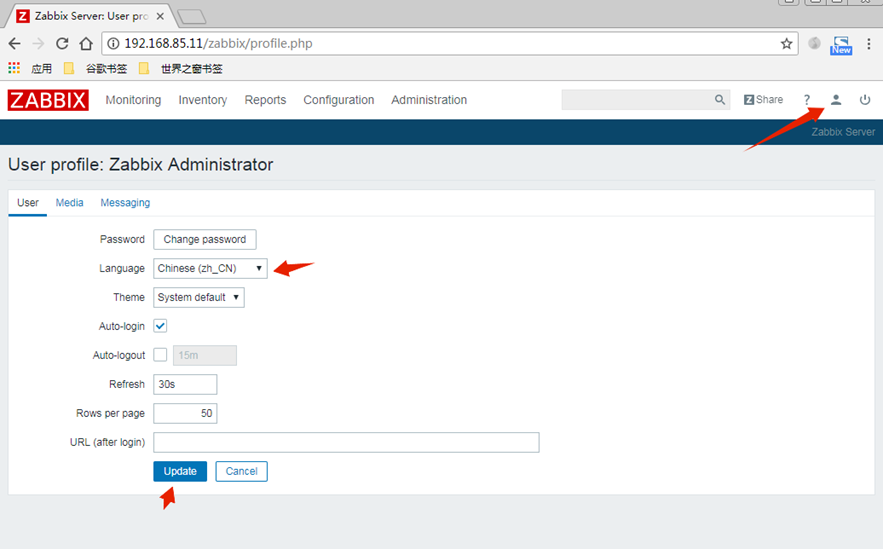
D:解决中文乱码无法显示的问题
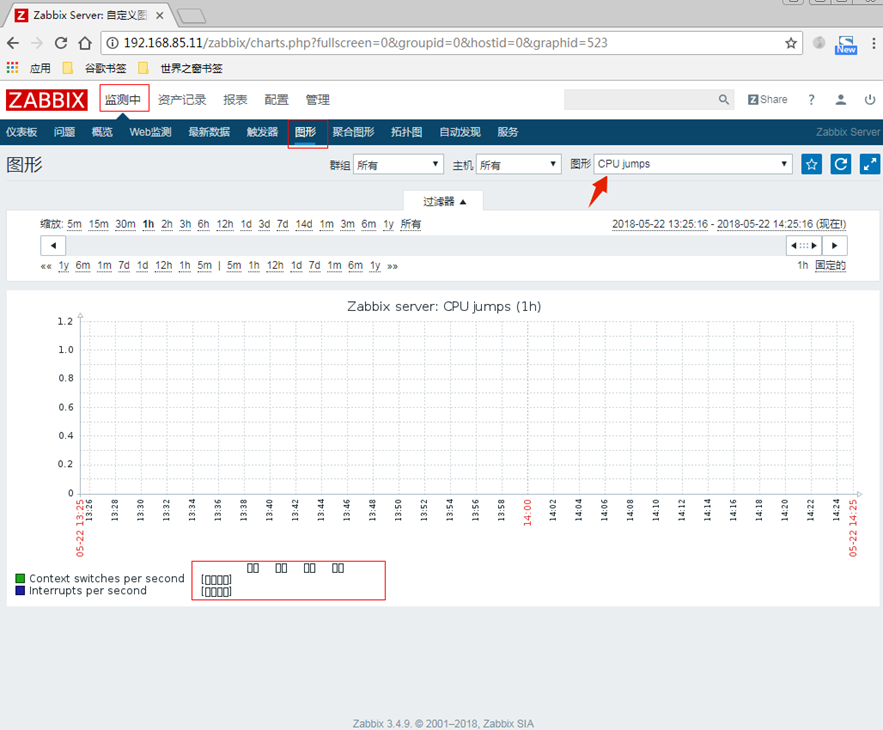
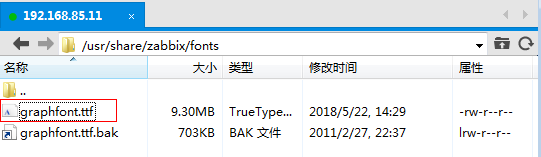
从我们电脑本机win+R运行输入fonts找到黑体然后复制到桌面然后在拷贝到/usr/share/zabbix/fonts
最后改为ttf后缀名
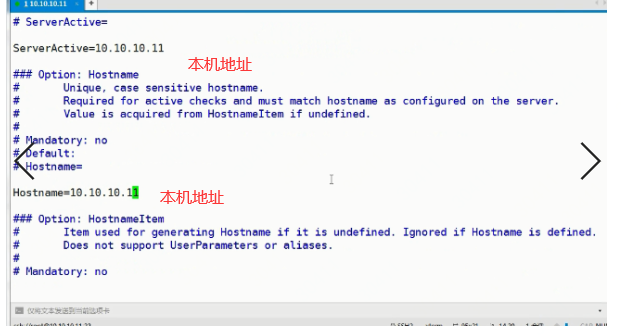
E:监控设置
vim /etc/zabbix/zabbix_agent.d

 systemctl start zabbix-agent
systemctl enable zabbix-agent
查看启动是否成功 netstat -antp |grep 10050