一、场景:类与类之间的消息通信,例如创建一个对象前后做拦截,日志等等相应的事件处理。
二、事件监听步骤
(1)自定义事件继承ApplicationEvent抽象类
(2)自定义事件监听器,一般实现ApplicationListener接口,传入自定义事件类
(3)配置监听器,启动时,需要把监听器加入到spring容器中(见实现方式)
(4)事件发布
三、实现方式
1、手动方式 --> 调用SpringBoot的addListeners方法把事件监听类添加的SpringBoot容器中
注解方式--> 事件监听类添加@Component
3、配置方式--> 在properties文件中配置,context.listener.classes=监听类全路径
4、事件处理类方式-->其实也是一种注解的方式,只是定义了专门的事件处理类+注解@EventListener(MyApplicationEvent.class) --> 该方法还可以指定监听的事件(推荐)
四、代码
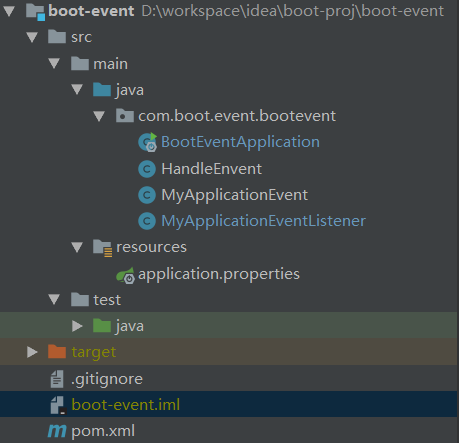
1、建立Spring Initializr项目:boot-event
代码结构
首先实验第一种方式:手动方式
第一步 自定义事件类 MyApplicationEvent extends ApplicationEvent


1 package com.boot.event.bootevent;
2
3 import org.springframework.context.ApplicationEvent;
4
5 public class MyApplicationEvent extends ApplicationEvent {
6     public MyApplicationEvent(Object source) {
7         super(source);
8     }
9 }
第二步 自定义事件监听类
 1 package com.boot.event.bootevent;
 2
 3 import org.springframework.context.ApplicationListener;
 4
 5 public class MyApplicationEventListener implements ApplicationListener<MyApplicationEvent> {
 6     @Override
 7     public void onApplicationEvent(MyApplicationEvent event) {
 8         System.out.println("接收到了事件:" + event.getClass());
 9     }
10 }
第三、四步 添加事件监听到spring容器 并发布自定义事件
 1 package com.boot.event.bootevent;
 2
 3 import org.springframework.boot.SpringApplication;
 4 import org.springframework.boot.autoconfigure.SpringBootApplication;
 5 import org.springframework.context.ConfigurableApplicationContext;
 6
 7 @SpringBootApplication
 8 public class BootEventApplication {
 9
10     public static void main(String[] args) {
11         SpringApplication app = new SpringApplication(BootEventApplication.class);
12
13         //第一种方式:手动添加监听事
14         app.addListeners(new MyApplicationEventListener());
15         ConfigurableApplicationContext contex = app.run(args);
16
17         //发布事件
18         contex.publishEvent(new MyApplicationEvent(new Object()));
19         contex.close();
20     }
21 }
打印结果:
接收到了事件:class com.boot.event.bootevent.MyApplicationEvent
以上手动调用addListeners把事件监听添加到Sring容器中管理。
第二种方式:注解方式 --> 事件监听类添加@Component
在第一种方式的基础上,在MyApplicationEventListener类添加注解@Component,如下
@Component
public class MyApplicationEventListener implements ApplicationListener<MyApplicationEvent> {
    @Override
    public void onApplicationEvent(MyApplicationEvent event) {
        System.out.println("接收到了事件:" + event.getClass());
    }
}
把BootEventApplication.java中main方法的addListeners注释掉
       //第一种方式:手动添加监听事
       //app.addListeners(new MyApplicationEventListener());
运行项目,打印结果
接收到了事件:class com.boot.event.bootevent.MyApplicationEvent
可以看到自定义的事件同样被监听到。
第三种方式:配置方式
在第二种方法的基础上继续第三种方法,首先在application.properties配置文件中添加以下配置信息
context.listener.classes=com.boot.event.bootevent.MyApplicationEventListener
同时把MyApplicationEventListener类的注解@Component注释掉,如下所示
//第二种方式:添加注解
//@Component
public class MyApplicationEventListener implements ApplicationListener<MyApplicationEvent> {
//......
}
打印结果
接收到了事件:class com.boot.event.bootevent.MyApplicationEvent
说明配置的方法也成功让自定义的事件监听起作用
第四中方式:事件处理类方式 -->定义专门的事件处理类HandleEnvent.java(推荐)
 1 package com.boot.event.bootevent;
 2
 3 import org.springframework.context.event.ContextClosedEvent;
 4 import org.springframework.context.event.EventListener;
 5 import org.springframework.stereotype.Component;
 6
 7 @Component
 8 public class HandleEnvent {
 9     @EventListener(MyApplicationEvent.class)
10     public void handleEvent(MyApplicationEvent event) {
11         System.out.println("接收到了事件:" + event.getClass());
12         System.out.println("接收到了事件:" + event.getSource());
13     }
14
15     @EventListener(ContextClosedEvent.class)
16     public void handleEvent(Object event) {
17         System.out.println("接收到了事件:" + event.getClass());
18     }
19 }
把第三中方法中的配置信息注释掉,其他不变
#context.listener.classes=com.boot.event.bootevent.MyApplicationEventListener
打印结果
接收到了事件:class com.boot.event.bootevent.MyApplicationEvent
接收到了事件:java.lang.Object@1c4ee95c
接收到了事件:class org.springframework.context.event.ContextClosedEvent