三、集成:数据源
1、Apache Kafka:一种高吞吐量的分布式发布订阅消息系统
(1)
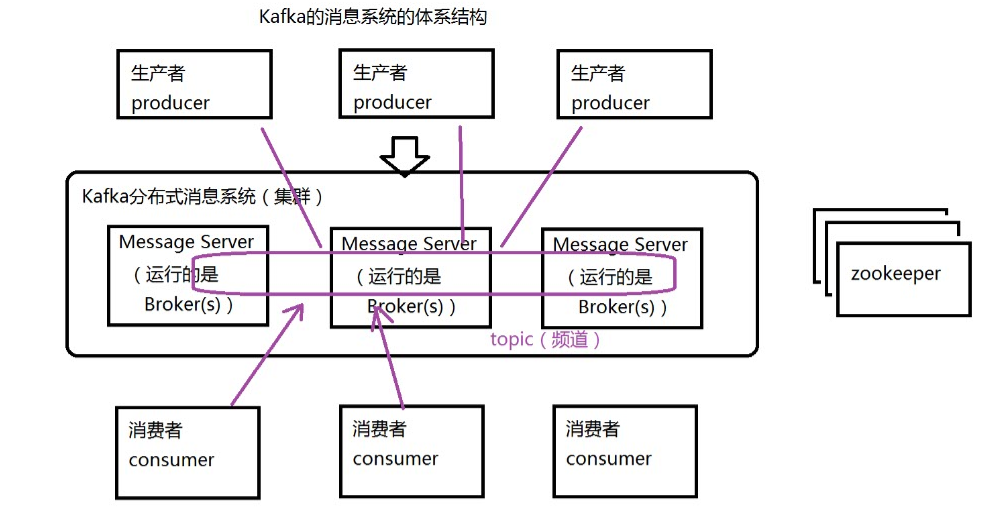
(*)消息的类型
Topic:主题(相当于:广播)
Queue:队列(相当于:点对点)
(*)常见的消息系统
Kafka、Redis -----> 只支持Topic
JMS(Java Messaging Service标准):Topic、Queue -----> Weblogic
(*)角色:生产者:产生消息
消费者:接收消息(处理消息)
(2)Kafka的消息系统的体系结构
(3)搭建Kafka的环境:单机单Broker的模式
//启动kafka
bin/kafka-server-start.sh config/server.properties &
测试Kafka
创建Topic
bin/kafka-topics.sh --create --zookeeper bigdata11:2181 -replication-factor 1 --partitions 3 --topic mydemo1
发送消息
bin/kafka-console-producer.sh --broker-list bigdata11:9092 --topic mydemo1
接收消息: 从zookeeper中获取topic的信息
bin/kafka-console-consumer.sh --zookeeper bigdata11:2181 --topic mydemo1
(4)集成Spark Streaming:两种方式
注意:依赖的jar包很多(还有冲突),强烈建议使用Maven方式
读到数据:都是key value
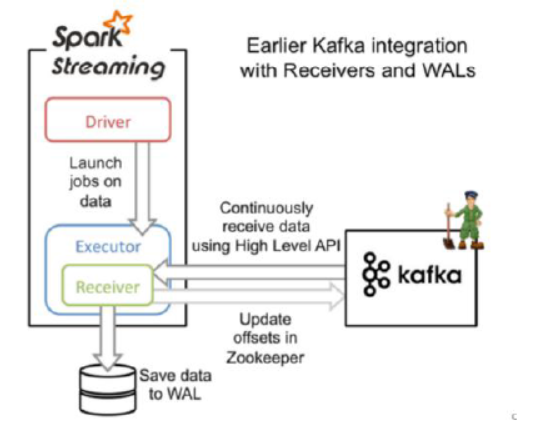
(*)基于接收器方式(receiver)
Receiver的实现使用到Kafka高层次的API.对于所有的Receivers,接收到的数据将会保存在Spark executors中,然后由Spark Streaming 启动Job来处理这些数据
 1 package main.scala.demo
 2
 3 import org.apache.spark.SparkConf
 4 import org.apache.spark.streaming.kafka.KafkaUtils
 5 import org.apache.spark.streaming.{Seconds, StreamingContext}
 6
 7 object KafkaReceiverDemo {
 8
 9   def main(args: Array[String]): Unit = {
10     val conf = new SparkConf().setAppName("KafkaReceiverDemo").setMaster("local[2]")
11     val ssc = new StreamingContext(conf,Seconds(10))
12
13     //指定Topic信息:从mydemo1的topic中,每次接受一条消息
14     val topic = Map("mydemo1" -> 1)
15
16     //创建Kafka输入流(DStream),基于Receiver方式,链接到ZK
17     //参数:SparkStream,ZK地址,groupId,topic
18     val kafkaStream = KafkaUtils.createStream(ssc,"192.168.153.11:2181","mygroup",topic)
19
20     //接受数据,并处理
21     val lines = kafkaStream.map(e=>{
22         //e代表是每次接受到的数据
23         new String(e.toString())
24       }
25     )
26
27     //输出
28     lines.print()
29
30     ssc.start()
31     ssc.awaitTermination()
32   }
33 }
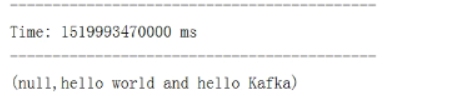
启动Kafka,在上面发送一条消息,结果
(*)直接读取方式:推荐(效率更高)
这种方式定期的从Kafka的topic+partition中查询最新的偏移量,再根据定义的偏移量在每个batch里面处理数据。当需要处理的数据来临时,spark通过调用kafka简单的消费者API读取一定范围内的数据。

package main.scala.demo

import kafka.serializer.StringDecoder
import org.apache.spark.SparkConf
import org.apache.spark.streaming.kafka.KafkaUtils
import org.apache.spark.streaming.{Seconds, StreamingContext}

object KafkaDirectDemo {
  def main(args: Array[String]): Unit = {
    val conf = new SparkConf().setAppName("KafkaReceiverDemo").setMaster("local[2]")
    val ssc = new StreamingContext(conf,Seconds(10))

    //指定Topic信息
    val topic = Set("mydemo1")

    //直接读取Broker,指定就是Broker的地址
    val brokerList = Map[String,String]("metadata.broker.list"->"192.168.153.11:9092")

    //创建一个DStream                          key    value   key的解码器  value的解码器
    val lines = KafkaUtils.createDirectStream[String,String,StringDecoder,StringDecoder](ssc,brokerList,topic)

    //读取消息
    val message = lines.map(e=>{
      new String(e.toString())
    }
      )

      message.print()

    ssc.start()
    ssc.awaitTermination()


  }
}
2、集成Apache Flume:两种方式
注意:依赖jar包Flume lib下面的Jar包,以及
(1)基于Flume Push模式: 推模式。Flume被用于在Flume agents 之间推送数据。在这种方式下,Spark Streaming可以建立一个receiver,起到一个avro receiver的作用。Flume可以直接将数据推送到该receiver。
a4.conf配置。
#bin/flume-ng agent -n a4 -f myagent/a4.conf -c conf -Dflume.root.logger=INFO,console
#定义agent名, source、channel、sink的名称
a4.sources = r1
a4.channels = c1
a4.sinks = k1

#具体定义source
a4.sources.r1.type = spooldir
a4.sources.r1.spoolDir = /root/training/logs

#具体定义channel
a4.channels.c1.type = memory
a4.channels.c1.capacity = 10000
a4.channels.c1.transactionCapacity = 100

#具体定义sink
a4.sinks = k1
a4.sinks.k1.type = avro
a4.sinks.k1.channel = c1
a4.sinks.k1.hostname = 192.168.153.1
a4.sinks.k1.port = 1234

#组装source、channel、sink
a4.sources.r1.channels = c1
a4.sinks.k1.channel = c1
package flume

import org.apache.spark.SparkConf
import org.apache.spark.streaming.flume.FlumeUtils
import org.apache.spark.streaming.{Seconds, StreamingContext}

object MyFlumeStream {
  def main(args: Array[String]): Unit = {
    val conf = new SparkConf().setAppName("SparkFlumeNGWordCount").setMaster("local[2]")
    val ssc = new StreamingContext(conf, Seconds(5))

    //创建FlumeEvent的DStream
    val flumeEvent = FlumeUtils.createStream(ssc,"192.168.153.1",1234)

    //将FlumeEvent中的事件转成字符串
    val lineDStream = flumeEvent.map( e => {
      new String(e.event.getBody.array)
    })

    //输出结果
    lineDStream.print()

    ssc.start()
    ssc.awaitTermination();
  }
}
测试:
1.启动Spark streaming程序MyFlumeStream
2.启动Flume:bin/flume-ng agent -n a4 -f myagent/a4.conf -c conf -Dflume.root.logger=INFO,console
3.拷贝日志文件到/root/training/logs目录
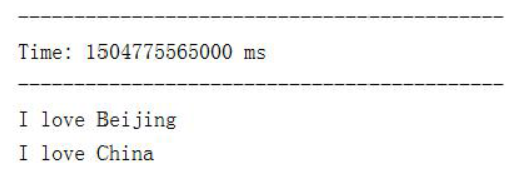
4.观察输出,采集到数据:
(2)自定义sink方式(Pull模式): 拉模式。Flume将数据推送到sink中,并且保持数据buffered状态。Spark Streaming使用一个可靠的Flume接收器从sink拉取数据。这种模式更加健壮和可靠,需要为Flume配置一个正常的sink
(*)将Spark的jar包拷贝到Flume的lib目录下
(*)下面的这个jar包也需要拷贝到Flume的lib目录下
(*)同时加入IDEA工程的classpath
#bin/flume-ng agent -n a1 -f myagent/a1.conf -c conf -Dflume.root.logger=INFO,console
a1.channels = c1
a1.sinks = k1
a1.sources = r1

a1.sources.r1.type = spooldir
a1.sources.r1.spoolDir = /root/training/logs

a1.channels.c1.type = memory
a1.channels.c1.capacity = 100000
a1.channels.c1.transactionCapacity = 100000

a1.sinks.k1.type = org.apache.spark.streaming.flume.sink.SparkSink
a1.sinks.k1.channel = c1
a1.sinks.k1.hostname = 192.168.153.11
a1.sinks.k1.port = 1234

#组装source、channel、sink
a1.sources.r1.channels = c1
a1.sinks.k1.channel = c1
package flume

import org.apache.spark.SparkConf
import org.apache.spark.storage.StorageLevel
import org.apache.spark.streaming.flume.FlumeUtils
import org.apache.spark.streaming.{Seconds, StreamingContext}

object FlumeLogPull {
  def main(args: Array[String]) {
    val conf = new SparkConf().setAppName("SparkFlumeNGWordCount").setMaster("local[2]")
    val ssc = new StreamingContext(conf, Seconds(10))

    //创建FlumeEvent的DStream
    val flumeEvent = FlumeUtils.createPollingStream(ssc,"192.168.153.11",1234,StorageLevel.MEMORY_ONLY_SER_2)

    //将FlumeEvent中的事件转成字符串
    val lineDStream = flumeEvent.map( e => {
      new String(e.event.getBody.array)
    })

    //输出结果
    lineDStream.print()

    ssc.start()
    ssc.awaitTermination();
  }
}
开启flume:
bin/flume-ng agent -n a1 -f myagent/a1.conf -c conf -Dflume.root.logger=INFO,console
测试步骤和推模式类似。