在Spring+Maven环境中使用Junit Test
前言
以前我是很讨厌写测试代码的,总觉得测试用例是测试人员写的,现在想想自己真是Too yuong too simple,接触开发多了之后发现在开发中需要不断通过测试来发现某些路子的可行性,如果不写测试代码直接一股脑写下去,很可能代码写完了一运行发现到处都是坑。下面总结一下在SpringMVC和SpringBoot环境中的单元测试(Junit Test)的搭建和使用。
SpringMVC中的单元测试
加入依赖包
首先需要在pom.xml中加入junit依赖,其中scope限定了junit包的使用范围是test环境:
<dependency>
	<groupId>junit</groupId>
	<artifactId>junit</artifactId>
	<version>4.11</version>
	<!-- 表示开发的时候引入,发布的时候不会加载此包 -->
	<scope>test</scope>
</dependency>

<dependency>
		<groupId>org.springframework</groupId>
		<artifactId>spring-test</artifactId>
		<version>4.0.2.RELEASE</version>
		<scope>test</scope>
</dependency>
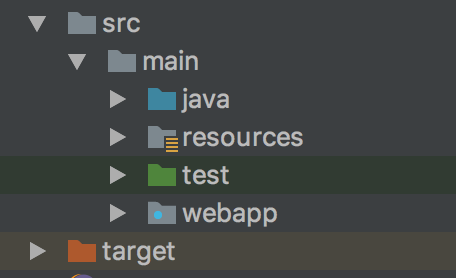
下图是我在IntelliJ IDEA中的项目包的架构,我们需要在test包下进行单元测试编写。
编写测试基类
由于我们在单元测试中可能需要对SpringMVC中的service、dao层进行调用,但是我们又知道在Spring中对象的创建时交给容器的,不需要我们手动创建、实例化对象,那么就需要引入配置文件进行上下文的初始化。所以为了避免每次写一个测试类都要进行相关的配置操作,我们直接写一个父类,然后每个测试类继承该类就可以达到简化的目的了。
BaseTest.java如下,其中@Before和@After注解都是junit提供的,其含义写在代码的注释中了:
@RunWith(SpringJUnit4ClassRunner.class)
@ContextConfiguration({"classpath:spring-mvc.xml","classpath:spring-mybatis.xml"})
public class BaseTest {
    @Before
    public void init() {
        //在运行测试之前的业务代码
    }
    @After
    public void after() {
        //在测试完成之后的业务代码
    }
}
编写具体测试类
写完测试基类后,就可以开始写真正的单元测试了,下面是一个简单的示例:
public class HelloTest extends BaseTest {

    @Test
    public void getTicketInfo() {
    	System.out.println("hello");
}

我们可以看到在IDEA中可以直接对单元测试的某个方法进行运行,不用编译项目和启动服务器就可以达到对业务代码的功能测试,可见其便利程度。
SpringBoot中的单元测试
SpringBoot中使用Junit和SpringMVC基本类似,只需要改动一些配置即可。
加入依赖
<dependency>
    <groupId>org.springframework.boot</groupId>
    <artifactId>spring-boot-test</artifactId>
    <version>1.5.2.RELEASE</version>
    <scope>test</scope>
</dependency>
<dependency>
    <groupId>org.springframework</groupId>
    <artifactId>spring-test</artifactId>
    <version>4.3.7.RELEASE</version>
    <scope>test</scope>
</dependency>
<dependency>
    <groupId>junit</groupId>
    <artifactId>junit</artifactId>
    <version>4.12</version>
    <scope>test</scope>
</dependency>
编写测试基类
@RunWith(SpringRunner.class)
@SpringBootTest
public class BaseTest {
    @Before
    public void init() {

    }

    @After
    public void after() {

    }
}