背景:
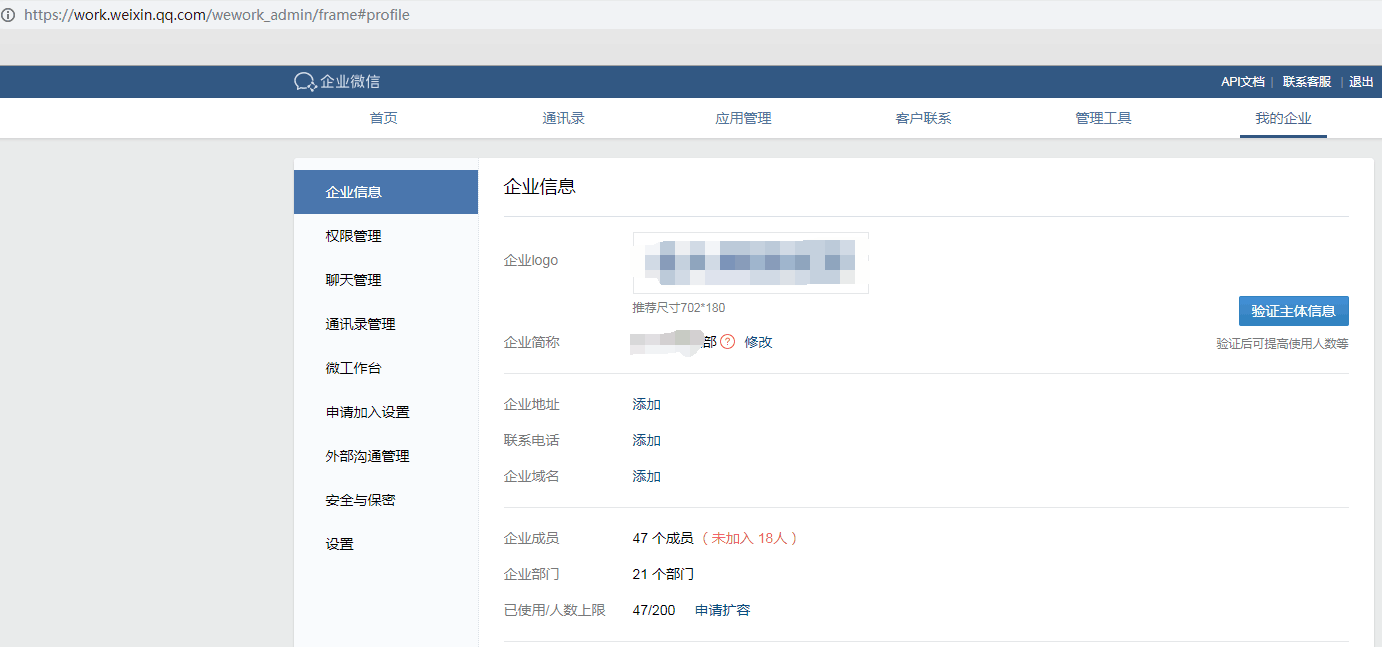
公司管理系统需要获取企业微信页面的配置参数如企业名、logo、人数等信息并操作,来隐藏相关敏感信息并自定义简化企业号配置流程
第一版已经实现了扫码登录获取cookie,使用该cookie就能获取合法身份随意请求页面和接口,所以第一版的模拟操作主要是抓接口,有接口就用没有就没的用了
第二版这一版的需要一些配置参数的来源页面是js渲染上去的,没有接口,普通的get页面又不能拿到渲染后的页面文档,所以只能使用无头浏览器来爬取并操作页面
实现过程:
laravel版
项目是使用laravel开发,首先想到的是集成到框架里,而laravel确实提供了相关组件:Laravel Dusk
虽然这个插件是用来做浏览器测试的,但这里也可以用来爬取页面

很帅,,但是操作的时候安装不上去,

PHP版
好吧,那就自己实现吧,直接上代码
自己封装了一个类,new的时候直接把之前登录cookie传过来,这样就能直接跳页面了
class QyWebChrome
{
  #下载对应google-chrome版本的驱动https://sites.google.com/a/chromium.org/chromedriver/downloads
    private $envchromedriverpath = 'webdriver.chrome.driver=/usr/bin/chromedriver';

    private $driver;

    private $error;

    public function __construct($cookie_str)
    {
        putenv($this->envchromedriverpath);
        $capabilities = DesiredCapabilities::chrome();
//        $cookie_str ='sdfn=sssf1;; _gxxxx=1';

        //'-headless' 无头模式:浏览器在后台运行,在安装了桌面环境的浏览器服务器中可去掉预览整个过程
        $capabilities->setCapability(
            'chromeOptions',
            ['args' => ['--disable-gpu','-headless','--user-agent=Mozilla/5.0 (Windows NT 10.0; Win64; x64) AppleWebKit/537.36 (KHTML, like Gecko) Chrome/71.0.3578.80 Safari/537.36']]
        );

        $this->driver = ChromeDriver::start($capabilities,null);

        sleep(3);
        //先去index设置登录cookie,之后想跳哪个页面就跳哪个页面
        $this->driver->get('https://work.weixin.qq.com/');
        sleep(2);
        // adding cookie
        $this->driver->manage()->deleteAllCookies();
        sleep(1);
        $cookie_arr = explode(';',$cookie_str);
        foreach ($cookie_arr as $cookpair){
            $cookie_item = explode('=',$cookpair);
            $cookie=[
                'name'=>trim($cookie_item[0]),
                'value'=>trim($cookie_item[1]),
                'domain'=>'work.weixin.qq.com',
                'httpOnly'=>false,
                'path'=>'/',
                'secure'=>false,
            ];
            $this->driver->manage()->addCookie($cookie);
        }

        sleep(1);

    }

    public function __destruct()
    {
        $this->driver->close();
    }

    //跳转到我的企业页面获取企业信息
    public function getProfilePage(){
        $data =[];
        $this->driver->get('https://work.weixin.qq.com/wework_admin/frame#profile/enterprise');
        sleep(3);
        //企业logourl

        //企业简称
        $companynamespan = $this->driver->findElement(
            WebDriverBy::className('profile_enterprise_item_shareName')
        );
        $data['companyname'] = $companynamespan->getText();

        return $data;
    }

    //获取渲染后的html
    //$driver->getPageSource();
    /*
     webdriver 主要提供了 2 个 API 来给我们操作 DOM 元素

RemoteWebDriver::findElement(WebDriverBy) 获取单个元素
RemoteWebDriver::findElements(WebDriverBy) 获取元素列表
WebDriverBy 是查询方式对象,提供了下面几个常用的方式

WebDriverBy::id($id) 根据 ID 查找元素
WebDriverBy::className($className) 根据 class 查找元素
WebDriverBy::cssSelector($selctor) 根据通用的 css 选择器查询
WebDriverBy::name($name) 根据元素的 name 属性查询
WebDriverBy::linkText($text) 根据可见元素的文本锚点查询
WebDriverBy::tagName($tagName) 根据元素标签名称查询
WebDriverBy::xpath($xpath) 根据 xpath 表达式查询,这个很强大
     */

    //截图
    public function takeScrenshot($savepath="test.png"){
        $this->driver->takeScreenshot($savepath);
    }

    /**
     * @return mixed
     */
    public function getError()
    {
        return $this->error;
    }

    /**
     * @param mixed $error
     */
    public function setError($error): void
    {
        $this->error = $error;
    }
}
部署注意:
先安装google-chrome
yum install google-chrome
安装完成后获取chrome版

下载对应的chromedriver https://sites.google.com/a/chromium.org/chromedriver/downloads 嗯这个在谷歌
页面是这个样子的,主要是googlechrome和chromedirver的对应关系

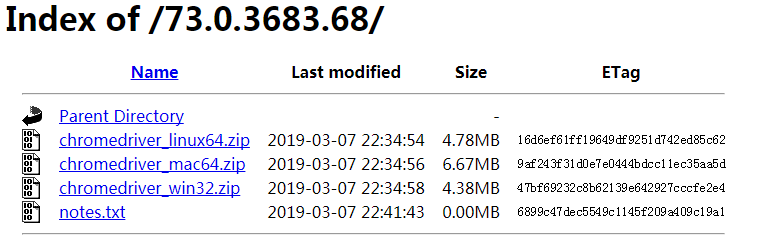
连不上Google 在这下载https://chromedriver.storage.googleapis.com/index.html
这边网盘各个版本都存了一份 https://pan.baidu.com/s/1xykIgqKUAUm_l0iVHbh6kw 提取码: hbvz
运行截图:
以为这样就完成了,没想到在线上出了问题无法部署!!

wf??原来运维为了保证服务器能兼容低版本的软件,C的依赖版本安装的很低,这么底层的依赖还是不要动了,
解决方案有两个:
1找台服务器安装高版本的GLIBC_2.14,GLIBC_2.16;
2把爬虫这块封装到docker里面,对外提供抓取服务,就是到时候直接请求下接口,接口放回抓取的企业微信页面
因为公司有k8s集群,所以直接build一个docker更简单一点,所以选取方案2
Python docker 版
使用docker那就尽量简单点,直接使用python脚本,爬虫还是使用python更猛一些,各种依赖直接pip,之前2017年使用无头浏览器做监控爬虫的时候驱动还是使用phantomjs呢,现在chrome的headless直接切换过来,api都没变,
先封装docker:先去dockers里把环境搭起来,把相关依赖搞清楚
docker run -it -v /test:/test python:3.7.4 /bin/bash
使用/test作为共享目录,方便宿主机和docker传输文件
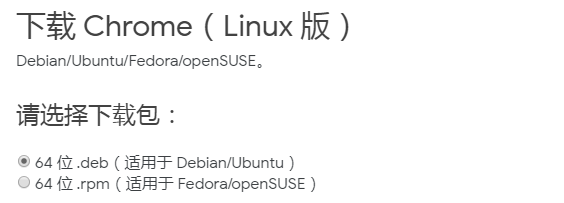
先安装google-chrome,python:3.7.4直接下载deb安装包 https://dl.google.com/linux/direct/google-chrome-stable_current_amd64.deb
这有网盘共享 链接: https://pan.baidu.com/s/15rlArB7xCGOHXSko6UUkJA 提取码: p6d5
docker内安装google-chrome
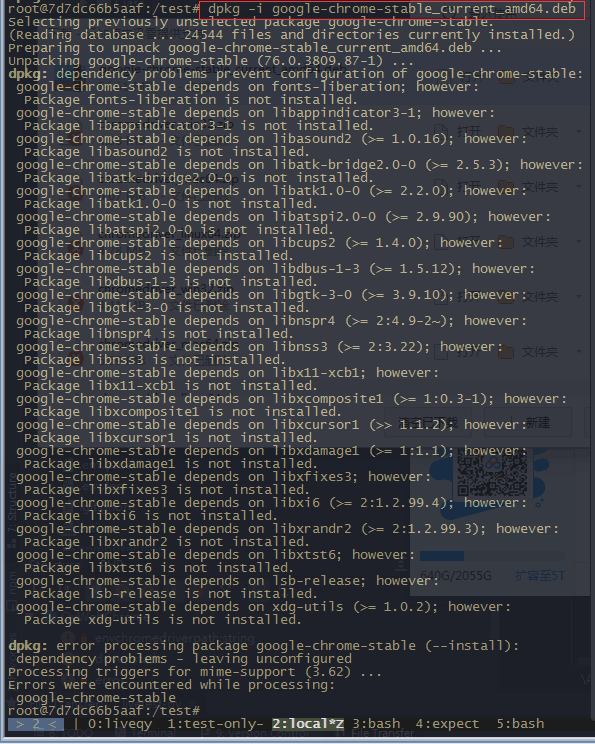
然后就是解决依赖,
现在直接上Dockerfile
# Use an official Python runtime as a parent image
FROM python:3.7.4

# Set the working directory to /app
WORKDIR /app

# Copy the current directory contents into the container at /app
COPY . /app

#install depend
RUN apt update && apt -y --fix-broken install libnss3-dev fonts-liberation libappindicator3-1 libasound2 libatk-bridge2.0-0 libatk1.0-0 libatspi2.0-0 libcups2 libdbus-1-3 libgtk-3-0 libx11-xcb1 libxcomposite1 libxcursor1 libxdamage1 libxfixes3 libxi6 libxrandr2 libxtst6 lsb-release xdg-utils libdbusmenu-glib4 libdbusmenu-gtk3-4 libindicator3-7 libasound2-data libatk1.0-data libavahi-client3 libavahi-common3 adwaita-icon-theme libcolord2 libepoxy0 libjson-glib-1.0-0 librest-0.7-0 libsoup2.4-1 libwayland-client0 libwayland-cursor0 libwayland-egl1 libxinerama1 libxkbcommon0 libgtk-3-common libgtk-3-bin distro-info-data gtk-update-icon-cache libavahi-common-data gtk-update-icon-cache dconf-gsettings-backend libjson-glib-1.0-common libsoup-gnome2.4-1 glib-networking xkb-data dconf-service libdconf1 libproxy1v5 glib-networking-services glib-networking-common gsettings-desktop-schemas default-dbus-session-bus dbus libpam-systemd systemd systemd-sysv libapparmor1 libapparmor1 libcryptsetup12 libidn11 libip4tc0 libkmod2 libargon2-1 libdevmapper1.02.1  libjson-c3 dmsetup
&& apt-get install -y fonts-wqy-zenhei
&& dpkg -i google-chrome-stable_current_amd64.deb

# Install any needed packages specified in requirements.txt
RUN pip install --trusted-host pypi.python.org -r requirements.txt

d +x run.sh

# Make port 80 available to the world outside this container
EXPOSE 80

# Define environment variable
ENV NAME World

#v1 dev Run app.py when the container launches
#CMD ["python", "app.py"]
#v2 production
#CMD ["gunicorn","--config","gunicorn_config.py","app:app"]
#v3
#ENTRYPOINT ["gunicorn","--config","gunicorn_config.py","app:app"]
#v4
ENTRYPOINT ["./run.sh"]
项目目录

app.py 处理请求
from flask import Flask
import os
import socket
from selenium import webdriver
from selenium.webdriver.common.keys import Keys
from selenium.webdriver.chrome.options import Options
from selenium.webdriver.support.wait import WebDriverWait
from selenium.webdriver.support import expected_conditions as EC
from selenium.webdriver.common.by import By
import time
from time import sleep


app = Flask(__name__)

@app.route("/hello/<cookie_str>/<aim_url>/<end_class>")
def hello(cookie_str,aim_url,end_class):
    print(cookie_str)
    print(aim_url)
    print(end_class)
    chrome_options = Options()
    chrome_options.add_argument("--headless")
    chrome_options.add_argument("--no-sandbox")
    chrome_options.add_argument("--disable-gpu")
    chrome_options.add_argument('window-size=1200x600')
    user_ag='Mozilla/5.0 (Windows NT 10.0; Win64; x64) AppleWebKit/537.36 (KHTML, like Gecko) Chrome/71.0.3578.80 Safari/537.36'
    chrome_options.add_argument('user-agent=%s'%user_ag)

    profile_url = "https://work.weixin.qq.com/wework_admin/frame#profile"
    base_url = "https://work.weixin.qq.com"
    #chromedriver
    driver = webdriver.Chrome(executable_path=(r'/test/chromedriver'), chrome_options=chrome_options)

    #加载首页设置登录cookie
    driver.get(base_url + "/")
    driver.implicitly_wait(10)
    driver.save_screenshot('screen1.png')
    for coo in cookie_str.split(';'):
        cooki=coo.split('=')
        print(cooki[0].strip())
        print(cooki[1].strip())
        driver.add_cookie({'name':cooki[0].strip(),'value':cooki[1].strip(),'domain':'work.weixin.qq.com','httpOnly':False,'path':'/','secure':False})

    driver.implicitly_wait(10)

    #跳转目标页面
    driver.get(profile_url)
    WebDriverWait(driver,20,0.5).until(EC.presence_of_element_located((By.CLASS_NAME, 'ww_commonCntHead_title_inner_text')))
    #sleep(5)
    driver.save_screenshot('screen.png')

    driver.close()
    return "hhhhhh $s" % cookie_str

if __name__ == "__main__":
    app.run(host='0.0.0.0', port=80)
run.sh
#!/bin/bash
set -e
pwd

touch access.log error.log

exec gunicorn app:app
        --bind 0.0.0.0:80
        --workers 4
        --timeout 120
        --log-level debug
        --access-logfile=access.log
        --error-logfile=error.log

exec "$@"
requirements.txt
Flask
selenium
gunicorn
flask的内置服务器开发的时候能用,线上部署的时候使用官方推荐的gunicorn部署,这里直接用了gunicorn运行
gunicorn的启动配置后来写进run.sh了,所以gunicorn_config.py就没用了
docker 镜像构建
docker build -t mypythonflask:v6 .
docker启动命令
docker run -d -v /data:/data -p 8888:80 -v /dev/shm:/dev/shm mypythonflask:v6
这里的/dev/shm是为了解决当加载的页面过大或者加载大图docker内存不够浏览器爆掉 解决方案来着 https://stackoverflow.com/questions/39936240/selenium-error-in-python-webdriverexception-unknown-error-session-deleted-bec/57302028#57302028
Selenium error in python: WebDriverException: unknown error: session deleted because of page crash from tab crashed
请求测试
[root@localhost testdockerchrome]# curl "http://localhost:8888/hello/sss=sss;%20_ssst=1/bb/cc"
<!DOCTYPE HTML PUBLIC "-//W3C//DTD HTML 3.2 Final//EN">
<title>500 Internal Server Error</title>
<h1>Internal Server Error</h1>
<p>The server encountered an internal error and was unable to complete your request. Either the server is overloaded or there is an error in the application.</p>
#处理时间太长导致超时,检查下截图

这曲折的实现历程。。。
至此,爬取服务搭建完毕,后面只要是处理一下业务相关的东西,比如拓展app.py的功能,使其支持更多的操作
总结下来就是使用docker部署了一个服务,该服务接收登录cookie,url,配置等参数,使用chrome的headless模式抓取页面操作页面,返回结果,拓展浏览器操作可以写在app.py中
^-^原创文章,转载请声明出处