摘要:
在Windows客户端程序(WPF和Windows Forms)中使用Ninject和在控制台应用程序中使用Ninject没什么不同。在这些应用程序里我们不需要某些配置用来安装Ninject,因为在Windows客户端应用程序里,开发者可以控制UI组件的实例化(Forms或Windows),可以很容易地委托这种控制到Ninject。然而在Web应用程序里,就不同了,因为框架负责了实例化UI元素。因此,我们需要知道怎样告诉框架委托这种控制责任给Ninject。幸运的是,让ASP.NET MVC框架做这件事是很容易的,但是这又和Web Forms应用程序不同。
多亏了Ninject MVC扩展,我们甚至不需要麻烦地安装MVC框架来支持DI。反而,Ninject的MVC扩展将帮我们做这个。在这篇文章中,我们在ASP.NET MVC 3应用程序中使用Ninject。Ninject MVC扩展也支持其他版本的MVC框架。
还是继续使用上一篇文章的Solution,Demo.Northwind。
使用Ninject创建ASP.NET MVC应用程序
1. 创建MVC工程Demo.Northwind.MVC。
2. 使用NutGet Manager添加引用。
添加如下Ninject引用。
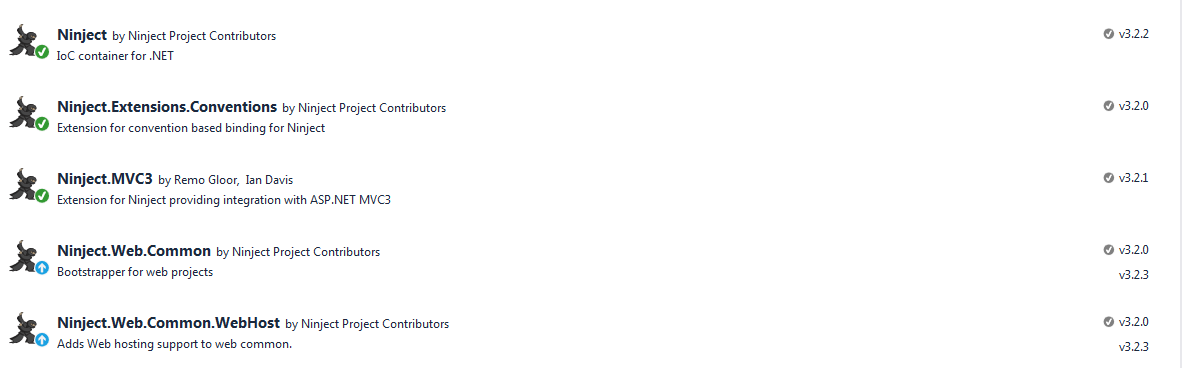
添加bootstrap引用(前端框架)和EntityFramework引用。

添加指向Demo.Northwind.Core的引用。
3. 修改根路径下的Web.config文件。
添加connectionStrings节
  <connectionStrings>
    <add name="NorthwindContext" providerName="System.Data.SqlClient" connectionString="Data Source=localhost;Initial Catalog=NORTHWND;Integrated Security=True" />
  </connectionStrings>
4. 修改Ninject配置。
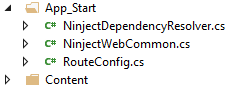
展开App_Start文件夹,发现自动添加了NinjectDependencyResolver.cs代码文件和NinjectWebCommon.cs代码文件。
打开NinjectWebCommon.cs文件,CreateKernel方法:
 1         private static IKernel CreateKernel()
 2         {
 3             var kernel = new StandardKernel();
 4             try
 5             {
 6                 kernel.Bind<Func<IKernel>>().ToMethod(ctx => () => new Bootstrapper().Kernel);
 7                 kernel.Bind<IHttpModule>().To<HttpApplicationInitializationHttpModule>();
 8
 9                 RegisterServices(kernel);
10                 return kernel;
11             }
12             catch
13             {
14                 kernel.Dispose();
15                 throw;
16             }
17         }
CreateKernel方法就是是Ninject根控制的起始方法,他调用RegisterServices方法完成Ninject注入。
下面来看RegisterServices方法。RegisterServices方法调用System.Web.Mvc.DependencyResolver.SetResolver方法,传入一NinjectDependencyResolver对象,将DI控制任务委托给了NinjectDependencyResolver对象。
1         private static void RegisterServices(IKernel kernel)
2         {
3             System.Web.Mvc.DependencyResolver.SetResolver(new NinjectDependencyResolver(kernel));
4         }
再来看NinjectDependencyResolver.cs。
1         private readonly IKernel kernel;
2
3         public NinjectDependencyResolver(IKernel kernelParam)
4         {
5             kernel = kernelParam;
6             AddBindings();
7         }
NinjectDependencyResolver类的AddBindings方法最终完成依赖注入。
修改AddBindings方法:
1         private void AddBindings()
2         {
3             kernel.Bind(x => x.FromAssembliesMatching("Demo.Northwind.*")
4                   .SelectAllClasses().EndingWith("Repository")
5                   .BindAllInterfaces());
6         }
5. 修改HomeController,添加Index、Edit这些Action。
 1 using Demo.Northwind.Core.Interface;
 2 using Demo.Northwind.Core.Model;
 3 using System;
 4 using System.Collections.Generic;
 5 using System.Linq;
 6 using System.Web;
 7 using System.Web.Mvc;
 8
 9 namespace Demo.Northwind.MVC.Controllers
10 {
11     public class HomeController : Controller
12     {
13         private readonly ICustomerRepository repository;
14
15         public HomeController(ICustomerRepository repository)
16         {
17             this.repository = repository;
18         }
19
20         public ActionResult Index()
21         {
22             var customers = repository.GetAll();
23             return View(customers);
24         }
25
26         public ActionResult Create()
27         {
28             return View("Edit", "");
29         }
30
31         public ActionResult Edit(string customerId)
32         {
33             var customer = repository.Get(customerId);
34             return View(customer);
35         }
36
37         [HttpPost]
38         public ActionResult Edit(Customer customer)
39         {
40             if (ModelState.IsValid)
41             {
42                 repository.SaveCustomer(customer);
43                 return RedirectToAction("Index");
44             }
45             return View();
46         }
47
48         [HttpPost]
49         public ActionResult Delete(string customerId)
50         {
51             Customer deletedCustomer = repository.Delete(customerId);
52             if (deletedCustomer != null)
53             {
54                 TempData["message"] = string.Format("{0} was deleted", deletedCustomer.CompanyName);
55             }
56             return RedirectToAction("Index");
57         }
58     }
59 }
HomeController使用构造函数注入方式,注入了ICustomerRepository对象。
1         private readonly ICustomerRepository repository;
2
3         public HomeController(ICustomerRepository repository)
4         {
5             this.repository = repository;
6         }
6. 添加HomeController对应的View。
使用了bootstrap前端框架的css样式表。
_Layout.cshtml:
<!DOCTYPE html>
<html>
<head>
    <meta charset="utf-8" />
    <meta name="viewport" content="width=device-width, initial-scale=1.0">
    <link href="~/Content/bootstrap.css" rel="stylesheet" />
    <link href="~/Content/bootstrap-theme.css" rel="stylesheet" />
    <link href="~/Content/ErrorStyles.css" rel="stylesheet" />
    <title>@ViewBag.Title</title>
    <style>
        .navbar-right {
            float: right !important;
            margin-right: 15px;
            margin-left: 15px;
        }
    </style>
</head>
<body>
    <div class="row panel">
        <div class="col-xs-12 col-sm-8">
            @if (TempData["message"] != null)
            {
                <div class="alert alert-success">@TempData["message"]</div>
            }
            @RenderBody()
        </div>
    </div>
</body>
</html>
Index.cshtml:
@model IEnumerable<Demo.Northwind.Core.Model.Customer>
@{
    ViewBag.Title = "Index";
    Layout = "~/Views/Shared/_Layout.cshtml";
}

<div class="panel panel-default">
    <div class="panel-heading">
        <h3>All Customers</h3>
    </div>
    <div class="panel-body">
        <table class="table table-striped table-condensed table-bordered">
            <tr>
                <th class="text-right">ID</th>
                <th>Company Name</th>
                <th>City</th>
                <th>Postal Code</th>
                <th>Phone</th>
                <th class="text-center">Actions</th>
            </tr>
            @foreach (var item in Model)
        {
                <tr>
                    <td class="text-right">@item.CustomerID</td>
                    <td>
                        @Html.ActionLink(item.CompanyName, "Edit", new
                    {
                        item.CustomerID
                    })
                    </td>
                    <td>@item.City</td>
                    <td>@item.PostalCode</td>
                    <td>@item.Phone</td>
                    <td class="text-center">
                        @using (Html.BeginForm("Delete", "Home"))
                        {
                            @Html.Hidden("CustomerID", item.CustomerID)
                            <input type="submit"
                                   class="btn btn-default btn-xs"
                                   value="Delete" />
                        }
                    </td>
                </tr>
            }
        </table>
    </div>
    <div class="panel-footer">
        @Html.ActionLink("Add a new customer", "Create", null, new { @class = "btn btn-default" })
    </div>
</div>
Edit.cshtml:
@model Demo.Northwind.Core.Model.Customer
@{
    ViewBag.Title = "Edit";
    Layout = "~/Views/Shared/_Layout.cshtml";
}
@if (Model != null)
{
    <h1>Edit @Model.CompanyName</h1>
}
else
{
    <h1>Create</h1>
}
@using (Html.BeginForm("Edit", "Home", FormMethod.Post))
{
    <div class="panel-body">
        @foreach (var property in ViewData.ModelMetadata.Properties)
        {
            <div class="form-group">
                <label>
                    @(property.DisplayName ?? property.PropertyName)
                </label>
                @if (property.PropertyName == "CustomerID" && Model != null)
                {
                    @Html.TextBox(property.PropertyName, null, new { @class = "form-control", @readonly = "true" })
                }
                else
                {
                    @Html.TextBox(property.PropertyName, null, new { @class = "form-control" })
                }
                @Html.ValidationMessage(property.PropertyName)
            </div>
        }
    </div>
    <div class="panel-footer">
        <input type="submit" value="Save" class="btn btn-primary" />
        @Html.ActionLink("Cancel and return to List", "Index", null, new { @class = "btn btn-default" })
    </div>
}
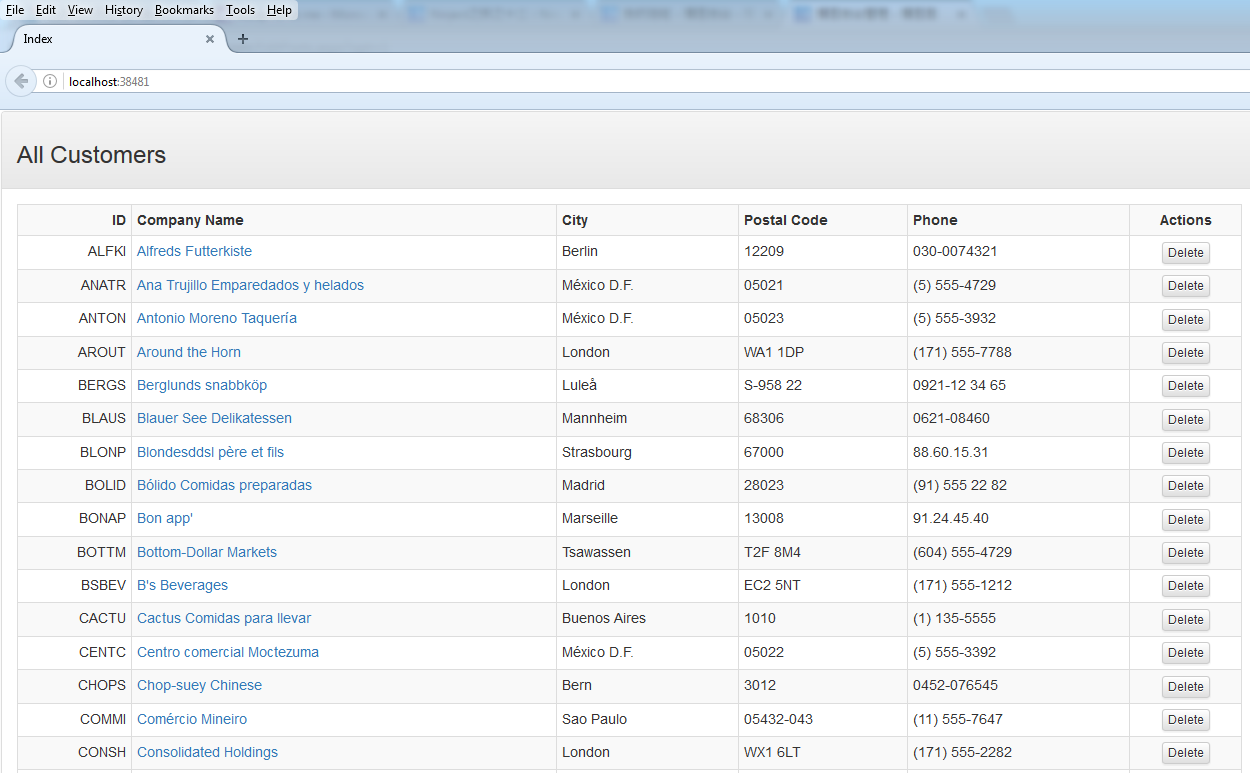
7. 执行程序,得到运行结果。
Index页:
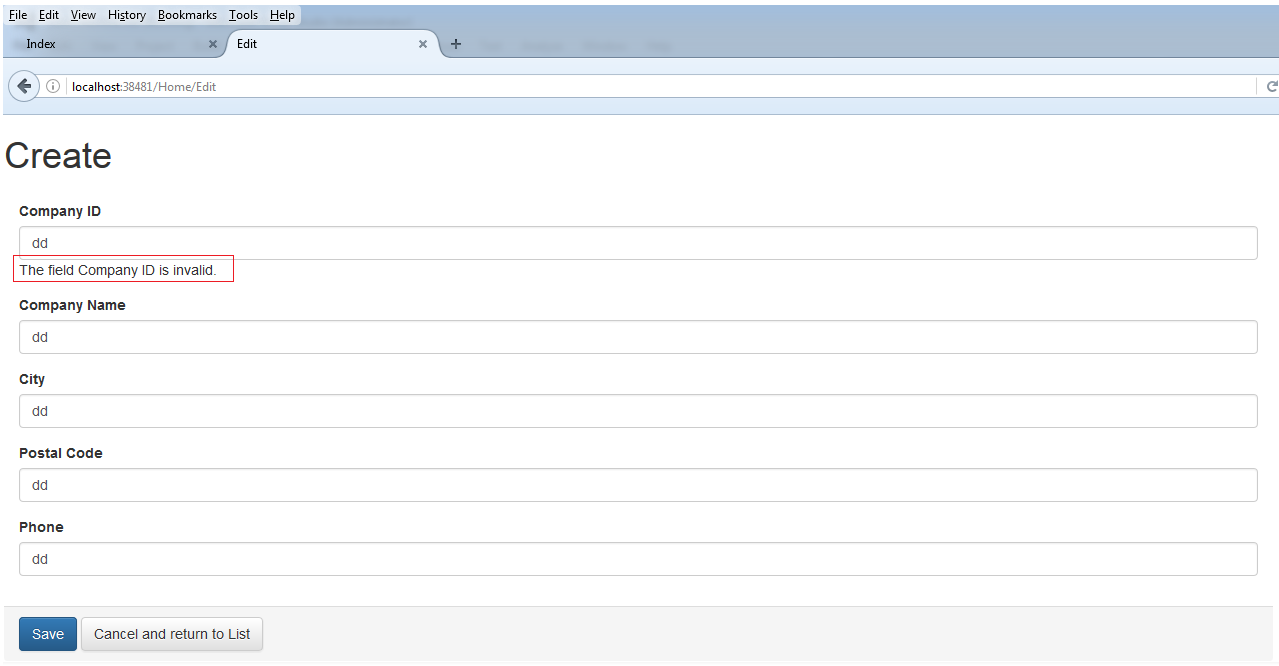
Edit页:

添加Log4Net日志分析
1. 通过NutGet Manager工具添加log4Net引用。

2. 修改应用程序配置,添加log4Net配置。
1)在根路径下的Web.config文件的appSettings里添加log4netConfigFile。
<add key="log4netConfigFile" value="log4net.xml" />

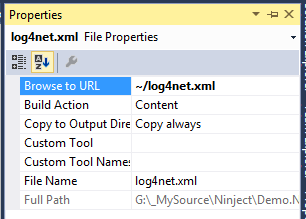
2)在根路径下添加log4net.xml文件。
<?xml version="1.0" encoding="utf-8" ?>
<log4net>
  <appender name="FileAppender" type="log4net.Appender.FileAppender">
    <file value="c:LogFilesNorthwind.mvc.log" />
    <appendToFile value="true" />
    <layout type="log4net.Layout.PatternLayout">
      <conversionPattern value="%date [%thread] %-5level %logger [%property{NDC}] - %message%newline" />
    </layout>
  </appender>

  <root>
    <level value="DEBUG" />
    <appender-ref ref="FileAppender" />
  </root>
</log4net>
FileAppender指出使用文件系统日志。
appendFile支持日志文件路径。创建文件夹和文件:c:LogFilesNorthwind.mvc.log。
设置log4net.xml文件的属性Copy to Output Directory。
3. 修改Global.asax.cs文件,注册Log4Net。
 1 using log4net.Config;
 2 using System;
 3 using System.Configuration;
 4 using System.IO;
 5 using System.Web.Mvc;
 6 using System.Web.Routing;
 7
 8 namespace Demo.Northwind.MVC
 9 {
10     public class MvcApplication : System.Web.HttpApplication
11     {
12         protected void Application_Start()
13         {
14             AreaRegistration.RegisterAllAreas();
15             RouteConfig.RegisterRoutes(RouteTable.Routes);
16
17             RegisterLog4Net();
18         }
19
20         public static void RegisterLog4Net()
21         {
22             var log4NetConfigFile = ConfigurationManager.AppSettings["log4netConfigFile"];
23             var log4NetConfigPath = Path.Combine(AppDomain.CurrentDomain.BaseDirectory, log4NetConfigFile);
24             XmlConfigurator.Configure(new FileInfo(log4NetConfigPath));
25         }
26     }
27 }
4. 修改NinjectDependencyResolver.cs文件。
修改AddBindings方法,添加Log4Net注入。
1         private void AddBindings()
2         {
3             kernel.Bind(x => x.FromAssembliesMatching("Demo.Northwind.*")
4                   .SelectAllClasses().EndingWith("Repository")
5                   .BindAllInterfaces());
6
7             kernel.Bind<ILog>().ToMethod(GetLogger);
8         }
绑定log4net接口ILog到工厂方法GetLogger。
下面添加GetLogger方法。
1         private static ILog GetLogger(IContext ctx)
2         {
3             var filterContext = ctx.Request.ParentRequest.Parameters
4                 .OfType<FilterContextParameter>()
5                 .SingleOrDefault();
6             return LogManager.GetLogger(filterContext == null ?
7                 ctx.Request.Target.Member.DeclaringType :
8                 filterContext.ActionDescriptor.ControllerDescriptor.ControllerType);
9         }
- 从参数IContext对象得到日志上下文对象的类型。
- log4net使用LogManager的静态方法GetLogger得到ILog对象:
1 public class MyClass
2 {
3     private static readonly ILog log = LogManager.GetLogger(typeof(MyApp));
4 }
5. 我们将使用特性修饰Action,进行写日志,因此添加LogAttribute特性类。
1 using System;
2
3 namespace Demo.Northwind.MVC
4 {
5     public class LogAttribute : Attribute
6     {
7         public string LogLevel { get; set; }
8     }
9 }
LogAttribute特性类包含一个字符串类型的LogLevel属性。
6. 使用IActionFilter接口实现写日志功能。因此创建类LogFilter继承自IActionFilter接口。
 1 using log4net;
 2 using log4net.Core;
 3 using System.Globalization;
 4 using System.Web.Mvc;
 5
 6 namespace Demo.Northwind.MVC
 7 {
 8     public class LogFilter : IActionFilter
 9     {
10         private readonly ILog log;
11         private readonly Level logLevel;
12
13         public LogFilter(ILog log, string logLevel)
14         {
15             this.log = log;
16             this.logLevel = log.Logger.Repository.LevelMap[logLevel];
17         }
18
19         public void OnActionExecuting(ActionExecutingContext filterContext)
20         {
21             var message = string.Format(
22                 CultureInfo.InvariantCulture,
23                 "Executing action {0}.{1}",
24                 filterContext.ActionDescriptor.ControllerDescriptor.ControllerName,
25                 filterContext.ActionDescriptor.ActionName);
26             this.log.Logger.Log(typeof(LogFilter), this.logLevel, message, null);
27         }
28
29         public void OnActionExecuted(ActionExecutedContext filterContext)
30         {
31             var message = string.Format(
32                 CultureInfo.InvariantCulture,
33                 "Executed action {0}.{1}",
34                 filterContext.ActionDescriptor.ControllerDescriptor.ControllerName,
35                 filterContext.ActionDescriptor.ActionName);
36             this.log.Logger.Log(typeof(LogFilter), this.logLevel, message, null);
37         }
38     }
39 }
- LogFilter类通过构造函数,注入log4Net的ILog接口对象。
- 通过构造函数传入logLevel字符串,并从log.Logger.Repository.LevelMap查找,得到log4net.Core.Level。构造函数的logLevel字符串参数值将被使用Ninject注入。
- IActionFilter接口方法OnActionExecuting和方法OnActionExecuted将在Action执行时和执行后触发。而参数ActionExecutingContext对象保存了Action的上下文信息。
7. 再次修改NinjectDependencyResolver.cs文件的AddBindings方法。
 1         private void AddBindings()
 2         {
 3             kernel.Bind(x => x.FromAssembliesMatching("Demo.Northwind.*")
 4                   .SelectAllClasses().EndingWith("Repository")
 5                   .BindAllInterfaces());
 6
 7             kernel.Bind<ILog>().ToMethod(GetLogger);
 8
 9             kernel.BindFilter<LogFilter>(FilterScope.Action, 0)
10                 .WhenActionMethodHas<LogAttribute>()
11                 .WithConstructorArgumentFromActionAttribute<LogAttribute>(
12                     "logLevel",
13                     attribute => attribute.LogLevel);
14         }
1)为了告诉MVC使用Ninject来解析一个过滤器,我们需要使用Kernel对象的方法BindFilter<TFilter>来注册这个过滤器:
Kernel.BindFilter<LogFilter>(FilterScope.Action, 0);
BindFilter方法的原型如下:
public static IFilterBindingWhenInNamedWithOrOnSyntax<T> BindFilter<T>(this IBindingRoot kernel, FilterScope scope, int? order);
FilterScope是一个枚举,指出过滤器用在什么东西之上。
2)WhenXXX方法用来定义在哪种情况下使用这个过滤器,Ninject提供了三个这样的方法:
• WhenControllerType: 这个方法只在指定类型的Controller上使用过滤器。
• WhenControllerHas: 这个方法在含有指定特性类型的Controller上使用过滤器。
• WhenActionMethodHas: 这个方法在含有指定特性类型的Action上使用过滤器。
代码中使用的是:WhenActionMethodHas<LogAttribute>(),指出在有LogAttribute特性修饰的Action上使用此过滤器。
3) WithXXX方法对过滤器注入参数。Ninject提供了四个这样的方法:
• WithConstructorArgumentFromActionAttribute: 从Action方法的特性Attribute得到构造函数参数。
• WithConstructorArgumentFromControllerAttribute: 从Controller类的特性Attribute得到构造函数参数。
• WithPropertyValueFromActionAttribute: 如果是属性注入,用Action方法的特性Attribute值来设置属性值。
• WithPropertyValueFromControllerAttribute: 如果是属性注入,用Controller类的特性Attribute值来设置属性值。
代码中使用的是:WithConstructorArgumentFromActionAttribute<LogAttribute>("logLevel", attribute => attribute.LogLevel);从Action的特性Attribute设置构造函数参数logLevel的值。
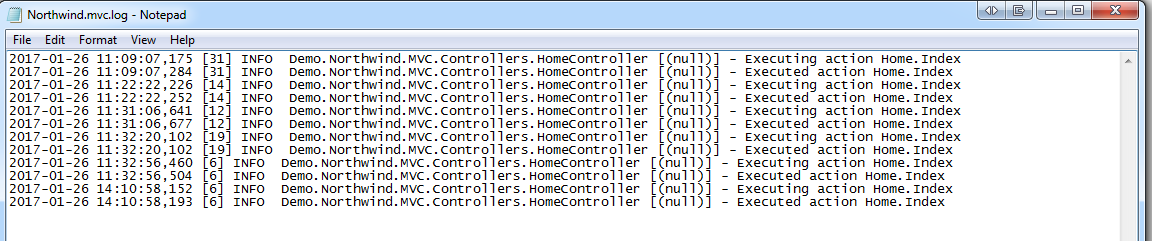
8. 再次运行程序,打开C:LogFilesNorthwind.mvc.log文件,得到写出的日志。
数据验证
如果我们需要验证Domain的Customer对象,需要引入System.ComponentModel.DataAnnotations名称空间。
 1 using System.ComponentModel.DataAnnotations;
 2
 3 namespace Demo.Northwind.Core.Model
 4 {
 5     public class Customer
 6     {
 7         [Required]
 8         [Display(Name = "Company ID")]
 9         public string CustomerID { get; set; }
10         [Required]
11         [Display(Name ="Company Name")]
12         public string CompanyName { get; set; }
13         public string City { get; set; }
14         [Display(Name = "Postal Code")]
15         public string PostalCode { get; set; }
16         [StringLength(10)]
17         public string Phone { get; set; }
18     }
19 }
上面的修改能够验证一般的业务逻辑:不能为空,字符串长度。但是如果要求验证一个Customer对象的CompanyName在数据库中是否已经存在要怎么做呢?
同样使用给属性添加特性的办法,添加唯一性验证逻辑。
1. 首先添加自定义的InjectAttribute特性:
1 namespace Demo.Northwind.Core.Attribute
2 {
3     public class InjectAttribute : System.Attribute
4     {
5     }
6 }
2. 修改NinjectWebCommon.cs的CreateKernel方法。
 1         private static IKernel CreateKernel()
 2         {
 3             var ninjectSettings = new NinjectSettings
 4             {
 5                 InjectAttribute = typeof(Demo.Northwind.Core.Attribute.InjectAttribute)
 6           };
 7             var kernel = new StandardKernel(ninjectSettings);
 8             try
 9             {
10                 kernel.Bind<Func<IKernel>>().ToMethod(ctx => () => new Bootstrapper().Kernel);
11                 kernel.Bind<IHttpModule>().To<HttpApplicationInitializationHttpModule>();
12
13                 RegisterServices(kernel);
14                 return kernel;
15             }
16             catch
17             {
18                 kernel.Dispose();
19                 throw;
20             }
21         }
StandardKernel构造函数传入NinjectSettings对象,重写了默认的Ninject特性设置。
默认的Ninject的Inject特性如下:
1     [AttributeUsage(AttributeTargets.Constructor | AttributeTargets.Method | AttributeTargets.Property | AttributeTargets.Field, AllowMultiple = false, Inherited = true)]
2     public class InjectAttribute : Attribute
3     {
4         public InjectAttribute();
5     }
3. 创建UniqueCustomerIdAttribute特性类,继承自ValidationAttribute抽象类。
 1 using Demo.Northwind.Core.Attribute;
 2 using Demo.Northwind.Core.Interface;
 3 using System;
 4 using System.ComponentModel.DataAnnotations;
 5
 6 namespace Demo.Northwind.Core
 7 {
 8     public class UniqueCustomerIdAttribute : ValidationAttribute
 9     {
10         [Inject]
11         public ICustomerRepository Validator
12         {
13             get; set;
14         }
15
16         public override bool IsValid(object value)
17         {
18             if (Validator == null)
19             {
20                 throw new Exception("Validator is not specified.");
21             }
22             if (string.IsNullOrEmpty(value as string))
23             {
24                 return false;
25             }
26             return Validator.ValidateUniqueness(value as string);
27         }
28     }
29 }
在属性public ICustomerRepository Validator上使用刚才定义的[Inject]特性实现DI注入,这里注入的是ICustomerRepository对象。
重写抽象类ValidationAttribute的Validate方法,添加验证逻辑。
4. 再次修改Customer类,为属性CompanyName添加UniqueCustomerId特性。
 1 using System.ComponentModel.DataAnnotations;
 2
 3 namespace Demo.Northwind.Core.Model
 4 {
 5     public class Customer
 6     {
 7         [Required]
 8         [UniqueCustomerId]
 9         [Display(Name = "Company ID")]
10         public string CustomerID { get; set; }
11         [Required]
12         [Display(Name ="Company Name")]
13         public string CompanyName { get; set; }
14         public string City { get; set; }
15         [Display(Name = "Postal Code")]
16         public string PostalCode { get; set; }
17         [StringLength(10)]
18         public string Phone { get; set; }
19     }
20 }
5. 再次运行程序,如果试图添加重复的记录,则会出现下面的页面: