Ubuntu 安装Redis redis-5.0.3 服务端
python 安装 pip install redis==2.10.6
在写celery异步任务时,注意导入Django的配置环境
os.environ.setdefault('DJANGO_SETTINGS_MODULE', 'DRF_test.settings')
如果channels配置有Redis缓存将配置写在settings.py中:
# 频道层的缓存    #
CHANNEL_LAYERS = {
    "default": {
        # "BACKEND": "channels.layers.InMemoryChannelLayer",
        "BACKEND": "channels_redis.core.RedisChannelLayer",
        "CONFIG": {
            "hosts": [("redis://:123@192.168.133.128:6380")],  # channel layers缓存使用Redis
        },
        # "channel_capacity": {
        #     "http.request": 200,
        #     "http.response!*": 10,
        #     re.compile(r"^websocket.send!.+"): 20,
        # },
    },
}
然后编写异步任务:
from celery import Celery
import time, os
from channels.layers import get_channel_layer
from asgiref.sync import async_to_sync

from DRF_test import settings
os.environ.setdefault('DJANGO_SETTINGS_MODULE', 'DRF_test.settings')

app = Celery('tasks', broker='redis://:123@192.168.133.128:6380/2', backend='redis://:123@192.168.133.128:6380/2')


@app.task
def hello(id, channel_name):

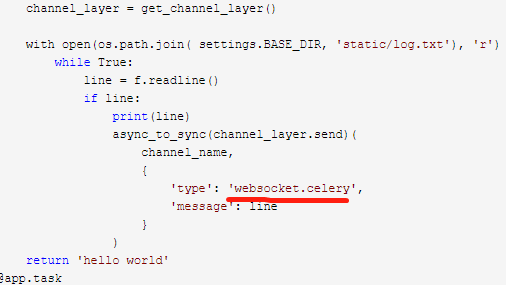
    channel_layer = get_channel_layer()

    with open(os.path.join( settings.BASE_DIR, 'static/log.txt'), 'r') as f:
        while True:
            line = f.readline()
            if line:
                print(line)
                async_to_sync(channel_layer.send)(
                    channel_name,
                    {
                        'type': 'websocket.celery',
                        'message': line
                    }
                )
    return 'hello world'
@app.task
def hello2(x,y):
    return x+y
编辑channels的websocket内容:
class ChatConsumer(WebsocketConsumer):
    result = None

    def websocket_connect(self, message):
        """客户端请求建立链接时 自动触发"""
        print("建立", message, self.scope["user"], self.scope['url_route']['kwargs']['id'])
        logId = self.scope['url_route']['kwargs']['id']
        self.accept()  # 建立链接  并且自动帮你维护每一个客户端
        # self.send('11331', self.channel_name)
        # channel_layer = get_channel_layer()
        self.result = hello.delay(logId, self.channel_name)

        # 将链接在列表中存储一份
        # consumer_object_list.append(self)

    #      ---------------
    #     self.group_name = self.scope['url_route']['kwargs']['group_name']
    #     self.channel_layer.group_add(self.group_name, self.channel_name)
    #     # 将用户添加至聊天组信息chats中
    #     try:
    #         ChatConsumer.chats[self.group_name].add(self)
    #     except:
    #         ChatConsumer.chats[self.group_name] = set([self])
        # print(ChatConsumer.chats)
        # 创建连接时调用
        # self.accept()


    def websocket_receive(self, message):
        """客户端发送数据过来  自动触发"""

        print(message)
        #  message = {'type': 'websocket.receive', 'text': 'hello world!'}
        text = message.get('message')  # 真正的数据
        # 给客户端发送消息  单独发送
        self.send(text_data=text)

        # 给所有的链接对象发送数据
        for obj in consumer_object_list:
            obj.send(text_data=text)

    def websocket_celery(self, message):
        """celery发送数据过来  自动触发"""

        print(message, '----------')
        #  message = {'type': 'websocket.receive', 'text': 'hello world!'}
        text = message.get('message')  # 真正的数据
        # 给客户端发送消息  单独发送
        self.send(text_data=text)

        # 给所有的链接对象发送数据
        for obj in consumer_object_list:
            obj.send(text_data=text)


    def websocket_disconnect(self, message):
        """客户端断开链接之后  自动触发"""
        # 客户端断开链接之后 应该将当前对象移除
        # consumer_object_list.remove(self)
        # raise StopConsumer()

        # 连接关闭时调用
        # 将关闭的连接从群组中移除
        # self.channel_layer.group_discard(self.group_name, self.channel_name)
        # 将该客户端移除聊天组连接信息
        # ChatConsumer.chats[self.group_name].remove(self)
        # self.close()
        # 清除celery任务
        self.result.revoke()
        print('清除成功')
        self.close()
注意;


最后启动celery:
celery -A app1.test worker -l info
一个异步执行任务完成,并且实时更新内容