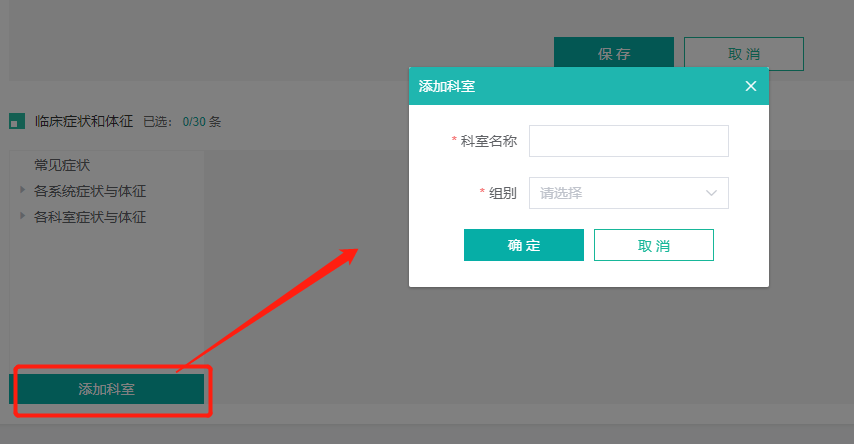
1、首先定义好一个弹框,弹框代码放在最后
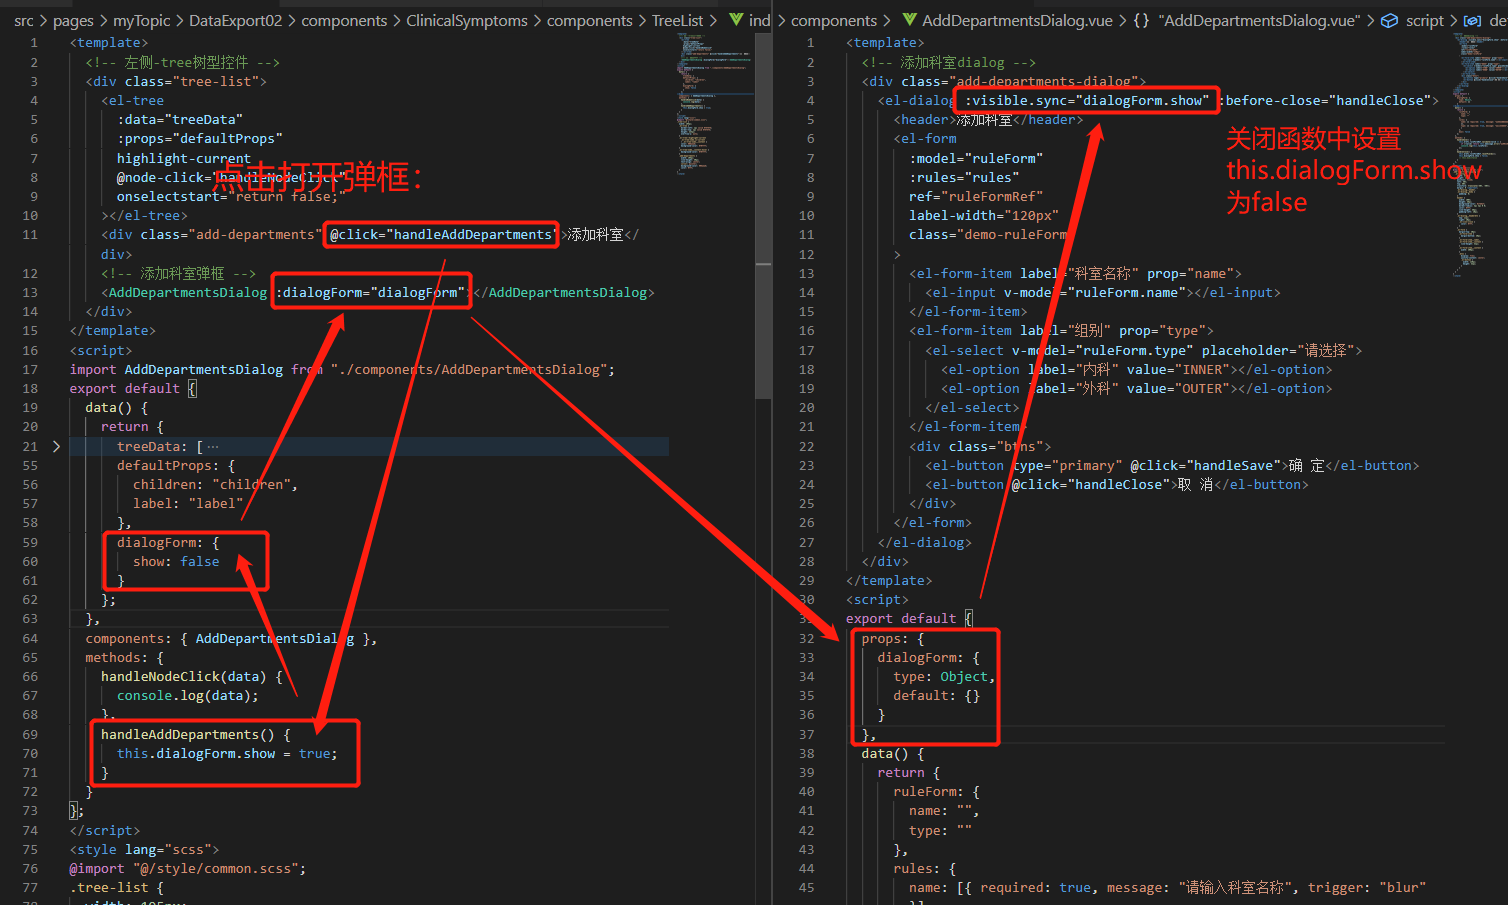
2、父组件中引入进来,用porps的方式传递一个show到子组件中,这种方式还可以传递其他的值过去。这种方法要注意不可以直接定义一个变量show为布尔值,然后对show进行修改,会报错的
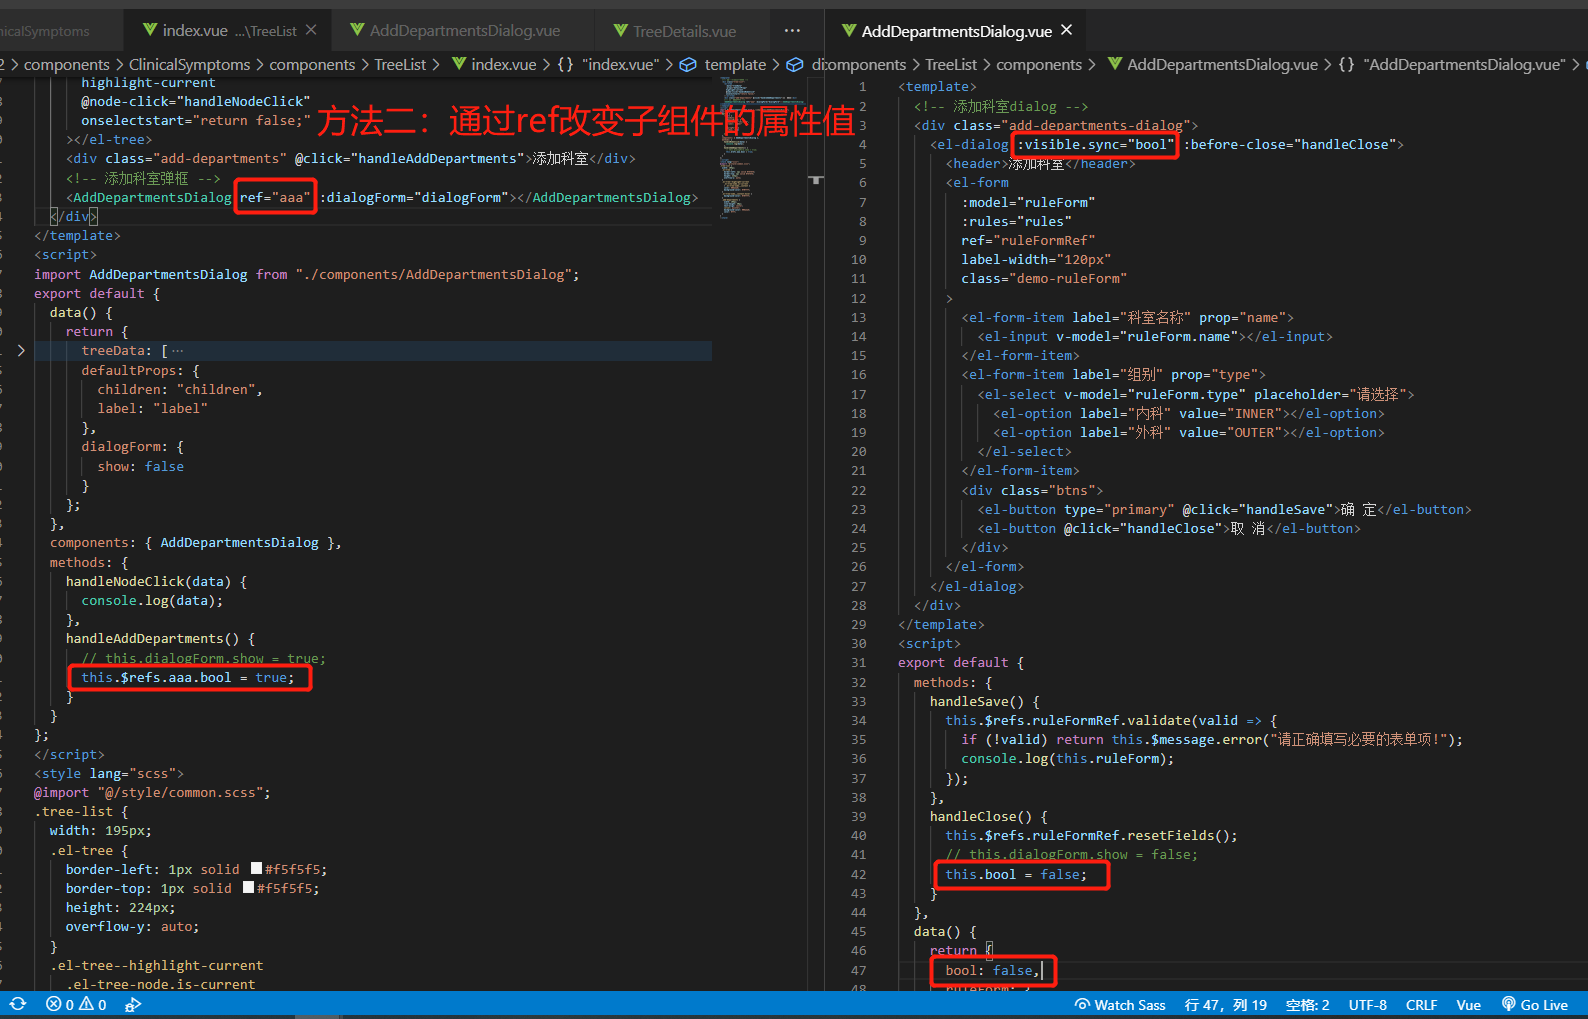
3、还有个办法也可以打开关闭弹框,这个方法简便,不用props传值,复杂场景还是得使用上面那种方式
<template>
  <!-- 添加科室dialog -->
  <div class="add-departments-dialog">
    <el-dialog :visible.sync="dialogForm.show" :before-close="handleClose">
      <header>添加科室</header>
      <el-form
        :model="ruleForm"
        :rules="rules"
        ref="ruleFormRef"
        label-width="120px"
        class="demo-ruleForm"
      >
        <el-form-item label="科室名称" prop="name">
          <el-input v-model="ruleForm.name"></el-input>
        </el-form-item>
        <el-form-item label="组别" prop="type">
          <el-select v-model="ruleForm.type" placeholder="请选择">
            <el-option label="内科" value="INNER"></el-option>
            <el-option label="外科" value="OUTER"></el-option>
          </el-select>
        </el-form-item>
        <div class="btns">
          <el-button type="primary" @click="handleSave">确 定</el-button>
          <el-button @click="handleClose">取 消</el-button>
        </div>
      </el-form>
    </el-dialog>
  </div>
</template>
<script>
export default {
  data() {
    return {
      ruleForm: {
        name: "",
        type: ""
      },
      rules: {
        name: [{ required: true, message: "请输入科室名称", trigger: "blur" }],
        type: [{ required: true, message: "请选择组别", trigger: "change" }]
      },
      bool: false
    };
  },
  methods: {
    handleSave() {
      this.$refs.ruleFormRef.validate(valid => {
        if (!valid) return this.$message.error("请正确填写必要的表单项!");
        console.log(this.ruleForm);
      });
    },
    handleClose() {
      this.$refs.ruleFormRef.resetFields();
      this.dialogForm.show = false;
      // this.bool=false
    }
  },
  props: {
    dialogForm: {
      type: Object,
      default: {}
    }
  }
};
</script>
<style lang="scss">
@import "@/style/common.scss";
.add-departments-dialog {
  .el-dialog {
    width: 360px;
    height: 220px;
    position: fixed;
    left: 50%;
    top: 50%;
    transform: translate(-50%, -50%);
    margin: 0 !important;
    .el-dialog__header,
    .el-dialog__body {
      padding: 0;
    }
    header {
      width: 100%;
      height: 38px;
      background-color: #1fb6af;
      border-radius: 3px 3px 0 0;
      color: #fff;
      line-height: 38px;
      padding-left: 10px;
    }
    .el-dialog__headerbtn {
      top: 11px;
      right: 10px;
      .el-icon-close {
        color: #fff;
      }
    }
    .el-form {
      margin-top: 20px;
      .el-form-item {
        margin-bottom: 20px;
      }
      .el-form-item__label,
      .el-form-item__content {
        line-height: 32px;
      }
      .el-form-item__content {
        width: 200px;
      }
      .btns {
        display: flex;
        justify-content: center;
        .el-button {
          width: 120px;
          height: 32px;
        }
      }
    }
  }
}
</style>