一 整合
由于本人的码云太多太乱了,于是决定一个一个的整合到一个springboot项目里面。
附上自己的github项目地址 https://github.com/247292980/spring-boot
附上汇总博文地址 https://www.cnblogs.com/ydymz/p/9391653.html
以整合功能
spring-boot,FusionChart,thymeleaf,vue,ShardingJdbc,mybatis-generator,微信分享授权,drools,spring-security,spring-jpa,webjars,Aspect,drools-drt,rabbitmq
这次就来整合下简单的zookeeper搭建
二 安装
这玩意最坑的地方在于,和mq一样,百度第一的安装教程缺了一部分。
1.先安装java并配置环境变量。直接百度,进官网下载,还是程序员最喜欢的解压安装,赞!
2.将安装目录下的conf文件夹下的zoo_sample.cfg复制一份并命名为zoo.cfg,如下图
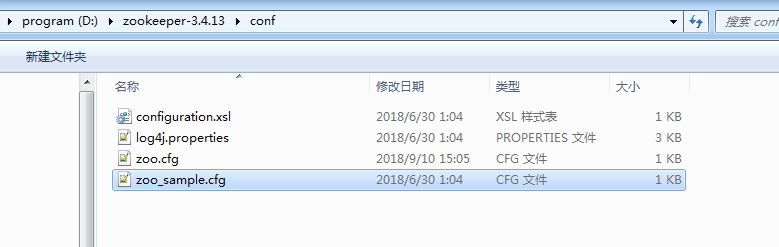
3.修改一下配置,主要是dataDir和dataDirLog,并且要创建相应的文件夹
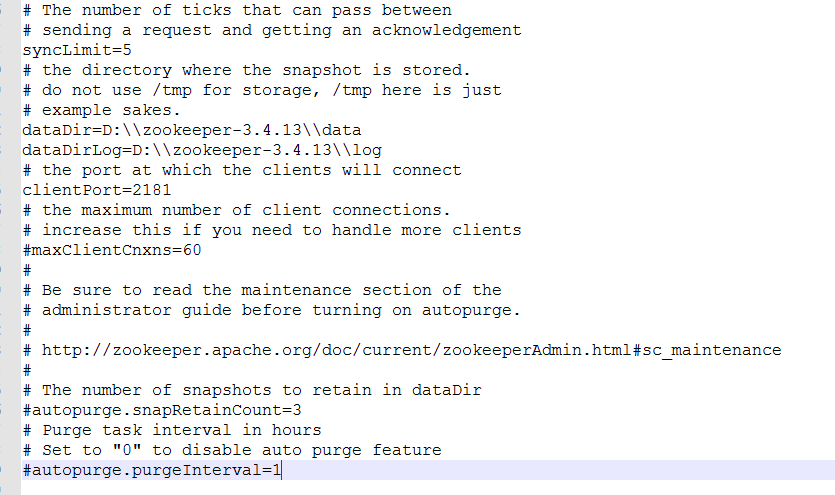
配置文件简单解析

1、tickTime:这个时间是作为Zookeeper 服务器之间或客户端与服务器之间维持心跳的时间间隔,也就是每个 tickTime 时间就会发送一个心跳。

2、dataDir:顾名思义就是Zookeeper 保存数据的目录,默认情况下,Zookeeper 将写数据的日志文件也保存在这个目录里。

3、dataLogDir:顾名思义就是Zookeeper 保存日志文件的目录

4、clientPort:这个端口就是客户端连接Zookeeper 服务器的端口,Zookeeper 会监听这个端口,接受客户端的访问请求。
4.进入到bin目录,并且启动zkServer.cmd
zkServer.cmd
可以通过以下代码检验有没有成功启动,成功后有一个QuorumPeerMain的进程
jps -l –v
5.启动一个zkCli
zkCli 127.0.0.1:2181
6.具体的cli可以去w3c里面了解,建议都试一次 https://www.w3cschool.cn/zookeeper/zookeeper_api.html
建议zkCli里面,跑一下这些命令,否则普通demo的java代码里面就什么都没有了

create /FirstZnode FirstZnode1
create /SecondZnode SecondZnode2
create /ThirdZnode ThirdZnode3
三 代码
代码有点多,我只贴集群监听demo和普通demo,基本上实际使用的都是集群监听demo,而普通demo是给大家一个过渡的阶段。
要是看完普通还看不懂集群监听,可以github把我的代码拷下来,里面有个中间态,监听demo。
普通demo,很简单获取根目录下的全部children
public class ZkDemo {
    public static void main(String[] args) throws IOException {
        String hostPort = "localhost:2181";
        List<String> zooChildren = new ArrayList<String>();
        ZooKeeper zk = new ZooKeeper(hostPort, 2000, null);
        if (zk != null) {
            try {
                String zpath = "/";
                zooChildren = zk.getChildren(zpath, false);
                System.out.println("Znodes of '/': ");
                for (String child : zooChildren) {
                    System.out.println(child);
                }
            }  catch (Exception e) {
                e.printStackTrace();
            }
        }
    }
}
集群监听demo.ClusterMonitor,写成线程是让他当个服务器,小白如果看到idea提示红色报警有点慌的话,可以看看文件名字有没有红色波浪线,没有即说明代码正常
public class ClusterMonitor implements Runnable {
    private static String membershipRoot = "/Members";
    private final Watcher connectionWatcher;
    private final Watcher childrenWatcher;
    private ZooKeeper zk;
    boolean alive = true;

    public ClusterMonitor(String HostPort) throws IOException, InterruptedException, KeeperException {
        connectionWatcher = new Watcher() {
            @Override
            public void process(WatchedEvent event) {
                if (event.getType() == Watcher.Event.EventType.None && event.getState() == Watcher.Event.KeeperState.SyncConnected) {
                    System.out.printf("
Event Received: %s", event.toString());
                }
            }
        };

        childrenWatcher = new Watcher() {
            @Override
            public void process(WatchedEvent event) {
                System.out.printf("
Event Received: %s", event.toString());
                if (event.getType() == Event.EventType.NodeChildrenChanged) {
                    try {
                        //Get current list of child znode,
                        //reset the watch
                        List<String> children = zk.getChildren(membershipRoot, this);
                        wall("!!!Cluster Membership Change!!!");
                        wall("Members: " + children);
                    } catch (KeeperException e) {
                        throw new RuntimeException(e);
                    } catch (InterruptedException e) {
                        Thread.currentThread().interrupt();
                        alive = false;
                        throw new RuntimeException(e);
                    }
                }
            }
        };

        zk = new ZooKeeper(HostPort, 2000, connectionWatcher);

        // Ensure the parent znode exists
        if (zk.exists(membershipRoot, false) == null) {
            zk.create(membershipRoot, "ClusterMonitorRoot".getBytes(), Ids.OPEN_ACL_UNSAFE, CreateMode.PERSISTENT);
        }

        // Set a watch on the parent znode
        List<String> children = zk.getChildren(membershipRoot, childrenWatcher);
        System.err.println("Members: " + children);
    }

    public synchronized void close() {
        try {
            zk.close();
        } catch (InterruptedException e) {
            e.printStackTrace();
        }
    }

    public void wall(String message) {
        System.out.printf("
MESSAGE: %s", message);
    }

    @Override
    public void run() {
        try {
            synchronized (this) {
                while (alive) {
                    wait();
                }
            }
        } catch (InterruptedException e) {
            e.printStackTrace();
            Thread.currentThread().interrupt();
        } finally {
            this.close();
        }
    }

    public static void main(String[] args) throws IOException, InterruptedException, KeeperException {
        String hostPort = "localhost:2181";
        new ClusterMonitor(hostPort).run();
    }
}
集群监听demo.ClusterClient,这个可能需要你多开几个java线程跑,idea改一下启动参数就好了,然后在服务器里面对比才比较明显
命令行启动java线程的代码

java -cp $CLASSPATH ClusterMonitor
public class ClusterClient implements Watcher, Runnable {
    private static String membershipRoot = "/Members";
    ZooKeeper zk;

    public ClusterClient(String hostPort, Long pid) {
        String processId = pid.toString();
        try {
            zk = new ZooKeeper(hostPort, 2000, this);
            if (zk != null) {
                zk.create(membershipRoot + '/' + processId, processId.getBytes(), Ids.OPEN_ACL_UNSAFE, CreateMode.EPHEMERAL);
            }
        } catch (Exception e) {
            e.printStackTrace();
        }
    }


    public synchronized void close() {
        try {
            zk.close();
        } catch (InterruptedException e) {
            e.printStackTrace();
        }
    }

    @Override
    public void process(WatchedEvent event) {
        System.out.printf("
Event Received: %s", event.toString());
    }

    @Override
    public void run() {
        try {
            synchronized (this) {
                while (true) {
                    wait();
                }
            }
        } catch (InterruptedException e) {
            e.printStackTrace();
            Thread.currentThread().interrupt();
        } finally {
            this.close();
        }
    }

    public static void main(String[] args) {
        String hostPort = "localhost:2181";
        //Get the process id
        String name = ManagementFactory.getRuntimeMXBean().getName();
        int index = name.indexOf('@');
        Long processId = Long.parseLong(name.substring(0, index));
        new ClusterClient(hostPort, processId).run();
    }
}
四 总结
1.因为基本是和rabbitmq一起写的博文,我难免会把他们做一番对比,zk和mq的安装比起来,明显zk简单多了。或许原因是mq是用erlang写的?
2.zk的生态圈很好,毕竟是Apache大厂出品,以上的代码,都是直接看Apache zookeeper的官网java版的api写的,比rabbitmq不是好的一点半点,例如mq包的报错日志问题...
建议去zk官网看一下api或者英语不好的去w3c的zk专栏 https://www.w3cschool.cn/zookeeper/
3.坑也就是要生成几个文件,看下日志就知道怎么做,顶多是其他人的博文不太完整。
4.zk的例子比mq的多,是因为zk可以直接创建znode,而mq的队列,通道,广播必须cli或者gui里面创建,工具包远没有zk方便。而我两篇博文的目的就是java调用而不是设计,所以并没有细说
5.最后每个项目都建议,诸位自己写一遍跑一遍,或者直接github我的代码跑一遍。