前言
Web API 接口服务场景里,用户的认证和鉴权是很常见的需求,Spring Security 据说是这个领域里事实上的标准,实践下来整体设计上确实有不少可圈可点之处,也在一定程度上印证了小伙们经常提到的 “太复杂了” 的说法也是很有道理的。
本文以一个简单的 SpringBoot Web 应用为例,重点介绍以下内容:
- 演示 Spring Security 接口认证和鉴权的配置方法;
- 以内存和数据库为例,介绍认证和鉴权数据的存储和读取机制;
- 若干模块的自定义实现,包括:认证过滤器、认证或鉴权失败处理器等。
SpringBoot 示例
创建 SpringBoot 示例,用于演示 Spring Security 在 SpringBoot 环境下的应用,简要介绍四部分内容:pom.xml、application.yml、IndexController 和 HelloController。
SpringBoot pom.xml
  ...
  <artifactId>boot-example</artifactId>

  <dependencies>
    <dependency>
      <groupId>org.springframework.boot</groupId>
      <artifactId>spring-boot-starter-web</artifactId>
    </dependency>

    <dependency>
      <groupId>org.springframework.boot</groupId>
      <artifactId>spring-boot-starter-logging</artifactId>
    </dependency>
  </dependencies>
boot-example 是用于演示的 SpringBoot 项目子模块(Module)。
注: 依赖项的版本已在项目 pom.xml dependencyManagement 中声明。
SpringBoot application.yml
spring:
  application:
    name: example

server:
  port: 9999

logging:
  level:
    root: info
SpringBoot 应用名称为 example,实例端口为 9999。
SpringBoot IndexController
@RestController
@RequestMapping("/")
public class IndexController {
  @GetMapping
  public String index() {
    return "index";
  }
}
IndexController 实现一个接口:/。
SpringBoot HelloController
@RestController
@RequestMapping("/hello")
public class HelloController {
  @GetMapping("/world")
  public String world() {
    return "hello world";
  }

  @GetMapping("/name")
  public String name() {
    return "hello name";
  }
}
HelloController 实现两个接口:/hello/world 和 /hello/name。
编译启动 SpringBoot 应用,通过浏览器请求接口,请求路径和响应结果:
http://localhost:9999
index

http://localhost:9999/hello/world
hello world

http://localhost:9999/hello/name
hello name
SpringBoot 示例准备完成。
SpringBoot 集成 Spring Security
SpringBoot 集成 Spring Security 仅需要在 pom.xml 中添加相应的依赖:spring-boot-starter-security,如下:
  <dependencies>
    ...

    <dependency>
      <groupId>org.springframework.boot</groupId>
      <artifactId>spring-boot-starter-security</artifactId>
    </dependency>
  </dependencies>
编译启动应用,相对于普通的 SpringBoot 应用,我们可以在命令行终端看到特别的两行日志:
2022-01-09 16:05:57.437  INFO 87581 --- [           main] .s.s.UserDetailsServiceAutoConfiguration :

Using generated security password: 3ef27867-e938-4fa4-b5da-5015f0deab7b

2022-01-09 16:05:57.525  INFO 87581 --- [           main] o.s.s.web.DefaultSecurityFilterChain     : Will secure any request with [org.springframework.security.web.context.request.async.WebAsyncManagerIntegrationFilter@11e355ca, org.springframework.security.web.context.SecurityContextPersistenceFilter@5114b7c7, org.springframework.security.web.header.HeaderWriterFilter@24534cb0, org.springframework.security.web.csrf.CsrfFilter@77c233af, org.springframework.security.web.authentication.logout.LogoutFilter@5853ca50, org.springframework.security.web.authentication.UsernamePasswordAuthenticationFilter@6d074b14, org.springframework.security.web.authentication.ui.DefaultLoginPageGeneratingFilter@3206174f, org.springframework.security.web.authentication.ui.DefaultLogoutPageGeneratingFilter@70d63e05, org.springframework.security.web.authentication.www.BasicAuthenticationFilter@5115f590, org.springframework.security.web.savedrequest.RequestCacheAwareFilter@767f6ee7, org.springframework.security.web.servletapi.SecurityContextHolderAwareRequestFilter@7b6c6e70, org.springframework.security.web.authentication.AnonymousAuthenticationFilter@e11ecfa, org.springframework.security.web.session.SessionManagementFilter@106d77da, org.springframework.security.web.access.ExceptionTranslationFilter@7b66322e, org.springframework.security.web.access.intercept.FilterSecurityInterceptor@3e5fd2b1]
表示 Spring Security 已在 SpringBoot 应用中生效。默认情况下,Spring Security 自动化地帮助我们完成以下三件事件:
-
开启 FormLogin 登录认证模式;
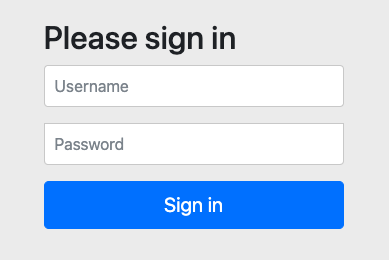
我们使用浏览器请求接口 /:
http://localhost:9999/会发现请求会被重定向至页面 /login:
http://localhost:9999/login提示使用用户名和密码登录:
-
生成用于登录的用户名和密码;
用户名为 user,密码会输出到应用的启动日志:
Using generated security password: 3ef27867-e938-4fa4-b5da-5015f0deab7b每一次应用启动,密码都会重新随机生成。
-
注册用于认证和鉴权的过滤器;
Spring Security 本质就是通过 过滤器 或 过滤器(链) 实现的,每一个接口请求都会按顺序经过这些过滤器的“过滤”,每个过滤器承担的各自的职责,组合起来共同完成认证和鉴权。
根据配置的不同,注册的过滤器也会有所不同,默认情况下,加载的过滤器列表可以参考启动日志:WebAsyncManagerIntegrationFilter SecurityContextPersistenceFilter HeaderWriterFilter CsrfFilter LogoutFilter UsernamePasswordAuthenticationFilter DefaultLoginPageGeneratingFilter DefaultLogoutPageGeneratingFilter BasicAuthenticationFilter RequestCacheAwareFilter SecurityContextHolderAwareRequestFilter AnonymousAuthenticationFilter SessionManagementFilter ExceptionTranslationFilter FilterSecurityInterceptor
使用 Spring Security 默认为我们生成的用户名和密码进行登录(Sign in),成功之后会自动重定向至 / :
index
之后我们就可以通过浏览器正常请求 /hello/world 和 /hello/name。
默认情况下,Spring Security 仅支持基于 FormLogin 方式的认证,只能使用固定的用户名和随机生成的密码,且不支持鉴权。如果想要使用更丰富的安全特性:
- 其他认证方式,如:HttpBasic
- 自定义用户名和密码
- 鉴权
则需要我们自定义配置 Spring Security。自定义配置可以通过两种方式实现: - Java Configuration:使用 Java 代码的方式配置
- Security NameSpace Configuration:使用 XML 文件的方式配置
本文以 Java Configuration 的方式为例进行介绍,需要我们提供一个继承自 WebSecurityConfigurerAdapter 配置类,然后通过重写若干方法进而实现自定义配置。
import org.springframework.context.annotation.Configuration;
import org.springframework.security.config.annotation.web.builders.HttpSecurity;
import org.springframework.security.config.annotation.web.configuration.WebSecurityConfigurerAdapter;

@Configuration
public class SecurityConfig extends WebSecurityConfigurerAdapter {
  @Override
  protected void configure(HttpSecurity http) throws Exception {

  }
}
SecurityConfig 使用 @Configuration 注解(配置类),继承自 WebSecurityConfigurerAdapter,本文通过重写 configure 方法实现自定义配置。
需要注意:WebSecurityConfigurerAdapter 中有多个名称为 configure 的重载方法,这里使用的是参数类型为 HttpSecurity 的方法。
注: Spring Security 默认自动化配置参考 Spring Boot Auto Configuration。
Spring Security 使用 HttpBasic 认证
  protected void configure(HttpSecurity http) throws Exception {
    http
            .authorizeHttpRequests(authorize ->
                    authorize
                            .anyRequest()
                            .authenticated())
            .httpBasic();
  }
http.authorizeHttpRequests()
用以指定哪些请求需要什么样的认证或授权,这里使用 anyRequest() 和 authenticated() 表示所有的请求均需要认证。
http.authorizeHttpRequests()
表示我们使用 HttpBasic 认证。
编译启动应用,会发现终端仍会输出密码:
Using generated security password: e2c77467-8c46-4fe1-ab32-eb87558b8c0e
因为,我们仅仅改变的是认证方式。
为方便演示,我们使用 CURL 直接请求接口:
curl http://localhost:9999

{
	"timestamp": "2022-01-10T02:47:20.820+00:00",
	"status": 401,
	"error": "Unauthorized",
	"path": "/"
}
会提示我们 Unauthorized,即:没有认证。
我们按照 HttpBasic 要求添加请求头部参数 Authorization,它的值:
Basic Base64(user:e2c77467-8c46-4fe1-ab32-eb87558b8c0e)
即:
Basic dXNlcjplMmM3NzQ2Ny04YzQ2LTRmZTEtYWIzMi1lYjg3NTU4YjhjMGU=
再次请求接口:
curl -H "Authorization: Basic dXNlcjplMmM3NzQ2Ny04YzQ2LTRmZTEtYWIzMi1lYjg3NTU4YjhjMGU=" http://localhost:9999

index
认证成功,接口正常响应。
Spring Security 自定义用户名和密码
使用默认用户名和随机密码的方式不够灵活,大部分场景都需要我们支持多个用户,且分别为他们设置相应的密码,这就涉及到两个问题:
- 用户名和密码如何读取(查询)
- 用户名和密码如何存储(增加/删除/修改)
对于 读取,Spring Security 设计了 UserDetailsService 接口:
public interface UserDetailsService {
    UserDetails loadUserByUsername(String username) throws UsernameNotFoundException;
}
loadUserByUsername
实现按照用户名(username)从某个存储介质中加载相对应的用户信息(UserDetails)。
username
用户名,客户端发送请求时写入的用于用户名。
UserDetails
用户信息,包括用户名、密码、权限等相关信息。
注意:用户信息不只用户名和用户密码。
对于 存储,Spring Security 设计了 UserDetailsManager 接口:
public interface UserDetailsManager extends UserDetailsService {
    void createUser(UserDetails user);

    void updateUser(UserDetails user);

    void deleteUser(String username);

    void changePassword(String oldPassword, String newPassword);

    boolean userExists(String username);
}
createUser
创建用户信息
updateUser
修改用户信息
deleteUser
删除用户信息
changePassword
修改当前用户的密码
userExists
检查用户是否存在
注意:UserDetailsManager 继承自 UserDetailsService。
也就是说,我们可以通过提供一个已实现接口 UserDetailsManager* 的类,并重写其中的若干方法,基于某种存储介质,定义用户名、密码等信息的存储和读取逻辑;然后将这个类的实例以 Bean 的形式注入 Spring Security,就可以实现用户名和密码的自定义。
实际上,Spring Security 仅关心如何 读取,存储 可以由业务系统自行实现;相当于,只实现接口 UserDetailsService 即可。
Spring Security 已经为我们预置了两种常见的存储介质实现:
- InMemoryUserDetailsManager,基于内存的实现
- JdbcUserDetailsManager,基于数据库的实现
InMemoryUserDetailsManager 和 JdbcUserDetailsManager 均实现接口 UserDetailsManager,本质就是对于 UserDetails 的 CRUD。我们先介绍 UserDetails,然后再分别介绍基于内存和数据库的实现。
UserDetails
UserDetails 是用户信息的抽象接口:
public interface UserDetails extends Serializable {
    Collection<? extends GrantedAuthority> getAuthorities();

    String getPassword();

    String getUsername();

    boolean isAccountNonExpired();

    boolean isAccountNonLocked();

    boolean isCredentialsNonExpired();

    boolean isEnabled();

}
getUsername
获取用户名。
getPassword
获取密码。
getAuthorities
获取权限,可以简单理解为角色名称(字符串),用于实现接口基于角色的授权访问,详情见后文。
其他
获取用户是否可用,或用户/密码是否过期或锁定。
Spring Security 提供了一个 UserDetails 的实现类 User,用于用户信息的实例表示。另外,User 提供 Builder 模式的对象构建方式。
UserDetails user = User.builder()
    .username("user")
    .password("{bcrypt}$2a$10$GRLdNijSQMUvl/au9ofL.eDwmoohzzS7.rmNSJZ.0FxO/BTk76klW")
    .roles("USER")
    .build();
username
设置用户名称。
password
设置密码,Spring Security 不建议使用明文字符串存储密码,密码格式:
{id}encodedPassword
其中,id 为加密算法标识,encodedPassword 为密码加密后的字符串。这里以加密算法 bcrypt 为例,详细内容可参考 Password Storage。
roles
设置角色,支持多个。
UserDetails 实例创建完成之后,就可以使用 UserDetailsManager 的具体实现进行存储和读取。
In Memory
InMemoryUserDetailsManager 是 Spring Security 为我们提供的基于内存实现的 UserDetailsManager 。
@Configuration
public class SecurityConfig extends WebSecurityConfigurerAdapter {
  ...

  @Bean
  public UserDetailsManager users() {
    UserDetails user = User.builder()
            .username("userA")
            .password("{bcrypt}$2a$10$CrPsv1X3hM" +
                    ".giwVZyNsrKuaRvpJZyGQycJg78xT7Dm68K4DWN/lxS")
            .roles("USER")
            .build();

    InMemoryUserDetailsManager manager = new InMemoryUserDetailsManager();
    manager.createUser(user);

    return manager;
  }
}
- 创建用户信息实例 user,用户名为 userA,密码为 123456(使用 Bcrypt 算法加密);认证并需要角色参与,但 roles 必须被设置,这里指定为 USER;
- 创建 InMemoryUserDetailsManager 实例 manager;
- 使用 createUser 方法 将 user 存储至 manager;相当于把用户信息存储至内存介质中;
- 返回 manager;
使用 @Bean 将 InMemoryUserDetailsManager 实例注入 Spring Security。
创建 InMemoryUserDetailsManager 实例之后,并不是必须立即调用 createUser 添加用户信息,也可以在业务系统的其它地方获取已注入的 InMemoryUserDetailsManager 动态存储 UserDetails 实例。
编译启动应用,使用我们自己创建的用户名和密码(userA/123456)访问接口:
curl -H "Authorization: Basic dXNlckE6MTIzNDU2" http://localhost:9999

index
基于内存介质自定义的用户名和密码已生效,接口正常响应。
JDBC
JdbcUserDetailsManager 是 Spring Security 为我们提供的基于数据库实现的 UserDetailsManager,相较于 InMemoryUserDetailsManager 使用略复杂,需要我们创建数据表,并准备好数据库连接需要的数据源(DataSource), JdbcUserDetailsManager 实例的创建依赖于数据源。
JdbcUserDetailsManager 可以与业务系统共用一个数据库数据源实例,本文不讨论数据源的相关配置。
以 MySQL 为例,创建数据表语句:
create table users(
    username varchar(50) not null primary key,
    password varchar(500) not null,
    enabled boolean not null
);

create table authorities (
    username varchar(50) not null,
    authority varchar(50) not null,
    constraint fk_authorities_users foreign key(username) references users(username)
);

create unique index ix_auth_username on authorities (username,authority);
其他数据库语句可参考 User Schema。
JdbcUserDetailsManager 实例的创建与注入,除
- 获取已注入的数据源实例 dataSource;
- 创建实例时需要传入数据源实例 dataSource;
之外,整体流程与 InMemoryUserDetailsManager 类似,不再赘述。
@Configuration
public class SecurityConfig extends WebSecurityConfigurerAdapter {
  ......

  @Autowired
  private DataSource dataSource;

  @Bean
  public UserDetailsManager users() {
    UserDetails user = User.builder()
            .username("user")
            .password("{bcrypt}$2a$10$CrPsv1X3hM" +
                    ".giwVZyNsrKuaRvpJZyGQycJg78xT7Dm68K4DWN/lxS")
            .roles("USER")
            .build();

    JdbcUserDetailsManager manager = new JdbcUserDetailsManager(dataSource);
    manager.createUser(user);

    return manager;
  }
}
在业务系统中获取已注入的 JdbcUserDetailsManager 实例,可以动态存储 UserDetails 实例。
编译启动应用,使用我们自己创建的用户名和密码(userA/123456)访问接口:
curl -H "Authorization: Basic dXNlckE6MTIzNDU2" http://localhost:9999

index
基于数据库介质自定义的用户名和密码已生效,接口正常响应。
Spring Security 鉴权
Spring Security 可以提供基于角色的权限控制:
- 不同的用户可以属于不同的角色
- 不同的角色可以访问不同的接口
假设,存在两个角色 USER(普通用户) 和 ADMIN(管理员),
角色 USER 可以访问接口 /hello/name,
角色 ADMIN 可以访问接口 /hello/world,
所有用户认证后可以访问接口 /。
我们需要按上述需求重新设置 HttpSecurity:
  protected void configure(HttpSecurity http) throws Exception {
    http
            .authorizeHttpRequests(authorize ->
                    authorize
                            .mvcMatchers("/hello/name").hasRole("USER")
                            .mvcMatchers("/hello/world").hasRole("ADMIN")
                            .anyRequest().authenticated())
            .httpBasic();
  }
mvcMatchers("/hello/name").hasRole("USER")
设置角色 USER 可以访问接口 /hello/name。
mvcMatchers("/hello/world").hasRole("ADMIN")
设置角色 ADMIN 可以访问接口 /hello/world。
anyRequest().authenticated()
设置其他接口认证后即可访问。
mvcMatchers 支持使用通配符。
创建属于角色 USER 和 ADMIN 的用户:
用户名:userA,密码:123456,角色:USER
用户名:userB,密码:abcdef,角色:ADMIN
  @Bean
  public UserDetailsManager users() {
    UserDetails userA = User.builder()
            .username("userA")
            .password("{bcrypt}$2a$10$CrPsv1X3hM.giwVZyNsrKuaRvpJZyGQycJg78xT7Dm68K4DWN/lxS")
            .roles("USER")
            .build();

    UserDetails userB = User.builder()
            .username("userB")
            .password("{bcrypt}$2a$10$PES8fUdtRrQ9OxLqf4CofOfcXBLQ3lkY2TSIcs1E9A0z2wECmZigG")
            .roles("ADMIN")
            .build();

    JdbcUserDetailsManager manager = new JdbcUserDetailsManager(dataSource);

    manager.createUser(userA);
    manager.createUser(userB);

    return manager;
  }
对于用户 userA:
使用用户 userA 的用户名和密码访问接口 /:
curl -H "Authorization: Basic dXNlckE6MTIzNDU2" http://localhost:9999

index
认证通过,可正常访问。
使用用户 userA 的用户名和密码访问接口 /hello/name:
curl -H "Authorization: Basic dXNlckE6MTIzNDU2" http://localhost:9999/hello/name

hello name
认证通过,鉴权通过,可正常访问。
使用用户 userA 的用户名和密码访问接口 /hello/world:
curl -H "Authorization: Basic dXNlckE6MTIzNDU2" http://localhost:9999/hello/world

{
	"timestamp": "2022-01-10T13:11:18.032+00:00",
	"status": 403,
	"error": "Forbidden",
	"path": "/hello/world"
}
认证通过,用户 userA 不属于角色 ADMIN,禁止访问。
使用用户 userA 的用户名和密码访问接口 /:
curl -H "Authorization: Basic dXNlckE6MTIzNDU2" http://localhost:9999

index
认证通过,可正常访问。
对于用户 userB:
使用用户 userB 的用户名和密码访问接口 /:
curl -H "Authorization: Basic dXNlckI6YWJjZGVm" http://localhost:9999

index
认证通过,可正常访问。
使用用户 userB 的用户名和密码访问接口 /hello/world:
curl -H "Authorization: Basic dXNlckI6YWJjZGVm" http://localhost:9999/hello/world

hello world
认证通过,鉴权通过,可正常访问。
使用用户 userB 的用户名和密码访问接口 /hello/name:
curl -H "Authorization: Basic dXNlckI6YWJjZGVm" http://localhost:9999/hello/name

{
	"timestamp": "2022-01-10T13:18:29.461+00:00",
	"status": 403,
	"error": "Forbidden",
	"path": "/hello/name"
}
认证通过,用户 userB 不属于角色 USER,禁止访问。
这里可能会有一点奇怪,一般情况下我们会认为 管理员 应该拥有 普通用户 的全部权限,即普通用户 可以访问接口 /hello/name,那么 管理员 应该也是可以访问接口 /hello/name 的。如何实现呢?
方式一,设置用户 userB 同时拥有角色 USER 和 ADMIN;
    UserDetails userB = User.builder()
            .username("userB")
            .password("{bcrypt}$2a$10$PES8fUdtRrQ9OxLqf4CofOfcXBLQ3lkY2TSIcs1E9A0z2wECmZigG")
            .roles("USER", "ADMIN")
            .build();
这种方式有点不够“优雅”。
方式二,设置角色 ADMIN 包含 USER;
Spring Security 有一个 Hierarchical Roles 的特性,可以支持角色之间的 包含 操作。
使用这个特性要特别注意两个地方:
- authorizeRequests
  @Override
  protected void configure(HttpSecurity http) throws Exception {
    http
            .authorizeRequests(authorize ->
                    authorize
                            .mvcMatchers("/hello/name").hasRole("USER")
                            .mvcMatchers("/hello/world").hasRole("ADMIN")
                            .mvcMatchers("/").authenticated())
            .httpBasic();
  }
前文使用的是 HttpSecurity.authorizeHttpRequests 方法,此处需要变更为 HttpSecurity.authorizeRequests 方法。
- RoleHierarchy
  @Bean
  RoleHierarchy hierarchy() {
    RoleHierarchyImpl hierarchy = new RoleHierarchyImpl();
    hierarchy.setHierarchy("ROLE_ADMIN > ROLE_USER");

    return hierarchy;
  }
使用 RoleHierarchy 以 Bean 的方式定义角色之间的 层级关系;其中,“ROLE_” 是 Spring Security 要求的固定前缀。
编译启动应用,使用用户 userB 的用户名和密码访问接口 /hello/name:
curl -H "Authorization: Basic dXNlckI6YWJjZGVm" http://localhost:9999/hello/name

hello name
认证通过,鉴权通过,可正常访问。
如果开启 Spring Security 的 debug 日志级别,访问接口时可以看到如下的日志输出:
From the roles [ROLE_ADMIN] one can reach [ROLE_USER, ROLE_ADMIN] in zero or more steps.
可以看出,Spring Security 可以从角色 ADMIN 推导出用户实际拥有 USER 和 ADMIN 两个角色。
特别说明
Hierarchical Roles 文档中的示例有明显错误:
@Bean
AccessDecisionVoter hierarchyVoter() {
    RoleHierarchy hierarchy = new RoleHierarchyImpl();
    hierarchy.setHierarchy("ROLE_ADMIN > ROLE_STAFF\n" +
            "ROLE_STAFF > ROLE_USER\n" +
            "ROLE_USER > ROLE_GUEST");
    return new RoleHierarcyVoter(hierarchy);
}
接口 RoleHierarchy 中并不存在方法 setHierarchy。前文所述 authorizeRequests 和 RoleHierarchy 结合使用的方法是结合网络搜索和自身实践得出的,仅供参考。
另外,authorizeHttpRequests 和 RoleHierarchy 结合是没有效果的,authorizeRequests 和 authorizeHttpRequests 两者之间的区别可以分别参考 Authorize HttpServletRequests with AuthorizationFilter 和 Authorize HttpServletRequest with FilterSecurityInterceptor。
鉴权的前提需要认证通过;认证不通过的状态码为401,鉴权不通过的状态码为403,两者是不同的。
Spring Security 异常处理器
Spring Security 异常主要分为两种:认证失败异常和鉴权失败异常,发生异常时会分别使用相应的默认异常处理器进行处理,即:认证失败异常处理器和鉴权失败异常处理器。
使用的认证或鉴权实现机制不同,可能使用的默认异常处理器也不相同。
认证失败异常处理器
Spring Security 认证失败异常处理器:
public interface AuthenticationEntryPoint {
  void commence(HttpServletRequest request, HttpServletResponse response, AuthenticationException authException) throws IOException, ServletException;
}
如前文所述,认证失败时,Spring Security 使用默认的认证失败处理器实现返回:
{
	"timestamp": "2022-01-10T02:47:20.820+00:00",
	"status": 401,
	"error": "Unauthorized",
	"path": "/"
}
如果想要自定义返回内容,则可以通过自定义认证失败处理器实现:
  AuthenticationEntryPoint authenticationEntryPoint() {
    return (request, response, authException) -> response
            .getWriter()
            .print("401");
  }

  @Override
  protected void configure(HttpSecurity http) throws Exception {
    http
            ...
            .httpBasic()
            .authenticationEntryPoint(authenticationEntryPoint());
  }
authenticationEntryPoint() 会创建返回一个自定义的 AuthenticationEntryPoint 实例;其中,使用 HttpServletResponse.getWriter().print() 写入我们想要返回的内容:401。
httpBasic().authenticationEntryPoint(authenticationEntryPoint()) 使用我们自定义的 AuthenticationEntryPoint 替换 HttpBasic 默认的 BasicAuthenticationEntryPoint。
编译启动应用,使用不正确的用户名和密码访问接口 /:
curl -H "Authorization: Basic error" http://localhost:9999

401
认证不通过,使用我们自定义的内容 401 返回。
鉴权失败异常处理器
Spring Security 鉴权失败异常处理器:
public interface AccessDeniedHandler {
  void handle(HttpServletRequest request, HttpServletResponse response, AccessDeniedException accessDeniedException) throws IOException, ServletException;
}
如前文所述,认证失败时,Spring Security 使用默认的认证失败处理器实现返回:
{
	"timestamp": "2022-01-10T13:18:29.461+00:00",
	"status": 403,
	"error": "Forbidden",
	"path": "/hello/name"
}
如果想要自定义返回内容,则可以通过自定义鉴权失败处理器实现:
  AccessDeniedHandler accessDeniedHandler() {
    return (request, response, accessDeniedException) -> response
            .getWriter()
            .print("403");
  }

  @Override
  protected void configure(HttpSecurity http) throws Exception {
    http
            ...
            .httpBasic()
            .authenticationEntryPoint(authenticationEntryPoint())
            .and()
            .exceptionHandling()
            .accessDeniedHandler(accessDeniedHandler());
  }
自定义鉴权失败处理器与认证失败处理器过程类似,不再赘述。
编译启动应用,使用用户 userA 的用户名和密码访问接口 /hello/world:
curl -H "Authorization: Basic dXNlckE6MTIzNDU2" http://localhost:9999/hello/world

403
鉴权不通过,使用我们自定义的内容 403 返回。
特别注意
exceptionHandling() 也是有一个 authenticationEntryPoint() 方法的;对于 HttpBasic 而言,使用 exceptionHandling().authenticationEntryPoint() 设置自定义认证失败处理器是不生效的,具体原因需要大家自行研究。
Spring Security 自定义认证
前文介绍两种认证方式:FormLogin 和 HttpBasic,Spring Security 还提供其他若干种认证方式,详情可参考 Authentication Mechanisms。
如果我们想实现自己的认证方式,也是比较简单的。Spring Security 本质就是 过滤器,我们可以实现自己的认证过滤器,然后加入到 Spring Security 中即可。
  Filter preAuthenticatedFilter() {
    return (servletRequest, servletResponse, filterChain) -> {
      ...
      UserDetails user = User
              .builder()
              .username("xxx")
              .password("xxx")
              .roles("USER")
              .build();

      UsernamePasswordAuthenticationToken token =
              new UsernamePasswordAuthenticationToken(
                      user,
                      user.getPassword(),
                      user.getAuthorities());

      SecurityContext context =
              SecurityContextHolder.createEmptyContext();
      context.setAuthentication(token);

      SecurityContextHolder.setContext(context);

      filterChain.doFilter(servletRequest, servletResponse);
    };
  }
认证过滤器核心实现流程:
-
利用 Http 请求(servletRequest)中的信息完成自定义认证过程(省略),可能的情况:
- 检查请求中的用户名和密码是否匹配
- 检查请求中的 Token 是否有效
- 其他
如果认证成功,则继续下一步;认证失败,则可以抛出异常,或者跳过后续步骤;
-
从 Http 请求中提取 username(用户名),使用已注入的 UserDetailsService 实例,加载 UserDetails(用户信息)(省略);
简单起见,模拟创建一个用户信息实例 user;因为到这一步时,用户已是认证成功的,用户名和密码可以随意设置,实际只有角色是必须的,我们设置已认证用户的角色为 USER。 -
创建用户认证标识;
Spring Security 内部是依靠 Authentication.isAuthenticated() 来判断用户是否已认证过的,UsernamePasswordAuthenticationToken 是 Authentication 的一种具体实现,需要注意创建实例时使用的构造方法和参数,构造方法内部会调用 Authentication.setAuthenticated(true)。 -
创建并设置环境上下文 SecurityContext;
环境上下文中保存着用户认证标识:context.setAuthentication(token)。
特别注意
除去抛出异常的情况外,filterChain.doFilter(servletRequest, servletResponse); 是必须保证被执行的。
理解认证过滤器涉及的概念会比较多,详情参考 Servlet Authentication Architecture。
认证过滤器创建完成之后,就可以加入到 Spring Security 中:
  @Override
  protected void configure(HttpSecurity http) throws Exception {
    http
            ......
            .addFilterBefore(preAuthenticatedFilter(),
                    ExceptionTranslationFilter.class)
            .exceptionHandling()
            .authenticationEntryPoint(authenticationEntryPoint())
            .accessDeniedHandler(accessDeniedHandler());
  }
Spring Security 根据我们配置的不同,会为我们自动按照一定的次序组装一条 过滤器链,通过这条链上的若干过滤器完成认证鉴权的。我们需要把自定义的认证过滤器加到这个链的合适位置,这是选取的位置是在 ExceptionTranslationFilter 的前面。
过滤器链的顺序可以参考 Security Filters。
ExceptionTranslationFilter 的作用可以参考 Handling Security Exceptions。
特别注意
使用自定义认证过滤器时,自定义认证失败异常处理器和鉴权失败异常处理器的设置方法。
编译启动应用,我们会发现可以在不填入任何认证信息的情况下直接访问接口 / 和 /hello/name,因为模拟用户已认证且角色为 USER;访问接口 /hello/world 时会出现提示 403。
结语
Spring Security 自身包含的内容很多,官方文档也不能很好的讲述清楚每个功能特性的使用方法,很多时候需要我们自己根据文档、示例、源码以及他人的分享,尽可能多的实践,逐步加深理解。