通过注解的方式实现一个简单的HelloWorld。
源码
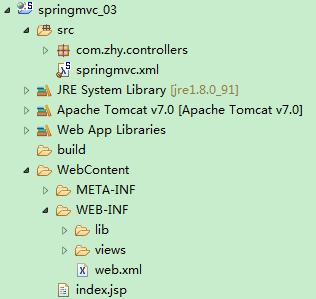
一、新建项目
不同的是springmvc配置文件的命名和路径,此处为src/springmvc.xml
二、配置文件
1、配置web.xml
<?xml version="1.0" encoding="UTF-8"?>
<web-app xmlns:xsi="http://www.w3.org/2001/XMLSchema-instance" xmlns="http://java.sun.com/xml/ns/javaee" xsi:schemaLocation="http://java.sun.com/xml/ns/javaee http://java.sun.com/xml/ns/javaee/web-app_3_0.xsd" id="WebApp_ID" version="3.0">
  <!-- The front controller of this Spring Web application, responsible for handling all application requests -->
    <servlet>
        <servlet-name>springDispatcherServlet</servlet-name>
        <servlet-class>org.springframework.web.servlet.DispatcherServlet</servlet-class>
        <init-param>
            <param-name>contextConfigLocation</param-name>
            <param-value>classpath:springmvc.xml</param-value>
        </init-param>
        <load-on-startup>1</load-on-startup>
    </servlet>

    <!-- Map all requests to the DispatcherServlet for handling -->
    <servlet-mapping>
        <servlet-name>springDispatcherServlet</servlet-name>
        <url-pattern>/</url-pattern>
    </servlet-mapping>
</web-app>
2、配置springmvc.xml
<?xml version="1.0" encoding="UTF-8"?>
<beans xmlns="http://www.springframework.org/schema/beans"
    xmlns:xsi="http://www.w3.org/2001/XMLSchema-instance"
    xmlns:context="http://www.springframework.org/schema/context"
    xmlns:mvc="http://www.springframework.org/schema/mvc"
    xsi:schemaLocation="http://www.springframework.org/schema/beans http://www.springframework.org/schema/beans/spring-beans.xsd
        http://www.springframework.org/schema/context http://www.springframework.org/schema/context/spring-context-4.2.xsd
        http://www.springframework.org/schema/mvc http://www.springframework.org/schema/mvc/spring-mvc-4.2.xsd">

    <!-- 配置扫描自定义的包 -->
    <context:component-scan base-package="com.zhy.controllers"></context:component-scan>

    <!-- 配置视图解析器 -->
    <bean class="org.springframework.web.servlet.view.InternalResourceViewResolver">
        <!-- 配置前缀 -->
        <property name="prefix" value="/WEB-INF/views/"></property>
        <!-- 配置后缀 -->
        <property name="suffix" value=".jsp"></property>
    </bean>
</beans>
三、编写Controller
package com.zhy.controllers;

import org.springframework.stereotype.Controller;
import org.springframework.web.bind.annotation.RequestMapping;

@Controller
public class HelloWorldController {

    /*
     * 通过视图解析器(ViewResolver)得到实际的物理视图
     * 视图解析器的解析规则:prefix + returnvalue + suffix
     * 结合本实例,视图解析器的解析出来的物理视图为:/WEB-INF/views/helloworld.jsp
     * */
    @RequestMapping("/mvc")
    public String hello(){

        System.out.println("call controller");
        return "helloworld";
    }
}