使用jQuery 利用 FormData 上传文件:http://harttle.com/2016/07/04/jquery-file-upload.html
通过FormData对象可以组装一组用
XMLHttpRequest发送请求的键/值对。它可以更灵活方便的发送表单数据,因为可以独立于表单使用。如果你把表单的编码类型设置为multipart/form-data ,则通过FormData传输的数据格式和表单通过submit() 方法传输的数据格式相同,也就是二进制文件。不是用<form>表单构造FormData对象,var file = fileInput.files[0];它的file值为以下的图片的对象
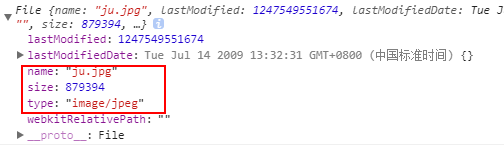
{
     lastModified:1247549551674
     lastModifiedDate:Tue Jul 14 2009 13:32:31 GMT+0800 (中国标准时间) {}
     name:"ju.jpg"
     size:879394
     type:"image/jpeg"
     webkitRelativePath:""
}
可以自己创建一个FormData对象,然后通过调用它的append()方法添加字段,就像这样:
var formData = new FormData();

formData.append("username", "Groucho");
formData.append("accountnum", 123456); // 数字 123456 会被立即转换成字符串 "123456"

// HTML 文件类型input,由用户选择
formData.append("userfile", fileInputElement.files[0]);

// JavaScript file-like 对象var content = '<a id="a"><b id="b">hey!</b></a>'; // 新文件的正文...var blob = new Blob([content], { type: "text/xml"});

formData.append("webmasterfile", blob);

var request = new XMLHttpRequest();
request.open("POST", "http://foo.com/submitform.php");
request.send(formData);
通过表单创建 FormData 对象
<form id="uploadForm" enctype="multipart/form-data">
     <input id="file" type="file" name="file"/>
     <button id="upload" type="button">upload</button>
</form>

enctype="multipart/form-data"  文件的二进制属性
上传文件部分只有底层的XMLHttpRequest对象发送上传请求,那么怎么通过jQuery的Ajax上传呢?
本文将介绍通过jQuery使用FormData对象上传文件。
<form id="uploadForm" enctype="multipart/form-data">
     <input id="file" type="file" name="file"/>
     <button id="upload" type="button">upload</button>
</form>

$.ajax({
     url: '/upload',
     type: 'POST',
     cache: false,
     data: new FormData($('#uploadForm')[0]),
     processData: false,
     contentType: false
}).done(function(res) {
}).fail(function(res) {});
这里要注意几点:
- processData设置为false。因为data值是FormData对象,不需要对数据做处理。
- <form>标签添加enctype="multipart/form-data"属性。
- cache设置为false,上传文件不需要缓存。
- contentType设置为false。因为是由<form>表单构造的FormData对象,且已经声明了属性enctype="multipart/form-data",所以这里设置为false。
上传后,服务器端代码需要使用从查询参数名为file获取文件输入流对象,因为<input>中声明的是name="file"。
使用FormData对象添加字段方式上传文件,它 不是用
<form>表单构造FormData对象,常用<div id="uploadForm">
<input id="file" type="file" multiple/>
<button id="upload" type="button">upload</button>
</div>
var formData = new FormData();
formData.append('file', $('#file')[0].files[0]);
$.ajax({
url: '/upload',
type: 'POST',
cache: false,
data: formData,
processData: false,
contentType: false
}).done(function(res) {
//
}).fail(function(res) {
//
});
这里有几处不一样:
- append()的第二个参数应是文件对象,即$('#file')[0].files[0]。
- contentType也要设置为‘false’。
从代码$('#file')[0].files[0]中可以看到一个<input type="file">标签能够上传多个文件,
只需要在<input type="file" multiple>里添加multiple或multiple="multiple"属性。
通过AJAX提交表单和上传文件可以不使用FormData对象
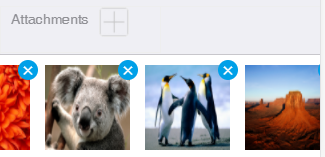
Form Data 图片上传,手机版,使用 mui 的方法,效果图为:
<style>
                  .anviz-upload-file .image-item{
                        width: 30px;
                      height: 30px;
                      background-image: url(../../img/icon/add.png);
                      background-size: 100% 100%;
                      display: inline-block;
                      position: relative;
                      border-radius: 5px;
                      margin-right: 10px;
                      margin-bottom: 10px;
                      border: solid 1px #e8e8e8;
                      margin-left: 20px;
                  }
                  .anviz-upload-file .image-item .image-close
                  {
                        position: absolute;
                      display: inline-block;
                      right: -6px;
                      top: -6px;
                      width: 20px;
                      height: 20px;
                      text-align: center;
                      line-height: 20px;
                      border-radius: 12px;
                      background-color: #FF5053;
                      color: #f3f3f3;
                      border: solid 1px #FF5053;
                      font-size: 9px;
                      font-weight: 200;
                      z-index: 1;
                  }
                  .anviz-upload-file .image-item input[type="file"]{
                        position: absolute;
                      left: 0px;
                      top: 0px;
                      width: 100%;
                      height: 100%;
                      opacity: 0;
                      cursor: pointer;
                      z-index: 0;
                  }
                  .img-list{
                        width: 100%;
                        height: 105px;
                      padding: 10px 10px;
                      overflow: hidden;
                      border-top: 1px solid #c8c7cc;
                      border-bottom: 1px solid #c8c7cc;
                      background: #fff;
                      margin: 0;
                      display: -webkit-box;
                      display: -ms-flexbox;
                      display: flex;
                      justify-content: flex-start;
                      overflow: scroll;

                  }
                  .img-list li{
                        position: relative;
                        margin-right: 15px;
                  }
                  .img-list li img{
                        width: 85px;
                        height: 85px;
                  }
                  .img-list li span{
                        position: absolute;
                      top: -5px;
                  left: 73px;
                      background: #00a0e8;
                      width: 20px;
                      height: 20px;
                      border-radius: 20px;
                      text-align: center;
                      line-height: 18px;
                      color: #fff;
                  }
            </style>

<ul class="mui-table-view mui-grid-view mui-grid-9">
    <li class="mui-table-view-cell mui-media mui-col-xs-6 mui-col-sm-6 anviz-upload-warp" style="display: flex;padding: 0;">
         <h5 class="anviz-padded">Attachments</h5>
         <div class="anviz-upload-file">
             <div class="image-item">
                  <input id="file" type="file" />
             </div>
         </div>
    </li>
</ul>
<ul id="imgList" class="img-list"></ul>
<script> mui.ready(function(){ var myfile = document.getElementById('file'); var List = document.getElementsByClassName('img-list')[0]; myfile.onchange = function(){ var files = this.files; if(!files)return; for(var i = 0;i<files.length;i++){ var oLi = '<li><img src="'+URL.createObjectURL(files[i])+'"><span class="close" onclick="closeli(this)" >×</span></li>'; List.innerHTML+=oLi; } } }); function closeli(obj){ var filearr = []; var closes = document.getElementsByClassName('close'); [].slice.call(closes).forEach(function(dom,index){ if(obj === closes[index]){ filearr.splice(index,1); }; }); obj.parentNode.remove(); } </script>
亲测可用!欢迎指正交流。