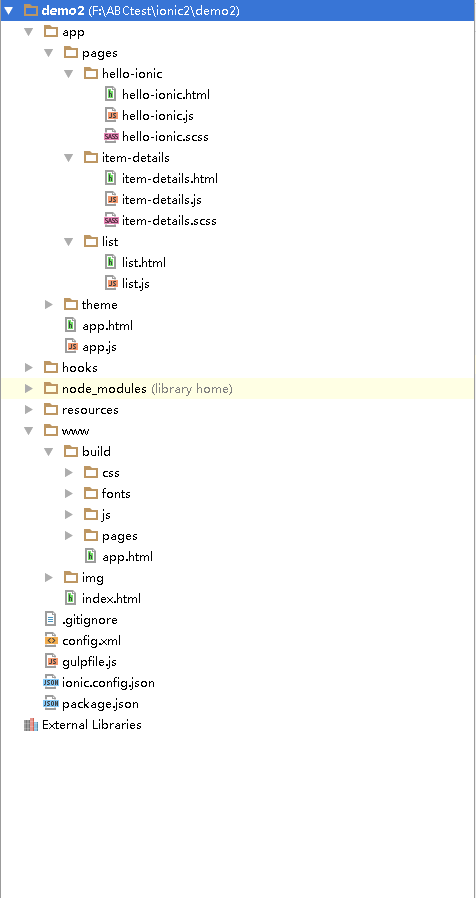
0、目录结构
1、看完上一章,一定会发现 路由消失了,这章看一下ionic的初始化项目的源码。
/* --- app.js ----*/

import {ViewChild} from '@angular/core';
import {App, Platform, MenuController} from 'ionic-angular';
import {StatusBar} from 'ionic-native';
import {HelloIonicPage} from './pages/hello-ionic/hello-ionic';
import {ListPage} from './pages/list/list';


@App({
  templateUrl: 'build/app.html',
  config: {}, // http://ionicframework.com/docs/v2/api/config/Config/
  queries: {
    nav: new ViewChild('content')
  }
})
class MyApp {
  static get parameters() {
    return [[Platform], [MenuController]];
  }
  constructor(platform, menu) {
    this.platform = platform;
    this.menu = menu;
    this.initializeApp();
    // 设置我们的应用程序的页面
    this.pages = [
      { title: 'Hello Ionic', component: HelloIonicPage },
      { title: 'My First List', component: ListPage }
    ];
    // make HelloIonicPage the root (or first) page
    this.rootPage = HelloIonicPage;
  }
  initializeApp() {
    this.platform.ready().then(() => {
      // 好的,这样的平台是现成的,我们的插件是可用的。
      // 在这里你可以做任何你可能需要的更高水平的
      StatusBar.styleDefault();
    });
  }

  openPage(page) {
    // close the menu when clicking a link from the menu
    // 从菜单上点击一个链接时,可以关闭菜单
    this.menu.close();
    // navigate to the new page if it is not the current page
    // 如果不是当前页面,则导航到新页
    this.nav.setRoot(page.component);
  }
}

/* --- app.js ----*/
/* --- app.html ----*/

<ion-menu [content]="content">

  <ion-toolbar>
    <ion-title>Pages</ion-title>
  </ion-toolbar>

  <ion-content>
    <ion-list>
      <button ion-item *ngFor="let p of pages" (click)="openPage(p)" >
        {{p.title}}
      </button>
    </ion-list>
  </ion-content>

</ion-menu>

<ion-nav [root]="rootPage" #content swipe-back-enabled="false"></ion-nav>

/* --- app.html ----*/
上述 app.js 中的红色部分是配置 侧边栏。红色部分中的黑色部分要和app.html中的红色部分的黑色部分对应上,这样才能告诉浏览器渲染的子页面
在 ion-nav(绿色部分)中显示。
之后再来解析一下。
<ion-nav [root]="rootPage" #content swipe-back-enabled="false"></ion-nav> 1、#content代表的是关联的侧边栏。 2、上述的app.js的紫色部分 openPage(page)方法。他的形参是一个page。记住这个形参
this.pages = [ { title: 'Hello Ionic', component: HelloIonicPage }, { title: 'My First List', component: ListPage } ]; 因为 this 和 class类中的方法 其实就相当于ng1中的 $scope 所以这个时候作用于起到了作用 把这个方法 和这个变量交给了 app.html 中 这个时候 app.html中的紫色部分 <ion-list> <button ion-item *ngFor="let p of pages" (click)="openPage(p)" > {{p.title}} </button> </ion-list> 他循环了 pages 之后 得到了p 之后 (click)="openPage(p) 意思就是说 点击这个按钮的时候 走openPage方法 同时穿进去了一个p的参数 我们得知 p.component是一个组件。 所以这个时候 在这个方法里。 this.menu.close(); 告诉我们从菜单上点击一个链接时,可以关闭菜单 this.nav.setRoot(page.component); 告诉我们如果不是当前页面,则导航到新页,!注意page是形参 p是实参。 4、在来看一下橙色部分 static get parameters() { return [[Platform], [MenuController]]; } 他向 constructor(platform, menu);传了两个参数。 这两个参数的由来是。 import {App, Platform, MenuController} from 'ionic-angular'; 我记得、在typescript中我是这么写的。 constructor(platform : Platform, menu : MenuController);
因为这里用的是 es2015 也就是es6编写的。因为是默认模式。 3、root 是连接组件。因为在app.js中已经声明了。this.rootPage = HelloIonicPage; 而 HelloIonicPage 其实就是另一个组件。import {HelloIonicPage} from './pages/hello-ionic/hello-ionic'; 所以这个时候 [root]="rootPage" 也就相当于默认到了 HelloIonicPage 组件的页面当中。下面来看一下 hellow-ionic 的js 与 html。
/* --- hello-ionic.html ----*/

<ion-navbar *navbar>
  <button menuToggle>
    <ion-icon name="menu"></ion-icon>
  </button>
  <ion-title>Hello Ionic</ion-title>
</ion-navbar>


<ion-content padding class="getting-started">

  <h3>Welcome to your first Ionic app!</h3>

  <p>
    This starter project is our way of helping you get a functional app running in record time.
  </p>
  <p>
    Follow along on the tutorial section of the Ionic docs!
  </p>
  <p>
    <button primary menuToggle>Toggle Menu</button>
  </p>

</ion-content>

/* --- hello-ionic.html ----*/
/* --- hello-ionic.js ----*/

import {Page} from 'ionic-angular';


@Page({
  templateUrl: 'build/pages/hello-ionic/hello-ionic.html'
})

export class HelloIonicPage {
  constructor() {

  }
}

/* --- hello-ionic.js ----*/
他是没有路由参数的。ionic2好像比ng1还过分取消了路由。但是却很吊。因为 在 app.js 中 openPage(page) 方法已经讲过 他直接就利用了组件跳转到了另一个页面 所以
根本就不用配置 url 。 好歹ng2有一个 @RouteConfig 可以配置Name 和 path 传参数 用Roter 和 RoterParams 而ionic2呢。见识一下他的强大吧。
/* --- list.html ----*/

<ion-navbar *navbar>
  <button menuToggle>
    <ion-icon name="menu"></ion-icon>
  </button>
  <ion-title>My First List</ion-title>
</ion-navbar>

<ion-content>
  <ion-list>
    <button ion-item *ngFor="let item of items" (click)="itemTapped($event, item)">
      <ion-icon name="{{item.icon}}" item-left></ion-icon>
      {{item.title}}
      <div class="item-note" item-right>
        {{item.note}}
      </div>
    </button>
  </ion-list>
  <div *ngIf="selectedItem" padding>
    You navigated here from <b>{{selectedItem.title}}</b>
  </div>
</ion-content>

/* --- list.html ----*/
/* --- list.js----*/

import {Page, NavController, NavParams} from 'ionic-angular';
import {ItemDetailsPage} from '../item-details/item-details';


@Page({
  templateUrl: 'build/pages/list/list.html'
})
export class ListPage {
  static get parameters() {
    return [[NavController], [NavParams]];
  }

  constructor(nav, navParams) {
    this.nav = nav;

    // If we navigated to this page, we will have an item available as a nav param
    this.selectedItem = navParams.get('item');

    this.icons = ['flask', 'wifi', 'beer', 'football', 'basketball', 'paper-plane',
    'american-football', 'boat', 'bluetooth', 'build'];

    this.items = [];
    for(let i = 1; i < 11; i++) {
      this.items.push({
        title: 'Item ' + i,
        note: 'This is item #' + i,
        icon: this.icons[Math.floor(Math.random() * this.icons.length)]
      });
    }
  }

  itemTapped(event, item) {
     this.nav.push(ItemDetailsPage, {
       item: item
     });
  }
}

/* --- list.js----*/
说是没有了路由实际上他是没有了路径。先看 list.js 中的 红色部分 。他定义了一个 items 循环把数据放进去 形成了数组<对象>你懂得。
然后他在 list.html 中 用 *ngFor 遍历出来。在看 红色部分 中的 黑色部分
(click)="itemTapped($event, item) 可以看得出来点击某个button之后 走这个方法这个方法有两个参数 一个是$event事件。一个是item 这个item是 单个的数据。 例如: {title: "Item 3", note: "This is item #3", icon: "wifi"}之后看 这个方法做了什么 灰色部分 首选你需要向别的组件提供一个参数,所以他需要
import {Page, NavController, NavParams} from 'ionic-angular'; constuctor声明就不多说了。this.nav.push( ItemDetailsPage , { item: item});this._router.navigate( ['/Animates/Movie',{ item: item}])对比一下 发现 ionic2 中的 ItemDetailsPage 是组件
import {ItemDetailsPage} from '../item-details/item-details'; 而 angular2 中的 '/Animates/Movie' 是@RouteConfig中的name所以ionic2简直了!
既然指向了组件 并且传了参数 那么如何接受参数呢 ?
/* --- item-details.html ----*/

<ion-navbar *navbar>
  <button menuToggle *ngIf="!selectedItem">
    <ion-icon name="menu"></ion-icon>
  </button>
  <ion-title>Item Details</ion-title>
</ion-navbar>

<ion-content>
 <div *ngIf="selectedItem" class="selection">
    <b>{{selectedItem.title}}</b>
    <ion-icon name="{{selectedItem.icon}}"></ion-icon>
    <div>
      You navigated here from <b>{{selectedItem.title}}</b>
    </div>
  </div>
</ion-content>

/* ---item-details.html ----*/
/* --- item-details.js ----*/

import {Page, NavController, NavParams} from 'ionic-angular';


@Page({
  templateUrl: 'build/pages/item-details/item-details.html'
})
export class ItemDetailsPage {
  static get parameters() {
    return [[NavController], [NavParams]];
  }

  constructor(nav, navParams) {
    this.nav = nav;
    // If we navigated to this page, we will have an item available as a nav param
    this.selectedItem = navParams.get('item');
  }
}

/* --- item-details.js  ----*/
来看 item-details.js 中的 红色部分 参数就是这样接收的。基本与angular2基本上一样。
以上就是
$ ionic start 项目名称 tutorial --v2 的初始化代码解析。