来源:https://www.zybuluo.com/ncepuwanghui/note/954160
参考:https://blog.huihut.com/2017/08/25/LinuxInstallConfigShadowsocksClient/
亲测在CentOS-7-x86_64-DVD-1804.iso(KDE)上安装成功
一、安装shadowsocks
安装epel扩展源
采用Python包管理工pip安装
sudo yum -y install epel-release
sudo yum -y install python-pip
由于安装shadowsocks时提示需要jiaja2和pyudev,dnspython的版本要求,所以安装和更新
ipaclient 4.5.4 requires jinja2, which is not installed.
rtslib-fb 2.1.63 has requirement pyudev>=0.16.1, but you'll have pyudev 0.15 which is incompatible.
ipapython 4.5.4 has requirement dnspython>=1.15, but you'll have dnspython 1.12.0 which is incompatible.
安装jiaja2
sudo yum -y install python-jinja2
更新pyudev
git clone https://github.com/lunaryorn/pyudev.git
cd pyudev
sudo python setup.py install
wget http://www.dnspython.org/kits/1.15.0/dnspython-1.15.0.tar.gz
tar -zxvf dnspython-1.15.0.tar.gz
cd dnspython-1.15.0
sudo python setup.py install
安装shadowsocks
sudo pip install shadowsocks
如果出现此提示,则按提示更新pip
You are using pip version 8.1.2, however version 10.0.1 is available.
You should consider upgrading via the 'pip install --upgrade pip' command.
更新
sudo pip install --upgrade pip
二、配置Shadowsocks
新建设置文件
sudo vi /etc/shadowsocks.json
{
    "local_address": "127.0.0.1",
    "local_port":1080,
    "server":"服务器IP",
    "server_port":服务器端口,
    "password":"服务器密码",
    "timeout":300,
    "method":"aes-256-cfb",
    "fast_open": false,
    "workers": 1
}
2.新建自启动脚本,设置后开机可以自启动(注意路径)
sudo vi /etc/systemd/system/shadowsocks.service
[Unit]
Description=Shadowsocks
[Service]
TimeoutStartSec=0
ExecStart=/usr/bin/sslocal -c /etc/shadowsocks.json
[Install]
WantedBy=multi-user.target
3.启动
systemctl enable shadowsocks.service
systemctl start shadowsocks.service
systemctl status shadowsocks.service
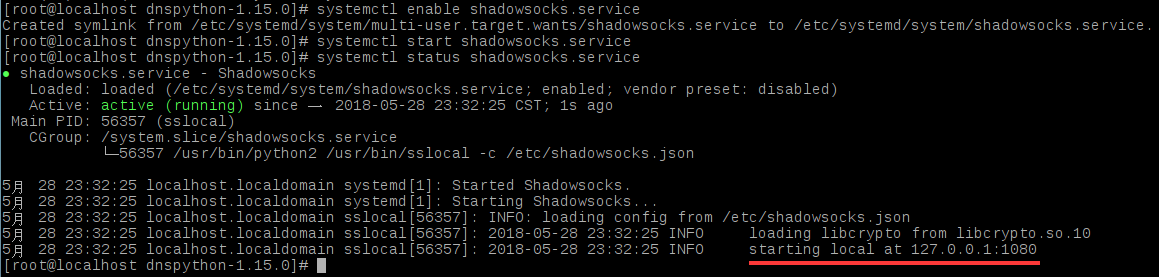
4.测试,成功时返回shadowsocks的设置IP
curl --socks5 127.0.0.1:1080 http://httpbin.org/ip
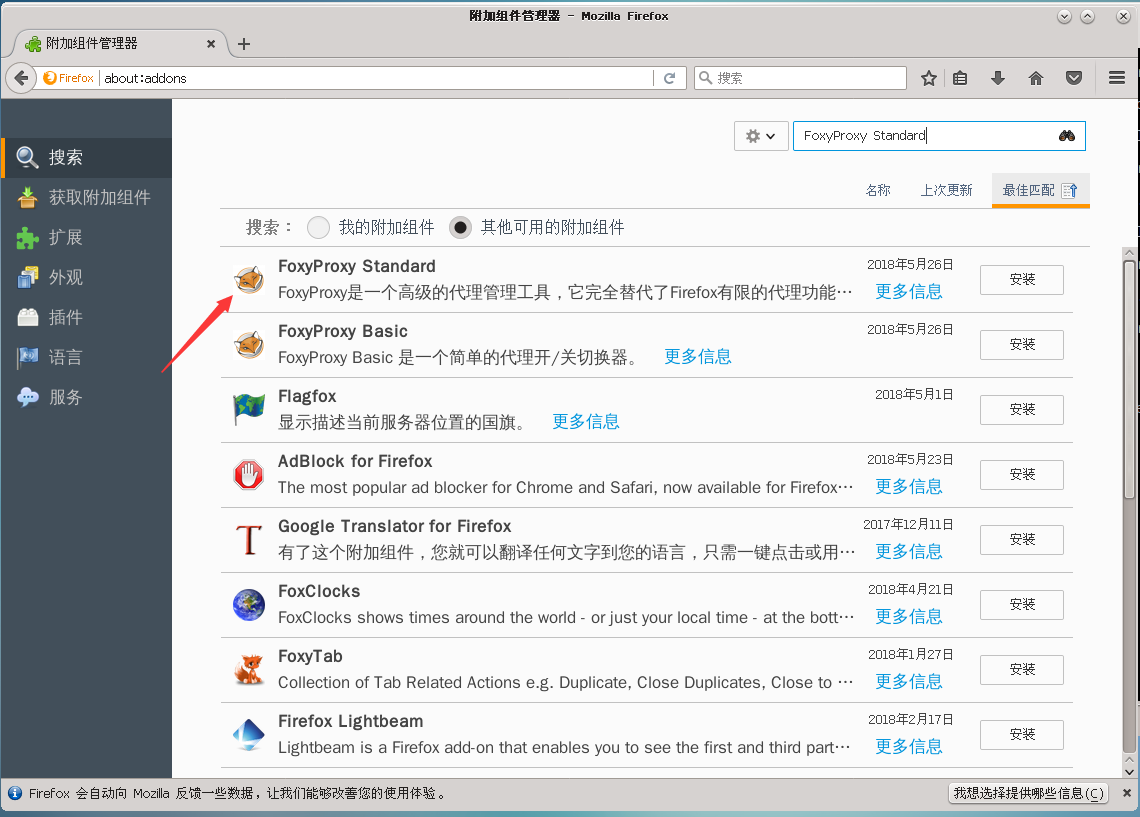
三、配置火狐
下载安装FoxyProxy Standard
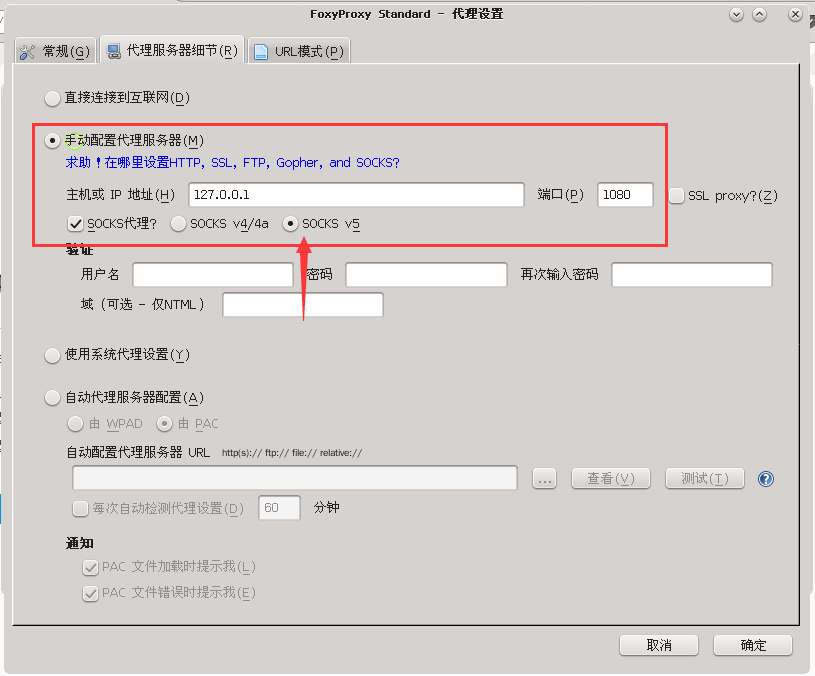
配置FoxyProxy,填写IP和端口,选择socks5,保存
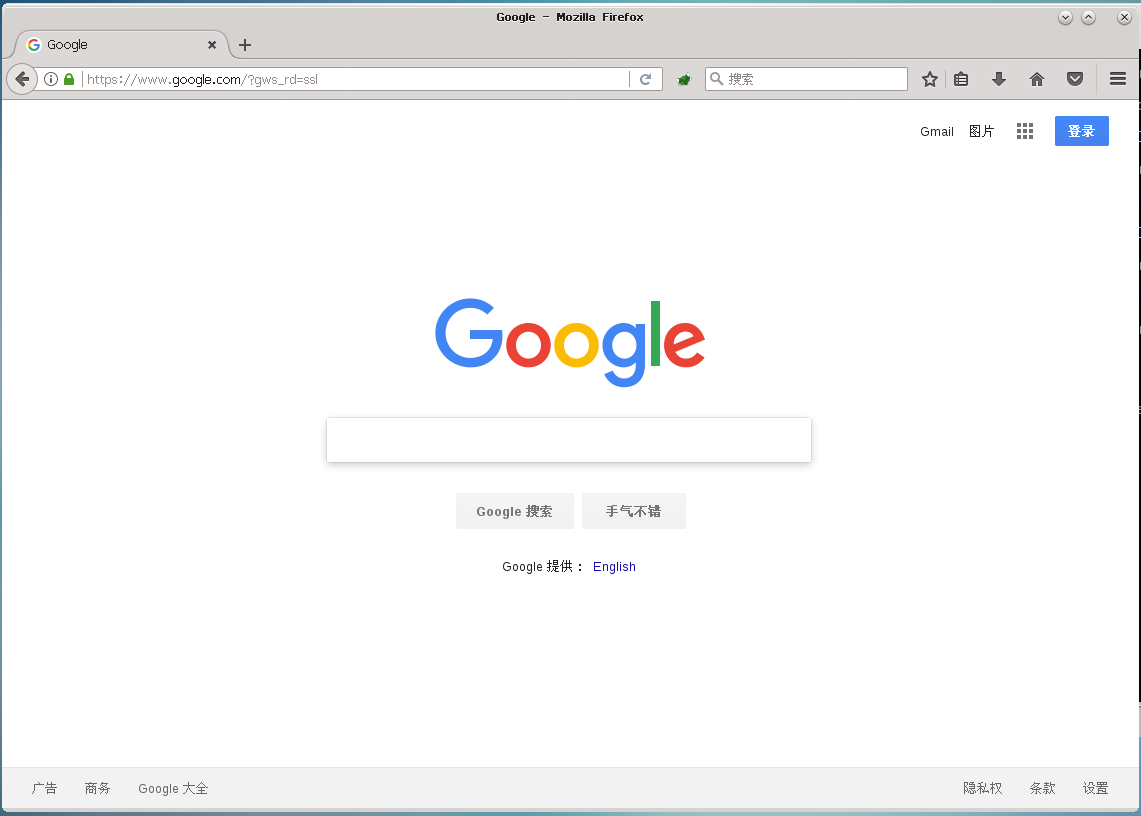
启用代理

测试
四、安装配置Privoxy
sudo yum -y install privoxy
启动Privoxy
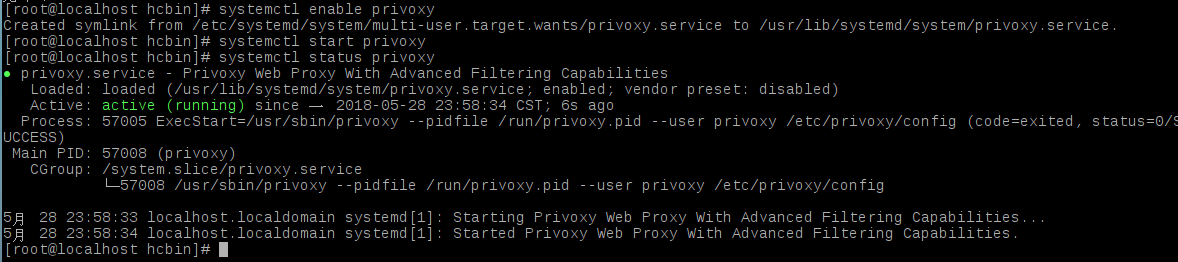
systemctl enable privoxy
systemctl start privoxy
systemctl status privoxy
配置Privoxy(文本较长,建议其他文本编辑器查找)
sudo vi /etc/privoxy/config
确保如下内容没有被注释掉
listen-address 127.0.0.1:8118    #8118是默认端口,不用改
forward-socks5t / 127.0.0.1:1080 .    #转发到本地端口
添加代理
sudo vi /etc/profile
export http_proxy=http://127.0.0.1:8118
export https_proxy=http://127.0.0.1:8118
source /etc/profile
测试
curl www.google.com