大家肯定遇到过或将要遇到加载大数据的时候,如果出现长时间的空白等待,一般人的概念会是:难道卡死了?
作为一个懂技术的挨踢技术,即使你明知道数据量太大正在加载,但是假如看不到任何动静,自己觉得还是一种很不好的体验。
之前做项目的时候有这方面的要求,我的前辈们早已给出了完美的解决方案。最近自己在努力学习,今天拿出来与大家一起分享,我想一定会有帮助的。看过之后大家会佩服我的前辈的,呵呵,好,废话少说,下面开始。
因为怕自己班门弄斧,所以在网上先查了资料,确定很难找到这样的实例才敢拿出来与大家见面。不过确实也找到了一个相似效果的案例,但那位高手用的全是前台实现,而我的前辈是在后台写了一个类BusyDecorator,用起来更加方便。喜欢前台xaml实现的可以去看一下那位高手的代码:http://blog.csdn.net/qqamoon/article/details/7001693 他的代码我没做试验,看他的那个实现效果跟我的是一样的。
我的陋代码又要上台表现了,诸位扶好眼镜框了哈~~
首先我们需要定义一些属性用来保存位置,大小,角度,透明度之类:


        /// <summary>
        /// 条的数量
        /// </summary>
        int _elementCount;

        /// <summary>
        /// 圆的半径
      /// </summary>
        double _radious = 10;

        /// <summary>
        /// 执行动画的DispatcherTimer
        /// </summary>
        DispatcherTimer _animationTimer;

        /// <summary>
        /// 当前条的索引位置
        /// </summary>
        int _currentElementIndex = 0;

        /// <summary>
        /// 需要变换的透明度个数
        /// </summary>
        int _opacityCount;

        /// <summary>
        /// 透明度间的间隔
        /// </summary>
        double _opacityInterval;

        /// <summary>
        /// 透明度
        /// </summary>
        double _opacity;

        /// <summary>
        /// 最小透明度
        /// </summary>
        double _minOpacity;

        /// <summary>
        /// 条的数组
        /// </summary>
        object[] _elements;

        /// <summary>
        /// 画布
        /// </summary>
        private Canvas _canvas;
由于我们是定义在一个类BusyDecorator里面,所以需要在构造函数里定义最初的静态画布效果。然后利用计时器控制动画的启动与停止。
重点便是静态画布的设计与Timer_Tick事件的实现。
我的前辈给出的静态画布设计如下:
  private void CreateElements(Canvas canvas, double Left, double Top)
        {
            _elementCount = 12;
            _opacity = 1;
            _minOpacity = 0.3;
            double surplusOpacity = _opacity - _minOpacity;
            _opacityCount = (int)(_elementCount * 0.5);
            _opacityInterval = surplusOpacity / _opacityCount;

            _elements = new object[_elementCount];

            for (int i = 0; i < _elementCount; i++)
            {
                Rectangle rect = new Rectangle();
                rect.Fill = new SolidColorBrush(Colors.Black);
                rect.Width = 5;
                rect.Height = 5;
                rect.RadiusX = 2;
                rect.RadiusY = 2;
                if (i < _opacityCount)
                {
                    rect.Opacity = _opacity - i * _opacityInterval;
                }
                else
                {
                    rect.Opacity = _minOpacity;
                }
                rect.SetValue(Canvas.LeftProperty, Left + _radious * Math.Cos(360 / _elementCount * i * Math.PI / 180));
                rect.SetValue(Canvas.TopProperty, Top - 2.5 - _radious * Math.Sin(360 / _elementCount * i * Math.PI / 180));

                rect.RenderTransform = new RotateTransform(360 - 360 / _elementCount * i, 0, 2.5);
                canvas.Children.Add(rect);

                _elements[i] = rect;
            }

            _currentElementIndex = 0;

        }
接下来就是Timer_Tick事件了,一般人想不到这样处理吧:
 private void _animationTimer_Tick(object sender, EventArgs e)
        {
            try
            {
                _currentElementIndex--;
                _currentElementIndex = _currentElementIndex < 0 ? _elements.Length - 1 : _currentElementIndex;
                int opacitiedCount = 0;
                for (int i = _currentElementIndex; i < _currentElementIndex + _elementCount; i++)
                {
                    int j = i > _elements.Length - 1 ? i - _elements.Length : i;

                    if (opacitiedCount < _opacityCount)
                    {
                        ((Rectangle)_elements[j]).Opacity = _opacity - opacitiedCount * _opacityInterval;
                        opacitiedCount++;
                    }
                    else
                    {
                        ((Rectangle)_elements[j]).Opacity = _minOpacity;
                    }
                }
            }
            catch (Exception ex)
            { }
        }
好了,重点结束后就是剩下的构造函数BusyDecorator了:
        public BusyDecorator(Canvas canvas)
        {
            this._canvas = canvas;
            _animationTimer = new DispatcherTimer();
            _animationTimer.Interval = TimeSpan.FromMilliseconds(40);
            _animationTimer.Tick += new EventHandler(_animationTimer_Tick);

            CreateElements(canvas, canvas.Width / 2, canvas.Height / 2);
        }
注意:此构造函数由于用到了canvas.width和canvas.height,所以,前台定义canvas时一定要设置其width和height属性。
然后是启动动画与停止动画事件:
        public void StartDecorator()
        {
            _canvas.Visibility = Visibility.Visible;
            _animationTimer.Start();
        }

        public void StopDecorator()
        {
            _canvas.Visibility = Visibility.Hidden;
            _animationTimer.Stop();
        }
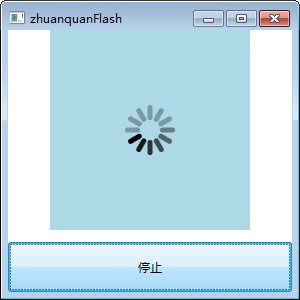
好了,类BusyDecorator设计好了,下面做一个实例测试一下吧:
做一个前台页面:
<Window x:Class="testFlowDocument.zhuanquanFlash"
        xmlns="http://schemas.microsoft.com/winfx/2006/xaml/presentation"
        xmlns:x="http://schemas.microsoft.com/winfx/2006/xaml"
        Title="zhuanquanFlash" Height="300" Width="300">
    <Grid>
        <Canvas Name="canvas_bu" Width="200" Height="200"  VerticalAlignment="Top" Background="LightBlue">

         </Canvas>
        <Button Name="btn_start" Content="开始" Height="50" VerticalAlignment="Bottom" Click="Button_Click" />

    </Grid>
</Window>
后台代码:
using System;
using System.Collections.Generic;
using System.Linq;
using System.Text;
using System.Windows;
using System.Windows.Controls;
using System.Windows.Data;
using System.Windows.Documents;
using System.Windows.Input;
using System.Windows.Media;
using System.Windows.Media.Imaging;
using System.Windows.Shapes;

namespace testFlowDocument
{
    /// <summary>
    /// zhuanquanFlash.xaml 的交互逻辑
    /// </summary>
    public partial class zhuanquanFlash : Window
    {
        public zhuanquanFlash()
        {
            InitializeComponent();
            busy = new BusyDecorator(this.canvas_bu);
        }
        BusyDecorator busy;
        bool isstart = false;
        private void Button_Click(object sender, RoutedEventArgs e)
        {
            if (isstart == false)
            {
                busy.StartDecorator();
                isstart = true;
                this.btn_start.Content = "停止";
            }
            else
            {
                busy.StopDecorator();
                isstart = false;
                this.btn_start.Content = "开始";
            }
        }
    }
}
静态效果图:
PS:如何快速制作动态gif图?像上边链接地址里的那样的gif图。不会photoshop,求推荐好使工具~~
本文地址:http://www.cnblogs.com/jying/p/3230391.html 转载请写明出处~~
ok,到此为止,谢谢大家捧场~~