Prometheus监控基本原理
Prometheus的基本原理是通过HTTP协议周期性抓取被监控组件的状态,任意组件只要提供对应的HTTP接口就可以接入监控。不需要任何SDK或者其他的集成过程。这样做非常适合做虚拟化环境监控系统,比如VM、Docker、Kubernetes等。输出被监控组件信息的HTTP接口被叫做exporter 。目前互联网公司常用的组件大部分都有exporter可以直接使用,比如Varnish、Haproxy、Nginx、MySQL、Linux系统信息(包括磁盘、内存、CPU、网络等等)。

Prometheus服务过程
Prometheus Daemon 负责定时去目标上抓取metrics(指标)数据,每个抓取目标需要暴露一个http服务的接口给它定时抓取。Prometheus支持通过配置文件、文本文件、Zookeeper、Consul、DNS SRV Lookup等方式指定抓取目标。Prometheus采用PULL的方式进行监控,即服务器可以直接通过目标PULL数据或者间接地通过中间网关来Push数据。
Prometheus在本地存储抓取的所有数据,并通过一定规则进行清理和整理数据,并把得到的结果存储到新的时间序列中。
Prometheus通过PromQL和其他API可视化地展示收集的数据。Prometheus支持很多方式的图表可视化,例如Grafana、自带的Promdash以及自身提供的模版引擎等等。Prometheus还提供HTTP API的查询方式,自定义所需要的输出。
PushGateway支持Client主动推送metrics到PushGateway,而Prometheus只是定时去Gateway上抓取数据。
Alertmanager是独立于Prometheus的一个组件,可以支持Prometheus的查询语句,提供十分灵活的报警方式。
Prometheus 三大套件
Server 主要负责数据采集和存储,提供PromQL查询语言的支持。
Alertmanager 警告管理器,用来进行报警。
Push Gateway 支持临时性Job主动推送指标的中间网关。
安装grafana+prometheus

#!/bin/bash

set -ex
CWD=$(pwd)

InstallDir=/usr/local
AppsDir=/tmp

echo "nameserver 114.114.114.114">>/etc/resolv.conf
mkdir -p $InstallDir
mkdir -p $AppsDir
useradd -s /sbin/nologin -M prometheus

#Download Software
#官方链接地址
#https://grafana.com/grafana/download?pg=get&plcmt=selfmanaged-box1-cta1

wget https://dl.grafana.com/oss/release/grafana-8.0.6-1.x86_64.rpm
yum -y install grafana-8.0.6-1.x86_64.rpm
systemctl enable grafana-server;systemctl start grafana-server

#官方链接地址 https://prometheus.io/download/
cd ${AppsDir} &&
 wget https://github.com/prometheus/prometheus/releases/download/v2.28.1/prometheus-2.28.1.linux-amd64.tar.gz
tar xf prometheus-2.28.1.linux-amd64.tar.gz -C ${InstallDir}
mv ${InstallDir}/prometheus* ${InstallDir}/prometheus

#官方链接地址 https://prometheus.io/download/
cd ${AppsDir} &&
 wget https://github.com/prometheus/node_exporter/releases/download/v1.2.0/node_exporter-1.2.0.linux-amd64.tar.gz
tar xf node_exporter-1.2.0.linux-amd64.tar.gz -C $InstallDir
mv $InstallDir/node_exporter* $InstallDir/node_exporter

chown -R prometheus:prometheus $InstallDir/prometheus
chown -R prometheus:prometheus $InstallDir/node_exporter

cat>/usr/lib/systemd/system/prometheus.service<<EOF
[Unit]
Description=Prometheus
Documentation=https://prometheus.io/
After=network.target
[Service]
Type=simple
User=prometheus
ExecStart=$InstallDir/prometheus/prometheus
  --config.file=$InstallDir/prometheus/prometheus.yml
  --web.enable-lifecycle
  --storage.tsdb.path=$InstallDir/prometheus/data
  --storage.tsdb.retention=60d
Restart=on-failure
[Install]
WantedBy=multi-user.target
EOF

cat>/usr/lib/systemd/system/node_exporter.service<<EOF
[Unit]
Description=node_exporter
Documentation=https://prometheus.io/
After=network.target
[Service]
Type=simple
User=prometheus
ExecStart=$InstallDir/node_exporter/node_exporter
Restart=on-failure
[Install]
WantedBy=multi-user.target
EOF
systemctl daemon-reload
systemctl enable node_exporter prometheus grafana-server
systemctl start  node_exporter prometheus grafana-server

#安装zabbix插件
grafana-cli plugins install alexanderzobnin-zabbix-app
mysql -uroot -proot -e "GRANT SELECT ON zabbix.* TO 'grafana'@'%' identified by 'grafana';flush privileges"

clear
echo
ss -tuanlpe | egrep  "3000|9090"
systemctl status prometheus node_exporter grafana-server | grep Active
登录prometheus和grafana 【192.168.31.89为服务器IP地址】
http://192.168.31.89:9090 #prometheus登录地址
http://192.168.31.89:3000 #grafana登录地址
添加zabbix到grafana
1. 进入grafana官方网站,下载插件
https://grafana.com/grafana/plugins/?search=zabbix
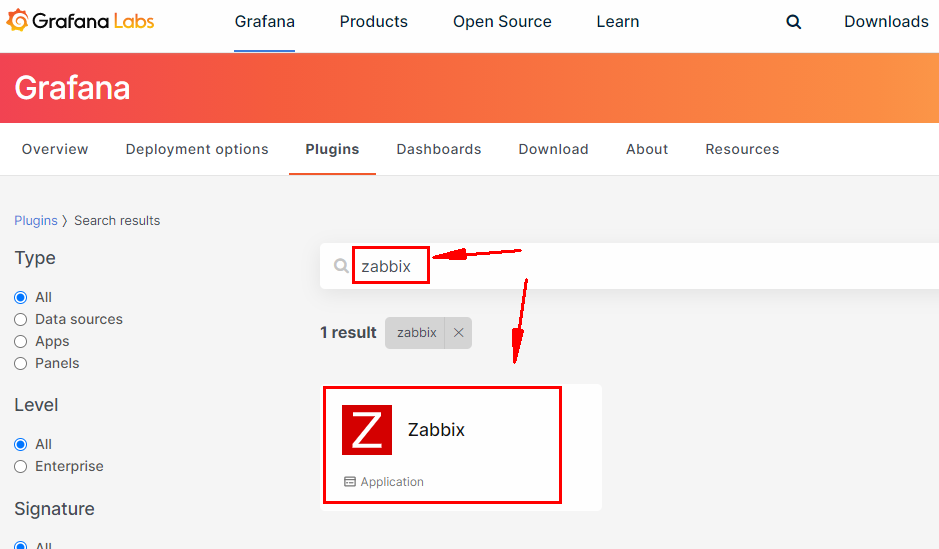

2)重启grafana
systemctl restart grafana-server
3) grafana界面添加插件
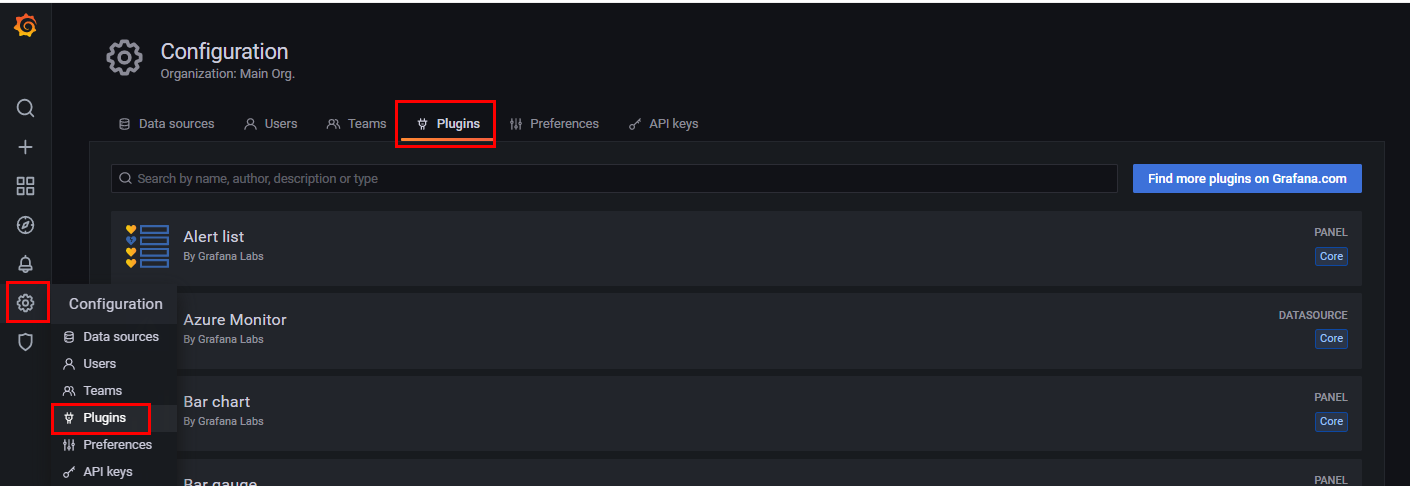


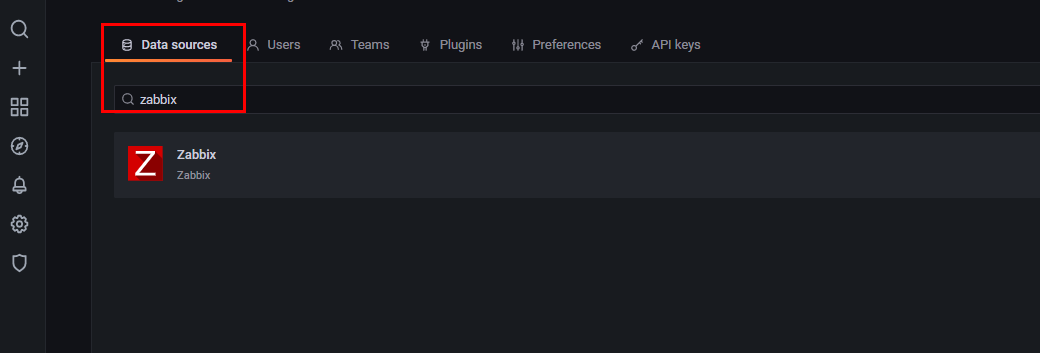
4) 配置数据源
4.1) 配置连接mysql数据库的zabbix库

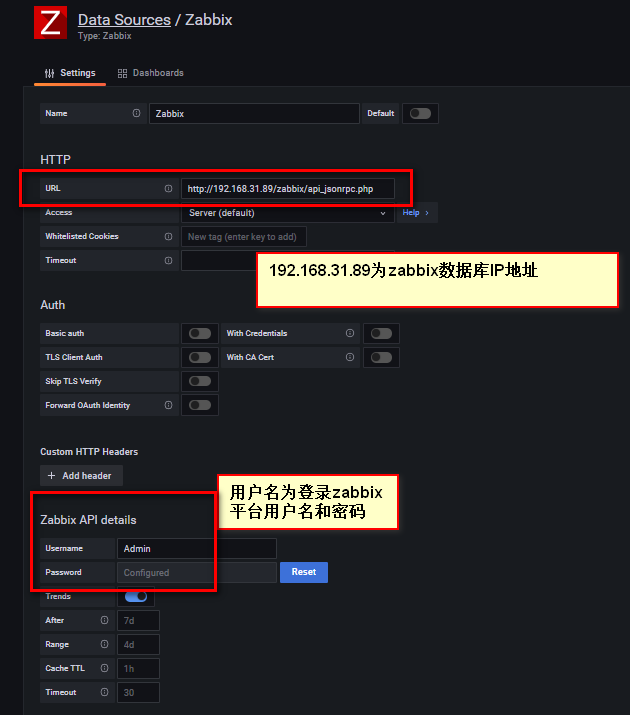
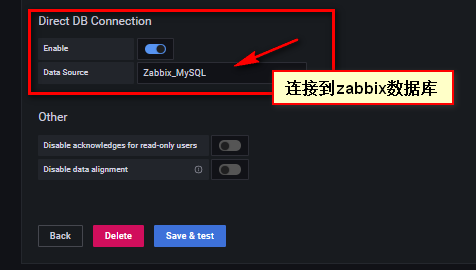
4.2) 配置zabbix数据源,启用Direct DB Connection

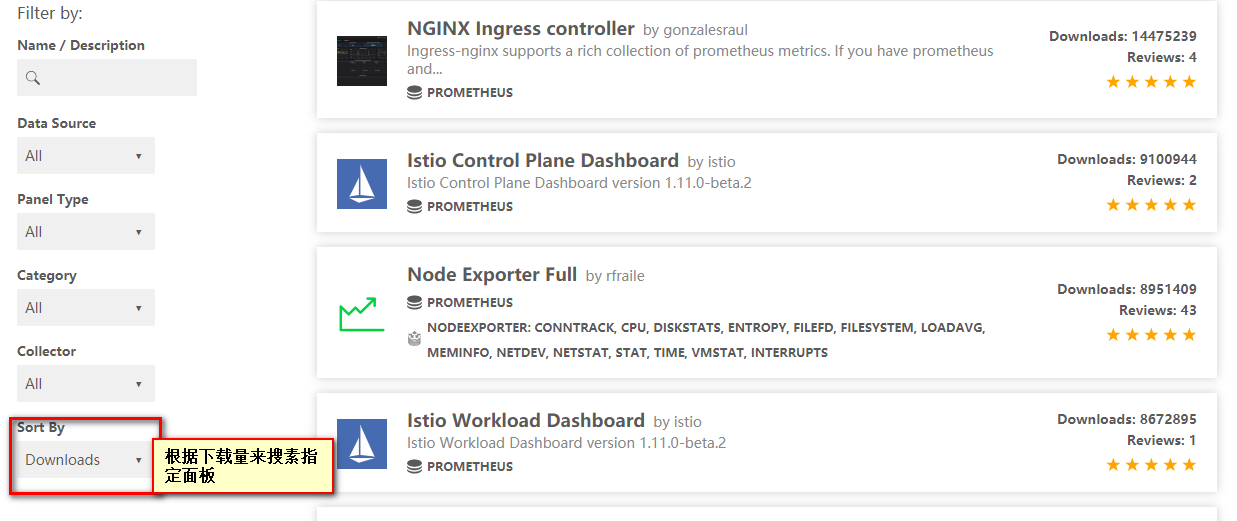
配置Dashboards面板
网址: https://grafana.com/grafana/dashboards
