前言
bootstrap-table 表格行内编辑网上很多资料都是用第三方bootstrap-table-editable.js和x-editable.js实现,不喜欢折腾的用插件实现最快。
我想要的需求其实很简单,直接点击表格编辑就行,不需要太多复杂的功能,官方文档上给的资料少的可怜,这方面的资料网上查阅了很多,总结来说很乱,没注释,代码不全,并且还有一些BUG。
于是花了3个晚上,头发掉了一大串,现在终于弄清楚了,整个的实现方式。
table表格
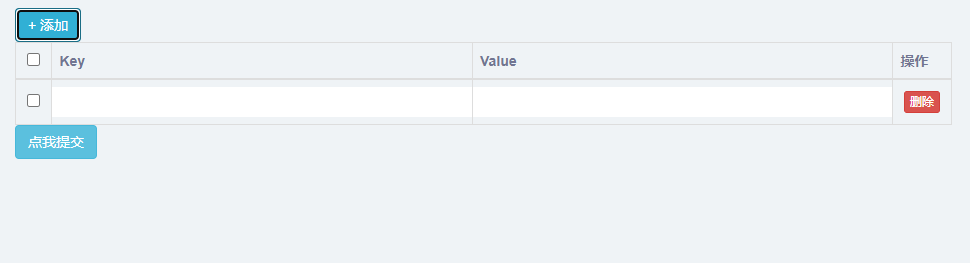
html代码很简单,点个添加一行的按钮,一个提交按钮
<div>
  <div>
      <input onclick="add_row('table')" type="button" class="btn btn-info" value="+ 添加">
  </div>
  <table id="table" class="table"></table>
  <div>
      <input id="save" type="button" class="btn btn-info" value="点我提交">
  </div>
</div>
bootstrap-table 表格初始化
<script>
// 操作事件在前面设置
window.operateEvents = {
    'click #rowDel': function (e, value, row, index) {
        $('#table').bootstrapTable('remove', {
            field: 'id',
            values: [row.id]
        });
    }
};
// 设置列
var columns = [
        {
            checkbox: true,
            visible: true               //是否显示复选框
        },
        {
            field: 'key',
            title: 'Key',
            formatter: function (value, row, index) {
                        return '<input style="font-size:24px; line-height:33px; height: 100%; 100%; overflow: hidden; border: none" type="text" id="key' +index + '" value="'+value+ '" >';
                    },
            // 设置表格样式,输入文本很长的时候隐藏前面的
            cellStyle: function (value, row, index) {
                        return {
                            css: {
                                "min-width": "100px",
                                "white-space": "nowrap",
                                "text-overflow": "ellipsis",
                                "overflow": "hidden",
                                "max-width": "100px",
                                'padding': '0px'
                            }
                        }
                    }
        },
        {
            field: 'value',
            title: 'Value',
            formatter: function (value, row, index) {
                        return '<input style="font-size:24px; line-height:33px; height: 100%; 100%; overflow: hidden; border: none" type="text" id="value' +index + '" value="'+value+ '">';
                    },
            cellStyle: function (value, row, index) {
                        return {
                            css: {
                                "min-width": "100px",
                                "white-space": "nowrap",
                                "text-overflow": "ellipsis",
                                "overflow": "hidden",
                                "max-width": "100px",
                                'padding': '0px'
                            }
                        }
                    }
        },
         {
            field: 'button',
            title: '操作',
             '20%',
            events: operateEvents,  // 操作事件
            formatter: operateFormatter
        }

];
// 默认显示第一行,空数据
data = [
    {'id': 0, 'key': '', 'value': ''}
];
// table表格配置
$("#table").bootstrapTable({
    cache: false,
    classes: "table table-bordered table-condensed",
    columns: columns,                 //列参数
    data: data,
    onClickCell: function(field, value, row, $element) {
            console.log('000000000000000--------接收点击事件------');
            let index = $element.parent().data('index');    // 获取单元格cell的index
            var cell_id = '#' + field+index;
            console.log(cell_id);
            $cell = $element.find(cell_id);
            console.log('111111111获取焦点-');
            $cell.blur(function(){
                // 输入框失去焦点,保存表格数据
                console.log('失去焦点22222222222222-')
                let newValue = $element.find(cell_id).val();
                console.log('新数据:'+newValue)
                // 更新表格数据到row
                row[field] = newValue
                });
        }
});
再接着定义添加/删除/提交数据功能
// 定义 add_row
function add_row(table_name){
var tab = '#'+table_name;
var count = $(tab).bootstrapTable('getData').length;
// 新增一行数据
$(tab).bootstrapTable('insertRow',{index:count,row:{'id':count, 'key':'', 'value':''}});
}
// 添加一个删除按钮
function operateFormatter(value, row, index) {
return [
'<button type="button" style="margin: 6px;" class="btn btn-xs btn-danger" id="rowDel">删除</button>'
].join('');
}
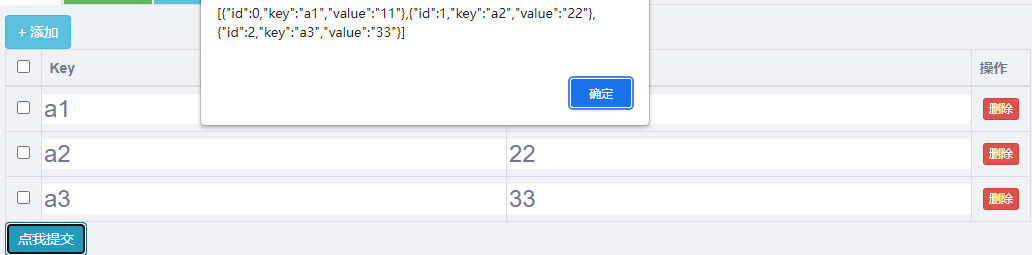
// 点击保存
$('#save').click(function(){
rows = $("#table").bootstrapTable('getData')
alert(JSON.stringify(rows))
})
页面效果
实现思路和遇到的坑
最关键代码是onClickCell,单元格的点击事件,点击单元格后,可以给单元格可编辑的属性:$element.attr('contenteditable', true)
代码如下:
onClickCell: function(field, value, row, $element) {
            $element.attr('contenteditable', true);
            $element.blur(function() {
                let index = $element.parent().data('index');
                let tdValue = $element.html();
                $("#table").bootstrapTable('updateCell', {
                    index: index,       //行索引
                    field: field,       //列名
                    value: tdValue        //cell值
                })
            })
        }
这样虽然也实现了单元格可以编辑,但是操作上非常不方便,往往需要点击2-3次单元格才能编辑,这是不能忍的。
于是想到给单元格添加input标签,在输入框编辑,这样实现就方便多了,在columns设置列属性的时候,自定义返回input标签,给每个input标签加一个id属性和value属性
{
            field: 'key',
            title: 'Key',
            formatter: function (value, row, index) {
                        return '<input style="font-size:24px; line-height:33px; height: 100%; 100%; overflow: hidden; border: none" type="text" id="key' +index + '" value="'+value+ '" >';
                    }
输入框的问题解决了,接下来是保存数据,也是在onClickCell 里面实现,当输入框失去焦点的时候保存:$element.blur
 onClickCell: function(field, value, row, $element) {
            console.log('000000000000000--------接收点击事件------');
            let index = $element.parent().data('index');
            var cell_id = '#' + field+index;
            $cell = $element.find(cell_id);
            console.log('111111111获取焦点-');
            $cell.blur(function(){
            // 输入框失去焦点,保存表格数据
                console.log('失去焦点22222222222222-')
                let newValue = $element.find(cell_id).val();
                console.log('新数据:'+newValue)
                $('#table').bootstrapTable('updateCell', {
                        index: index,
                        field: field,
                        value: newValue
                    });
                });
        }
大部分实现报告更新是 用的上面方式: bootstrapTable('updateCell', )
$('#table').bootstrapTable('updateCell', {
                        index: index,
                        field: field,
                        value: newValue
                    });
在实际测试过程中,会发现在表格内切换编辑的时候,会漏洞一些数据,主要原因在于bootstrapTable('updateCell', )更新数据后,
点击事件没生效,导致从一个表格点到另外一个报告时候,不会有接收点击事件,这样数据就无法正常保存。
于是想到不更新表格,直接更新row的数据,既方便又实用
                // 更新表格数据到row
                row[field] = newValue
除了上面的在初始化表格的时候,添加onClickCell
 onClickCell: function(field, value, row, $element) {
}
也可以在初始化后,自己写一个点击表格的事件,两种方式实现效果一样,下面这种传参多一个e参数
$('#table').on('click-cell.bs.table',
        function (e, field, value, row, $element) {
        console.log('99999999999999绑定点击事件')
});