概述
Angular中的输入输出是通过注解@Input和@Output来标识,它位于组件控制器的属性上方。
输入输出针对的对象是父子组件。
演示
Input
- 新建项目
connInComponents:ng new connInComponents. - 新增组件
stock:ng g component stock. - 在
stock.component.ts中新增属性stockName并将其标记为输入@Input():
  @Input()
  protected stockName: string;
- 既然有
@Input()则应有对应的父组件,此处使用默认生成的主组件app.
在父组件中定义属性keyWork并通过视图文件app.component.html中的标签<input>来进行双向绑定,最后,在视图文件app.component.html中嵌入子组件并进行赋值:
//ts
protected keyWord: string;

//html
<input placeholder="请输入股票名称" [(ngModel)]="keyWord">
<app-stock [stockName]="keyWord"></app-stock>
注意,[(ngModel)]需要在app.module.ts中引入模块FormsModule。
这样就完成了父组件向子组件赋值的操作了。
- 在子组件中进行展示
<p>
  stock works!
</p>
<div>
  股票名称:{{stockName}}
</div>
Output
Output的赋值操作不像Input那样简单,它需要通过位于@angular/core包下的EventEmitter对象来监听并处理数据。并且需要传入泛型类来规定参数类型。
需求
在父子组件中各自定义一个表示股票价格的属性,并通过Output将子组件中的价格信息传给父组件。
- 由于
EventEmitter需要传入泛型类,因此我们首先定义一个股票信息类:
export class StockInfo {
  constructor(public name: string, public price: number) {
    this.name = name;
    this.price = price;
  }
}
- 在子组件
stock.component.ts中新增属性stockPrice和event,并在初始化方法中为stockPrice赋值并通过event将当前绑定对象发射出去:
  protected stockPrice: number;
  @Output()
  protected event: EventEmitter<StockInfo> = new EventEmitter();

  ngOnInit() {
    setInterval(() => {
      const stock: StockInfo = new StockInfo(this.stockName, 100 * Math.random());
      this.stockPrice = stock.price;
      this.event.emit(stock);
    }, 3000);
  }
此时子组件的发射动作已完成,那么如何接收发射的数据呢?
- 在父组件中定义价格属性
currentPrice和接收方法eventHandler:
  protected currentPrice: number;

  eventHandler(stock: StockInfo) {
    this.currentPrice = stock.price;
  }
- 在嵌入的子组件视图元素
<app-stock>上添加绑定关系:
<app-stock [stockName]="keyWord" (event)="eventHandler($event)"></app-stock>
其中event对应子组件属性,eventHandler对应父组件接收并处理子组件传来的方法,$event代表泛型类参数,此处是一个类型为StockInfo的实例。
此时赋值操作已经完成,在父子组件的视图文件中添加显示接收到的信息(股票价格)即可:
stock.component.html
<div>
  股票名称:{{stockName}}<br>当前价格:{{stockPrice | number:'2.1-2'}}
</div>
app.component.html
<div>
  股票名称:{{keyWord}}<br>当前价格:{{currentPrice | number:'2.1-2'}}
</div>
tips
@Output可以传递参数,其值与嵌入的子组件视图元素<app-stock>上绑定的数据名称统一。
如@Output('lastPrice'),那么
<app-stock [stockName]="keyWord" (event)="eventHandler($event)"></app-stock>
相应改为:
<app-stock [stockName]="keyWord" (lastPrice)="eventHandler($event)"></app-stock>
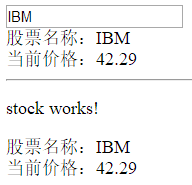
效果