本文转载自: https://www.93bok.com
Openstack概述
OpenStack是一个NASA美国国家航空航天局和Rackspace合作研发的,以Apache讲可证授权,并且是一个自由软件和开放源代码项目。
Open是开放,Stack 则是堆砌之意,合起来就是将众多的功能服务堆积起来的集合,让人们通过 Openstack 云计算项目,能够将诸如计算能力、存储、网络和软件等资源抽象成服务,以便让用户可以通 过互联网远程来享用,付费的形式也变得因需而定,调整方便,拥有极强的虚拟可扩展性,是公共和私有云的建设与管理软件中的优秀开源项目。
Openstack作用
OpenStack是一个云平台管理的项目,它不是一个软件。这个项目由几个主要的组件组合起来完成一些具体的工作。
OpenStack是一个旨在为公共及私有云的建设与管理提供软件的开源项目。它的社区拥有超过130家企业及1350位开发者,这些机构与个人都将OpenStack作为基础设施即服务(简称IaaS)资源的通用前端。
IAAS、PAAS、SAAS概述
1、IaaS(Infrastructure as a Service),基础设施即服务。
消费者通过 Internet 可以从完善的计算机基础设施获得服务。这类服务称为基础设施即服务。基于 Internet 的服务(如存储和数据库)是 IaaS的一部分。 比如:在腾讯云上买一台于主机(8个CPU,32G,5T硬盘于主机等)
2、PaaS是Platform-as-a-Service的缩写,开发平台即服务。 把服务器平台作为一种服务提 供的商业模式。
3、SaaS是Software-as-a-Service的缩写,软件即服务。

Openstack版本命名规则
1、Openstack版本发布以 A-Z 字母顺序来发布,很好记。
例:
2010年10月  发布‘Austin’
2011年2月   发布‘Bexar’
2011年4月   发布‘Cactus’
2011年7月   发布‘Diablo’
2012年4月   发布‘Essex’
2012年10月 发布‘Folsom’
2013年4月 发布‘Grizzly’
2013年10月  发布 Havana
2014年4月  发布‘Icehouse’
2、查看一下现在的最新版本
https://releases.openstack.org/

显而易见,现在最新的版本是Queens,而Rocky预计会在2018-08-30发布
Openstack各组件关系
1、Openstack核心组件主要有
Keystone(身份认证)
Nova(计算)
Neutron(网络)
Glance(镜像存储)
Cinder(块存储)
Swift(对象存储)
Horizon(web UI 界面)
Ceilometer(计量)
Heat(部署编排)
Trove(数据库)
Keystone(身份认证):
统一的授权、认证管理。所有组件都依赖于 Keystone提供 3A(Account, Authentication, Authorization)服务。
3A认证:
1、认证(Authentication),验证用户的身份不可使用的网络服务;
2、授权(Authorization):依据认证结果开放网络服务给用户;
3、计帐(Accounting):记录用户对各种网络服务的用量,并提供给计费系统。整个系统在网络管理与安全问题中十分有效。
比如:宽带收费就是3A认证的典型例子:输入帐号密码(认证)=> 开10M带宽(授权)=> 在营业厅(计帐)
Nova(计算):
Nova是OpenStack 云中的计算组织控制器。Nova自身并没有提供任何虚拟化能力,相反它使用libvirt API 来与被支持的虚拟技术Hypervisors交互。如:kvm、Xen、VMware 等虚拟化技术。
Neutron(网络):
实现虚拟机的网络资源管理如网络连接、ip管理、公网映射
Glance(镜像存储):
主要存储和管理系统镜像。
Cinder(块存储):
为虚拟机提供存储空间。比如硬盘,分区,目前支持ip-san、fc-san等。
Swift(对象存储):
OpenStack Swift 开源项目提供了弹性可伸缩、高可用的分布式对象存储服务,适合存储大规模非结构化数据。通过key/value的方式实现对文件的存储,现在的云盘就是这样的,和 MFS, HDFS类似。 注:如果客户需要一个1000T的存储空间,使用Cinder或Glance就不行,效率太低。这时就用Swift。
** Horizon(web UI 界面):**
安装好后,openstack的web界面控制台DashBoard
Ceilometer(计量):
Ceilometer是OpenStack中的一个子项目,它像一个漏斗一样,能把 OpenStack内部发生的几乎所有的事件都收集起来,然后为计费和监控以及其它服务提供数据支撑。
Heat(部署编排):
是一个编排引擎,它可以基于文本文件形式的模板启动多个复合云应用程序(这些文件可以被视为代码)。简单来说,Heat为OpenStack 用户提供了一种自动创建云组件(如网络、实例、存储设备等)的方法。
Trove(数据库):
为关系型数据库和非关系型数据库引擎提供可扩展的和可靠的云数据库服务,并继续改进其功能齐全、可扩展的开源框架。
Openstack项目相关资源获取
http://www.openstack.org
https://github.com/openstack
http://docs.openstack.org
http://www.openstack.cn
Openstack-Queens详细安装教程
一、实验环境
		 操作系统					   IP地址		    内存		内核			主机名
Centos7.4 minimal 64位系统			192.168.1.92		6G		4核			node1
Centos7.4 minimal 64位系统			192.168.1.94		6G		4核			node2
二、增加域名解析(控制和计算节点)
vim /etc/hosts
192.168.1.92    node1
192.168.1.94    node2

scp /etc/hosts 192.168.1.94:/etc/hosts
三、关闭firewalld和selinux(控制和计算节点)
systemctl stop firewalld
systemctl disable firewalld
vim /etc/sysconfig/selinux
SELINUX=disabled
最好是reboot一次才生效
四、准备yum源(控制和计算节点)
如果是使用系统默认的yum源,是无法安装openstack的,这里需要修改一些参数,在本文中教大家怎么制作一个openstack的本地yum源,然后往后就直接本地安装openstack就行了,不需要联网才能安装
1、修改yum源
cd /etc/yum.repos.d/
mv * /opt/
mv /opt/CentOS-Base.repo /etc/yum.repos.d/
vim CentOS-Base.repo
[base]
name=CentOS-$releasever - Base
#mirrorlist=http://mirrorlist.centos.org/?release=$releasever&arch=$basearch&repo=os&infra=$infra
#baseurl=http://mirror.centos.org/centos/$releasever/os/$basearch/
baseurl=http://vault.centos.org/7.4.1708/os/x86_64/
gpgcheck=0
gpgkey=file:///etc/pki/rpm-gpg/RPM-GPG-KEY-CentOS-7

#released updates
[updates]
name=CentOS-$releasever - Updates
#mirrorlist=http://mirrorlist.centos.org/?release=$releasever&arch=$basearch&repo=updates&infra=$infra
#baseurl=http://mirror.centos.org/centos/$releasever/updates/$basearch/
baseurl=http://vault.centos.org/7.4.1708/updates/x86_64/
gpgcheck=0
gpgkey=file:///etc/pki/rpm-gpg/RPM-GPG-KEY-CentOS-7

#additional packages that may be useful
[extras]
name=CentOS-$releasever - Extras
#mirrorlist=http://mirrorlist.centos.org/?release=$releasever&arch=$basearch&repo=extras&infra=$infra
#baseurl=http://mirror.centos.org/centos/$releasever/extras/$basearch/
baseurl=http://vault.centos.org/7.4.1708/extras/x86_64/
gpgcheck=0
gpgkey=file:///etc/pki/rpm-gpg/RPM-GPG-KEY-CentOS-7

#additional packages that extend functionality of existing packages
[centosplus]
name=CentOS-$releasever - Plus
#mirrorlist=http://mirrorlist.centos.org/?release=$releasever&arch=$basearch&repo=centosplus&infra=$infra
#baseurl=http://mirror.centos.org/centos/$releasever/centosplus/$basearch/
baseurl=http://vault.centos.org/7.4.1708/centosplus/x86_64/
gpgcheck=0
enabled=0
gpgkey=file:///etc/pki/rpm-gpg/RPM-GPG-KEY-CentOS-7
2、修改yum配置文件
vim /etc/yum.conf
keepcache=1
五、安装chrony服务
1、控制节点安装
yum clean all
yum -y install chrony

vim /etc/chrony.conf(添加)
server node1 iburst
allow 192.168.0.0./24

systemctl start chronyd
systemctl enable chronyd
2、计算节点安装
yum clean all
yum -y install chrony

vim /etc/chrony.conf(添加)
server node1 iburst

systemctl start chronyd
systemctl enable chronyd
六、安装openstack客户端(控制和计算节点)
yum -y install centos-release-openstack-queens
1、修改yum源(否则无法继续下一步安装,会报错)
vim /etc/yum.repos.d/CentOS-Ceph-Luminous.repo(修改红色部分)
[centos-ceph-luminous]
name=CentOS-$releasever - Ceph Luminous
#baseurl=http://mirror.centos.org/centos/$releasever/storage/$basearch/ceph-luminous/
baseurl=http://vault.centos.org/7.4.1708/storage/x86_64/ceph-luminous/
gpgcheck=0
enabled=1
gpgkey=file:///etc/pki/rpm-gpg/RPM-GPG-KEY-CentOS-SIG-Storage
vim /etc/yum.repos.d/CentOS-OpenStack-queens.repo(修改红色部分)
[centos-openstack-queens]
name=CentOS-7 - OpenStack queens
#baseurl=http://mirror.centos.org/centos/7/cloud/$basearch/openstack-queens/
baseurl=http://vault.centos.org/7.4.1708/cloud/x86_64/openstack-queens/
gpgcheck=0
enabled=1
gpgkey=file:///etc/pki/rpm-gpg/RPM-GPG-KEY-CentOS-SIG-Cloud
exclude=sip,PyQt4
vim /etc/yum.repos.d/CentOS-QEMU-EV.repo(修改红色部分)
[centos-qemu-ev]
name=CentOS-$releasever - QEMU EV
#baseurl=http://mirror.centos.org/centos/$releasever/virt/$basearch/kvm-common/
baseurl=http://vault.centos.org/7.4.1708/virt/x86_64/kvm-common/
gpgcheck=0
enabled=1
gpgkey=file:///etc/pki/rpm-gpg/RPM-GPG-KEY-CentOS-SIG-Virtualization
2、安装openstack客户端
yum -y install python-openstackclient
3、安装openstack-selinux
yum -y install openstack-selinux
七、安装数据库(控制节点)
yum -y install mariadb mariadb-server python2-PyMySQL
1、创建并编辑配置文件
vim /etc/my.cnf.d/openstack.cnf
[mysqld]
bind-address = 192.168.1.92

default-storage-engine = innodb
innodb_file_per_table = on
max_connections = 4096
collation-server = utf8_general_ci
character-set-server = utf8
2、启动并开机自启
systemctl start mariadb
systemctl enable mariadb
3、为数据库设置密码(我设置的123456)
mysql_secure_installation
NOTE: RUNNING ALL PARTS OF THIS SCRIPT IS RECOMMENDED FOR ALL MariaDB
      SERVERS IN PRODUCTION USE!  PLEASE READ EACH STEP CAREFULLY!

In order to log into MariaDB to secure it, we'll need the current
password for the root user.  If you've just installed MariaDB, and
you haven't set the root password yet, the password will be blank,
so you should just press enter here.

Enter current password for root (enter for none): 		#直接回车
OK, successfully used password, moving on...

Setting the root password ensures that nobody can log into the MariaDB
root user without the proper authorisation.

Set root password? [Y/n] y
New password: 				#设置密码123456
Re-enter new password:
Password updated successfully!
Reloading privilege tables..
 ... Success!


By default, a MariaDB installation has an anonymous user, allowing anyone
to log into MariaDB without having to have a user account created for
them.  This is intended only for testing, and to make the installation
go a bit smoother.  You should remove them before moving into a
production environment.

Remove anonymous users? [Y/n] y
 ... Success!

Normally, root should only be allowed to connect from 'localhost'.  This
ensures that someone cannot guess at the root password from the network.

Disallow root login remotely? [Y/n] y
 ... Success!

By default, MariaDB comes with a database named 'test' that anyone can
access.  This is also intended only for testing, and should be removed
before moving into a production environment.

Remove test database and access to it? [Y/n] y
 - Dropping test database...
 ... Success!
 - Removing privileges on test database...
 ... Success!

Reloading the privilege tables will ensure that all changes made so far
will take effect immediately.

Reload privilege tables now? [Y/n] y
 ... Success!

Cleaning up...

All done!  If you've completed all of the above steps, your MariaDB
installation should now be secure.

Thanks for using MariaDB!
八、安装消息队列(控制节点)
yum -y install rabbitmq-server
1、启动并开机自启
systemctl start rabbitmq-server
systemctl enable rabbitmq-server
2、创建用户和密码
rabbitmqctl add_user openstack openstack
Creating user "openstack" ...
3、授权
rabbitmqctl set_permissions -p / openstack '.*' '.*' '.*'
Setting permissions for user "openstack" in vhost "/" ...
4、设置角色
rabbitmqctl set_user_tags openstack administrator
Setting tags for user "openstack" to [administrator] ...
5、启用web插件
rabbitmq-plugins enable rabbitmq_management
The following plugins have been enabled:
  mochiweb
  webmachine
  rabbitmq_web_dispatch
  amqp_client
  rabbitmq_management_agent
  rabbitmq_management

Applying plugin configuration to rabbit@node1... started 6 plugins.
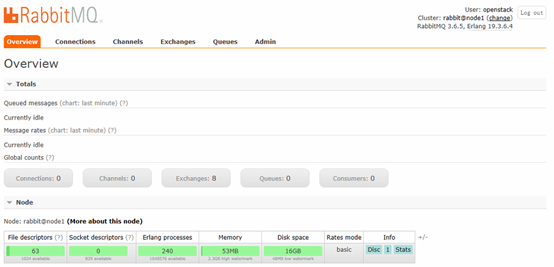
6、访问RabbitMQ(使用openstack用户)
http://192.168.1.92:15672
九、安装memcached服务(控制节点)
yum -y install memcached python-memcached
1、修改配置文件
vim /etc/sysconfig/memcached
OPTIONS="-l 127.0.0.1,::1,node1"
2、启动并开机自启
systemctl start memcached
systemctl enable memcached
十、安装etcd服务(控制节点)
yum -y install etcd
1、修改配置文件
vim /etc/etcd/etcd.conf
#[Member]
#ETCD_CORS=""
ETCD_DATA_DIR="/var/lib/etcd/default.etcd"
#ETCD_WAL_DIR=""
ETCD_LISTEN_PEER_URLS="http://localhost:2380"
ETCD_LISTEN_CLIENT_URLS="http://localhost:2379"
#ETCD_MAX_SNAPSHOTS="5"
#ETCD_MAX_WALS="5"
ETCD_NAME="node1"
#ETCD_SNAPSHOT_COUNT="100000"
#ETCD_HEARTBEAT_INTERVAL="100"
#ETCD_ELECTION_TIMEOUT="1000"
#ETCD_QUOTA_BACKEND_BYTES="0"
#ETCD_MAX_REQUEST_BYTES="1572864"
#ETCD_GRPC_KEEPALIVE_MIN_TIME="5s"
#ETCD_GRPC_KEEPALIVE_INTERVAL="2h0m0s"
#ETCD_GRPC_KEEPALIVE_TIMEOUT="20s"
#
#[Clustering]
ETCD_INITIAL_ADVERTISE_PEER_URLS="http://localhost:2380"
ETCD_ADVERTISE_CLIENT_URLS="http://localhost:2379"
#ETCD_DISCOVERY=""
#ETCD_DISCOVERY_FALLBACK="proxy"
#ETCD_DISCOVERY_PROXY=""
#ETCD_DISCOVERY_SRV=""
ETCD_INITIAL_CLUSTER="default=http://localhost:2380"
ETCD_INITIAL_CLUSTER_TOKEN="etcd-cluster-01"
ETCD_INITIAL_CLUSTER_STATE="new"
#ETCD_STRICT_RECONFIG_CHECK="true"
#ETCD_ENABLE_V2="true"
2、启动并开机自启
systemctl start etcd
systemctl enable etcd
十一、安装keystone认证服务(控制节点)
1、创建并设置keystone的数据库
mysql -u root -p123456

MariaDB [(none)]> CREATE DATABASE keystone;
MariaDB [(none)]> GRANT ALL PRIVILEGES ON keystone.* TO 'keystone'@'localhost' IDENTIFIED BY '123456';
MariaDB [(none)]> GRANT ALL PRIVILEGES ON keystone.* TO 'keystone'@'%' IDENTIFIED BY '123456';
2、安装keystone服务
yum -y install openstack-keystone httpd mod_wsgi
3、修改配置文件
vim /etc/keystone/keystone.conf
……
[database]
connection = mysql+pymysql://keystone:123456@node1/keystone
……
[token]
provider = fernet
……
4、导入keystone数据库表结构
su -s /bin/sh -c "keystone-manage db_sync" keystone
5、初始化
keystone-manage fernet_setup --keystone-user keystone --keystone-group keystone
keystone-manage credential_setup --keystone-user keystone --keystone-group keystone
6、引导认证服务
keystone-manage bootstrap --bootstrap-password 123456 --bootstrap-admin-url http://node1:35357/v3/ --bootstrap-internal-url http://node1:5000/v3/ --bootstrap-public-url http://node1:5000/v3/ --bootstrap-region-id RegionOne
7、配置apache服务
vim /etc/httpd/conf/httpd.conf
ServerName node1
8、创建配置文件链接文件
ln -s /usr/share/keystone/wsgi-keystone.conf /etc/httpd/conf.d/
9、启动并开机自启
systemctl start httpd
systemctl enable httpd
10、创建相关域、项目、用户和角色
1)先导入管理员环境变量信息
export OS_USERNAME=admin
export OS_PASSWORD=123456
export OS_PROJECT_NAME=admin
export OS_USER_DOMAIN_NAME=Default
export OS_PROJECT_DOMAIN_NAME=Default
export OS_AUTH_URL=http://node1:35357/v3
export OS_IDENTITY_API_VERSION=3
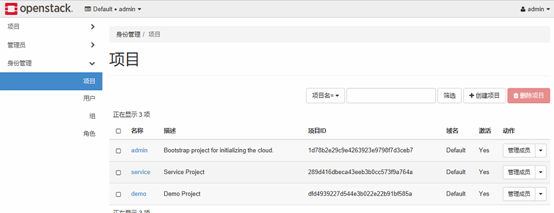
2)创建名为example的域
openstack domain create --description "An Example Domain" example
+-------------+----------------------------------+
| Field       | Value                            |
+-------------+----------------------------------+
| description | An Example Domain                |
| enabled     | True                             |
| id          | 557282312d1a4c0183eb145fb897c99f |
| name        | example                          |
| tags        | []                               |
+-------------+----------------------------------+
3)创建名为service的项目
openstack project create --domain default --description "Service Project" service
+-------------+----------------------------------+
| Field       | Value                            |
+-------------+----------------------------------+
| description | Service Project                  |
| domain_id   | default                          |
| enabled     | True                             |
| id          | 289d416dbeca43eeb3b0cc573f9a764a |
| is_domain   | False                            |
| name        | service                          |
| parent_id   | default                          |
| tags        | []                               |
+-------------+----------------------------------+
4)创建名为demo的项目
openstack project create --domain default --description "Demo Project" demo
+-------------+----------------------------------+
| Field       | Value                            |
+-------------+----------------------------------+
| description | Demo Project                     |
| domain_id   | default                          |
| enabled     | True                             |
| id          | dfd4939227d544e3b022e22b91bf585a |
| is_domain   | False                            |
| name        | demo                             |
| parent_id   | default                          |
| tags        | []                               |
+-------------+----------------------------------+
5)创建名为demo的用户(为了统一,密码我设置为123456)
openstack user create --domain default --password-prompt demo
User Password:
Repeat User Password:
+---------------------+----------------------------------+
| Field               | Value                            |
+---------------------+----------------------------------+
| domain_id           | default                          |
| enabled             | True                             |
| id                  | 822527c63e6740d49d136a63af470bf8 |
| name                | demo                             |
| options             | {}                               |
| password_expires_at | None                             |
+---------------------+----------------------------------+
6)创建名为user的角色
openstack role create user
+-----------+----------------------------------+
| Field     | Value                            |
+-----------+----------------------------------+
| domain_id | None                             |
| id        | e3a7a7a689534a90aa48cf7e6c506ed4 |
| name      | user                             |
+-----------+----------------------------------+
7)把demo用户添加到user角色
openstack role add --project demo --user demo user
11、验证
1)解除环境变量的设置
unset OS_AUTH_URL OS_PASSWORD
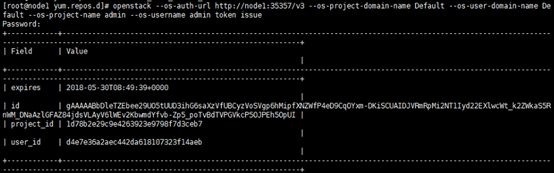
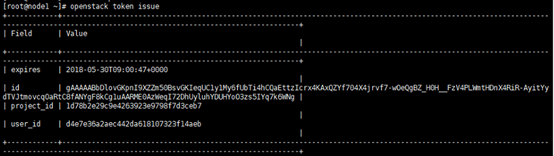
2)使用admin用户请求token(这里需要输入admin用户的密码,我刚刚设置的是123456)
openstack --os-auth-url http://node1:35357/v3 --os-project-domain-name Default --os-user-domain-name Default --os-project-name admin --os-username admin token issue
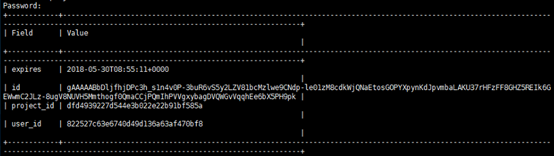
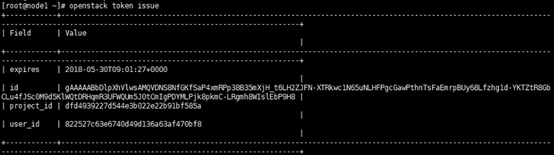
3)使用demo用户请求token(这里需要输入demo用户的密码,我刚刚设置的是123456)
openstack --os-auth-url http://node1:35357/v3 --os-project-domain-name Default --os-user-domain-name Default --os-project-name demo --os-username demo token issue
12、创建环境变量脚本
1)创建admin用户的环境变量脚本
vim admin-openrc
export OS_PROJECT_DOMAIN_NAME=Default
export OS_USER_DOMAIN_NAME=Default
export OS_PROJECT_NAME=admin
export OS_USERNAME=admin
export OS_PASSWORD=123456
export OS_AUTH_URL=http://node1:5000/v3
export OS_IDENTITY_API_VERSION=3
export OS_IMAGE_API_VERSION=2
2)创建demo用户的环境变量脚本
vim demo-openrc
export OS_PROJECT_DOMAIN_NAME=Default
export OS_USER_DOMAIN_NAME=Default
export OS_PROJECT_NAME=demo
export OS_USERNAME=demo
export OS_PASSWORD=123456
export OS_AUTH_URL=http://node1:5000/v3
export OS_IDENTITY_API_VERSION=3
export OS_IMAGE_API_VERSION=2
3)验证脚本的效果
. admin-openrc
openstack token issue
. demo-openrc
openstack token issue
十二、安装glance镜像服务(控制节点)
1、创建并设置glance的数据库
mysql -u root -p123456

MariaDB [(none)]> CREATE DATABASE glance;
MariaDB [(none)]> GRANT ALL PRIVILEGES ON glance.* TO 'glance'@'localhost' IDENTIFIED BY '123456';
MariaDB [(none)]> GRANT ALL PRIVILEGES ON glance.* TO 'glance'@'%' IDENTIFIED BY '123456';
2、创建glance镜像服务的keystone相关认证信息
1)设置admin用户的环境变量
. admin-openrc
2)创建glance用户(密码我设置的123456)
openstack user create --domain default --password-prompt glance
User Password:
Repeat User Password:
+---------------------+----------------------------------+
| Field               | Value                            |
+---------------------+----------------------------------+
| domain_id           | default                          |
| enabled             | True                             |
| id                  | 736c8a2d11e04d13aad667a4f5987d1c |
| name                | glance                           |
| options             | {}                               |
| password_expires_at | None                             |
+---------------------+----------------------------------+
3)将glance用户加入service项目,并设置为amdin角色
openstack role add --project service --user glance admin
4)创建名为glance的服务
openstack service create --name glance --description "OpenStack Image" image
+-------------+----------------------------------+
| Field       | Value                            |
+-------------+----------------------------------+
| description | OpenStack Image                  |
| enabled     | True                             |
| id          | 785ad98df075454186c64765d1decb40 |
| name        | glance                           |
| type        | image                            |
+-------------+----------------------------------+
5)创建镜像的api端口
openstack endpoint create --region RegionOne image public http://node1:9292
+--------------+----------------------------------+
| Field        | Value                            |
+--------------+----------------------------------+
| enabled      | True                             |
| id           | 7c0b5905329749a5af75994ac467b2b9 |
| interface    | public                           |
| region       | RegionOne                        |
| region_id    | RegionOne                        |
| service_id   | 785ad98df075454186c64765d1decb40 |
| service_name | glance                           |
| service_type | image                            |
| url          | http://node1:9292                |
+--------------+----------------------------------+
openstack endpoint create --region RegionOne image internal http://node1:9292
+--------------+----------------------------------+
| Field        | Value                            |
+--------------+----------------------------------+
| enabled      | True                             |
| id           | d70646b73bfb42b79303407c7f70e0bf |
| interface    | internal                         |
| region       | RegionOne                        |
| region_id    | RegionOne                        |
| service_id   | 785ad98df075454186c64765d1decb40 |
| service_name | glance                           |
| service_type | image                            |
| url          | http://node1:9292                |
+--------------+----------------------------------+
openstack endpoint create --region RegionOne image admin http://node1:9292
+--------------+----------------------------------+
| Field        | Value                            |
+--------------+----------------------------------+
| enabled      | True                             |
| id           | f53c25dc10a9494cb0fd215d2e227b55 |
| interface    | admin                            |
| region       | RegionOne                        |
| region_id    | RegionOne                        |
| service_id   | 785ad98df075454186c64765d1decb40 |
| service_name | glance                           |
| service_type | image                            |
| url          | http://node1:9292                |
+--------------+----------------------------------+
3、安装glance服务
yum -y install openstack-glance
4、修改配置文件
vim /etc/glance/glance-api.conf
……
[database]
connection = mysql+pymysql://glance:123456@node1/glance
……
[keystone_authtoken]
auth_uri = http://node1:5000
auth_url = http://node1:5000
memcached_servers = node1:11211
auth_type = password
project_domain_name = Default
user_domain_name = Default
project_name = service
username = glance
password = 123456
……
[paste_deploy]
flavor = keystone
……
[glance_store]
stores = file,http
default_store = file
filesystem_store_datadir = /var/lib/glance/images/
……
5、修改配置文件
vim /etc/glance/glance-registry.conf
……
[database]
connection = mysql+pymysql://glance:123456@node1/glance
……
[keystone_authtoken]
auth_uri = http://node1:5000
auth_url = http://node1:5000
memcached_servers = node1:11211
auth_type = password
project_domain_name = Default
user_domain_name = Default
project_name = service
username = glance
password = 123456
……
[paste_deploy]
flavor = keystone
……
6、同步数据库
su -s /bin/sh -c "glance-manage db_sync" glance
/usr/lib/python2.7/site-packages/oslo_db/sqlalchemy/enginefacade.py:1334: OsloDBDeprecationWarning: EngineFacade is deprecated; please use oslo_db.sqlalchemy.enginefacade
  expire_on_commit=expire_on_commit, _conf=conf)
INFO  [alembic.runtime.migration] Context impl MySQLImpl.
INFO  [alembic.runtime.migration] Will assume non-transactional DDL.
INFO  [alembic.runtime.migration] Running upgrade  -> liberty, liberty initial
INFO  [alembic.runtime.migration] Running upgrade liberty -> mitaka01, add index on created_at and updated_at columns of 'images' table
INFO  [alembic.runtime.migration] Running upgrade mitaka01 -> mitaka02, update metadef os_nova_server
INFO  [alembic.runtime.migration] Running upgrade mitaka02 -> ocata_expand01, add visibility to images
INFO  [alembic.runtime.migration] Running upgrade ocata_expand01 -> pike_expand01, empty expand for symmetry with pike_contract01
INFO  [alembic.runtime.migration] Running upgrade pike_expand01 -> queens_expand01
INFO  [alembic.runtime.migration] Context impl MySQLImpl.
INFO  [alembic.runtime.migration] Will assume non-transactional DDL.
Upgraded database to: queens_expand01, current revision(s): queens_expand01
INFO  [alembic.runtime.migration] Context impl MySQLImpl.
INFO  [alembic.runtime.migration] Will assume non-transactional DDL.
INFO  [alembic.runtime.migration] Context impl MySQLImpl.
INFO  [alembic.runtime.migration] Will assume non-transactional DDL.
Database migration is up to date. No migration needed.
INFO  [alembic.runtime.migration] Context impl MySQLImpl.
INFO  [alembic.runtime.migration] Will assume non-transactional DDL.
INFO  [alembic.runtime.migration] Context impl MySQLImpl.
INFO  [alembic.runtime.migration] Will assume non-transactional DDL.
INFO  [alembic.runtime.migration] Running upgrade mitaka02 -> ocata_contract01, remove is_public from images
INFO  [alembic.runtime.migration] Running upgrade ocata_contract01 -> pike_contract01, drop glare artifacts tables
INFO  [alembic.runtime.migration] Running upgrade pike_contract01 -> queens_contract01
INFO  [alembic.runtime.migration] Context impl MySQLImpl.
INFO  [alembic.runtime.migration] Will assume non-transactional DDL.
Upgraded database to: queens_contract01, current revision(s): queens_contract01
INFO  [alembic.runtime.migration] Context impl MySQLImpl.
INFO  [alembic.runtime.migration] Will assume non-transactional DDL.
Database is synced successfully.
7、启动并设置开机自启
systemctl start openstack-glance-api
systemctl start openstack-glance-registry
systemctl enable openstack-glance-api
systemctl enable openstack-glance-registry
8、验证
1)设置admin用户的环境变量
. admin-openrc
2)下载镜像
wget http://download.cirros-cloud.net/0.3.5/cirros-0.3.5-x86_64-disk.img
--2018-05-30 16:32:45--  http://download.cirros-cloud.net/0.3.5/cirros-0.3.5-x86_64-disk.img
Resolving download.cirros-cloud.net (download.cirros-cloud.net)... 64.90.42.85, 2607:f298:6:a036::bd6:a72a
Connecting to download.cirros-cloud.net (download.cirros-cloud.net)|64.90.42.85|:80... connected.
HTTP request sent, awaiting response... 200 OK
Length: 13267968 (13M) [text/plain]
Saving to: ‘cirros-0.3.5-x86_64-disk.img’

100%[=======================================================================================>] 13,267,968   244KB/s   in 2m 24s

2018-05-30 16:35:15 (90.1 KB/s) - ‘cirros-0.3.5-x86_64-disk.img’ saved [13267968/13267968]
3)查看下载的镜像
[root@node1 ~]# ls
admin-openrc  anaconda-ks.cfg  cirros-0.3.5-x86_64-disk.img  demo-openrc
4)上传镜像
openstack image create "cirros" --file cirros-0.3.5-x86_64-disk.img --disk-format qcow2 --container-format bare --public
+------------------+------------------------------------------------------+
| Field            | Value                                                |
+------------------+------------------------------------------------------+
| checksum         | f8ab98ff5e73ebab884d80c9dc9c7290                     |
| container_format | bare                                                 |
| created_at       | 2018-05-30T08:42:38Z                                 |
| disk_format      | qcow2                                                |
| file             | /v2/images/794a74e7-eb18-4fe3-a439-6cae05330da0/file |
| id               | 794a74e7-eb18-4fe3-a439-6cae05330da0                 |
| min_disk         | 0                                                    |
| min_ram          | 0                                                    |
| name             | cirros                                               |
| owner            | 1d78b2e29c9e4263923e9798f7d3ceb7                     |
| protected        | False                                                |
| schema           | /v2/schemas/image                                    |
| size             | 13267968                                             |
| status           | active                                               |
| tags             |                                                      |
| updated_at       | 2018-05-30T08:42:38Z                                 |
| virtual_size     | None                                                 |
| visibility       | public                                               |
+------------------+------------------------------------------------------+
5)确认镜像是否成功上传
openstack image list
+--------------------------------------+--------+--------+
| ID                                   | Name   | Status |
+--------------------------------------+--------+--------+
| 794a74e7-eb18-4fe3-a439-6cae05330da0 | cirros | active |
+--------------------------------------+--------+--------+
十三、安装nova计算服务(控制节点)
1、创建并设置nova的数据库
mysql -u root -p123456

MariaDB [(none)]> CREATE DATABASE nova_api;
MariaDB [(none)]> CREATE DATABASE nova;
MariaDB [(none)]> CREATE DATABASE nova_cell0;

MariaDB [(none)]> GRANT ALL PRIVILEGES ON nova_api.* TO 'nova'@'localhost' IDENTIFIED BY '123456';
MariaDB [(none)]> GRANT ALL PRIVILEGES ON nova_api.* TO 'nova'@'%' IDENTIFIED BY '123456';

MariaDB [(none)]> GRANT ALL PRIVILEGES ON nova.* TO 'nova'@'localhost' IDENTIFIED BY '123456';
MariaDB [(none)]> GRANT ALL PRIVILEGES ON nova.* TO 'nova'@'%' IDENTIFIED BY '123456';

MariaDB [(none)]> GRANT ALL PRIVILEGES ON nova_cell0.* TO 'nova'@'localhost' IDENTIFIED BY '123456';
MariaDB [(none)]> GRANT ALL PRIVILEGES ON nova_cell0.* TO 'nova'@'%' IDENTIFIED BY '123456';
2、创建nova计算服务的keystone相关认证信息
1)设置admin用户的环境变量
. admin-openrc
2)创建nova用户(密码我设置的123456)
openstack user create --domain default --password-prompt nova
User Password:
Repeat User Password:
+---------------------+----------------------------------+
| Field               | Value                            |
+---------------------+----------------------------------+
| domain_id           | default                          |
| enabled             | True                             |
| id                  | 1076752a5c954cc4937c2f5c56733ee0 |
| name                | nova                             |
| options             | {}                               |
| password_expires_at | None                             |
+---------------------+----------------------------------+
3)将nova用户加入service项目,并设置为amdin角色
openstack role add --project service --user nova admin
4)创建名为nova的服务
openstack service create --name nova --description "OpenStack Compute" compute
+-------------+----------------------------------+
| Field       | Value                            |
+-------------+----------------------------------+
| description | OpenStack Compute                |
| enabled     | True                             |
| id          | 41f44bbc86ba470d9070d4f8a7c1cfec |
| name        | nova                             |
| type        | compute                          |
+-------------+----------------------------------+
5)创建nova计算的api端口
openstack endpoint create --region RegionOne compute public http://node1:8774/v2.1
+--------------+----------------------------------+
| Field        | Value                            |
+--------------+----------------------------------+
| enabled      | True                             |
| id           | aba33ce6684a46f0802ffae556f527e4 |
| interface    | public                           |
| region       | RegionOne                        |
| region_id    | RegionOne                        |
| service_id   | 41f44bbc86ba470d9070d4f8a7c1cfec |
| service_name | nova                             |
| service_type | compute                          |
| url          | http://node1:8774/v2.1           |
+--------------+----------------------------------+
openstack endpoint create --region RegionOne compute internal http://node1:8774/v2.1
+--------------+----------------------------------+
| Field        | Value                            |
+--------------+----------------------------------+
| enabled      | True                             |
| id           | 4e6a3a6d4c6c450f9a2a693980f95f48 |
| interface    | internal                         |
| region       | RegionOne                        |
| region_id    | RegionOne                        |
| service_id   | 41f44bbc86ba470d9070d4f8a7c1cfec |
| service_name | nova                             |
| service_type | compute                          |
| url          | http://node1:8774/v2.1           |
+--------------+----------------------------------+
openstack endpoint create --region RegionOne compute admin http://node1:8774/v2.1
+--------------+----------------------------------+
| Field        | Value                            |
+--------------+----------------------------------+
| enabled      | True                             |
| id           | ff4dacb37aa245b5a633c7678046a68a |
| interface    | admin                            |
| region       | RegionOne                        |
| region_id    | RegionOne                        |
| service_id   | 41f44bbc86ba470d9070d4f8a7c1cfec |
| service_name | nova                             |
| service_type | compute                          |
| url          | http://node1:8774/v2.1           |
+--------------+----------------------------------+
3、创建placement服务的keystone相关认证信息
1)设置admin用户的环境变量
. admin-openrc
2)创建placement用户(密码我设置的123456)
openstack user create --domain default --password-prompt placement
User Password:
Repeat User Password:
+---------------------+----------------------------------+
| Field               | Value                            |
+---------------------+----------------------------------+
| domain_id           | default                          |
| enabled             | True                             |
| id                  | ea8973e3fd19462b9890d9ad4bb29e28 |
| name                | placement                        |
| options             | {}                               |
| password_expires_at | None                             |
+---------------------+----------------------------------+
3)将placement用户加入service项目,并设置为amdin角色
openstack role add --project service --user placement admin
4)创建名为placement的服务
openstack service create --name placement --description "Placement API" placement
+-------------+----------------------------------+
| Field       | Value                            |
+-------------+----------------------------------+
| description | Placement API                    |
| enabled     | True                             |
| id          | bf8279eace1b4255b364fd566ba7c44d |
| name        | placement                        |
| type        | placement                        |
+-------------+----------------------------------+
5)创建placement的api端口
openstack endpoint create --region RegionOne placement public http://node1:8778
+--------------+----------------------------------+
| Field        | Value                            |
+--------------+----------------------------------+
| enabled      | True                             |
| id           | 754dd52b2d3f4b728b60cac9934269a3 |
| interface    | public                           |
| region       | RegionOne                        |
| region_id    | RegionOne                        |
| service_id   | bf8279eace1b4255b364fd566ba7c44d |
| service_name | placement                        |
| service_type | placement                        |
| url          | http://node1:8778                |
+--------------+----------------------------------+
openstack endpoint create --region RegionOne placement internal http://node1:8778
+--------------+----------------------------------+
| Field        | Value                            |
+--------------+----------------------------------+
| enabled      | True                             |
| id           | 64c388a5b9d747b28a5d88946529776b |
| interface    | internal                         |
| region       | RegionOne                        |
| region_id    | RegionOne                        |
| service_id   | bf8279eace1b4255b364fd566ba7c44d |
| service_name | placement                        |
| service_type | placement                        |
| url          | http://node1:8778                |
+--------------+----------------------------------+
openstack endpoint create --region RegionOne placement admin http://node1:8778
+--------------+----------------------------------+
| Field        | Value                            |
+--------------+----------------------------------+
| enabled      | True                             |
| id           | d68789f711a948b6ab796e8f5b8b956f |
| interface    | admin                            |
| region       | RegionOne                        |
| region_id    | RegionOne                        |
| service_id   | bf8279eace1b4255b364fd566ba7c44d |
| service_name | placement                        |
| service_type | placement                        |
| url          | http://node1:8778                |
+--------------+----------------------------------+
4、安装nova服务
yum -y install openstack-nova-api openstack-nova-conductor openstack-nova-console openstack-nova-novncproxy openstack-nova-scheduler openstack-nova-placement-api
5、修改配置文件
vim /etc/nova/nova.conf
……
[DEFAULT]
enabled_apis = osapi_compute,metadata
transport_url = rabbit://openstack:openstack@node1
my_ip = 192.168.1.92
use_neutron = True
firewall_driver = nova.virt.firewall.NoopFirewallDriver
……
[api_database]
connection = mysql+pymysql://nova:123456@node1/nova_api
……
[database]
connection = mysql+pymysql://nova:123456@node1/nova
……
[api]
auth_strategy = keystone
……
[keystone_authtoken]
auth_uri = http://node1:5000
auth_url = http://node1:35357
memcached_servers = node1:11211
auth_type = password
project_domain_name = Default
user_domain_name = Default
project_name = service
username = nova
password = 123456
……
[vnc]
enabled = true
server_listen = $my_ip
server_proxyclient_address = $my_ip
……
[glance]
api_servers = http://node1:9292
……
[oslo_concurrency]
lock_path = /var/lib/nova/tmp
……
[placement]
os_region_name = RegionOne
project_domain_name = Default
project_name = service
auth_type = password
user_domain_name = Default
auth_url = http://node1:35357/v3
username = placement
password = 123456
……
6、因为软件包的bug,修改配置文件添加以下内容
vim /etc/httpd/conf.d/00-nova-placement-api.conf
<Directory /usr/bin>
   <IfVersion >= 2.4>
      Require all granted
   </IfVersion>
   <IfVersion < 2.4>
      Order allow,deny
      Allow from all
   </IfVersion>
</Directory>
7、重启httpd服务
systemctl restart httpd
8、同步数据库
su -s /bin/sh -c "nova-manage api_db sync" nova
su -s /bin/sh -c "nova-manage cell_v2 map_cell0" nova
su -s /bin/sh -c "nova-manage cell_v2 create_cell --name=cell1 --verbose" nova
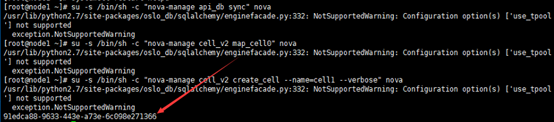
su -s /bin/sh -c "nova-manage db sync" nova
/usr/lib/python2.7/site-packages/oslo_db/sqlalchemy/enginefacade.py:332: NotSupportedWarning: Configuration option(s) ['use_tpool'] not supported
  exception.NotSupportedWarning
/usr/lib/python2.7/site-packages/pymysql/cursors.py:166: Warning: (1831, u'Duplicate index `block_device_mapping_instance_uuid_virtual_name_device_name_idx`. This is deprecated and will be disallowed in a future release.')
  result = self._query(query)
/usr/lib/python2.7/site-packages/pymysql/cursors.py:166: Warning: (1831, u'Duplicate index `uniq_instances0uuid`. This is deprecated and will be disallowed in a future release.')
  result = self._query(query)
9、验证cell0和cell1是否成功注册
nova-manage cell_v2 list_cells

10、启动并开机自启
systemctl start openstack-nova-api
systemctl start openstack-nova-consoleauth
systemctl start openstack-nova-scheduler
systemctl start openstack-nova-conductor
systemctl start openstack-nova-novncproxy

systemctl enable openstack-nova-api
systemctl enable openstack-nova-consoleauth
systemctl enable openstack-nova-scheduler
systemctl enable openstack-nova-conductor
systemctl enable openstack-nova-novncproxy
十四、安装nova计算服务(计算节点)
1、安装计算节点nova服务
yum -y install openstack-nova-compute
2、修改配置文件
vim /etc/nova/nova.conf
[DEFAULT]
enabled_apis = osapi_compute,metadata
transport_url = rabbit://openstack:openstack@node1
my_ip = 192.168.1.94
use_neutron = True
firewall_driver = nova.virt.firewall.NoopFirewallDriver
……
[api]
auth_strategy = keystone
……
[keystone_authtoken]
auth_uri = http://node1:5000
auth_url = http://node1:35357
memcached_servers = node1:11211
auth_type = password
project_domain_name = Default
user_domain_name = Default
project_name = service
username = nova
password = 123456
……
[vnc]
enabled = True
server_listen = 0.0.0.0
server_proxyclient_address = $my_ip
novncproxy_base_url = http://192.168.1.92:6080/vnc_auto.html
……
[glance]
api_servers = http://node1:9292
……
[oslo_concurrency]
lock_path = /var/lib/nova/tmp
……
[placement]
os_region_name = RegionOne
project_domain_name = Default
project_name = service
auth_type = password
user_domain_name = Default
auth_url = http://node1:35357/v3
username = placement
password = 123456
……
3、检查计算节点是否支持硬件虚拟化
egrep -c '(vmx|svm)' /proc/cpuinfo
4
4、启动并开机自启
systemctl start libvirtd
systemctl start openstack-nova-compute
systemctl enable libvirtd
systemctl enable openstack-nova-compute
十五、向cell数据库添加计算节点(控制节点)
1、设置admin用户环境变量
. admin-openrc
2、查看计算节点的信息是否已经在数据库中
openstack compute service list --service nova-compute
+----+--------------+-------+------+---------+-------+----------------------------+
| ID | Binary       | Host  | Zone | Status  | State | Updated At                 |
+----+--------------+-------+------+---------+-------+----------------------------+
|  7 | nova-compute | node2 | nova | enabled | up    | 2018-05-30T10:00:20.000000 |
+----+--------------+-------+------+---------+-------+----------------------------+
3、发现计算节点
su -s /bin/sh -c "nova-manage cell_v2 discover_hosts --verbose" nova
/usr/lib/python2.7/site-packages/oslo_db/sqlalchemy/enginefacade.py:332: NotSupportedWarning: Configuration option(s) ['use_tpool'] not supported
  exception.NotSupportedWarning
Found 2 cell mappings.
Skipping cell0 since it does not contain hosts.
Getting computes from cell 'cell1': 91edca88-9633-443e-a73e-6c098e271366
Checking host mapping for compute host 'node2': d7ad2bf3-9dc6-4bff-be8e-68fc4052c719
Creating host mapping for compute host 'node2': d7ad2bf3-9dc6-4bff-be8e-68fc4052c719
Found 1 unmapped computes in cell: 91edca88-9633-443e-a73e-6c098e271366
4、验证
1)设置admin用户环境变量
. admin-openrc
2)列出计算服务的运行状态
openstack compute service list
+----+------------------+-------+----------+---------+-------+----------------------------+
| ID | Binary           | Host  | Zone     | Status  | State | Updated At                 |
+----+------------------+-------+----------+---------+-------+----------------------------+
|  4 | nova-consoleauth | node1 | internal | enabled | up    | 2018-05-30T10:04:14.000000 |
|  5 | nova-scheduler   | node1 | internal | enabled | up    | 2018-05-30T10:04:14.000000 |
|  6 | nova-conductor   | node1 | internal | enabled | up    | 2018-05-30T10:04:16.000000 |
|  7 | nova-compute     | node2 | nova     | enabled | up    | 2018-05-30T10:04:20.000000 |
+----+------------------+-------+----------+---------+-------+----------------------------+
3)列出认证服务的端口
openstack catalog list
+-----------+-----------+------------------------------------+
| Name      | Type      | Endpoints                          |
+-----------+-----------+------------------------------------+
| keystone  | identity  | RegionOne                          |
|           |           |   public: http://node1:5000/v3/    |
|           |           | RegionOne                          |
|           |           |   internal: http://node1:5000/v3/  |
|           |           | RegionOne                          |
|           |           |   admin: http://node1:35357/v3/    |
|           |           |                                    |
| nova      | compute   | RegionOne                          |
|           |           |   internal: http://node1:8774/v2.1 |
|           |           | RegionOne                          |
|           |           |   public: http://node1:8774/v2.1   |
|           |           | RegionOne                          |
|           |           |   admin: http://node1:8774/v2.1    |
|           |           |                                    |
| glance    | image     | RegionOne                          |
|           |           |   public: http://node1:9292        |
|           |           | RegionOne                          |
|           |           |   internal: http://node1:9292      |
|           |           | RegionOne                          |
|           |           |   admin: http://node1:9292         |
|           |           |                                    |
| placement | placement | RegionOne                          |
|           |           |   internal: http://node1:8778      |
|           |           | RegionOne                          |
|           |           |   public: http://node1:8778        |
|           |           | RegionOne                          |
|           |           |   admin: http://node1:8778         |
|           |           |                                    |
+-----------+-----------+------------------------------------+
4)列出镜像信息,确认能访问镜像服务
openstack image list
+--------------------------------------+--------+--------+
| ID                                   | Name   | Status |
+--------------------------------------+--------+--------+
| 794a74e7-eb18-4fe3-a439-6cae05330da0 | cirros | active |
+--------------------------------------+--------+--------+
5)确认cells和placement的api成功运行
nova-status upgrade check
/usr/lib/python2.7/site-packages/oslo_db/sqlalchemy/enginefacade.py:332: NotSupportedWarning: Configuration option(s) ['use_tpool'] not supported
  exception.NotSupportedWarning
Option "os_region_name" from group "placement" is deprecated. Use option "region-name" from group "placement".
+---------------------------+
| Upgrade Check Results     |
+---------------------------+
| Check: Cells v2           |
| Result: Success           |
| Details: None             |
+---------------------------+
| Check: Placement API      |
| Result: Success           |
| Details: None             |
+---------------------------+
| Check: Resource Providers |
| Result: Success           |
| Details: None             |
+---------------------------+
十六、安装neutron网络服务(控制节点)
1、创建并设置neutron的数据库
mysql -u root -p123456

MariaDB [(none)]> CREATE DATABASE neutron;
MariaDB [(none)]> GRANT ALL PRIVILEGES ON neutron.* TO 'neutron'@'localhost' IDENTIFIED BY '123456';
MariaDB [(none)]>GRANT ALL PRIVILEGES ON neutron.* TO 'neutron'@'%' IDENTIFIED BY '123456';
2、创建neutron网络服务的keystone相关认证信息
1)设置admin用户的环境变量
. admin-openrc
2)创建neutron用户(密码我设置的123456)
openstack user create --domain default --password-prompt neutron
User Password:
Repeat User Password:
+---------------------+----------------------------------+
| Field               | Value                            |
+---------------------+----------------------------------+
| domain_id           | default                          |
| enabled             | True                             |
| id                  | 01832b87e7e44c21941e5e5292f83c69 |
| name                | neutron                          |
| options             | {}                               |
| password_expires_at | None                             |
+---------------------+----------------------------------+
3)将neutron用户加入service项目,并设置为amdin角色
openstack role add --project service --user neutron admin
4)创建名为neutron的服务
openstack service create --name neutron --description "OpenStack Networking" network
+-------------+----------------------------------+
| Field       | Value                            |
+-------------+----------------------------------+
| description | OpenStack Networking             |
| enabled     | True                             |
| id          | 777fe19fd71d4caa91adb43878b23513 |
| name        | neutron                          |
| type        | network                          |
+-------------+----------------------------------+
5)将网络服务端口信息注册到认证服务(neutron网络服务的api端口)
openstack endpoint create --region RegionOne network public http://node1:9696
+--------------+----------------------------------+
| Field        | Value                            |
+--------------+----------------------------------+
| enabled      | True                             |
| id           | a307e8dd18d3475f88a7cdf4252532b0 |
| interface    | public                           |
| region       | RegionOne                        |
| region_id    | RegionOne                        |
| service_id   | 777fe19fd71d4caa91adb43878b23513 |
| service_name | neutron                          |
| service_type | network                          |
| url          | http://node1:9696                |
+--------------+----------------------------------+
openstack endpoint create --region RegionOne network internal http://node1:9696
+--------------+----------------------------------+
| Field        | Value                            |
+--------------+----------------------------------+
| enabled      | True                             |
| id           | 56b4e025b7e9430e845266fdf6c3cd1e |
| interface    | internal                         |
| region       | RegionOne                        |
| region_id    | RegionOne                        |
| service_id   | 777fe19fd71d4caa91adb43878b23513 |
| service_name | neutron                          |
| service_type | network                          |
| url          | http://node1:9696                |
+--------------+----------------------------------+
openstack endpoint create --region RegionOne network admin http://node1:9696
+--------------+----------------------------------+
| Field        | Value                            |
+--------------+----------------------------------+
| enabled      | True                             |
| id           | 65bed127dd8d477e8c0d378ccc7ab996 |
| interface    | admin                            |
| region       | RegionOne                        |
| region_id    | RegionOne                        |
| service_id   | 777fe19fd71d4caa91adb43878b23513 |
| service_name | neutron                          |
| service_type | network                          |
| url          | http://node1:9696                |
+--------------+----------------------------------+
3、安装neutron服务(采用self-service network的方式部署网络)
yum -y install openstack-neutron openstack-neutron-ml2 openstack-neutron-linuxbridge ebtables
4、修改配置文件
vim /etc/neutron/neutron.conf
……
[database]
connection = mysql+pymysql://neutron:123456@node1/neutron
……
[DEFAULT]
core_plugin = ml2
service_plugins = router
allow_overlapping_ips = true
transport_url = rabbit://openstack:openstack@node1
auth_strategy = keystone
notify_nova_on_port_status_changes = true
notify_nova_on_port_data_changes = true
……
[keystone_authtoken]
auth_uri = http://node1:5000
auth_url = http://node1:35357
memcached_servers = node1:11211
auth_type = password
project_domain_name = Default
user_domain_name = Default
project_name = service
username = neutron
password = 123456
……
[nova]
auth_url = http://node1:35357
auth_type = password
project_domain_name = Default
user_domain_name = Default
region_name = RegionOne
project_name = service
username = nova
password = 123456
……
[oslo_concurrency]
lock_path = /var/lib/neutron/tmp
……
5、修改配置文件配置二层插件
vim /etc/neutron/plugins/ml2/ml2_conf.ini
……
[ml2]
type_drivers = flat,vlan,vxlan
tenant_network_types = vxlan
mechanism_drivers = linuxbridge,l2population
extension_drivers = port_security
……
[ml2_type_flat]
flat_networks = provider
……
[ml2_type_vxlan]
vni_ranges = 1:1000
……
[securitygroup]
enable_ipset = true
……
6、修改配置文件配置linux bridge插件
vim /etc/neutron/plugins/ml2/linuxbridge_agent.ini
……
[linux_bridge]
physical_interface_mappings = provider:ens33		##第二张网卡名称
……
[vxlan]
enable_vxlan = true
local_ip = 192.168.1.92
l2_population = true
……
[securitygroup]
enable_security_group = true
firewall_driver = neutron.agent.linux.iptables_firewall.IptablesFirewallDriver
……
7、修改以下文件
vim /etc/sysctl.conf
net.bridge.bridge-nf-call-iptables=1
net.bridge.bridge-nf-call-ip6tables=1
8、载入br_netfilter模块
modprobe br_netfilter
9、从配置文件加载内核参数
sysctl –p

net.bridge.bridge-nf-call-iptables = 1
net.bridge.bridge-nf-call-ip6tables = 1
10、修改配置文件配置三层插件
vim /etc/neutron/l3_agent.ini
[DEFAULT]
interface_driver = linuxbridge
11、修改配置文件配置dhcp插件
vim /etc/neutron/dhcp_agent.ini
[DEFAULT]
interface_driver = linuxbridge
dhcp_driver = neutron.agent.linux.dhcp.Dnsmasq
enable_isolated_metadata = true
12、修改配置文件配置metadata插件
vim /etc/neutron/metadata_agent.ini
[DEFAULT]
nova_metadata_host = node1
metadata_proxy_shared_secret = 123456
13、修改配置文件配置计算服务使用网络服务
vim /etc/nova/nova.conf
……
[neutron]
url = http://node1:9696
auth_url = http://node1:35357
auth_type = password
project_domain_name = Default
user_domain_name = Default
region_name = RegionOne
project_name = service
username = neutron
password = 123456
service_metadata_proxy = true
metadata_proxy_shared_secret = 123456
……
14、创建链接文件
ln -s /etc/neutron/plugins/ml2/ml2_conf.ini /etc/neutron/plugin.ini
15、导入数据库结构
su -s /bin/sh -c "neutron-db-manage --config-file /etc/neutron/neutron.conf --config-file /etc/neutron/plugins/ml2/ml2_conf.ini upgrade head" neutron
INFO  [alembic.runtime.migration] Context impl MySQLImpl.
INFO  [alembic.runtime.migration] Will assume non-transactional DDL.
  Running upgrade for neutron ...
INFO  [alembic.runtime.migration] Context impl MySQLImpl.
INFO  [alembic.runtime.migration] Will assume non-transactional DDL.
INFO  [alembic.runtime.migration] Running upgrade  -> kilo, kilo_initial
INFO  [alembic.runtime.migration] Running upgrade kilo -> 354db87e3225, nsxv_vdr_metadata.py
INFO  [alembic.runtime.migration] Running upgrade 354db87e3225 -> 599c6a226151, neutrodb_ipam
INFO  [alembic.runtime.migration] Running upgrade 599c6a226151 -> 52c5312f6baf, Initial operations in support of address scopes
INFO  [alembic.runtime.migration] Running upgrade 52c5312f6baf -> 313373c0ffee, Flavor framework
INFO  [alembic.runtime.migration] Running upgrade 313373c0ffee -> 8675309a5c4f, network_rbac
INFO  [alembic.runtime.migration] Running upgrade 8675309a5c4f -> 45f955889773, quota_usage
INFO  [alembic.runtime.migration] Running upgrade 45f955889773 -> 26c371498592, subnetpool hash
INFO  [alembic.runtime.migration] Running upgrade 26c371498592 -> 1c844d1677f7, add order to dnsnameservers
INFO  [alembic.runtime.migration] Running upgrade 1c844d1677f7 -> 1b4c6e320f79, address scope support in subnetpool
INFO  [alembic.runtime.migration] Running upgrade 1b4c6e320f79 -> 48153cb5f051, qos db changes
INFO  [alembic.runtime.migration] Running upgrade 48153cb5f051 -> 9859ac9c136, quota_reservations
INFO  [alembic.runtime.migration] Running upgrade 9859ac9c136 -> 34af2b5c5a59, Add dns_name to Port
INFO  [alembic.runtime.migration] Running upgrade 34af2b5c5a59 -> 59cb5b6cf4d, Add availability zone
INFO  [alembic.runtime.migration] Running upgrade 59cb5b6cf4d -> 13cfb89f881a, add is_default to subnetpool
INFO  [alembic.runtime.migration] Running upgrade 13cfb89f881a -> 32e5974ada25, Add standard attribute table
INFO  [alembic.runtime.migration] Running upgrade 32e5974ada25 -> ec7fcfbf72ee, Add network availability zone
INFO  [alembic.runtime.migration] Running upgrade ec7fcfbf72ee -> dce3ec7a25c9, Add router availability zone
INFO  [alembic.runtime.migration] Running upgrade dce3ec7a25c9 -> c3a73f615e4, Add ip_version to AddressScope
INFO  [alembic.runtime.migration] Running upgrade c3a73f615e4 -> 659bf3d90664, Add tables and attributes to support external DNS integration
INFO  [alembic.runtime.migration] Running upgrade 659bf3d90664 -> 1df244e556f5, add_unique_ha_router_agent_port_bindings
INFO  [alembic.runtime.migration] Running upgrade 1df244e556f5 -> 19f26505c74f, Auto Allocated Topology - aka Get-Me-A-Network
INFO  [alembic.runtime.migration] Running upgrade 19f26505c74f -> 15be73214821, add dynamic routing model data
INFO  [alembic.runtime.migration] Running upgrade 15be73214821 -> b4caf27aae4, add_bgp_dragent_model_data
INFO  [alembic.runtime.migration] Running upgrade b4caf27aae4 -> 15e43b934f81, rbac_qos_policy
INFO  [alembic.runtime.migration] Running upgrade 15e43b934f81 -> 31ed664953e6, Add resource_versions row to agent table
INFO  [alembic.runtime.migration] Running upgrade 31ed664953e6 -> 2f9e956e7532, tag support
INFO  [alembic.runtime.migration] Running upgrade 2f9e956e7532 -> 3894bccad37f, add_timestamp_to_base_resources
INFO  [alembic.runtime.migration] Running upgrade 3894bccad37f -> 0e66c5227a8a, Add desc to standard attr table
INFO  [alembic.runtime.migration] Running upgrade 0e66c5227a8a -> 45f8dd33480b, qos dscp db addition
INFO  [alembic.runtime.migration] Running upgrade 45f8dd33480b -> 5abc0278ca73, Add support for VLAN trunking
INFO  [alembic.runtime.migration] Running upgrade 5abc0278ca73 -> d3435b514502, Add device_id index to Port
INFO  [alembic.runtime.migration] Running upgrade d3435b514502 -> 30107ab6a3ee, provisioning_blocks.py
INFO  [alembic.runtime.migration] Running upgrade 30107ab6a3ee -> c415aab1c048, add revisions table
INFO  [alembic.runtime.migration] Running upgrade c415aab1c048 -> a963b38d82f4, add dns name to portdnses
INFO  [alembic.runtime.migration] Running upgrade kilo -> 30018084ec99, Initial no-op Liberty contract rule.
INFO  [alembic.runtime.migration] Running upgrade 30018084ec99 -> 4ffceebfada, network_rbac
INFO  [alembic.runtime.migration] Running upgrade 4ffceebfada -> 5498d17be016, Drop legacy OVS and LB plugin tables
INFO  [alembic.runtime.migration] Running upgrade 5498d17be016 -> 2a16083502f3, Metaplugin removal
INFO  [alembic.runtime.migration] Running upgrade 2a16083502f3 -> 2e5352a0ad4d, Add missing foreign keys
INFO  [alembic.runtime.migration] Running upgrade 2e5352a0ad4d -> 11926bcfe72d, add geneve ml2 type driver
INFO  [alembic.runtime.migration] Running upgrade 11926bcfe72d -> 4af11ca47297, Drop cisco monolithic tables
INFO  [alembic.runtime.migration] Running upgrade 4af11ca47297 -> 1b294093239c, Drop embrane plugin table
INFO  [alembic.runtime.migration] Running upgrade 1b294093239c -> 8a6d8bdae39, standardattributes migration
INFO  [alembic.runtime.migration] Running upgrade 8a6d8bdae39 -> 2b4c2465d44b, DVR sheduling refactoring
INFO  [alembic.runtime.migration] Running upgrade 2b4c2465d44b -> e3278ee65050, Drop NEC plugin tables
INFO  [alembic.runtime.migration] Running upgrade e3278ee65050 -> c6c112992c9, rbac_qos_policy
INFO  [alembic.runtime.migration] Running upgrade c6c112992c9 -> 5ffceebfada, network_rbac_external
INFO  [alembic.runtime.migration] Running upgrade 5ffceebfada -> 4ffceebfcdc, standard_desc
INFO  [alembic.runtime.migration] Running upgrade 4ffceebfcdc -> 7bbb25278f53, device_owner_ha_replicate_int
INFO  [alembic.runtime.migration] Running upgrade 7bbb25278f53 -> 89ab9a816d70, Rename ml2_network_segments table
INFO  [alembic.runtime.migration] Running upgrade a963b38d82f4 -> 3d0e74aa7d37, Add flavor_id to Router
INFO  [alembic.runtime.migration] Running upgrade 3d0e74aa7d37 -> 030a959ceafa, uniq_routerports0port_id
INFO  [alembic.runtime.migration] Running upgrade 030a959ceafa -> a5648cfeeadf, Add support for Subnet Service Types
INFO  [alembic.runtime.migration] Running upgrade a5648cfeeadf -> 0f5bef0f87d4, add_qos_minimum_bandwidth_rules
INFO  [alembic.runtime.migration] Running upgrade 0f5bef0f87d4 -> 67daae611b6e, add standardattr to qos policies
INFO  [alembic.runtime.migration] Running upgrade 89ab9a816d70 -> c879c5e1ee90, Add segment_id to subnet
INFO  [alembic.runtime.migration] Running upgrade c879c5e1ee90 -> 8fd3918ef6f4, Add segment_host_mapping table.
INFO  [alembic.runtime.migration] Running upgrade 8fd3918ef6f4 -> 4bcd4df1f426, Rename ml2_dvr_port_bindings
INFO  [alembic.runtime.migration] Running upgrade 4bcd4df1f426 -> b67e765a3524, Remove mtu column from networks.
INFO  [alembic.runtime.migration] Running upgrade 67daae611b6e -> 6b461a21bcfc, uniq_floatingips0floating_network_id0fixed_port_id0fixed_ip_addr
INFO  [alembic.runtime.migration] Running upgrade 6b461a21bcfc -> 5cd92597d11d, Add ip_allocation to port
INFO  [alembic.runtime.migration] Running upgrade 5cd92597d11d -> 929c968efe70, add_pk_version_table
INFO  [alembic.runtime.migration] Running upgrade 929c968efe70 -> a9c43481023c, extend_pk_with_host_and_add_status_to_ml2_port_binding
INFO  [alembic.runtime.migration] Running upgrade a9c43481023c -> 804a3c76314c, Add data_plane_status to Port
INFO  [alembic.runtime.migration] Running upgrade 804a3c76314c -> 2b42d90729da, qos add direction to bw_limit_rule table
INFO  [alembic.runtime.migration] Running upgrade 2b42d90729da -> 62c781cb6192, add is default to qos policies
INFO  [alembic.runtime.migration] Running upgrade 62c781cb6192 -> c8c222d42aa9, logging api
INFO  [alembic.runtime.migration] Running upgrade c8c222d42aa9 -> 349b6fd605a6, Add dns_domain to portdnses
INFO  [alembic.runtime.migration] Running upgrade 349b6fd605a6 -> 7d32f979895f, add mtu for networks
INFO  [alembic.runtime.migration] Running upgrade 7d32f979895f -> 594422d373ee, fip qos
INFO  [alembic.runtime.migration] Running upgrade b67e765a3524 -> a84ccf28f06a, migrate dns name from port
INFO  [alembic.runtime.migration] Running upgrade a84ccf28f06a -> 7d9d8eeec6ad, rename tenant to project
INFO  [alembic.runtime.migration] Running upgrade 7d9d8eeec6ad -> a8b517cff8ab, Add routerport bindings for L3 HA
INFO  [alembic.runtime.migration] Running upgrade a8b517cff8ab -> 3b935b28e7a0, migrate to pluggable ipam
INFO  [alembic.runtime.migration] Running upgrade 3b935b28e7a0 -> b12a3ef66e62, add standardattr to qos policies
INFO  [alembic.runtime.migration] Running upgrade b12a3ef66e62 -> 97c25b0d2353, Add Name and Description to the networksegments table
INFO  [alembic.runtime.migration] Running upgrade 97c25b0d2353 -> 2e0d7a8a1586, Add binding index to RouterL3AgentBinding
INFO  [alembic.runtime.migration] Running upgrade 2e0d7a8a1586 -> 5c85685d616d, Remove availability ranges.
  OK
16、重启计算服务
systemctl restart openstack-nova-api
17、启动网络服务并开机自启
systemctl start neutron-server
systemctl start neutron-linuxbridge-agent
systemctl start neutron-dhcp-agent
systemctl start neutron-metadata-agent
systemctl start neutron-l3-agent

systemctl enable neutron-server
systemctl enable neutron-linuxbridge-agent
systemctl enable neutron-dhcp-agent
systemctl enable neutron-metadata-agent
systemctl enable neutron-l3-agent
十七、安装neutron网络服务(计算节点)
1、安装软件包
yum -y install openstack-neutron-linuxbridge ebtables ipset
2、修改配置文件
vim /etc/neutron/neutron.conf
[DEFAULT]
transport_url = rabbit://openstack:openstack@node1
auth_strategy = keystone
……
[keystone_authtoken]
auth_uri = http://node1:5000
auth_url = http://node1:35357
memcached_servers = node1:11211
auth_type = password
project_domain_name = Default
user_domain_name = Default
project_name = service
username = neutron
password = 123456
……
[oslo_concurrency]
lock_path = /var/lib/neutron/tmp
……
3、修改配置文件
vim /etc/neutron/plugins/ml2/linuxbridge_agent.ini
……
[linux_bridge]
physical_interface_mappings = provider:ens33	##第二张网卡名称
……
[vxlan]
enable_vxlan = true
local_ip = 192.168.1.94
l2_population = true
……
[securitygroup]
enable_security_group = true
firewall_driver = neutron.agent.linux.iptables_firewall.IptablesFirewallDriver
……
4、修改以下文件
vim /etc/sysctl.conf
net.bridge.bridge-nf-call-iptables=1
net.bridge.bridge-nf-call-ip6tables=1
5、载入br_netfilter模块
modprobe br_netfilter
6、从配置文件加载内核参数
sysctl –p

net.bridge.bridge-nf-call-iptables = 1
net.bridge.bridge-nf-call-ip6tables = 1
7、配置计算服务使用网络服务
vim /etc/nova/nova.conf
……
[neutron]
url = http://node1:9696
auth_url = http://node1:35357
auth_type = password
project_domain_name = Default
user_domain_name = Default
region_name = RegionOne
project_name = service
username = neutron
password = 123456
……
8、重启计算服务
systemctl restart openstack-nova-compute
9、启动网路服务并开机自启
systemctl start neutron-linuxbridge-agent
systemctl enable neutron-linuxbridge-agent
10、验证(控制节点)
1)设置admin用户环境变量
. admin-openrc
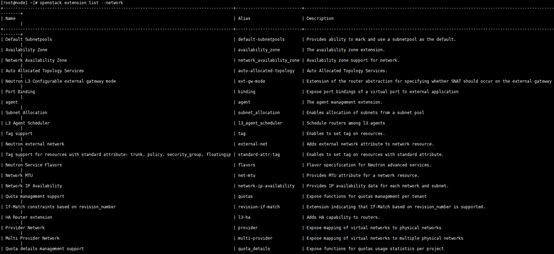
2)执行命令验证是否成功启动neutron-server(内容太多我就不完全截图了)
openstack extension list --network
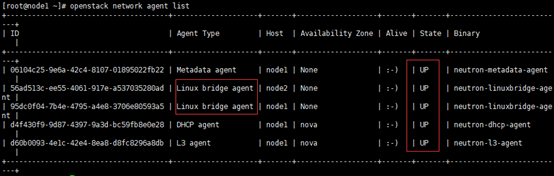
3)列出插件,验证网络插件是否成功启动
openstack network agent list
十八、安装horizon界面服务(控制节点)
1、安装服务
yum -y install openstack-dashboard
2、编辑配置文件
vim /etc/openstack-dashboard/local_settings
……
OPENSTACK_HOST = "node1"		##配置界面在控制节点使用
……
ALLOWED_HOSTS = ['*']				##允许所有主机访问
……
SESSION_ENGINE = 'django.contrib.sessions.backends.cache'	##配置memcached存储服务
……
CACHES = {
    'default': {
        'BACKEND': 'django.core.cache.backends.memcached.MemcachedCache',
        'LOCATION': 'node1:11211',
    },
}
……
OPENSTACK_KEYSTONE_URL = "http://%s:5000/v3" % OPENSTACK_HOST  ##启动v3的认证api
……
OPENSTACK_KEYSTONE_MULTIDOMAIN_SUPPORT = True		##启用domain支持
……
OPENSTACK_API_VERSIONS = {				##配置api版本
    "data-processing": 1.1,
    "identity": 3,
    "image": 2,
    "volume": 2,
    "compute": 2,
}
……
OPENSTACK_KEYSTONE_DEFAULT_DOMAIN = 'Default'		##配置Default为默认域

OPENSTACK_KEYSTONE_DEFAULT_ROLE = "user"				##配置user角色为默认角色

TIME_ZONE = "Asia/Shanghai"							##配置时区
3、重启httpd和memcached服务(控制节点)
systemctl restart httpd
systemctl restart memcached
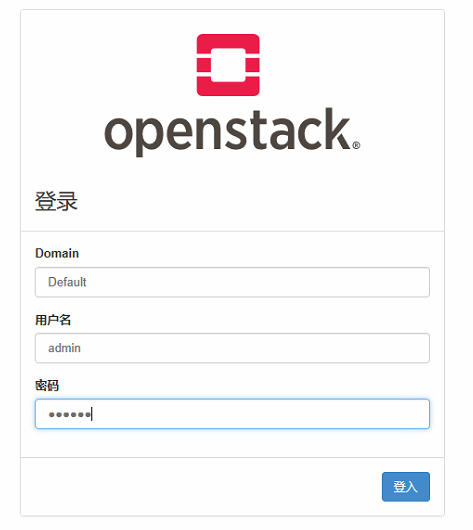
4、验证(得等一会等服务起来了再访问,否则无法访问到页面)
http:// 192.168.1.92/dashboard
创建安装openstack-queens的本地yum源
1、控制节点
yum -y install createrepo
mkdir -p /mnt/openstack-queens-packages
cd /var/cache/yum/x86_64/7/
find ./* -name "*.rpm"  -exec cp {} /mnt/openstack-queens-packages/ ;
2、计算节点
mkdir -p /mnt/openstack-queens-packages
cd /var/cache/yum/x86_64/7/
find ./* -name "*.rpm"  -exec cp {} /mnt/openstack-queens-packages/ ;
scp /mnt/openstack-queens-packages/* 192.168.1.92:/mnt/
3、到控制节点上把所有的rpm包都放到一起
cd /mnt/
mv -f *.rpm openstack-queens-packages/
4、创建yum源
cd /mnt/openstack-queens-packages/
createrepo ./
ls repodata/
3886991bc70f1cfd55c6ae93848dc2c742faa87235cb046c4ba5f0a904621175-other.xml.gz
5b30f7b1336e7263a472f8dcf35ea0291c7b44cbceb900aefd167871b1a79895-primary.xml.gz
79dc4f64e75b04469b8b3cf73d9d8d868488a8812c298842fa29d5d17d45a68d-filelists.sqlite.bz2
b09465d254b0b50e8219b2de1378fddc13e49955293a6fe053a1df22562942fc-other.sqlite.bz2
d345ae675f39814467b495667ce575a5ce70062dfdbf74a78e2a2d6038fa2ca9-filelists.xml.gz
d3f1e0ba5f26e675d01c8dc713d25dfe7773d73f8a1401af1dadfae4f3c7c742-primary.sqlite.bz2
repomd.xml
5、打包
cd /mnt/
tar -zcvf openstack-queens-packages.tar.gz openstack-queens-packages/
6、把tar.gz包下载到本地保存起来,下次装openstack就可以不用联网安装了
7、接下来说一说怎么使用本地yum源安装openstack
1)把tar.gz包上传到服务器/root/openstack-queens-packages.tar.gz的目录下
2)解压
tar -zxvf openstack-queens-packages.tar.gz
3)配置yum源
cd /etc/yum.repos.d/
mv CentOS-* /opt/
vim openstack-queens.repo
[openstack-queens-packages]
name=openstack-queens-packages
baseurl=file:///root/openstack-queens-packages
gpgcheck=0
enable=1