1.定义消息
在开始建立webSocket之前,我们需要定义消息,如:发送人,发送时间,发送人id等..
import 'dart:convert';
class ChatMessageData {
  final String id;
  final String msg;
  final DateTime created;
  final String name;
  final int role;
  ChatMessageData(
    this.id,
    this.msg,
    this.name,
    this.role,
    this.created,
  );
  static ChatMessageData formMap(Map map) => ChatMessageData(
      map['id'],
      map['msg'],
      map['name'],
      map['role'],
      DateTime.fromMicrosecondsSinceEpoch(map['created']));

  Map toMap() => {
        "id": id,
        "msg": msg,
        "name": name,
        "role":role,
        "created": created.millisecondsSinceEpoch
      };
  String toJson() => jsonEncode(toMap());
  @override
  String toString() => toMap().toString();
}
我们这里定义了一个ChatMessageData,如果你想需要更多字段,可以再添加
2.添加消息订阅
//控制消息的发送
final pub = StreamController<ChatMessageData>();
//当pub调用add(data)方法,该sub的listen会监听到
final Stream<ChatMessageData> sub = pub.stream.asBroadcastStream();
3. 定义接口
这里我们定义两个接口,一个用于连接的接口,一个用于发送消息的接口
/mini/login 提交用户的信息,如果不正确,返回相关的信息,不给连接
/min/connect 连接websocket,该接口获取到websocket对象,然后可以使用该对象
进行发送消息
登陆接口
..post('/mini/login', (ctx) async{
      User user=await ctx.bodyAsJson(convert: User.forMap);
      String username = user.username;
      String password = user.password;
      if (username.isEmpty || password.isEmpty) {
        return Response.json(apiJson.errorMsgA(-1, '用户名或密码为空!').toMap());
      } else {
        User user = await userBean.findOneWhere(userBean.username.eq(username));
        if (user == null || user.password != password) {
          return Response.json(apiJson.errorMsgA(-2, '用户名或密码不正确!').toMap());
        } else {
          print('用户:$username登陆成功');
          return Response.json(apiJson.successA().toMap());
        }
      }
    })
连接接口
..ws(
      '/mini/connect',
      onConnect: (ctx, ws) {
        var subscription = sub.listen((ChatMessageData data) {
          print(data.toJson());
          ws.add(data.toJson());
        });
        ws.done.then((_) {
          print('用户已退出聊天房');
          subscription.cancel();
        });
        //连接上之后返回一条信息
        ws.add(new ChatMessageData('1', '欢迎登陆', '服务器', 1, DateTime.now()).toJson());
      },
      handler: (data) {
        //获取用户发送的消息
        ChatMessageData msg=ChatMessageData.formMap(json.decode(data));
        print(msg.toJson());
        //广播一条消息
        pub.add(msg);
      },
    )
ok,我们已经搭建好一个简单的聊天接口了,下面,我们使用Flutter简单的编辑一下客户端平台
4.Flutter建立一个简单的聊天室
这部分代码为Flutter下,可简单的编辑一个聊天室
mport 'package:flutter/cupertino.dart';
import 'package:flutter/foundation.dart';
import 'package:flutter/material.dart';

void main() {
  runApp(new FriendlychatApp());
}

final ThemeData kIOSTheme = new ThemeData(
  primarySwatch: Colors.orange,
  primaryColor: Colors.grey[100],
  primaryColorBrightness: Brightness.light,
);

final ThemeData kDefaultTheme = new ThemeData(
  primarySwatch: Colors.purple,
  accentColor: Colors.orangeAccent[400],
);

const String _name = "Your Name";

class FriendlychatApp extends StatelessWidget {
 @override
 Widget build(BuildContext context) {
    return new MaterialApp(
      title: "Friendlychat",
      theme: defaultTargetPlatform == TargetPlatform.iOS
        ? kIOSTheme
        : kDefaultTheme,
      home: new ChatScreen(),
    );
  }
}

class ChatMessage extends StatelessWidget {
  ChatMessage({this.text, this.animationController});
  final String text;
  final AnimationController animationController;
  @override
  Widget build(BuildContext context) {
    return new SizeTransition(
      sizeFactor: new CurvedAnimation(
        parent: animationController,
        curve: Curves.easeOut
      ),
      axisAlignment: 0.0,
      child: new Container(
        margin: const EdgeInsets.symmetric(vertical: 10.0),
        child: new Row(
          crossAxisAlignment: CrossAxisAlignment.start,
          children: <Widget>[
            new Container(
              margin: const EdgeInsets.only(right: 16.0),
              child: new CircleAvatar(child: new Text(_name[0])),
            ),
            new Expanded(
              child: new Column(
                crossAxisAlignment: CrossAxisAlignment.start,
                children: <Widget>[
                  new Text(_name, style: Theme.of(context).textTheme.subhead),
                  new Container(
                    margin: const EdgeInsets.only(top: 5.0),
                    child: new Text(text),
                  ),
                ],
              ),
            ),
          ],
        ),
      )
    );
  }
}

class ChatScreen extends StatefulWidget {
  @override
  State createState() => new ChatScreenState();
}

class ChatScreenState extends State<ChatScreen> with TickerProviderStateMixin {
  final List<ChatMessage> _messages = <ChatMessage>[];
  final TextEditingController _textController = new TextEditingController();
  bool _isComposing = false;

  void _handleSubmitted(String text) {
    _textController.clear();
    setState(() {
      _isComposing = false;
    });
    ChatMessage message = new ChatMessage(
      text: text,
      animationController: new AnimationController(
        duration: new Duration(milliseconds: 700),
        vsync: this,
      ),
    );
    setState(() {
      _messages.insert(0, message);
    });
    message.animationController.forward();
  }

  void dispose() {
    for (ChatMessage message in _messages)
      message.animationController.dispose();
    super.dispose();
  }

   Widget _buildTextComposer() {
    return new IconTheme(
      data: new IconThemeData(color: Theme.of(context).accentColor),
      child: new Container(
          margin: const EdgeInsets.symmetric(horizontal: 8.0),
          child: new Row(children: <Widget>[
            new Flexible(
              child: new TextField(
                controller: _textController,
                onChanged: (String text) {
                  setState(() {
                    _isComposing = text.length > 0;
                  });
                },
                onSubmitted: _handleSubmitted,
                decoration:
                    new InputDecoration.collapsed(hintText: "Send a message"),
              ),
            ),
            new Container(
                margin: new EdgeInsets.symmetric(horizontal: 4.0),
                child: Theme.of(context).platform == TargetPlatform.iOS
                    ? new CupertinoButton(
                        child: new Text("Send"),
                        onPressed: _isComposing
                            ? () => _handleSubmitted(_textController.text)
                            : null,
                      )
                    : new IconButton(
                        icon: new Icon(Icons.send),
                        onPressed: _isComposing
                            ? () => _handleSubmitted(_textController.text)
                            : null,
                      )),
          ]),
          decoration: Theme.of(context).platform == TargetPlatform.iOS
              ? new BoxDecoration(
                  border:
                      new Border(top: new BorderSide(color: Colors.grey[200])))
              : null),
    );
  }

  Widget build(BuildContext context) {
    return new Scaffold(
      appBar: new AppBar(
        title: new Text("Friendlychat"),
        elevation:
            Theme.of(context).platform == TargetPlatform.iOS ? 0.0 : 4.0
      ),
      body: new Container(
        child: new Column(
          children: <Widget>[
          new Flexible(
            child: new ListView.builder(
              padding: new EdgeInsets.all(8.0),
              reverse: true,
              itemBuilder: (_, int index) => _messages[index],
              itemCount: _messages.length,
            )
          ),
          new Divider(height: 1.0),
          new Container(
            decoration: new BoxDecoration(
              color: Theme.of(context).cardColor),
            child: _buildTextComposer(),
          ),
         ]
       ),
       decoration: Theme.of(context).platform == TargetPlatform.iOS ? new BoxDecoration(border: new Border(top: new BorderSide(color: Colors.grey[200]))) : null),//new
   );
  }
}
上面就是简单的聊天界面,我们还有主要跟服务器交互的方法
WebSocket socket;
void login() {
    httpManager.post(
        url: 'http://192.168.1.101:8080/mini/login',
        body: json.encode({
          "username": "rhyme",
          "password": "123456",
        }),
        onSend: () {
//key为scaffold的key
          scaffoldKey?.currentState
              ?.showSnackBar(new SnackBar(content: Text('发送请求,连接服务器')));
        },
        onSuccess: (data) {
          WebSocket.connect('ws://192.168.1.101:8080/mini/connect')
              .then((socket) {
            this.socket = socket;
            socket.listen((data) {
//该方法接收服务器信息
              print(data);
              Map map = json.decode(data);
              ChatMessageData msg=ChatMessageData.formMap(map);
              if(msg.id!=widget.user.uuid){
                _handleGetMessage(msg);
              }
            });
            socket.done.then((e){
//当与服务器连接中断调用
              scaffoldKey.currentState.showSnackBar(new SnackBar(content: Text('连接服务器中断!')));
            });
          });
        },
        onError: (error) {
          print(error);
          scaffoldKey.currentState.showSnackBar(
              new SnackBar(content: Text('连接失败!${error.toString()}')));
        });
  }
我们发送消息给服务端
socket.add(new ChatMessageData(widget.user.uuid, value, widget.user.userName, widget.user.role, DateTime.now()).toJson());
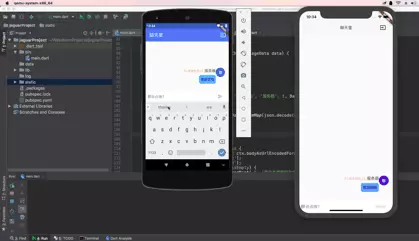
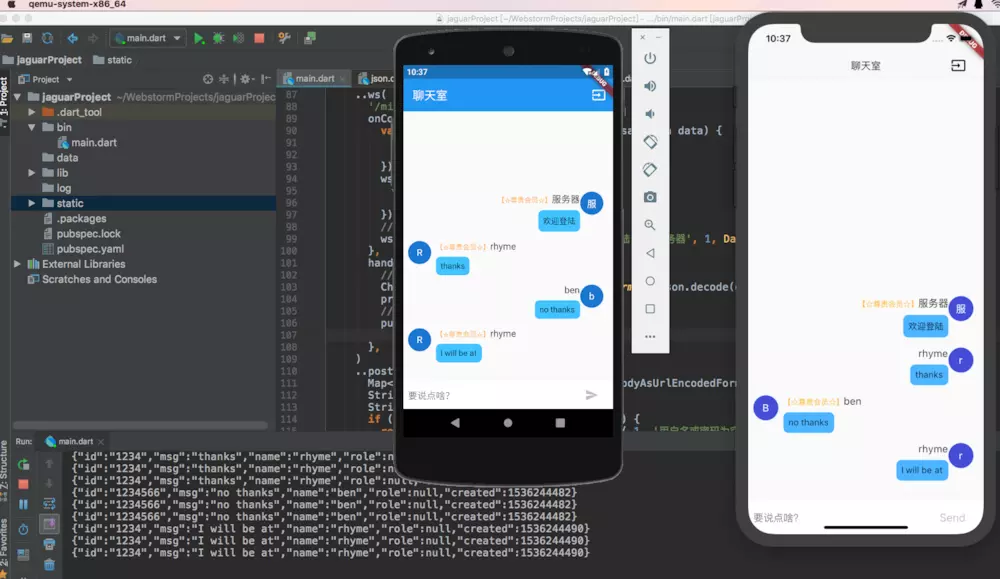
最后我们来尝试一下吧!