您的第一个项目
打开XNA Game Studio Express,在菜单栏中选择“文件→新建项目”,在弹出的新窗口中选择“Windows Game”模板,然后在项目名称处输入新项目的名称,比如“HelloWorld”或者就使用默认的名称“WindowsGame1”,在位置处输入新项目的保存位置,最后点击“确定”按钮。另外,在该窗口中还可以创建基于初学者工具包的游戏项目,比如“Spacewar Windows Starter Kit”。如下图1-10所示:
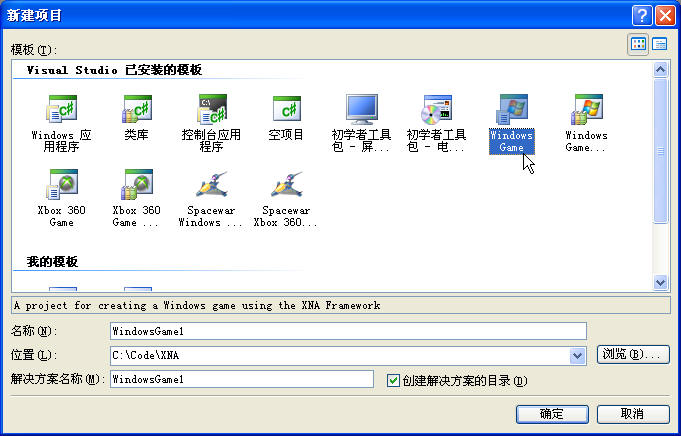
图1-10
在新创建的项目中包含两个类文件:Game1.cs和Program.cs。其中Program.cs文件包含了该应用程序的入口点Main方法,如下所示:
 static void Main(string[] args)
 {
{ using (Game1 game = new Game1())
 {
{ game.Run();
 }
} }
}Game1.cs文件包含了类Game1(继承自类Microsoft.Xna.Framework.Game),它包含了之前讲过的三个方法:Initialize、Update和Draw。Initialize方法此时不执行任何操作,只是调用基类的Initialize方法进行基本的初始化操作。Update方法主要包含下面的几行代码,用来检查Gamepad上的“Back”按钮是否被按下,如果按下则退出游戏,否则调用基类的Update方法:
 // Allows the game to exit
 if (GamePad.GetState(PlayerIndex.One).Buttons.Back == ButtonState.Pressed)
 this.Exit();
Draw方法主要执行一个操作,将游戏窗口的背景色设置成一个特定的颜色,如下所示:
 graphics.GraphicsDevice.Clear(Color.CornflowerBlue);
现在按下键盘上的F5键,或者选择菜单栏上的“调试→启动调试”命令运行游戏,此时将弹出如图1-11-(1)所示的窗口,它的了蓝色背景就是在Draw方法中设置的。
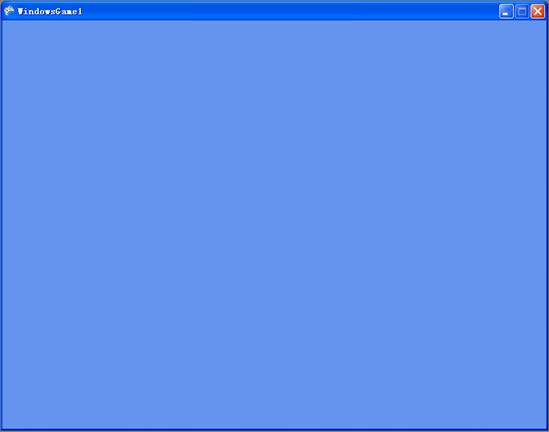
图1-11-(1)
您也可以把背景色改为绿色,比如Color.Green,然后再按F5运行程序,可以得到如图1-11-(2)所示的窗口,代码如下:
 graphics.GraphicsDevice.Clear(Color.Green);
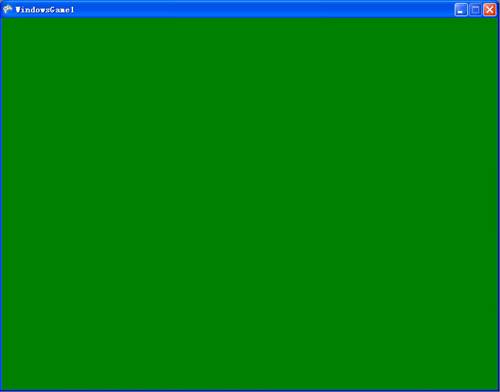
图1-11-(2)
GraphicsDevice的Clear方法还有其他几个重载版本,可以用来设置Depth和Stencil缓存参数,如果只设置颜色值这两个参数将自动设置为默认值,稍后您会用到只设置Depth缓存,而不用设置背景色参数,您只需要写下面这样的代码即可:
 graphics.GraphicsDevice.Clear(ClearOptions.DepthBuffer, Color.Green, 1, 0);
参数ClearOptions的默认值是ClearOptions.Target | ClearOptions.DepthBuffer,意思是背景色和Depth缓存都被清除。
修改代码
现在,您可以想一想如何修改您的代码来实现一些操作。比如,按下键盘上的Escape键可以退出游戏。之前说过,XNA默认的会在Update方法中检查Xbox 360控制器上的Back按钮是否被按下来决定是否退出游戏,代码如下:
 // Allows the game to exit
 if (GamePad.GetState(PlayerIndex.One).Buttons.Back == ButtonState.Pressed)
 this.Exit();
在“第三章-辅助类”中您将学习到Input类的使用,不过现在您可以使用一种快速的方法来操作键盘,下面的代码演示了当您按下Escape键时也能退出程序:
 // Get current gamepad and keyboard states
 GamePadState gamePad = GamePad.GetState(PlayerIndex.One);
 KeyboardState keyboard = Keyboard.GetState();
 // Back or Escape exits our game on Xbox 360 and Windows
 if (gamePad.Buttons.Back == ButtonState.Pressed ||
  keyboard.IsKeyDown(Keys.Escape))
 {
{ this.Exit();
 }
}第二章将详细讨论Sprites的知识,不过现在您可以稍微提前一点来学习在游戏中加载图像:给游戏加上一个背景图,然后操作键盘或者GamePad来移动该背景图,就像在一个竞速游戏或者Tile引擎中的一样,这些在很多2D的角色扮演游戏中经常会用到。对于更加复杂的Tile引擎,您还会需要石头、草、水、泥土等texture,甚至在草和水之间加一些过渡纹理(Transition Textures)。这将需要更多的texture和自定义代码,不过这也不是很难,如果您真的对Tile引擎感兴趣,您在网络上可以找到很多相关的信息。
在您的第一个项目中添加的texture如图1-12所示:
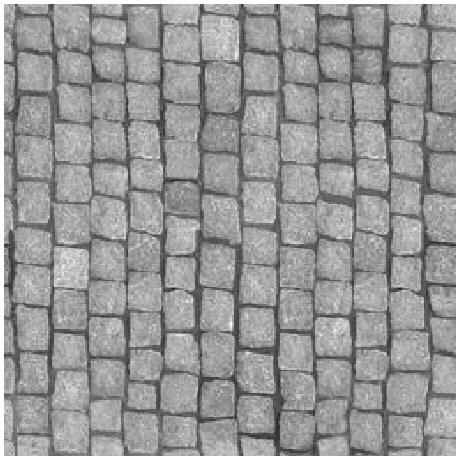
图1-12
要把这个texture(CityGroundSmall.jpg)加入到您的项目中,只需要在解决方案资源管理器(Solution Explorer)中把它拖拽到您的项目中即可,然后右键点击该文件查看“属性”,如图1-13-(1)所示:
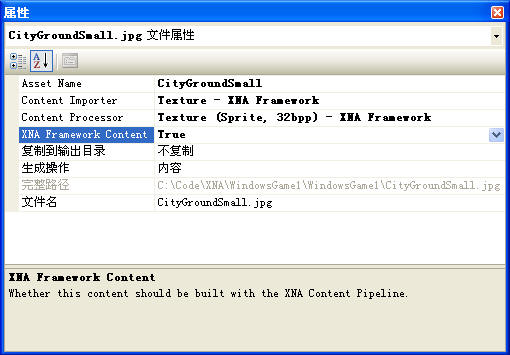
图1-13-(1)
通常您可能只会看到一些“生成操作(Build Action)”和“复制到输出目录”的选项(比如,您可能想把一个.dll或者.xml文件包含进来)。但如果XNA Studio检测到受支持的内容文件格式,您还会看到一些高级属性,此时会有另外三个重要设置:资源名称(Asset Name)、内容导入器(Content Importer)、内容处理器(Content Processor)。其中资源名称在将来选择加载资源时使用,而且内容文件的资源名称必须是唯一的,不能有重复。对于内容导入器,您可以像图1-13-(1)所示的情况中选择“Texture-XNA Framework”,或者为.x类型的文件选择“模型导入器(Model Importer)”,或者为.fx类型的文件选择“特效导入器(Effect Importer)”,如图1-13-(2)所示。
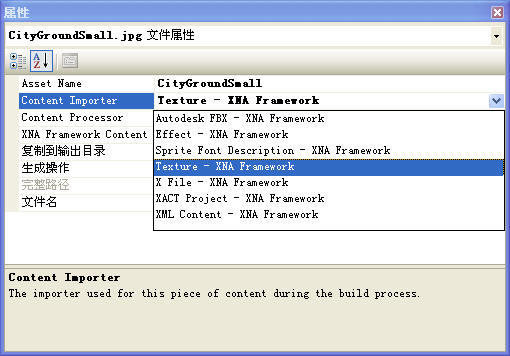
图1-13-(2)
内容处理器则包含更多的选项,比如,为这里的texture(CityGroundSmall.jpg)可以选择“Texture (Sprite, 32bpp) - XNA Framework”或者“Texture (Model, DXT, mipmapped) - XNA Framework”。DXT是一种压缩格式,在dds类型的文件中也经常使用,而且在游戏中这种格式用于texture效果非常好,因为它的压缩比高达1:6(如果包含透明像素则是1:4),这意味着在硬盘和显卡内存中的相同大小的空间上您可以存放多达 6倍数量的texture。对于2D sprite通常最好不要进行压缩,因为查看它们实际尺寸的时候使用32bpp(bits per pixel)可以保证最好的质量。关于内容管道的内容在本部分随后将会讲到。
现在如果您按下F5或者F6(生成解决方案)上述添加的texture将被处理,并在项目的输出文件夹中产生一个新的文件“CityGroundSmall.xnb”,而且在项目的输出窗口中会显示下面的信息:
Building CityGroundSmall.jpg -> bin\x86\Debug\CityGroundSmall.xnb
现在您要做的最后一件事就是加载已经导入的纹理文件,在Initialize方法中进行操作并且在类中添加一个变量backgroundTexture,并使用之前您指定的资源名称(Asset Name)(资源名称默认的是您添加的内容文件的名称)。要渲染您的texture到输出屏幕上,您需要下一章要讨论的SpriteBatch类,它先设置Alpha Blending,然后把texture画到sprite中,最后把所有东西都画到屏幕上,代码如下:
 private Texture2D backgroundTexture;
 private SpriteBatch sprites;
 protected override void Initialize()
 {
{ this.backgroundTexture = this.content.Load<Texture2D>("CityGroundSmall");
 this.sprites = new SpriteBatch(this.graphics.GraphicsDevice);
 base.Initialize();
 }
}要显示背景您必须在Draw方法中启动SpriteBatch,并把texture渲染到sprites中:
 protected override void Draw(GameTime gameTime)
 {
{ this.graphics.GraphicsDevice.Clear(Color.Green);
 this.sprites.Begin();
 this.sprites.Draw(this.backgroundTexture, Vector2.Zero, Color.White);
 this.sprites.End();
 base.Draw(gameTime);
 }
}上述代码将在您的输出屏幕的(0,0)坐标处显示该背景,SpriteBatch.Draw方法中的Color参数也可以重新设置,不过这里暂时并不重要。按下F5您将看到图1-14所示的结果:
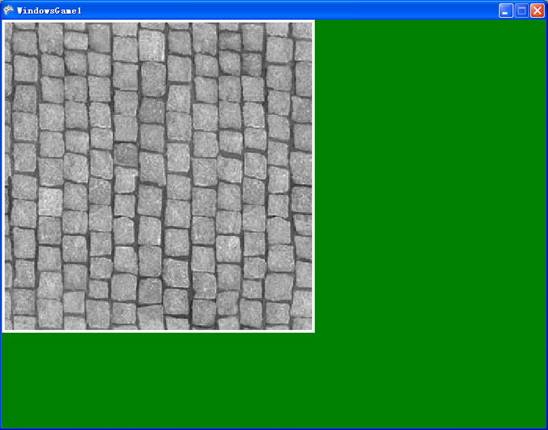
图1-14
为您的项目做的最后一件事就是添加使用键盘或者GamePad来滚动背景的功能,这样您就可以把可滚动的Tile渲染到整个背景。像下面这样修改Update方法您将可以捕获键盘或者GamePad输入:
 protected override void Update(GameTime gameTime)
 {
{ // Get current gamepad and keyboard states
 GamePadState gamePad = GamePad.GetState(PlayerIndex.One);
 KeyboardState keyboard = Keyboard.GetState();
 // Back or Escape exits our game on Xbox 360 and Windows
 if (gamePad.Buttons.Back == ButtonState.Pressed ||
 keyboard.IsKeyDown(Keys.Escape))
 {
{ this.Exit();
 }
} // Move 400 pixels each second
 float moveFactorPerSecond = 400 * (float)gameTime.ElapsedRealTime.TotalMilliseconds / 1000.0f;
 // Move up and down if we press the cursor or gamepad keys.
 if (gamePad.DPad.Up == ButtonState.Pressed ||
 keyboard.IsKeyDown(Keys.Up))
 {
{ this.scrollPosition += moveFactorPerSecond;
 }
} if (gamePad.DPad.Down == ButtonState.Pressed ||
 keyboard.IsKeyDown(Keys.Down))
 {
{ this.scrollPosition -= moveFactorPerSecond;
 }
} base.Update(gameTime);
 }
}前面几行代码和之前的例子是相同的。接下来要计算每一帧要移动多少像素,如果一秒钟只画一帧,那么变量moveFactorPerSecond的值就是400;如果一秒钟画60帧,那么一帧需要1/60秒,此时该变量的值就是400/60(其中gameTime.ElapsedRealTime表示相邻两帧之间的时间间隔)。Because you use floats here instead of just integers you can have a couple of thousand frames and the movement is still 400 pixels per second if you press up or down。
每当用户按下Up或者Down键的时候变量scrollPosition的值都会发生变化,此时在Draw方法中把scrollPosition的值加到坐标y上,就可以把背景来回上下移动了,代码如下:
 protected override void Draw(GameTime gameTime)
 {
{ this.graphics.GraphicsDevice.Clear(Color.Green);
 this.sprites.Begin();
 int resolutionWidth = this.graphics.GraphicsDevice.Viewport.Width;
 int resolutionHeight = this.graphics.GraphicsDevice.Viewport.Height;
 for (int x = 0; x <= resolutionWidth / this.backgroundTexture.Width; x++)
 {
{ for (int y = -1; y <= resolutionHeight / this.backgroundTexture.Height; y++)
 {
{ Vector2 position = new Vector2(
 x * this.backgroundTexture.Width,
 y * this.backgroundTexture.Height +
 ((int)this.scrollPosition) % this.backgroundTexture.Height);
 this.sprites.Draw(this.backgroundTexture, position, Color.White);
 }
} }
} this.sprites.End();
 base.Draw(gameTime);
 }
}现在运行您的游戏就可以上下来回移动,这对于您的第一个小应用是不是很酷?


