前言
Memcached 是一个高性能的分布式内存对象缓存系统,其存储性能在某些方面不比redis差,甚至在文本类型数据的存储上性能略优于redis,本文将介绍如何在springboot中集成memcached
准备工作
首先我们需要一款客户端连接对象,类似于我们在使用redis时使用的jedis , 目前memcached主流的客户端是Xmemcached,如果使用的是maven构建项目,则引入对应的依赖
   <!--引入memcached-->
        <dependency>
            <groupId>com.googlecode.xmemcached</groupId>
            <artifactId>xmemcached</artifactId>
            <version>2.4.5</version>
        </dependency>
配置
memcached在yml(properties)文件的相关配置
# memcached配置
memcached:
  server: 1.1.1.1:3333 2.2.2.2:4444 #memcached服务器集群(格式为host:port,多个服务器之间用空格隔开)
  opTimeout: 3000 #接口操作的默认超时时间,可以被接口覆盖
  poolSize: 10 #池子大小
  failureMode: false #是否开启失败模式,默认为false
  enabled: true # 是否使用memcached缓存
将memcached的配置由bean来管理,方便我们调用
 1 package com.me.config.properties;
 2
 3 import org.springframework.boot.context.properties.ConfigurationProperties;
 4 import org.springframework.stereotype.Component;
 5
 6 /**
 7  * @author : wang zns
 8  * @date : 2018-12-19
 9  */
10 @Component
11 @ConfigurationProperties(prefix = "memcached")
12 public class MemcachedProperties {
13
14     /**
15      * 服务器
16      */
17     private String server;
18
19     /**
20      * 操作超时时间,可以被API覆盖
21      */
22     private Integer opTimeout;
23     /**
24      * 连接池大小
25      */
26     private Integer poolSize;
27
28     /**
29      * 是否开启失败模式
30      */
31     private boolean failureMode;
32
33     /**
34      * 是否使用memcached缓存
35      */
36     private boolean enabled;
37
38
39
40     public String getServer() {
41         return server;
42     }
43
44     public void setServer(String server) {
45         this.server = server;
46     }
47
48     public Integer getOpTimeout() {
49         return opTimeout;
50     }
51
52     public void setOpTimeout(Integer opTimeout) {
53         this.opTimeout = opTimeout;
54     }
55
56     public Integer getPoolSize() {
57         return poolSize;
58     }
59
60     public void setPoolSize(Integer poolSize) {
61         this.poolSize = poolSize;
62     }
63
64     public boolean isFailureMode() {
65         return failureMode;
66     }
67
68     public void setFailureMode(boolean failureMode) {
69         this.failureMode = failureMode;
70     }
71
72     public boolean isEnabled() {
73         return enabled;
74     }
75
76     public void setEnabled(boolean enabled) {
77         this.enabled = enabled;
78     }
79 }
memcached配置类(创建memcached客户端对象,并注入spring容器中)
 1 package com.me.config;
 2
 3 import cn.stylefeng.guns.config.properties.MemcachedProperties;
 4 import lombok.extern.slf4j.Slf4j;
 5 import net.rubyeye.xmemcached.MemcachedClient;
 6 import net.rubyeye.xmemcached.MemcachedClientBuilder;
 7 import net.rubyeye.xmemcached.XMemcachedClientBuilder;
 8 import net.rubyeye.xmemcached.command.BinaryCommandFactory;
 9 import net.rubyeye.xmemcached.impl.KetamaMemcachedSessionLocator;
10 import org.springframework.beans.factory.annotation.Autowired;
11 import org.springframework.beans.factory.annotation.Qualifier;
12 import org.springframework.context.annotation.Bean;
13 import org.springframework.context.annotation.Configuration;
14
15 /**
16  * @author : wang zns
17  * @date : 2018-12-19
18  */
19 @Configuration
20 @Slf4j
21 public class MemcachedConfig {
22
23     @Autowired
24     private MemcachedProperties memcachedProperties;
25
26
27
28     @Bean(name = "memcachedClientBuilder")
29     public MemcachedClientBuilder getBuilder() {
30         MemcachedClientBuilder memcachedClientBuilder = new XMemcachedClientBuilder(memcachedProperties.getServer());
31
32         // 内部采用一致性哈希算法
33         memcachedClientBuilder.setSessionLocator(new KetamaMemcachedSessionLocator());
34         // 操作的超时时间
35         memcachedClientBuilder.setOpTimeout(memcachedProperties.getOpTimeout());
36         // 采用二进制传输协议(默认为文本协议)
37         memcachedClientBuilder.setCommandFactory(new BinaryCommandFactory());
38         // 设置连接池的大小
39         memcachedClientBuilder.setConnectionPoolSize(memcachedProperties.getPoolSize());
40         // 是否开起失败模式
41         memcachedClientBuilder.setFailureMode(memcachedProperties.isFailureMode());
42         return memcachedClientBuilder;
43     }
44
45     /**
46      * 由Builder创建memcachedClient对象,并注入spring容器中
47      * @param memcachedClientBuilder
48      * @return
49      */
50     @Bean(name = "memcachedClient")
51     public MemcachedClient getClient(@Qualifier("memcachedClientBuilder") MemcachedClientBuilder memcachedClientBuilder) {
52         MemcachedClient client = null;
53         try {
54             client =  memcachedClientBuilder.build();
55         } catch(Exception e) {
56             log.info("exception happens when bulid memcached client{}",e.toString());
57         }
58        return client;
59     }
60
61
62
63 }
使用
有了client对象之后,我们可以像直接操作服务端那样进行对应的操作,下面用一个小案例进行演示
service


 1 package cn.stylefeng.guns.modular.housemanage.cache;
 2
 3 import cn.stylefeng.guns.modular.system.model.TblHouse;
 4
 5 /**
 6  * 房屋管理缓存 业务层
 7  * @author : wang zns
 8  * @date : 2018-12-19
 9  */
10 public interface HouseManageCacheService {
11
12     /**
13      * 添加
14      * @param tblHouse
15      */
16     void add(TblHouse tblHouse);
17
18     /**
19      * 根据主键删除
20      * @param tblHouseId
21      */
22     void delete(Integer tblHouseId);
23
24 }
serviceImpl
 1 package cn.stylefeng.guns.modular.housemanage.cache;
 2
 3 import cn.stylefeng.guns.modular.housemanage.service.ITblHouseService;
 4 import cn.stylefeng.guns.modular.system.model.TblHouse;
 5 import com.alibaba.fastjson.JSON;
 6 import lombok.extern.slf4j.Slf4j;
 7 import net.rubyeye.xmemcached.MemcachedClient;
 8 import org.springframework.beans.factory.annotation.Autowired;
 9 import org.springframework.stereotype.Service;
10
11 /**
12  * @author : wang zns
13  * @date : 2018-12-19
14  */
15 @Service
16 @Slf4j
17 public class HouseManageCacheServiceImpl implements HouseManageCacheService{
18
19     @Autowired
20     private MemcachedClient memcachedClient;
21     @Autowired
22     private ITblHouseService iTblHouseService;
23
24     @Override
25     public void add(TblHouse tblHouse) {
26         // 先入库,入库成功则入缓存
27         boolean isSuccess = iTblHouseService.insert(tblHouse);
28         if (isSuccess) {
29             try {
30                 String houseJsonStr = JSON.toJSONString(tblHouse);
31                 memcachedClient.set(String.valueOf(tblHouse.getId()),0,houseJsonStr);
32             } catch (Exception e) {
33                 log.info("exception happens when add House:{}",e.toString());
34                 throw new RuntimeException(e.getMessage());
35             }
36         }
37     }
38
39     @Override
40     public void delete(Integer tblHouseId) {
41         // 先删除数据库内容,成功则清空缓存
42         boolean isSuccess = iTblHouseService.deleteById(tblHouseId);
43         if (isSuccess) {
44             try {
45                 memcachedClient.delete(String.valueOf(tblHouseId));
46             } catch (Exception e) {
47                 log.info("exception happens when delete House:{}",e.toString());
48                 throw new RuntimeException(e.getMessage());
49             }
50         }
51     }
52
53 }
controller
 1  /**
 2      * 新增房屋管理
 3      */
 4     @RequestMapping(value = "/add")
 5     @ResponseBody
 6     public Object add(@Valid TblHouse tblHouse, BindingResult bindingResult) {
 7         if(bindingResult.hasErrors()){
 8             throw new ServiceException(BizExceptionEnum.REQUEST_NULL);
 9         }
10         // 如果确定要使用缓存
11         if (memcachedProperties.isEnabled()) {
12             houseManageCacheService.add(tblHouse);
13         } else {
14             tblHouseService.insert(tblHouse);
15         }
16         return SUCCESS_TIP;
17     }
18
19     /**
20      * 删除房屋管理
21      */
22     @RequestMapping(value = "/delete")
23     @ResponseBody
24     public Object delete(@RequestParam Integer tblHouseId) {
25         if (memcachedProperties.isEnabled()) {
26             houseManageCacheService.delete(tblHouseId);
27         } else {
28             tblHouseService.deleteById(tblHouseId);
29         }
30         return SUCCESS_TIP;
31     }
运行结果:
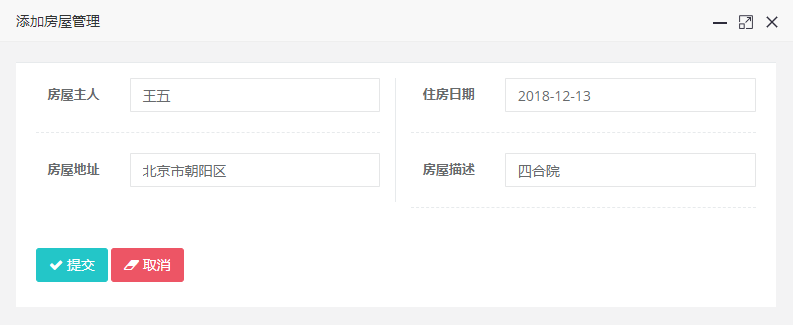
提交之后,去缓存服务器上查看

至此,springboot中集成memcached就完成了
写在最后
springboot集成memcached非常简单,核心步骤就是添加依赖、创建client对象并注入spring容器、然后就是用client对象进行各种操作。
client的接口当然有非常多,xmemcached对接口进行了封装。
最后附上xmemcached官网的地址,里面的文档很详细 https://github.com/killme2008/xmemcached/wiki