UITableView中我们使用datasource和delegate分别处理我们的数据和交互,而且UITableView默认提供了两种样式供我们选择如何呈现数据,在IOS6中苹果提供了UICollectionView用来更自由地定制呈现我们的数据。
UICollectionView使用包括三个部分:
1.设置数据(使用UICollectionViewDataSource)
2.设置数据呈现方式(使用UICollectionViewLayout)
3.设置界面交互(使用UICollectionViewDelegate)
其中1,3和UITableView一致,可见UICollectionView比UITableView更具有一般性(我们可以使用UICollectionView实现UITableView的效果)
本篇博客的outline如下(本文参考http://www.onevcat.com/2012/06/introducing-collection-views/,代码下载地址为https://github.com/zanglitao/UICollectionViewDemo)
1:基本介绍
2:UICollectionViewDataSource和UICollectionViewDelegate介绍
3:使用UICollectionViewFlowLayout
4:UICollectionViewFlowLayout的扩展
5:使用自定义UICollectionViewLayout
6:添加和删除数据
7:布局切换
基本介绍
UICollectionView是一种新的数据展示方式,简单来说可以把他理解成多列的UITableView(请一定注意这是UICollectionView的最最简单的形式)。如果你用过iBooks的话,可能你还对书架布局有一定印象:一个虚拟书架上放着你下载和购买的各类图书,整齐排列。其实这就是一个UICollectionView的表现形式,或者iPad的iOS6中的原生时钟应用中的各个时钟,也是UICollectionView的最简单的一个布局,如图:
 最简单的UICollectionView就是一个GridView,可以以多列的方式将数据进行展示。标准的UICollectionView包含三个部分,它们都是UIView的子类:
- Cells 用于展示内容的主体,对于不同的cell可以指定不同尺寸和不同的内容,这个稍后再说
- Supplementary Views 追加视图 如果你对UITableView比较熟悉的话,可以理解为每个Section的Header或者Footer,用来标记每个section的view
- Decoration Views 装饰视图 这是每个section的背景,比如iBooks中的书架就是这个


不管一个UICollectionView的布局如何变化,这三个部件都是存在的。再次说明,复杂的UICollectionView绝不止上面的几幅图。
UICollectionViewDataSource和UICollectionViewDelegate介绍
UICollectionViewDataSource用来设置数据,此协议包含的方法如下
- (NSInteger)collectionView:(UICollectionView *)collectionView numberOfItemsInSection:(NSInteger)section; //设置每个section包含的item数目

- (UICollectionViewCell *)collectionView:(UICollectionView *)collectionView cellForItemAtIndexPath:(NSIndexPath *)indexPath; //返回对应indexPath的cell

- (NSInteger)numberOfSectionsInCollectionView:(UICollectionView *)collectionView; //返回section的数目,此方法可选,默认返回1

- (UICollectionReusableView *)collectionView:(UICollectionView *)collectionView viewForSupplementaryElementOfKind:(NSString *)kind atIndexPath:(NSIndexPath *)indexPath; //返回Supplementary Views,此方法可选
对于Decoration Views,提供方法并不在UICollectionViewDataSource中,而是直接UICollectionViewLayout类中的(因为它仅仅是视图相关,而与数据无关),放到稍后再说。
与UITableViewCell相似的是UICollectionViewCell也支持重用,典型的UITbleViewCell重用写法如下
UITableViewCell *cell = [tableView dequeueReusableCellWithIdentifier:@"MY_CELL_ID"];
if (!cell) {    //如果没有可重用的cell,那么生成一个
    cell = [[UITableViewCell alloc] init];
}
//配置cell,blablabla
return cell
UICollectionViewCell重用写法于UITableViewCell一致,但是现在更简便的是如果我们直接在storyboard中对cell设置了identifier,或者使用了以下方法进行注册
- -registerClass:forCellWithReuseIdentifier:
- -registerClass:forSupplementaryViewOfKind:withReuseIdentifier:
- -registerNib:forCellWithReuseIdentifier:
- -registerNib:forSupplementaryViewOfKind:withReuseIdentifier:
那么可以更简单地实现重用
- (UICollectionView*)collectionView:(UICollectionView*)cv cellForItemAtIndexPath:(NSIndexPath*)indexPath {
    MyCell *cell = [cv dequeueReusableCellWithReuseIdentifier:@”MY_CELL_ID”];
    // Configure the cell's content
    cell.imageView.image = ...
    return cell;
}
上面的4个语句分别提供了nib和class方法对collectionViewCell和supplementaryView进行注册
UICollectionViewDelegate处理交互,包括cell点击事件,cell点击后高亮效果以及长按菜单等设置,当用户点击cell后,会依次执行协议中以下方法
- -collectionView:shouldHighlightItemAtIndexPath: 是否应该高亮?
- -collectionView:didHighlightItemAtIndexPath: 如果1回答为是,那么高亮
- -collectionView:shouldSelectItemAtIndexPath: 无论1结果如何,都询问是否可以被选中?
- -collectionView:didUnhighlightItemAtIndexPath: 如果1回答为是,那么现在取消高亮
- -collectionView:didSelectItemAtIndexPath: 如果3回答为是,那么选中cell
状态控制要比以前灵活一些,对应的高亮和选中状态分别由highlighted和selected两个属性表示。
关于Cell
相对于UITableViewCell来说,UICollectionViewCell没有这么多花头。首先UICollectionViewCell不存在各式各样的默认的style,这主要是由于展示对象的性质决定的,因为UICollectionView所用来展示的对象相比UITableView来说要来得灵活,大部分情况下更偏向于图像而非文字,因此需求将会千奇百怪。因此SDK提供给我们的默认的UICollectionViewCell结构上相对比较简单,由下至上:
- 首先是cell本身作为容器view
- 然后是一个大小自动适应整个cell的backgroundView,用作cell平时的背景
- 再其上是selectedBackgroundView,是cell被选中时的背景
- 最后是一个contentView,自定义内容应被加在这个view上
这次Apple给我们带来的好康是被选中cell的自动变化,所有的cell中的子view,也包括contentView中的子view,在当cell被选中时,会自动去查找view是否有被选中状态下的改变。比如在contentView里加了一个normal和selected指定了不同图片的imageView,那么选中这个cell的同时这张图片也会从normal变成selected,而不需要额外的任何代码。
使用UICollectionViewFlowLayout
UICollectionViewLayout用来处理数据的布局,通过它我们可以设置每个cell,Supplementary View以及Decoration Views的呈现方式,比如位置,大小,透明度,形状等等属性
Layout决定了UICollectionView是如何显示在界面上的。在展示之前,一般需要生成合适的UICollectionViewLayout子类对象,并将其赋予CollectionView的collectionViewLayout属性,苹果还提供了一个现成的UICollectionViewFlowLayout,通过这个layout我们可以很简单地实现流布局,UICollectionViewFlowLayout常用的配置属性如下
- CGSize itemSize:它定义了每一个item的大小。通过设定itemSize可以全局地改变所有cell的尺寸,如果想要对某个cell制定尺寸,可以使用-collectionView:layout:sizeForItemAtIndexPath:方法。
- CGFloat minimumLineSpacing:每一行的间距
- CGFloat minimumInteritemSpacing:item与item的间距
- UIEdgeInsets sectionInset:每个section的缩进
- UICollectionViewScrollDirection scrollDirection:设定是垂直流布局还是横向流布局,默认是UICollectionViewScrollDirectionVertical
- CGSize headerReferenceSize:设定header尺寸
- CGSize footerReferenceSize:设定footer尺寸
上面都是全局属性的设置,我们可以通过delegate中的方法对进行定制,通过实现以下这些方法设定的属性的优先级比全局设定的要高
@protocol UICollectionViewDelegateFlowLayout <UICollectionViewDelegate>
@optional

- (CGSize)collectionView:(UICollectionView *)collectionView layout:(UICollectionViewLayout*)collectionViewLayout sizeForItemAtIndexPath:(NSIndexPath *)indexPath;
- (UIEdgeInsets)collectionView:(UICollectionView *)collectionView layout:(UICollectionViewLayout*)collectionViewLayout insetForSectionAtIndex:(NSInteger)section;
- (CGFloat)collectionView:(UICollectionView *)collectionView layout:(UICollectionViewLayout*)collectionViewLayout minimumLineSpacingForSectionAtIndex:(NSInteger)section;
- (CGFloat)collectionView:(UICollectionView *)collectionView layout:(UICollectionViewLayout*)collectionViewLayout minimumInteritemSpacingForSectionAtIndex:(NSInteger)section;
- (CGSize)collectionView:(UICollectionView *)collectionView layout:(UICollectionViewLayout*)collectionViewLayout referenceSizeForHeaderInSection:(NSInteger)section;
- (CGSize)collectionView:(UICollectionView *)collectionView layout:(UICollectionViewLayout*)collectionViewLayout referenceSizeForFooterInSection:(NSInteger)section;

@end
接下来我们使用使用UICollectionViewFlowLayout完成一个简单demo
1:设置我们的cell
//SimpleFlowLayoutCell.h
@interface SimpleFlowLayoutCell : UICollectionViewCell
@property(nonatomic,strong)UILabel *label;
@end

//SimpleFlowLayoutCell.m
@implementation SimpleFlowLayoutCell

-(id)initWithFrame:(CGRect)frame {
    self = [super initWithFrame:frame];

    if (self) {
        self.label = [[UILabel alloc] initWithFrame:CGRectMake(0.0, 0.0, frame.size.width, frame.size.height)];
        self.label.textAlignment = NSTextAlignmentCenter;
        self.label.textColor = [UIColor blackColor];
        self.label.font = [UIFont boldSystemFontOfSize:15.0];
        self.backgroundColor = [UIColor lightGrayColor];

        [self.contentView addSubview:self.label];

        self.contentView.layer.borderWidth = 1.0f;
        self.contentView.layer.borderColor = [UIColor blackColor].CGColor;
    }

    return self;
}

@end
2:设置追加视图
//SimpleFlowLayoutSupplementaryView.h
@interface SimpleFlowLayoutSupplementaryView : UICollectionReusableView
@property(nonatomic,strong)UILabel *label;
@end

//SimpleFlowLayoutSupplementaryView.m
@implementation SimpleFlowLayoutSupplementaryView

-(id)initWithFrame:(CGRect)frame {
    self = [super initWithFrame:frame];

    if (self) {
        self.label = [[UILabel alloc] initWithFrame:CGRectMake(0.0, 0.0, frame.size.width, frame.size.height)];
        self.label.textAlignment = NSTextAlignmentCenter;
        self.label.textColor = [UIColor blackColor];
        self.label.font = [UIFont boldSystemFontOfSize:15.0];
        self.backgroundColor = [UIColor lightGrayColor];

        [self addSubview:self.label];

        self.layer.borderWidth = 1.0f;
        self.layer.borderColor = [UIColor blackColor].CGColor;
    }

    return self;
}

@end
3:使用流布局初始化我们的UICollectionView
- (void)viewDidLoad {
    [super viewDidLoad];

    self.collectionView = [[UICollectionView alloc] initWithFrame:[UIScreen mainScreen].bounds collectionViewLayout:[[UICollectionViewFlowLayout alloc] init]];
    self.collectionView.backgroundColor = [UIColor whiteColor];
    self.collectionView.delegate = self;
    self.collectionView.dataSource = self;

    [self.collectionView registerClass:[SimpleFlowLayoutCell class] forCellWithReuseIdentifier:@"MY_CELL"];
    //追加视图的类型是UICollectionElementKindSectionHeader,也可以设置为UICollectionElementKindSectionFooter
    [self.collectionView registerClass:[SimpleFlowLayoutSupplementaryView class] forSupplementaryViewOfKind:UICollectionElementKindSectionHeader withReuseIdentifier:@"MY_SUPPLEMENT"];

    [self.view addSubview:self.collectionView];
}
4:配置datasource
//每个section中有32个item
- (NSInteger)collectionView:(UICollectionView *)collectionView numberOfItemsInSection:(NSInteger)section {
    return  32;
}


- (UICollectionViewCell *)collectionView:(UICollectionView *)collectionView cellForItemAtIndexPath:(NSIndexPath *)indexPath {
    SimpleFlowLayoutCell *cell = [collectionView dequeueReusableCellWithReuseIdentifier:cellidentifier forIndexPath:indexPath];
    cell.label.text = [NSString stringWithFormat:@"%d",indexPath.item];
    return cell;
}

- (NSInteger)numberOfSectionsInCollectionView:(UICollectionView *)collectionView {
    return 2;
}

// The view that is returned must be retrieved from a call to -dequeueReusableSupplementaryViewOfKind:withReuseIdentifier:forIndexPath:
- (UICollectionReusableView *)collectionView:(UICollectionView *)collectionView viewForSupplementaryElementOfKind:(NSString *)kind atIndexPath:(NSIndexPath *)indexPath {
    SimpleFlowLayoutSupplementaryView *view = [collectionView dequeueReusableSupplementaryViewOfKind:UICollectionElementKindSectionHeader withReuseIdentifier:@"MY_SUPPLEMENT" forIndexPath:indexPath];
    view.label.text = [NSString stringWithFormat:@"section header %d",indexPath.section];
    return view;
}
此时运行程序可以看到如下界面
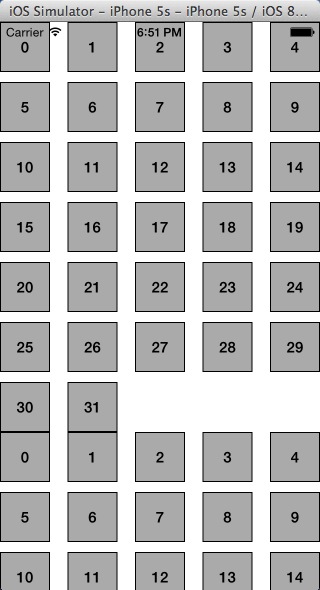
程序并没有显示我们设置的header视图,这是因为我们使用的是UICollectionViewFlowLayout默认配置,当前header视图高度为0,我们可以通过设置UICollectionViewFlowLayout的
headerReferenceSize属性改变大小,也可以通过协议方法返回特定section的header大小,这里我们先使用后者
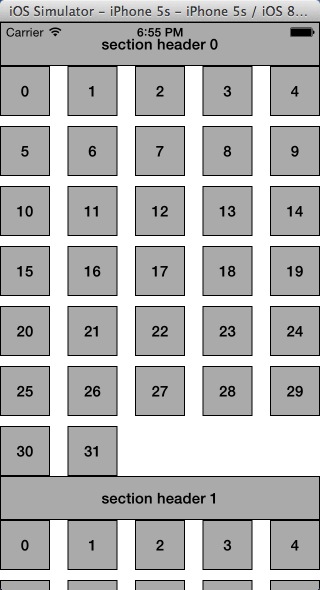
我们添加以下方法
- (CGSize)collectionView:(UICollectionView *)collectionView layout:(UICollectionViewLayout*)collectionViewLayout referenceSizeForHeaderInSection:(NSInteger)section {
    return CGSizeMake(44, 44);
}
此时再运行就能得到以下结果
5:配置layout
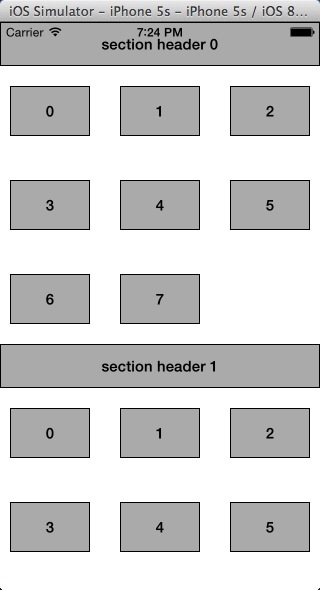
上面的代码使用了flowlayout默认的配置,包括itemsize,行间距,item间距,追加视图大小等等都是默认值,我们可以改变这些值
- (void)viewDidLoad {
    [super viewDidLoad];

    UICollectionViewFlowLayout *layout = [[UICollectionViewFlowLayout alloc] init];
    self.collectionView = [[UICollectionView alloc] initWithFrame:[UIScreen mainScreen].bounds collectionViewLayout:layout];
    self.collectionView.backgroundColor = [UIColor whiteColor];
    self.collectionView.delegate = self;
    self.collectionView.dataSource = self;

    [self.collectionView registerClass:[SimpleFlowLayoutCell class] forCellWithReuseIdentifier:@"MY_CELL"];
    //追加视图的类型是UICollectionElementKindSectionHeader,也可以设置为UICollectionElementKindSectionFooter
    [self.collectionView registerClass:[SimpleFlowLayoutSupplementaryView class] forSupplementaryViewOfKind:UICollectionElementKindSectionHeader withReuseIdentifier:@"MY_SUPPLEMENT"];

    [self.view addSubview:self.collectionView];

    //配置UICollectionViewFlowLayout属性
    //每个itemsize的大小
    layout.itemSize = CGSizeMake(80, 50);
    //行与行的最小间距
    layout.minimumLineSpacing = 44;

    //每行的item与item之间最小间隔(如果)
    layout.minimumInteritemSpacing = 20;
    //每个section的头部大小
    layout.headerReferenceSize = CGSizeMake(44, 44);
    //每个section距离上方和下方20,左方和右方10
    layout.sectionInset = UIEdgeInsetsMake(20, 10, 20, 10);
    //垂直滚动(水平滚动设置UICollectionViewScrollDirectionHorizontal)
    layout.scrollDirection = UICollectionViewScrollDirectionVertical;
}
运行结果如下
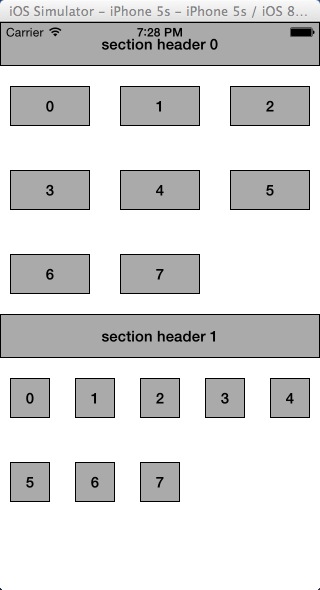
6:修改特定cell大小
包括上面配置header高度时使用的方法- collectionView:layout:referenceSizeForHeaderInSection:
UICollectionViewDelegateFlowLayout还提供了方法对特定cell大小,间距进行设置
- (CGSize)collectionView:(UICollectionView *)collectionView layout:(UICollectionViewLayout*)collectionViewLayout sizeForItemAtIndexPath:(NSIndexPath *)indexPath {
    if (indexPath.section == 0) {
        return CGSizeMake(80, 40);
    } else {
        return CGSizeMake(40, 40);
    }
}
7:设置delegate,通过delegate中的方法可以设置cell的点击事件,这部分和UITableView差不多
UICollectionViewFlowLayout的扩展
上一部分我们直接使用了UICollectionViewFlowLayout,我们也可以继承此布局实现更多的效果,苹果官方给出了一个flowlayout的demo,实现滚动时item放大以及网格对齐的功能
1:新建我们的cell类
//LineLayoutCell.h
@interface LineLayoutCell : UICollectionViewCell
@property (strong, nonatomic) UILabel* label;
@end

//LineLayoutCell.m
@implementation LineLayoutCell

- (id)initWithFrame:(CGRect)frame
{
    self = [super initWithFrame:frame];
    if (self) {
        self.label = [[UILabel alloc] initWithFrame:CGRectMake(0.0, 0.0, frame.size.width, frame.size.height)];
        self.label.autoresizingMask = UIViewAutoresizingFlexibleHeight|UIViewAutoresizingFlexibleWidth;
        self.label.textAlignment = NSTextAlignmentCenter;
        self.label.font = [UIFont boldSystemFontOfSize:50.0];
        self.label.backgroundColor = [UIColor underPageBackgroundColor];
        self.label.textColor = [UIColor blackColor];
        [self.contentView addSubview:self.label];;
        self.contentView.layer.borderWidth = 1.0f;
        self.contentView.layer.borderColor = [UIColor whiteColor].CGColor;
    }
    return self;
}

@end
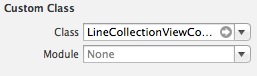
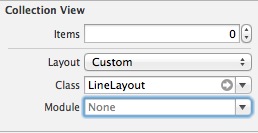
2:storyboard中新建UICollectionViewController,设置类为我们自定义的LineCollectionViewController,并设置Layout为我们自定义的LineLayout
3:在我们自定义的LineCollectionViewController中配置数据源
//LineCollectionViewController.h
@interface LineCollectionViewController : UICollectionViewController
@end

//LineCollectionViewController.m
@implementation LineCollectionViewController

-(void)viewDidLoad
{
    [self.collectionView registerClass:[LineLayoutCell class] forCellWithReuseIdentifier:@"MY_CELL"];
}

- (NSInteger)collectionView:(UICollectionView *)view numberOfItemsInSection:(NSInteger)section;
{
    return 60;
}

- (UICollectionViewCell *)collectionView:(UICollectionView *)cv cellForItemAtIndexPath:(NSIndexPath *)indexPath;
{
    LineLayoutCell *cell = [cv dequeueReusableCellWithReuseIdentifier:@"MY_CELL" forIndexPath:indexPath];
    cell.label.text = [NSString stringWithFormat:@"%d",indexPath.item];
    return cell;
}
@end
4:设置LineLayout
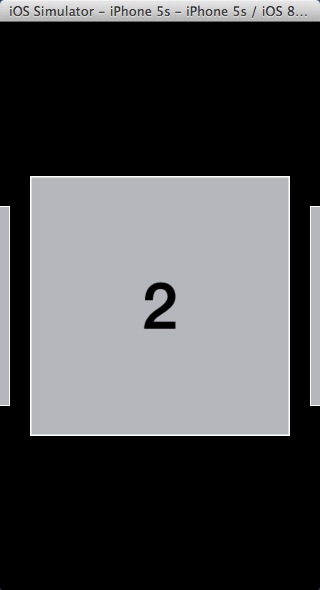
我们设置数据横向滚动,item大小为CGSizeMake(200, 200),并设置每列数据上下各间隔200,这样一行只有一列数据
//由于使用了storyboard的关系,需要使用initWithCoder
-(id)initWithCoder:(NSCoder *)aDecoder {
    self = [super initWithCoder:aDecoder];
    if (self) {
        self.itemSize = CGSizeMake(ITEM_SIZE, ITEM_SIZE);
        self.scrollDirection = UICollectionViewScrollDirectionHorizontal;
        self.sectionInset = UIEdgeInsetsMake(200, 0.0, 200, 0.0);
        self.minimumLineSpacing = 50.0;
    }
    return self;
}
然后设置item滚动居中,只需要实现方法-targetContentOffsetForProposedContentOffset:withScrollingVelocity,此方法第一个参数为不加偏移量预期滚动停止时的ContentOffset,返回值类型为CGPoint,代表x,y的偏移
- (CGPoint)targetContentOffsetForProposedContentOffset:(CGPoint)proposedContentOffset withScrollingVelocity:(CGPoint)velocity
{
    CGFloat offsetAdjustment = MAXFLOAT;

    //预期滚动停止时水平方向的中心点
    CGFloat horizontalCenter = proposedContentOffset.x + (CGRectGetWidth(self.collectionView.bounds) / 2.0);

    //预期滚动停止时显示在屏幕上的区域
    CGRect targetRect = CGRectMake(proposedContentOffset.x, 0.0, self.collectionView.bounds.size.width, self.collectionView.bounds.size.height);

    //获取该区域的UICollectionViewLayoutAttributes集合
    NSArray* array = [super layoutAttributesForElementsInRect:targetRect];


    for (UICollectionViewLayoutAttributes* layoutAttributes in array) {
        CGFloat itemHorizontalCenter = layoutAttributes.center.x;
        //循环结束后offsetAdjustment的值就是预期滚定停止后离水平方向中心点最近的item的中心店
        if (ABS(itemHorizontalCenter - horizontalCenter) < ABS(offsetAdjustment)) {
            offsetAdjustment = itemHorizontalCenter - horizontalCenter;
        }
    }

    //返回偏移量
    return CGPointMake(proposedContentOffset.x + offsetAdjustment, proposedContentOffset.y);
}
上面的代码中出现了一个新的类 UICollectionViewLayoutAttributes
UICollectionViewLayoutAttributes是一个非常重要的类,先来看看property列表:
- @property (nonatomic) CGRect frame
- @property (nonatomic) CGPoint center
- @property (nonatomic) CGSize size
- @property (nonatomic) CATransform3D transform3D
- @property (nonatomic) CGFloat alpha
- @property (nonatomic) NSInteger zIndex
- @property (nonatomic, getter=isHidden) BOOL hidden
可以看到,UICollectionViewLayoutAttributes的实例中包含了诸如边框,中心点,大小,形状,透明度,层次关系和是否隐藏等信息。和DataSource的行为十分类似,当UICollectionView在获取布局时将针对每一个indexPath的部件(包括cell,追加视图和装饰视图),向其上的UICollectionViewLayout实例询问该部件的布局信息(在这个层面上说的话,实现一个UICollectionViewLayout的时候,其实很像是zap一个delegate,之后的例子中会很明显地看出),这个布局信息,就以UICollectionViewLayoutAttributes的实例的方式给出。
接下来设置item滚动过程中放大缩小效果
#define ACTIVE_DISTANCE 200
#define ZOOM_FACTOR 0.3
-(NSArray*)layoutAttributesForElementsInRect:(CGRect)rect
{
    //获取rect区域的UICollectionViewLayoutAttributes集合
    NSArray* array = [super layoutAttributesForElementsInRect:rect];
    CGRect visibleRect;
    visibleRect.origin = self.collectionView.contentOffset;
    visibleRect.size = self.collectionView.bounds.size;

    for (UICollectionViewLayoutAttributes* attributes in array) {
        //只处理可视区域内的item
        if (CGRectIntersectsRect(attributes.frame, rect)) {
            //可视区域中心点与item中心点距离
            CGFloat distance = CGRectGetMidX(visibleRect) - attributes.center.x;

            CGFloat normalizedDistance = distance / ACTIVE_DISTANCE;
            if (ABS(distance) < ACTIVE_DISTANCE) {
                //放大系数
                //当可视区域中心点和item中心点距离为0时达到最大放大倍数1.3
                //当可视区域中心点和item中心点距离大于200时达到最小放大倍数1,也就是不放大
                //距离在0~200之间时放大倍数在1.3~1
                CGFloat zoom = 1 + ZOOM_FACTOR*(1 - ABS(normalizedDistance));
                attributes.transform3D = CATransform3DMakeScale(zoom, zoom, 1.0);
                attributes.zIndex = 1;
            }
        }
    }
    return array;
}

- (BOOL)shouldInvalidateLayoutForBoundsChange:(CGRect)oldBounds
{
    return YES;
}
对于个别UICollectionViewLayoutAttributes进行调整,以达到满足设计需求是UICollectionView使用中的一种思路。在根据位置提供不同layout属性的时候,需要记得让-shouldInvalidateLayoutForBoundsChange:返回YES,这样当边界改变的时候,-invalidateLayout会自动被发送,才能让layout得到刷新。
5:运行程序查看结果
使用自定义UICollectionViewLayout
如果我们想实现更加复杂的布局,那就必须自定义我们自己的UICollectionView,实现一个自定义layout的常规做法是继承UICollectionViewLayout类,然后重载下列方法
- -(CGSize)collectionViewContentSize:返回collectionView内容的尺寸,
- -(NSArray*)layoutAttributesForElementsInRect:(CGRect)rect:返回rect范围内所有元素的属性数组,属性是UICollectionViewLayoutAttributes,通过这个属性数组就能决定每个元素的布局样式
UICollectionViewLayoutAttributes可以是cell,追加视图或装饰视图的信息,通过以下三种不同的UICollectionViewLayoutAttributes初始化方法可以得到不同类型的UICollectionViewLayoutAttributes
- layoutAttributesForCellWithIndexPath:
- layoutAttributesForSupplementaryViewOfKind:withIndexPath:
- layoutAttributesForDecorationViewOfKind:withIndexPath:
- - (UICollectionViewLayoutAttributes *)layoutAttributesForItemAtIndexPath:(NSIndexPath *)path:返回对应于indexPath的元素的属性
- -(UICollectionViewLayoutAttributes _)layoutAttributesForItemAtIndexPath:(NSIndexPath _)indexPath:返回对应于indexPath的位置的追加视图的布局属性,如果没有追加视图可不重载
- -(UICollectionViewLayoutAttributes * )layoutAttributesForDecorationViewOfKind:(NSString_)decorationViewKind atIndexPath:(NSIndexPath _)indexPath:返回对应于indexPath的位置的装饰视图的布局属性,如果没有装饰视图可不重载
- -(BOOL)shouldInvalidateLayoutForBoundsChange:(CGRect)newBounds:当边界发生改变时,是否应该刷新布局。如果YES则在边界变化(一般是scroll到其他地方)时,将重新计算需要的布局信息
另外需要了解的是,在初始化一个UICollectionViewLayout实例后,会有一系列准备方法被自动调用,以保证layout实例的正确。
首先,-(void)prepareLayout将被调用,默认下该方法什么没做,但是在自己的子类实现中,一般在该方法中设定一些必要的layout的结构和初始需要的参数等。
之后,-(CGSize) collectionViewContentSize将被调用,以确定collection应该占据的尺寸。注意这里的尺寸不是指可视部分的尺寸,而应该是所有内容所占的尺寸。collectionView的本质是一个scrollView,因此需要这个尺寸来配置滚动行为。
接下来-(NSArray *)layoutAttributesForElementsInRect:(CGRect)rect被调用,这个没什么值得多说的。初始的layout的外观将由该方法返回的UICollectionViewLayoutAttributes来决定。
另外,在需要更新layout时,需要给当前layout发送 -invalidateLayout,该消息会立即返回,并且预约在下一个loop的时候刷新当前layout,这一点和UIView的setNeedsLayout方法十分类似。在
-invalidateLayout后的下一个collectionView的刷新loop中,又会从prepareLayout开始,依次再调用-collectionViewContentSize和-layoutAttributesForElementsInRect来生成更新后的布局。
苹果官方给出了一个circlelayout的demo
1:新建我们的cell类
//CircleLayoutCell.h
@interface CircleLayoutCell : UICollectionViewCell
@end

//CircleLayoutCell.m
@implementation CircleLayoutCell
- (id)initWithFrame:(CGRect)frame
{
    self = [super initWithFrame:frame];
    if (self) {
        self.contentView.layer.cornerRadius = 35.0;
        self.contentView.layer.borderWidth = 1.0f;
        self.contentView.layer.borderColor = [UIColor whiteColor].CGColor;
        self.contentView.backgroundColor = [UIColor underPageBackgroundColor];
    }
    return self;
}
@end
2:storyboard中新建UICollectionViewController,设置类为我们自定义的CircleCollectionViewController,并设置Layout为我们自定义的CircleLayout
3:在我们自定义的CircleCollectionViewController中配置数据源
//CircleCollectionViewController.h
@interface CircleCollectionViewController : UICollectionViewController
@end

//CircleCollectionViewController.m
@interface CircleCollectionViewController ()
@property (nonatomic, assign) NSInteger cellCount;
@end

@implementation CircleCollectionViewController
- (void)viewDidLoad {
    [super viewDidLoad];

    self.cellCount = 20;
    [self.collectionView registerClass:[CircleLayoutCell class] forCellWithReuseIdentifier:@"MY_CELL"];
    self.collectionView.backgroundColor = [UIColor scrollViewTexturedBackgroundColor];
}

- (NSInteger)collectionView:(UICollectionView *)view numberOfItemsInSection:(NSInteger)section;
{
    return self.cellCount;
}

- (UICollectionViewCell *)collectionView:(UICollectionView *)cv cellForItemAtIndexPath:(NSIndexPath *)indexPath;
{
    CircleLayoutCell *cell = [cv dequeueReusableCellWithReuseIdentifier:@"MY_CELL" forIndexPath:indexPath];
    return cell;
}

@end
4:设置CircleLayout
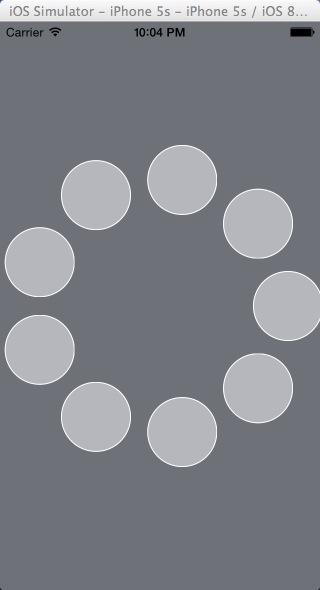
首先在prepareLayout中设置界面圆心的位置以及半径
-(void)prepareLayout
{
    [super prepareLayout];

    CGSize size = self.collectionView.frame.size;
    //当前元素的个数
    _cellCount = [[self collectionView] numberOfItemsInSection:0];
    _center = CGPointMake(size.width / 2.0, size.height / 2.0);
    _radius = MIN(size.width, size.height) / 2.5;
}
其实对于一个size不变的collectionView来说,除了_cellCount之外的中心和半径的定义也可以扔到init里去做,但是显然在prepareLayout里做的话具有更大的灵活性。因为每次重新给出layout时都会调用prepareLayout,这样在以后如果有collectionView大小变化的需求时也可以自动适应变化
之后设置内容collectionView内容的尺寸,这个demo中内容尺寸就是屏幕可视区域
-(CGSize)collectionViewContentSize
{
    return [self collectionView].frame.size;
}
接下来在-layoutAttributesForElementsInRect中返回各个元素属性组成的属性数组
-(NSArray*)layoutAttributesForElementsInRect:(CGRect)rect
{
    NSMutableArray* attributes = [NSMutableArray array];
    for (NSInteger i=0 ; i < self.cellCount; i++) {
        NSIndexPath* indexPath = [NSIndexPath indexPathForItem:i inSection:0];
        [attributes addObject:[self layoutAttributesForItemAtIndexPath:indexPath]];
    }
    return attributes;
}

- (UICollectionViewLayoutAttributes *)layoutAttributesForItemAtIndexPath:(NSIndexPath *)path
{
    //初始化一个UICollectionViewLayoutAttributes
    UICollectionViewLayoutAttributes* attributes = [UICollectionViewLayoutAttributes layoutAttributesForCellWithIndexPath:path];

    //元素的大小
    attributes.size = CGSizeMake(70, 70);

    //元素的中心点
    attributes.center = CGPointMake(_center.x + _radius * cosf(2 * path.item * M_PI / _cellCount),
                                    _center.y + _radius * sinf(2 * path.item * M_PI / _cellCount));
    return attributes;
}
5:运行程序查看结果
添加和删除数据
我们经常需要在collectionview中动态地添加一个元素或者删除一个元素,collectionview提供了下面的函数处理数据的删除与添加
- -deleteItemsAtIndexPaths:删除对应indexPath处的元素
- -insertItemsAtIndexPaths:在indexPath位置处添加一个元素
- -performBatchUpdates:completion:这个方法可以用来对collectionView中的元素进行批量的插入,删除,移动等操作
继续上面的CircleLayout的demo,我们为collectionView添加点击事件,如果点击某个元素则删除此元素,如果点击元素外的区域则在第一个位置新加一个元素
//CircleCollectionViewController.m
@implementation CircleCollectionViewController
- (void)viewDidLoad {
    [super viewDidLoad];

    self.cellCount = 20;
    [self.collectionView registerClass:[CircleLayoutCell class] forCellWithReuseIdentifier:@"MY_CELL"];
    self.collectionView.backgroundColor = [UIColor scrollViewTexturedBackgroundColor];


    UITapGestureRecognizer* tapRecognizer = [[UITapGestureRecognizer alloc] initWithTarget:self action:@selector(handleTapGesture:)];
    [self.collectionView addGestureRecognizer:tapRecognizer];
}

- (NSInteger)collectionView:(UICollectionView *)view numberOfItemsInSection:(NSInteger)section;
{
    return self.cellCount;
}

- (UICollectionViewCell *)collectionView:(UICollectionView *)cv cellForItemAtIndexPath:(NSIndexPath *)indexPath;
{
    CircleLayoutCell *cell = [cv dequeueReusableCellWithReuseIdentifier:@"MY_CELL" forIndexPath:indexPath];
    return cell;
}

- (void)handleTapGesture:(UITapGestureRecognizer *)sender {

    if (sender.state == UIGestureRecognizerStateEnded)
    {
        CGPoint initialPinchPoint = [sender locationInView:self.collectionView];
        NSIndexPath* tappedCellPath = [self.collectionView indexPathForItemAtPoint:initialPinchPoint];
        if (tappedCellPath!=nil)
        {
            self.cellCount = self.cellCount - 1;
            [self.collectionView performBatchUpdates:^{
                [self.collectionView deleteItemsAtIndexPaths:[NSArray arrayWithObject:tappedCellPath]];

            } completion:nil];
        }
        else
        {
            self.cellCount = self.cellCount + 1;
            [self.collectionView performBatchUpdates:^{
                [self.collectionView insertItemsAtIndexPaths:[NSArray arrayWithObject:[NSIndexPath indexPathForItem:0 inSection:0]]];
            } completion:nil];
        }
    }
}

@end
有时候我们希望给删除和添加元素加点动画,layout中提供了下列方法处理动画
- initialLayoutAttributesForAppearingItemAtIndexPath:
- initialLayoutAttributesForAppearingDecorationElementOfKind:atIndexPath:
- finalLayoutAttributesForDisappearingItemAtIndexPath:
- finalLayoutAttributesForDisappearingDecorationElementOfKind:atIndexPath:
需要注意的是以上4个方法会对所有显示的元素调用,所以我们需要两个数组放置刚添加或者删除的元素,只对它们进行动画处理,在insert或者delete之前prepareForCollectionViewUpdates:会被调用,insert或者delete之后finalizeCollectionViewUpdates:会被调用,我们可以在这两个方法中设置和销毁我们的数组
CircleLayout的完整代码如下
//CircleLayout.m
#define ITEM_SIZE 70

@interface CircleLayout()

// arrays to keep track of insert, delete index paths
@property (nonatomic, strong) NSMutableArray *deleteIndexPaths;
@property (nonatomic, strong) NSMutableArray *insertIndexPaths;

@end

@implementation CircleLayout


-(void)prepareLayout
{
    [super prepareLayout];

    CGSize size = self.collectionView.frame.size;
    //当前元素的个数
    _cellCount = [[self collectionView] numberOfItemsInSection:0];
    _center = CGPointMake(size.width / 2.0, size.height / 2.0);
    _radius = MIN(size.width, size.height) / 2.5;
}

-(CGSize)collectionViewContentSize
{
    return [self collectionView].frame.size;
}

- (UICollectionViewLayoutAttributes *)layoutAttributesForItemAtIndexPath:(NSIndexPath *)path
{
    //初始化一个UICollectionViewLayoutAttributes
    UICollectionViewLayoutAttributes* attributes = [UICollectionViewLayoutAttributes layoutAttributesForCellWithIndexPath:path];

    //元素的大小
    attributes.size = CGSizeMake(ITEM_SIZE, ITEM_SIZE);

    //元素的中心点
    attributes.center = CGPointMake(_center.x + _radius * cosf(2 * path.item * M_PI / _cellCount),
                                    _center.y + _radius * sinf(2 * path.item * M_PI / _cellCount));
    return attributes;
}

-(NSArray*)layoutAttributesForElementsInRect:(CGRect)rect
{
    NSMutableArray* attributes = [NSMutableArray array];
    for (NSInteger i=0 ; i < self.cellCount; i++) {
        NSIndexPath* indexPath = [NSIndexPath indexPathForItem:i inSection:0];
        [attributes addObject:[self layoutAttributesForItemAtIndexPath:indexPath]];
    }
    return attributes;
}

- (void)prepareForCollectionViewUpdates:(NSArray *)updateItems
{
    // Keep track of insert and delete index paths
    [super prepareForCollectionViewUpdates:updateItems];

    self.deleteIndexPaths = [NSMutableArray array];
    self.insertIndexPaths = [NSMutableArray array];

    for (UICollectionViewUpdateItem *update in updateItems)
    {
        if (update.updateAction == UICollectionUpdateActionDelete)
        {
            [self.deleteIndexPaths addObject:update.indexPathBeforeUpdate];
        }
        else if (update.updateAction == UICollectionUpdateActionInsert)
        {
            [self.insertIndexPaths addObject:update.indexPathAfterUpdate];
        }
    }
}

- (void)finalizeCollectionViewUpdates
{
    [super finalizeCollectionViewUpdates];
    // release the insert and delete index paths
    self.deleteIndexPaths = nil;
    self.insertIndexPaths = nil;
}

// Note: name of method changed
// Also this gets called for all visible cells (not just the inserted ones) and
// even gets called when deleting cells!
- (UICollectionViewLayoutAttributes *)initialLayoutAttributesForAppearingItemAtIndexPath:(NSIndexPath *)itemIndexPath
{
    // Must call super
    UICollectionViewLayoutAttributes *attributes = [super initialLayoutAttributesForAppearingItemAtIndexPath:itemIndexPath];

    if ([self.insertIndexPaths containsObject:itemIndexPath])
    {
        // only change attributes on inserted cells
        if (!attributes)
            attributes = [self layoutAttributesForItemAtIndexPath:itemIndexPath];

        // Configure attributes ...
        attributes.alpha = 0.0;
        attributes.center = CGPointMake(_center.x, _center.y);
    }

    return attributes;
}

// Note: name of method changed
// Also this gets called for all visible cells (not just the deleted ones) and
// even gets called when inserting cells!
- (UICollectionViewLayoutAttributes *)finalLayoutAttributesForDisappearingItemAtIndexPath:(NSIndexPath *)itemIndexPath
{
    // So far, calling super hasn't been strictly necessary here, but leaving it in
    // for good measure
    UICollectionViewLayoutAttributes *attributes = [super finalLayoutAttributesForDisappearingItemAtIndexPath:itemIndexPath];

    if ([self.deleteIndexPaths containsObject:itemIndexPath])
    {
        // only change attributes on deleted cells
        if (!attributes)
            attributes = [self layoutAttributesForItemAtIndexPath:itemIndexPath];

        // Configure attributes ...
        attributes.alpha = 0.0;
        attributes.center = CGPointMake(_center.x, _center.y);
        attributes.transform3D = CATransform3DMakeScale(0.1, 0.1, 1.0);
    }

    return attributes;
}

@end
布局切换
UICollectionView最大的好处是数据源,交互与布局的独立和解耦,我们可以方便地使用一套数据在几种布局中切换,直接更改collectionView的collectionViewLayout属性可以立即切换布局。而如果通过setCollectionViewLayout:animated:,则可以在切换布局的同时,使用动画来过渡。对于每一个cell,都将有对应的UIView动画进行对应