一、环境准备
环境1 台虚拟机,系统为centos7
二、17.09.0-ce 安装
- 卸载安装的所有Docker组件
在 Docker17.03.0-ce 版本中,与在 Docker 1.12 中引入的实验版本相比,管理插件 API发生了变化。在升级到 Docker17.03.0-ce之前,必须卸载使用 Docker 1.12 安装的插件。可通过 docker plugin rm 命令卸载插件。
要手动删除所有插件并解决此问题,请执行以下步骤:
-
从 /var/lib/docker/plugins/ 中删除 plugins.json
-
重新启动 Docker,验证 Docker 守护程序启动时是否有错误。
-
重新安装插件
-
卸载Docker安装包
yum remove docker*
卸载相关组件container-selinux(必须卸载,不然会报冲突的错误)
yum remove container-selinux-1.12.5-14.el7.centos.x86_64
- 下载官方Docker YUM源
登陆Docker官网https://www.docker.com/。首页点击Get Docker Community Edition
在下载页面选择对应的操作系统版本。然后在按照页面说明和操作步骤安装Docker CE
-
安装docker CE
-
安装yum-utils
sudo yum install -y yum-utils
1.下载docker yum源
sudo yum-config-manager
    --add-repo
     https://download.docker.com/linux/centos/docker-ce.repo
2.更新软件缓存
sudo yum makecache fast
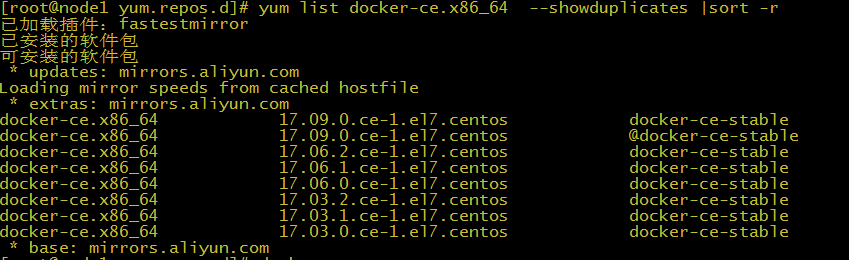
3、展示yum里能够提供的docker-ce的版本
yum list docker-ce.x86_64 --showduplicates |sort -r
4.获取、安装Docker CE
sudo yum -y install docker-ce-17.09.0.ce
5.启动docker并查看安装的docker版本
systemctl start docker
systemctl enable docker
6.查看版本信息
docker info
我们来稍微了解下17.09.0.ce的启动参数。
cat /lib/systemd/system/docker.service
[Unit]
Description=Docker Application Container Engine
Documentation=https://docs.docker.com
After=network-online.target firewalld.service
Wants=network-online.target

[Service]
Type=notify
# the default is not to use systemd for cgroups because the delegate issues still
# exists and systemd currently does not support the cgroup feature set required
# for containers run by docker
ExecStart=/usr/bin/dockerd  --bip=172.18.0.1/16 -Htcp://0.0.0.0:5257 -Hunix:///var/run/docker.sock --pidfile=/var/run/docker.pid  #启动时候执行项
ExecReload=/bin/kill -s HUP $MAINPID
# Having non-zero Limit*s causes performance problems due to accounting overhead
# in the kernel. We recommend using cgroups to do container-local accounting.
LimitNOFILE=infinity
LimitNPROC=infinity
LimitCORE=infinity
# Uncomment TasksMax if your systemd version supports it.
# Only systemd 226 and above support this version.
#TasksMax=infinity
TimeoutStartSec=0
# set delegate yes so that systemd does not reset the cgroups of docker containers
Delegate=yes
# kill only the docker process, not all processes in the cgroup
KillMode=process
# restart the docker process if it exits prematurely
Restart=on-failure
StartLimitBurst=3
StartLimitInterval=60s

[Install]
WantedBy=multi-user.target
我们只要配置ExecStart这个对应项,当使用systemctl start docker 时候执行的。
详细的配置参数可以使用 dockerd --help 查看
在没有特殊要求的情况下,我们很多启动配置参数是不需要用到的。所以我把我自己的配置参数贴出来给大家看下。
ExecStart=/usr/bin/dockerd --bip=172.18.0.1/16 -Htcp://0.0.0.0:5257 -Hunix:///var/run/docker.sock --pidfile=/var/run/docker.pid
--bip                          #指定桥接地址,即定义一个容器的私有网络
--H tcp://0.0.0.0:5257                     #将我的docker守护进程指定一个监听端口
--H unix:///var/run/docker.sock            #将我的docker守护进程指定一个sock位置
--pidfile=/var/run/docker.pid              #指定docker守护进程pid文件目录
配置好上述的参数时候,我们可以来启动docker了
systemctl stop docker
systemctl daemon-reload #这步是必须的,重新加载docker.service文件的配置,否则重启也是启动之前的配置。
systemctl start docker