今天我们一起学习下SpringBoot+Mybatis-Plus五步实现分页查询!
第一步:创建好SpringBoot项目后先配置maven依赖(完整pom如下)
注意:1.启动类上要加注解@MapperScan("com.zk.*.mapper") // 扫码mapper类,把bean加入到spring容器管理
2..pom中resources配置不可缺少
<?xml version="1.0" encoding="UTF-8"?>
<project xmlns="http://maven.apache.org/POM/4.0.0" xmlns:xsi="http://www.w3.org/2001/XMLSchema-instance"
         xsi:schemaLocation="http://maven.apache.org/POM/4.0.0 https://maven.apache.org/xsd/maven-4.0.0.xsd">
    <modelVersion>4.0.0</modelVersion>
    <parent>
        <groupId>org.springframework.boot</groupId>
        <artifactId>spring-boot-starter-parent</artifactId>
        <version>2.5.4</version>
        <relativePath/> <!-- lookup parent from repository -->
    </parent>
    <groupId>com.zk</groupId>
    <artifactId>mybatisplus</artifactId>
    <version>0.0.1-SNAPSHOT</version>
    <name>mybatisplus</name>
    <description>Demo project for Spring Boot</description>
    <properties>
        <java.version>1.8</java.version>
    </properties>
    <dependencies>
        <dependency>
            <groupId>org.springframework.boot</groupId>
            <artifactId>spring-boot-starter-web</artifactId>
        </dependency>
        <dependency>
            <groupId>org.springframework.boot</groupId>
            <artifactId>spring-boot-starter</artifactId>
        </dependency>
        <!--<dependency>-->
            <!--<groupId>org.springframework.boot</groupId>-->
            <!--<artifactId>spring-boot-starter-test</artifactId>-->
            <!--<scope>test</scope>-->
        <!--</dependency>-->
        <dependency>
            <groupId>mysql</groupId>
            <artifactId>mysql-connector-java</artifactId>
            <scope>runtime</scope>
        </dependency>
        <dependency>
            <groupId>org.projectlombok</groupId>
            <artifactId>lombok</artifactId>
            <optional>true</optional>
        </dependency>
        <!-- 这是mybatis-plus依赖 -->
        <dependency>
            <groupId>com.baomidou</groupId>
            <artifactId>mybatis-plus-boot-starter</artifactId>
            <version>3.1.1</version>
        </dependency>
        <!-- 这是mybatis-plus的代码自动生成器 -->
        <dependency>
            <groupId>com.baomidou</groupId>
            <artifactId>mybatis-plus-generator</artifactId>
            <version>3.1.1</version>
        </dependency>
        <!-- 这是模板引擎依赖 不可缺少-->
        <dependency>
            <groupId>org.freemarker</groupId>
            <artifactId>freemarker</artifactId>
            <version>2.3.30</version>
        </dependency>
    </dependencies>

    <build>
        <plugins>
            <plugin>
                <groupId>org.springframework.boot</groupId>
                <artifactId>spring-boot-maven-plugin</artifactId>
            </plugin>

            <!-- 打包时去除test测试类 -->
            <plugin>
                <groupId>org.apache.maven.plugins</groupId>
                <artifactId>maven-surefire-plugin</artifactId>
                <configuration>
                    <skip>true</skip>
                </configuration>
            </plugin>
        </plugins>

        <resources>
            <!--自动生成时候generate插件找到包,使用mybatis generator插件生成代码时先注掉-->
            <resource>
                <directory>lib</directory>
                <targetPath>BOOT-INF/lib/</targetPath>
                <includes>
                    <include>**/*.jar</include>
                </includes>
            </resource>

            <!-- maven项目中src源代码下的xml等资源文件编译进classes文件夹,注意:如果没有这个,它会自动搜索resources下是否有mapper.xml文件,
              如果没有就会报org.apache.ibatis.binding.BindingException: Invalid bound statement (not found): 很重要 -->
            <resource>
                <directory>src/main/java</directory>
                <includes>
                    <include>**/*.xml</include>
                </includes>
            </resource>

            <!-- 把resources下的文件编译进classes文件夹 -->
            <resource>
                <directory>src/main/resources</directory>
                <includes>
                    <include>**/*.*</include>
                </includes>
                <filtering>false</filtering>
            </resource>
        </resources>

    </build>

</project>
第二步:在application.yml添加mybatis-plus配置
#mybatis:
#  mapper-locations: classpath:com/mapper/xml/*.xml #注意:一定要对应mapper映射xml文件的所在路径
#  type-aliases-package: com.model # 注意:对应实体类的路径
#  configuration:  #打印sql
#  log-impl: org.apache.ibatis.logging.stdout.StdOutImpl

mybatis-plus:
  configuration:
    map-underscore-to-camel-case: true
    auto-mapping-behavior: full
    log-impl: org.apache.ibatis.logging.stdout.StdOutImpl
  mapper-locations: classpath*:com/zk/mybatisplus/**/*Mapper.xml
  global-config:
    # 关闭MP3.0自带的banner
    banner: false
    # 逻辑删除配置
    db-config:
      # 删除前
      logic-not-delete-value: 1
      # 删除后
      logic-delete-value: 0
第三步:需要配置一下分页插件
package com.zk.mybatisplus.config;
import com.baomidou.mybatisplus.extension.plugins.PaginationInterceptor;
import org.springframework.context.annotation.Bean;
import org.springframework.context.annotation.Configuration;
@Configuration
public class MybatisPlusConfig {
    /**
     * 分页插件
     */
    @Bean
    public PaginationInterceptor paginationInterceptor() {
        return new PaginationInterceptor();
    }
}
第四步:接下来就需要配置mybatis-plus的代码生成器了
package com.zk.mybatisplus.config;
import com.baomidou.mybatisplus.annotation.IdType;
import com.baomidou.mybatisplus.core.exceptions.MybatisPlusException;
import com.baomidou.mybatisplus.core.toolkit.StringPool;
import com.baomidou.mybatisplus.core.toolkit.StringUtils;
import com.baomidou.mybatisplus.generator.AutoGenerator;
import com.baomidou.mybatisplus.generator.InjectionConfig;
import com.baomidou.mybatisplus.generator.config.*;
import com.baomidou.mybatisplus.generator.config.po.TableInfo;
import com.baomidou.mybatisplus.generator.config.rules.DateType;
import com.baomidou.mybatisplus.generator.config.rules.NamingStrategy;
import com.baomidou.mybatisplus.generator.engine.FreemarkerTemplateEngine;
import java.util.ArrayList;
import java.util.List;
import java.util.Scanner;

/**
 * 代码生成器
 */
public class GeneratorCodeConfig {

    public static String scanner(String tip) {
        Scanner scanner = new Scanner(System.in);
        StringBuilder help = new StringBuilder();
        help.append("请输入" + tip + ":");
        System.out.println(help.toString());
        if (scanner.hasNext()) {
            String ipt = scanner.next();
            if (StringUtils.isNotEmpty(ipt)) {
                return ipt;
            }
        }
        throw new MybatisPlusException("请输入正确的" + tip + "!");
    }

    public static void main(String[] args) {
        // 代码生成器
        AutoGenerator mpg = new AutoGenerator();

        // 全局配置
        GlobalConfig gc = new GlobalConfig();
        String projectPath = System.getProperty("user.dir");
        gc.setOutputDir(projectPath + "/src/main/java");
        gc.setAuthor("zk");
        gc.setOpen(false);
        //实体属性 Swagger2 注解
        gc.setSwagger2(false);
        gc.setFileOverride(true);//是否覆盖
        gc.setActiveRecord(true);
        gc.setEnableCache(false);// XML 二级缓存
        gc.setBaseResultMap(true);// XML中的ResultMap标签
        gc.setBaseColumnList(false);// XML标签
        gc.setIdType(IdType.AUTO); //主键策略
        gc.setDateType(DateType.ONLY_DATE);
        // 自定义文件命名,注意 %s 会自动填充表实体属性!
        gc.setControllerName("%sController");
        gc.setServiceName("%sService");
        gc.setServiceImplName("%sServiceImpl");
        gc.setMapperName("%sMapper");
        mpg.setGlobalConfig(gc);

        // 数据源配置
        DataSourceConfig dsc = new DataSourceConfig();
        dsc.setUrl("jdbc:mysql://localhost:3306/user");
        dsc.setDriverName("com.mysql.cj.jdbc.Driver");
        dsc.setUsername("root");
        dsc.setPassword("123456");
        mpg.setDataSource(dsc);

        // 包配置
        PackageConfig pc = new PackageConfig();
        // pc.setModuleName(scanner("自定义包名"));
        pc.setParent("com");
        pc.setController("zk.mybatisplus.controller");
        pc.setEntity("zk.mybatisplus.model");
        pc.setMapper("zk.mybatisplus.mapper");
        pc.setService("zk.mybatisplus.service");
        pc.setServiceImpl("zk.mybatisplus.service.impl");
        pc.setXml("zk.mybatisplus.mapper.xml");
        mpg.setPackageInfo(pc);

        // 自定义配置
        InjectionConfig cfg = new InjectionConfig() {
            @Override
            public void initMap() {
                // to do nothing
            }
        };

        // 如果模板引擎是 freemarker
         String templatePath = "/templates/mapper.xml.ftl";
        // 如果模板引擎是 velocity
        //String templatePath = "/templates/mapper.xml.vm";

        // 自定义输出配置
        List<FileOutConfig> focList = new ArrayList<>();
        // 自定义配置会被优先输出
         focList.add(new FileOutConfig(templatePath) {
            @Override
            public String outputFile(TableInfo tableInfo) {
                // 自定义输出文件名 , 如果你 Entity 设置了前后缀、此处注意 xml 的名称会跟着发生变化!!
                return projectPath + "/src/main/java/com/zk/mybatisplus/mapper/xml"
                        + "/" + tableInfo.getEntityName() + "Mapper" + StringPool.DOT_XML;
            }
        });
        System.out.println( pc.getModuleName());
        /*
        cfg.setFileCreate(new IFileCreate() {
            @Override
            public boolean isCreate(ConfigBuilder configBuilder, FileType fileType, String filePath) {
                // 判断自定义文件夹是否需要创建
                checkDir("调用默认方法创建的目录");
                return false;
            }
        });
        */
        cfg.setFileOutConfigList(focList);
        mpg.setCfg(cfg);

        // 配置模板
        TemplateConfig templateConfig = new TemplateConfig();

        // 配置自定义输出模板
        //指定自定义模板路径,注意不要带上.ftl/.vm, 会根据使用的模板引擎自动识别
        // templateConfig.setEntity("templates/entity2.java");
        // templateConfig.setService();
        // templateConfig.setController();

        templateConfig.setXml(null);
        mpg.setTemplate(templateConfig);

        // 策略配置
        StrategyConfig strategy = new StrategyConfig();
        strategy.setNaming(NamingStrategy.underline_to_camel);
        strategy.setColumnNaming(NamingStrategy.underline_to_camel);
        strategy.setSuperEntityClass("com.baomidou.mybatisplus.extension.activerecord.Model");
        strategy.setEntityLombokModel(true);
        strategy.setRestControllerStyle(true);

        strategy.setEntityLombokModel(true);
        // 公共父类
//        strategy.setSuperControllerClass("com.baomidou.ant.common.BaseController");
        // 写于父类中的公共字段
//        strategy.setSuperEntityColumns("id");
        strategy.setInclude(scanner("表名,多个英文逗号分割").split(","));
        strategy.setControllerMappingHyphenStyle(true);
        strategy.setTablePrefix(pc.getModuleName() + "_");
        mpg.setStrategy(strategy);
        mpg.setTemplateEngine(new FreemarkerTemplateEngine());
        mpg.execute();
    }
}
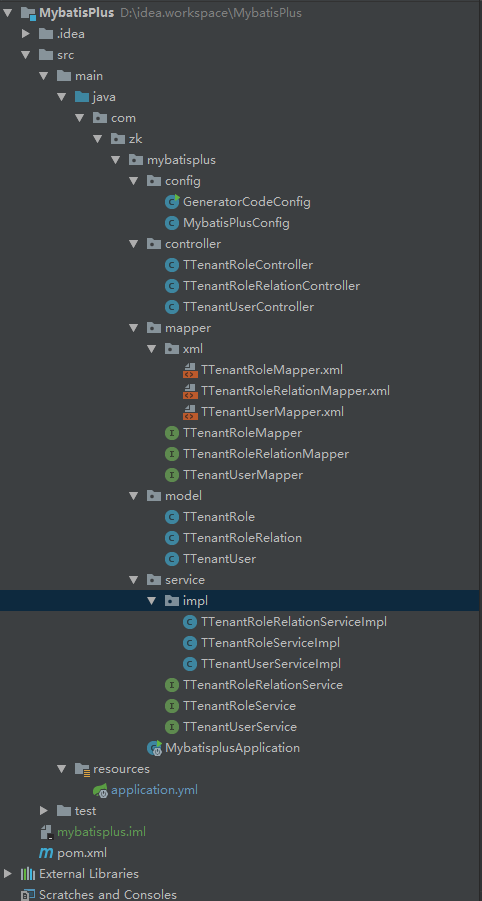
运行之后就会出现所有需要的文件了。
如果报错Exception in thread “main” java.lang.NoClassDefFoundError: freemarker/template/Configuration
问题可能原因:使用spring-boot-starter-test依赖
解决方案:1.注释掉spring-boot-starter-test依赖
2.复制此配置类到test目录运行
第五步:在controller里面写方法进行测试
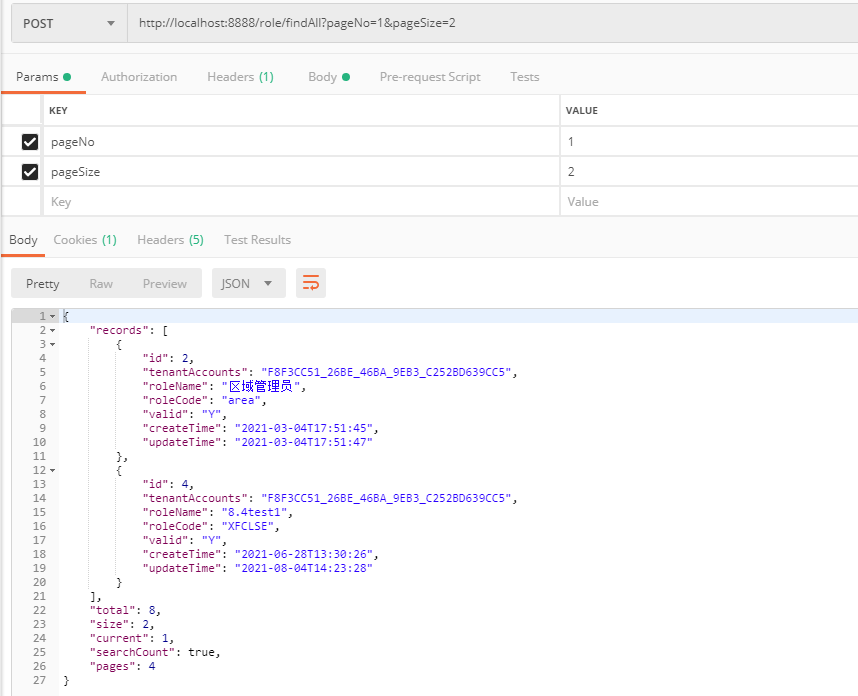
@RestController
@RequestMapping("/role")
public class TTenantRoleController {
    @Resource
    private ITTenantRoleService service;

    @RequestMapping(value = "/findAll",method = RequestMethod.POST)
    public Object findAll(HttpServletRequest request){
        //获取前台发送过来的数据
        Integer pageNo = Integer.valueOf(request.getParameter("pageNo"));
        Integer pageSize = Integer.valueOf(request.getParameter("pageSize"));
        IPage<TTenantRole> page = new Page<>(pageNo, pageSize);
        QueryWrapper<TTenantRole> wrapper = new QueryWrapper<>();
        TTenantRole student = new TTenantRole();
       // student.setId(2);
        wrapper.setEntity(student);
        return service.page(page,wrapper);
    }

}
实现的效果为:
github地址:https://github.com/zhangkundamowang/MybatisPlus
代码已经提交到github上了,有兴趣的小伙伴可以研究一下~